Are you Able to Send Emails but Not Receive?
There are many possible causes as to why you are not receiving emails in your HostGator free email (webmail). In this guide, we've divided the checklists into two parts and gathered the most commonly known issues, including but not limited to expired/inactive domains, full email storage (quota), incorrect email client settings, and emails identified as spam or junk.
This article will have the following sections:
Part 1: Basic Checklist
Have you recently signed up with HostGator? Are you a new customer and planning to host your emails with HostGator? If so, welcome!
To set up your emails with us, you must first add your email address to your HostGator account. Please check out the following article for more information on adding your email account.
Now that you're done adding your email addresses to your account, have you noticed that you can send emails but are not receiving responses or new emails? Perhaps your supposed-to-be recipients contacted you, saying the emails they are sending you are not being delivered, and they're receiving email bouncebacks?
If that is the case, you'll need to check a few things. So, here we go!
1. Check the domain status
You need a registered and active domain to use HostGator webmail. Just like websites, emails only work if the domain they're supposed to be connected to is active. If your domain was registered with HostGator, check the status of your domain in the Domains section of your Customer Portal.
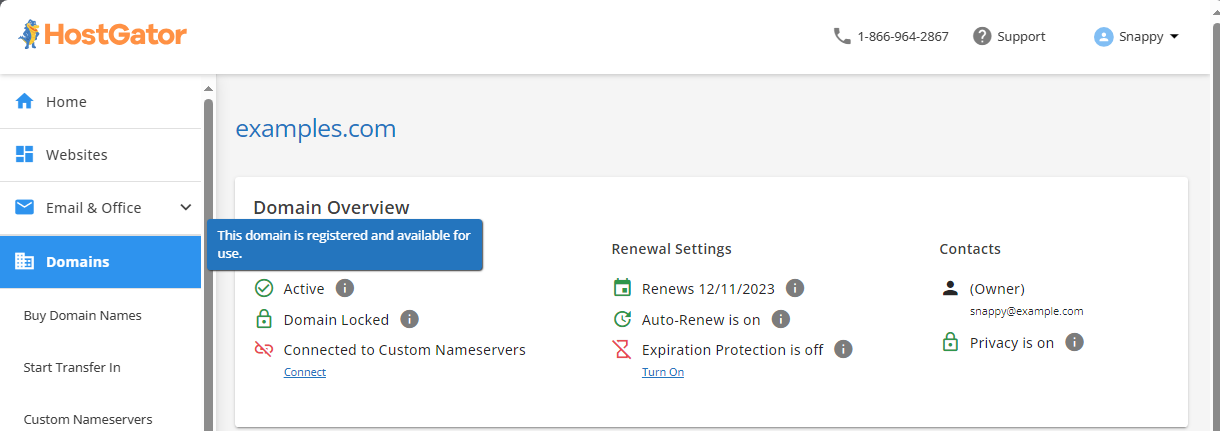
You can also use third-party domain lookups, such as ICANN Lookup, when checking the status of your domain name. If your domain has expired, follow the instructions in this article to renew your domain: How Do I Renew My Domain Name?
2. Check the email storage (email quota)
Each email account is allotted a set disk space quota, which was set when you added the email account in cPanel. Depending on your email requirements, you can set it to either Unlimited or a fixed size.
To check if you exceeded the allowable limit:
- Send an email to the affected email address using a different generic email address (for example, @gmail.com, @yahoo.com, etc.
- Check if you will get an SMTP 550 ("fromemail" max messages per session) email bounceback. If you did, you need to adjust the email storage in your cPanel and attempt to do a test email later.
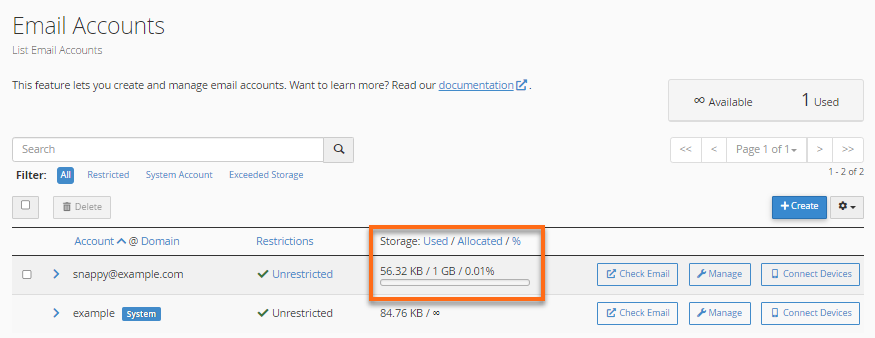
For more information on managing your email quota, here is your guide: How to Adjust Email Quota in cPanel.
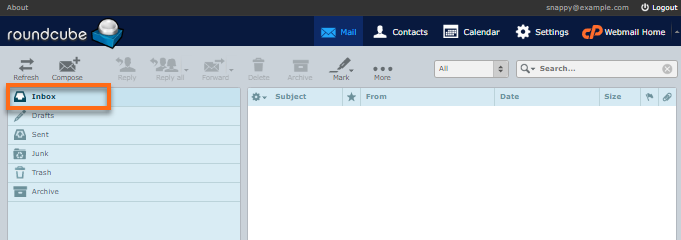
3. Access your HostGator webmail
There are many ways to read your emails. To check whether your email is missing, let us do some testing by logging in to your email client application (or webmail). Please check out the article How to Log into Webmail to learn how.
- Use a generic email address (for example, @gmail.com, @yahoo.com, etc.) to send a test email to the affected email address.
- Check your Inbox.
If you receive the email in your webmail but not in your email client application, you must check your email settings to confirm they match the ones in your hosting account. To check your correct email settings, please visit this article: Email Connection Settings.
- Check your Junk folder.
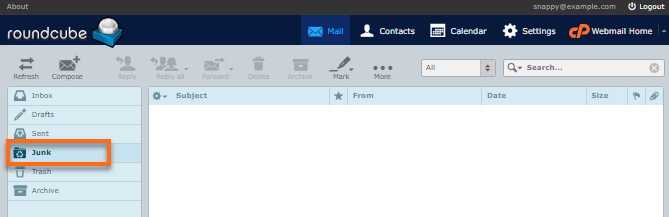
Suppose your emails were successfully received but identified as spam and stored in your Junk folder. To undo this, please read this article for the instructions: Why Am I Getting Spammed and How to Prevent It?
- Check your Trash or customized folder.
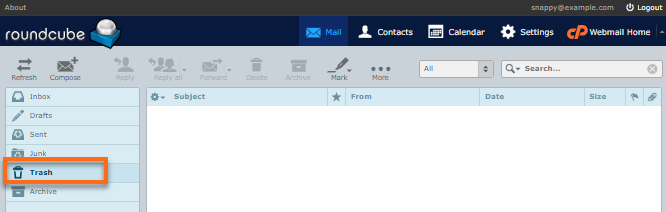
Suppose your legitimate emails go directly to the Trash folder. In that case, you need to check if you've set up your email filters (for example, SpamAssassin, BoxTrapper, or User or Account-Level Filtering) and make the necessary adjustments (remove if not needed).
Part 2: Advanced Checklist
Are you still having trouble receiving emails after going through Part 1: Basic Checklist? Here are a few more tips to help you identify the root cause and how to resolve it.
1. Check the MX records
Email accounts need to be connected to the domain to make it work. The MX records serve as the "bridge" between the two. If the domain is confirmed to be active, check its MX records to ensure it is connected to your preferred host. You may use online tools such as LeafDNS or WhatsmyDNS.
-
If you're using HostGator webmail, your MX records should look like this:
mail.yourdomain.ext
(Replace yourdomain.ext with your actual domain name)
Please use the steps outlined in Scenario 1 of the article How to Set Up Your MX (Mail Exchange) Record to check the MX records.
-
If you use a professional email product with us, such as Microsoft .365 or Google Workspace, their MX records look slightly different. Make sure it is set up correctly. See the guides below for the instructions.
2. Check the email routing
Email routing, or the email delivery method, is configured in your cPanel. If a different provider hosts your emails, you may want to change your email routing to Remote.
Set it up to Local if you wish HostGator to manage your emails. For more information, please check out the Local, Backup, and Remote Mail Exchanger article.
3. Check for an email bounceback
Bounceback messages are often the best way to determine what may be causing your emails not to work. If someone tells you their emails are not being sent to your email address, ask them what bounceback email they are getting. That way, we will better understand what could be going on with your emails and start troubleshooting from there. This is a good read: Email Bounce Back Messages.
Additional Information
Customers using Microsoft-related email services (Outlook.com, Hotmail.com, MSN.com, and Live.com) may note a problem with receiving emails from HostGator.com addresses via these services while still receiving messages from elsewhere. This can be resolved by following the steps found in this article: