How to Set up your MX (Mail Exchange) Record
The Mail Exchange record or MX record indicates the mail server responsible for sending and receiving your emails. They basically tell your host where to deliver your emails. Depending on your email host, MX records may vary. Some may have multiple MX records, like Google Workspace, and some may only have one, like HostGator.
This article discusses setting up your MX records with HostGator as your email host.
This article will discuss the following topics.
How to Set Up my MX Records to HostGator
Follow these steps to configure your MX records for email hosting with HostGator.
Scenario 1: My domain is registered at HostGator, and I am using HostGator's name servers
If your domain is registered with us, it will automatically use HostGator name servers, which means your email will be hosted here by default. However, if you are using a different email host and wish to switch back to HostGator, please follow the steps below.
Step 1: Pointing MX Records to HostGator
To point your MX records to HostGator:
- Log in to your Customer Portal.
- Click Domains on the left-hand menu.
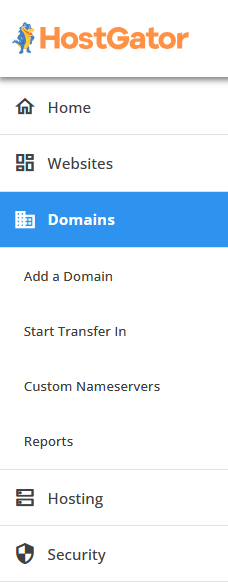
- Under Domains, look for the domain you need to manage for your emails.
If you have a single domain in your account, you will be redirected right away to the domain management page.
If you have multiple domains in your account, click the domain to go to the domain management page.
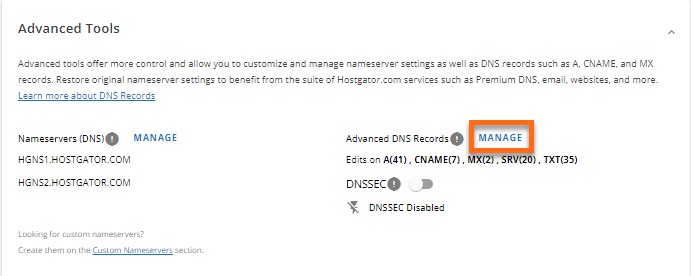
- On the domain management page, scroll down to the Advanced Tools section.
- Click the Manage link right next to Advanced DNS Records.
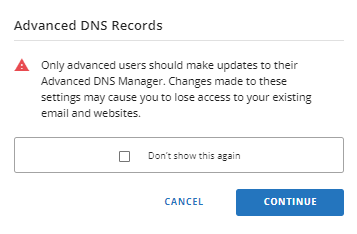
- Click Continue to proceed.
- On the Manage Advanced DNS Records page, update your existing MX records to "mail.yourdomain.ext" (replace 'yourdomain.ext' with your actual domain name). If this MX record does not exist, click the +Add Record button and select MX from the dropdown.
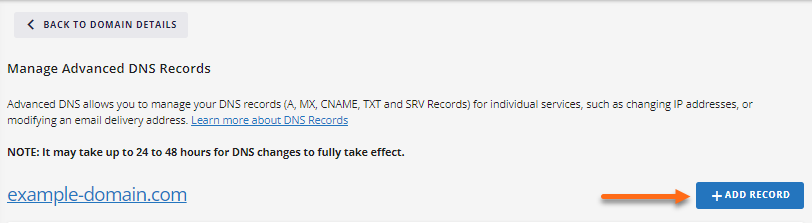
- Fill out the rest of the required fields.
- Mail Server: "mail.yourdomain.ext" (replace 'yourdomain.ext' with your actual domain name)
- Priority: 0 (zero)
- TTL: 14400
- Once done, click the Add button.
- Delete other existing MX records with the same Priority.
If two MX records have the same value for Priority, the sending server will randomly choose one to deliver emails. To prevent confusion, you can remove any MX records except for 'mail.yourdomain.ext.'
- Once the MX records are set up, check if the A records for 'mail' exist.
- If an existing A record for 'mail' with the correct HostGator IP Address exists, there is no need to change or add a new one.
- If there is no existing A record for 'mail,' add a new A record using your HostGator IP address.
Please see the section below to learn how to find your IP Address within your Customer Portal.
- Allow your DNS to fully propagate, which may take 0-4 hours.
Step 2: Setting up Email Routing
To set up email routing:
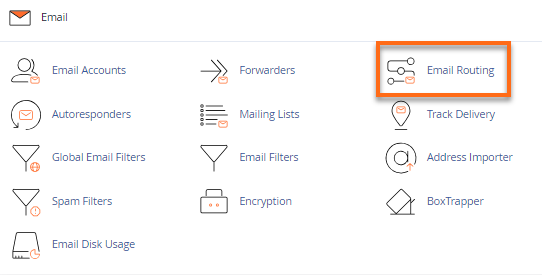
- Go to your cPanel.
- In the Email section, click Email Routing.
- Select your domain from the dropdown menu. For this sample scenario, select Local Mail Exchanger.
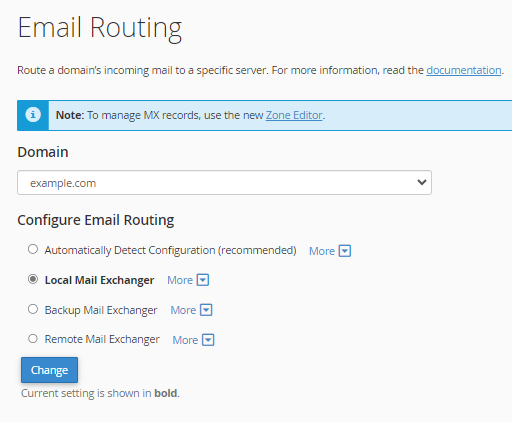
This section will show several email deliverability methods. For more information on these methods, please see Local, Backup, and Remote Mail Exchanger.
Scenario 2: I am not using HostGator name servers, but I want HostGator to host my emails
If your domain name does not use HostGator's name servers and you host your website elsewhere but want to host your emails with HostGator, follow these steps.
To connect your emails to HostGator via a third-party host:
- Get your HostGator IP address.
To locate your HostGator IP:
Customer Portal
- Within the Customer Portal, click on the Hosting tab.
- On the hosting management page, scroll down to the Server Information section.
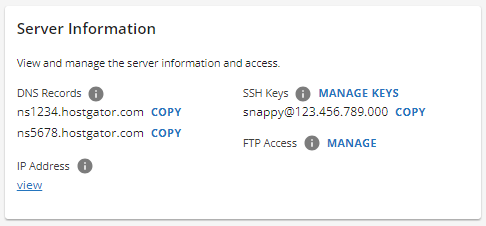
- Click View under IP address to view and copy your IP.
cPanel
- On the cPanel homepage, locate the General Information section on the right-hand side.
- This section will display your server information, including your IP address.

- Create an A record for your emails within your host's control panel or domain registrar. Use your HostGator IP address as your A record.
- Once the mail's A record is created, modify your MX record and email routing (set to "Remote") at your third-party host or domain registrar. Use HostGator's MX record, 'mail.yourdomain.ext' (replace 'yourdomain.ext' with your actual domain name), or HostGator IP address to connect your emails.
- If additional assistance is needed to update the current MX record, mail's A record, and email routing, don't hesitate to contact your hosting provider or registrar's Support team.
- Once DNS records are set up, allow time for propagation.
Essential Email Terms Explained
Here is a list of terminologies related to setting up emails that you may encounter in other supporting articles.
| Terminology | Description |
|---|---|
| Name Servers | This is the server that hosts your DNS zone files. For more details, see the article: What Are My Name Servers? Example:
|
| Email Host | This service provider hosts or handles your emails on their servers. |
| Domain Pointing | This is the process of setting up the server where you wish to host a service like your website or emails. |
| Email Routing | This setting tells HostGator how to handle your emails, whether hosted locally (by HostGator) or remotely (by a different host). For more information, please refer to the article Local, Backup, and Remote Mail Exchanger. |
| MX Records | These are the DNS records responsible for handling your emails. Example: mail.yourdomain.ext |
| IP Address | This is the IP address found in your Customer Portal and control panel. |
To check your domain name's current name servers and MX records, you can use Leaf DNS.
Below are some examples of sample MX records:
| Email Provider | MX Record Value |
|---|---|
| cPanel |
mail.yourdomain.com* Reference: MX Entry |
| Professional Email |
mx1.titan.email Reference: Setup Professional Email MX and TXT records |
|
Google Workspace |
GWS Sign-ups ON or AFTER April 2023: GWS Sign-ups BEFORE April 2023: References: |
| Microsoft 365** |
example-com.mail.protection.outlook.com Reference: Add DNS records to connect your domain |
- *Replace 'yourdomain' with your actual domain name.
- **Due to updates required for our current products and packaging for Microsoft, we are currently unable to offer Microsoft 365. If you purchased Microsoft Office 365 through HostGator, you can still manage your subscription through the Customer Portal. If you want to purchase a professional email, you can sign up for Google Workspace or Professional Email.