How Do I Create Email Accounts in cPanel?
By default, no email accounts are created when your hosting account is provisioned. Although your primary username may appear to be an email address, it is not automatically configured as a working mailbox. To send and receive emails, you must first create the email account in cPanel.
Need More Mailboxes?
Hosting plans include up to two (2) email mailboxes at no additional cost. If you need additional mailboxes, log in to your Account Portal and purchase a cPanel Email Plan.
Available plans:
- cPanel Email Basic: 3 to 10 mailboxes
- cPanel Email Plus: 11 to 20 mailboxes
- cPanel Email Premium: Unlimited mailboxes
For more information about the available features and management tools, please refer to the HostGator: Paid cPanel Email Overview article.
This article covers the following topics:
How to Create an Email Account
Follow these steps to create a new email account in cPanel:
- Log in to your Customer Portal.
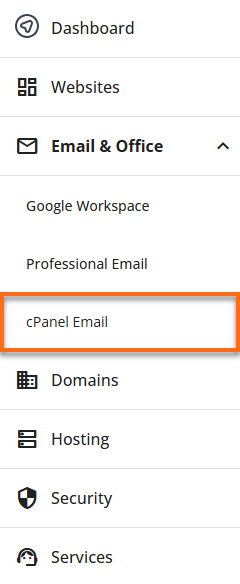
- From the left-hand navigation menu, click Email & Office.
- Select cPanel Email from the available options.
- Click the cPanel Email dropdown menu and select Email Accounts.
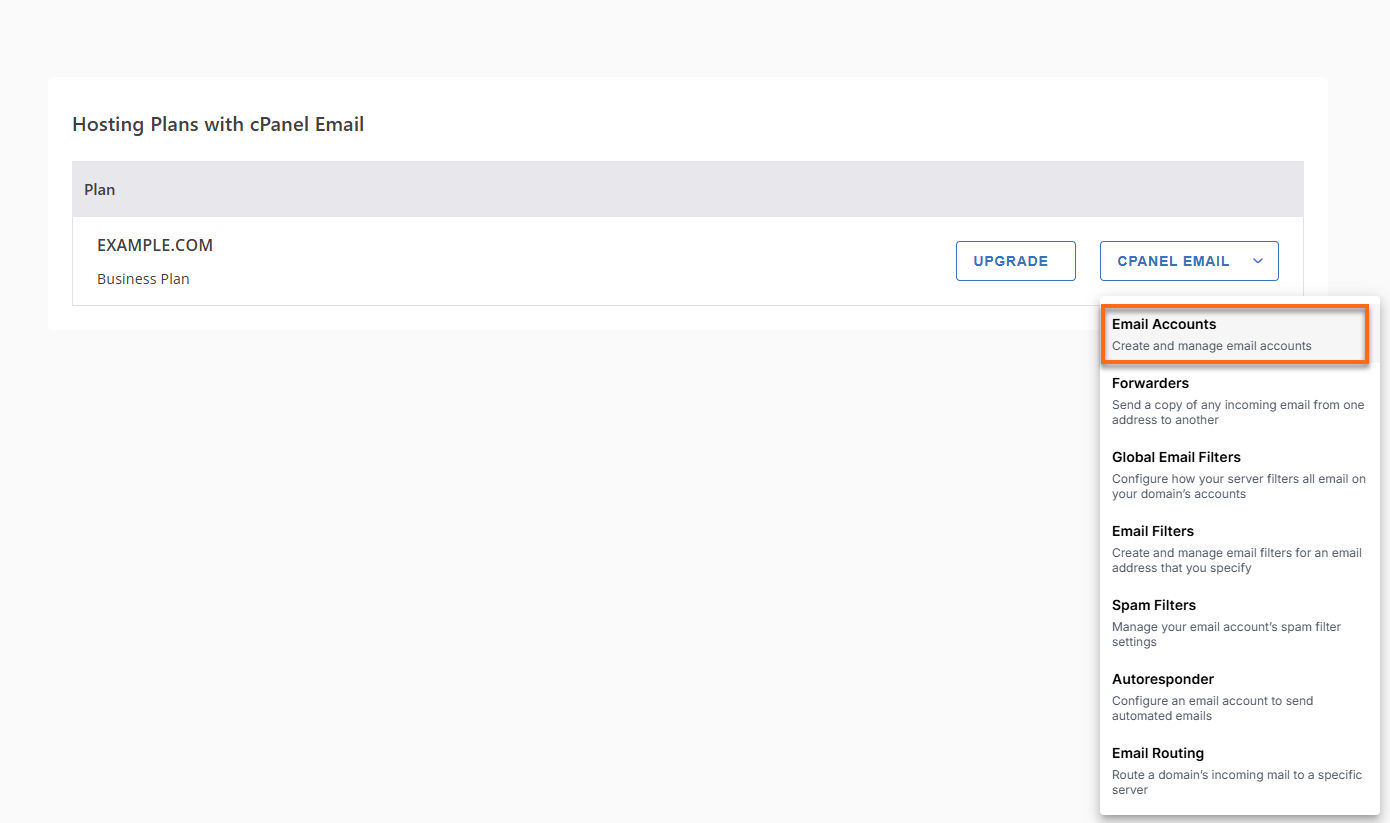
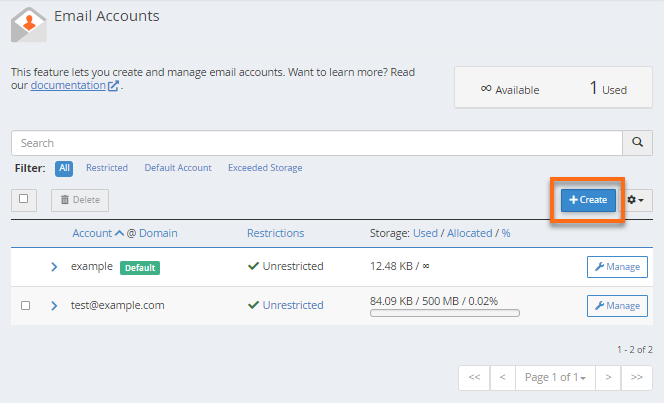
This will take you to the Email Accounts page, where you can manage your email accounts.
- Click the + Create button located on the right-hand side.
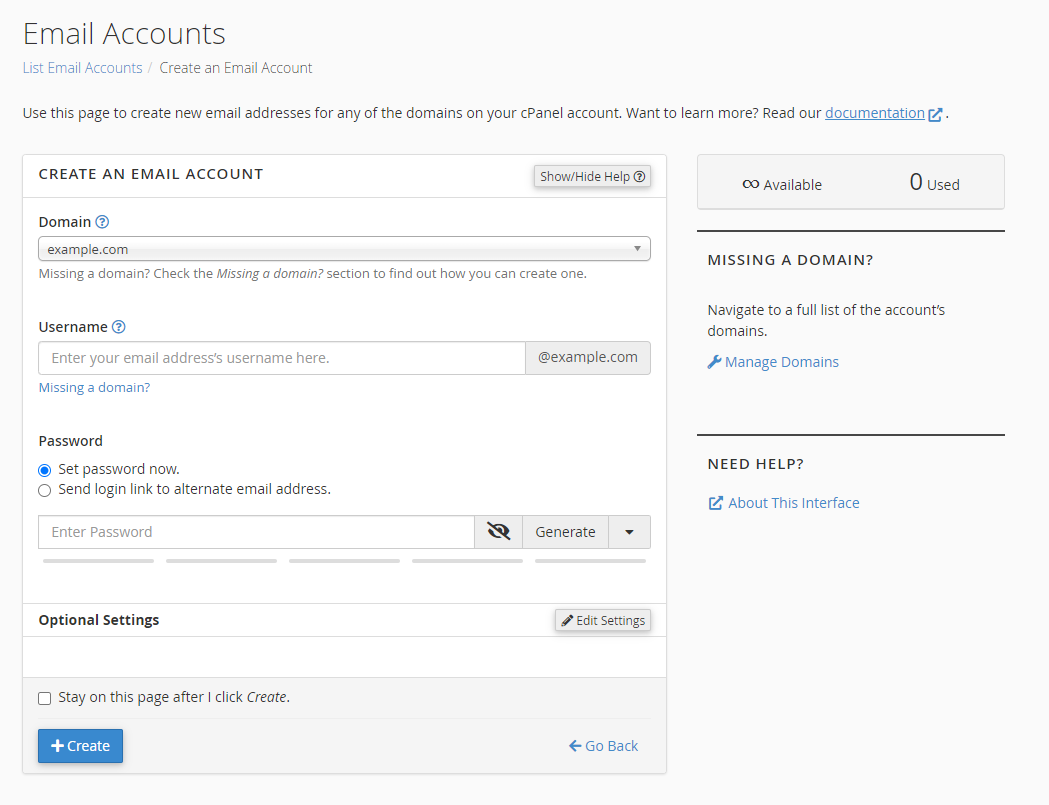
- Enter the required email account information:
- Domain: Select the domain where you want to create the email account.
- Username: Enter the desired email address username.
- Password: Create a secure password for the email account.
-
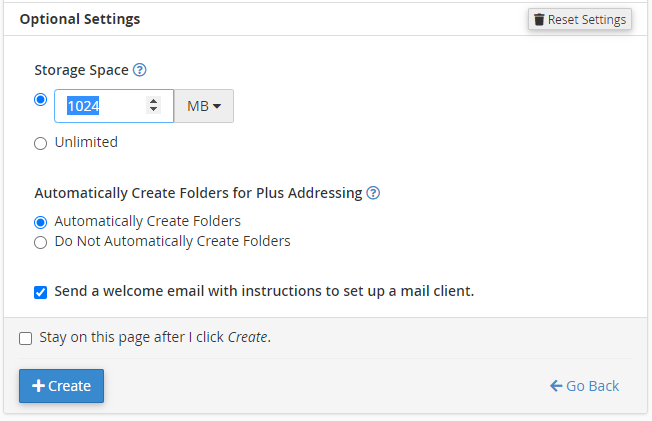
To customize mailbox settings, click Edit Settings under Optional Settings. From here, you can adjust the mailbox storage quota and other available options.
- Click + Create to finish creating the email account.
How to Create Forwarders
Forwarders allow incoming messages to be automatically redirected to another email address or destination.
Email Forwarder
An email forwarder automatically sends incoming messages from one email address to another.
To create an email forwarder:
- Log in to your Customer Portal.
- From the left-hand navigation menu, click Email & Office.
- Select cPanel Email from the available options.
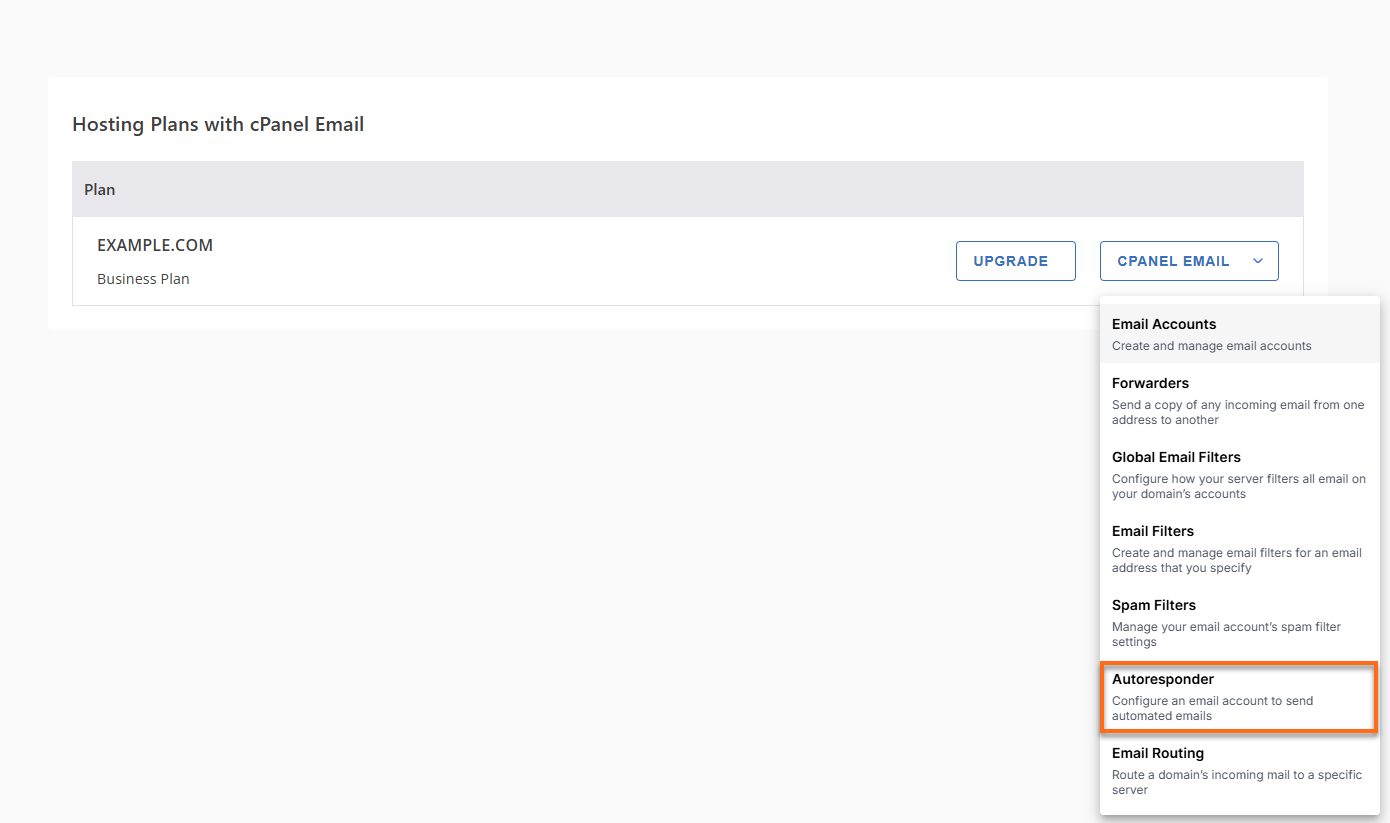
- Click the cPanel Email dropdown menu and select Forwarders.
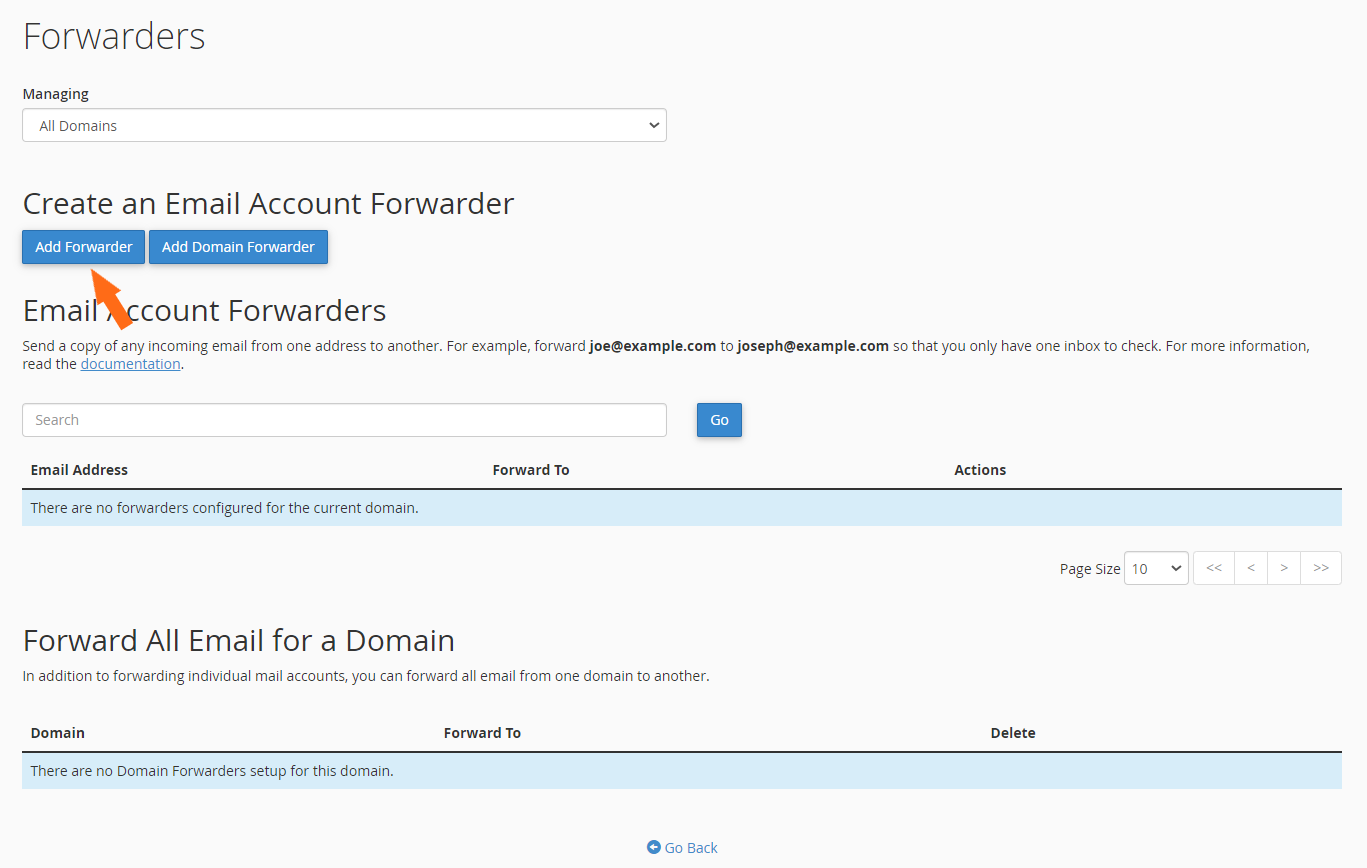
- Click Add Forwarder.
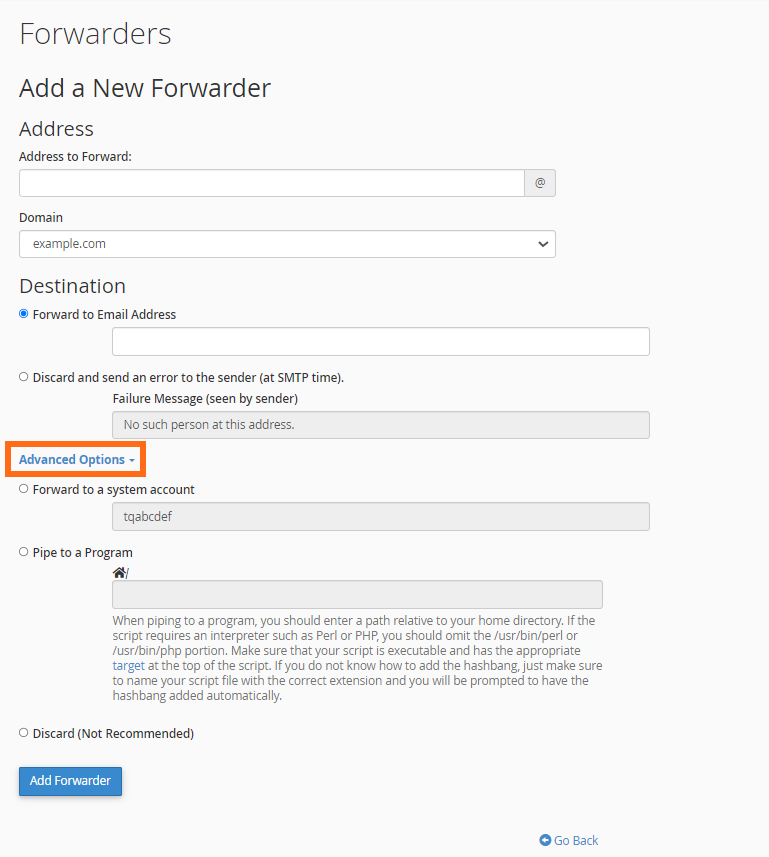
- In the Address to Forward field, enter the email username you want to forward messages from.

- Select the appropriate domain.
- Choose one of the following Destination options:
- Forward to Email Address: Forwards incoming messages to another email address.
- Discard and Send an Error to the Sender (at SMTP Time): Rejects incoming messages and returns a custom failure notification to the sender.
- Rejects incoming messages and returns a custom failure notification to the sender.
- Click Advanced Options to access additional forwarding methods:
- Forward to a System Account: Delivers messages to a local system user.
- Pipe to a Program: Sends incoming messages to a specified program.
- Discard (Not Recommended): Silently deletes incoming messages without notifying the sender.
- Click Add Forwarder to save your changes.
Domain Forwarder
A domain forwarder redirects emails sent to invalid addresses on one domain to another domain.
For example, an email sent to [email protected] can be automatically redirected to example.net.
To create a domain forwarder:
- On the Forwarders page, click Add Domain Forwarder.

- Select the domain you want to forward from.
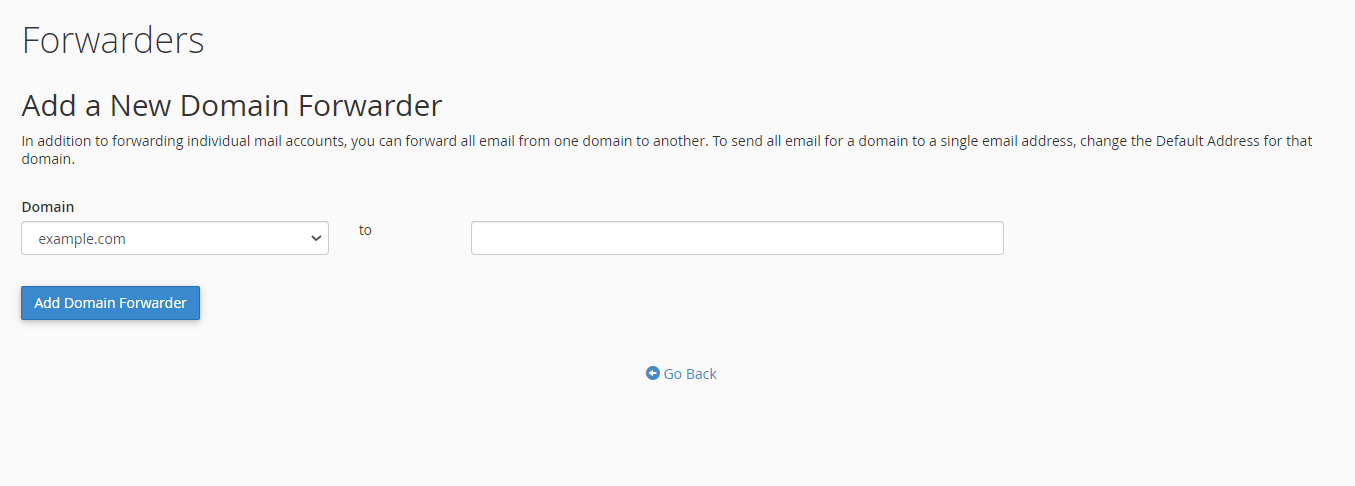
- Enter the destination domain.
- Click Add Domain Forwarder.