Custom Account and User Level Filters
Account and user-level filters control how your incoming email is handled, helping to ensure that you receive more mail and less spam. cPanel allows you to manage filters for each email account on your domain. This can be useful for discarding spam, redirecting mail, or piping messages to a program.
The Account Filter or Global Email Filter creates email filters for all the cPanel's email accounts. In contrast, the User-Level Filter or Email Filter creates email filters for a specific email address.
Adding a User-Level Filter
To create a user-level filter:
- Log in to your Customer Portal.
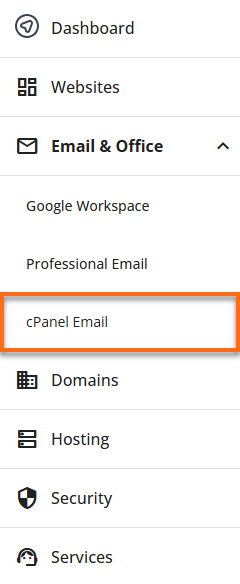
- From the left-hand navigation menu, click Email & Office.
- Select cPanel Email from the available options.
- Click the cPanel Email dropdown menu and select Email Accounts.
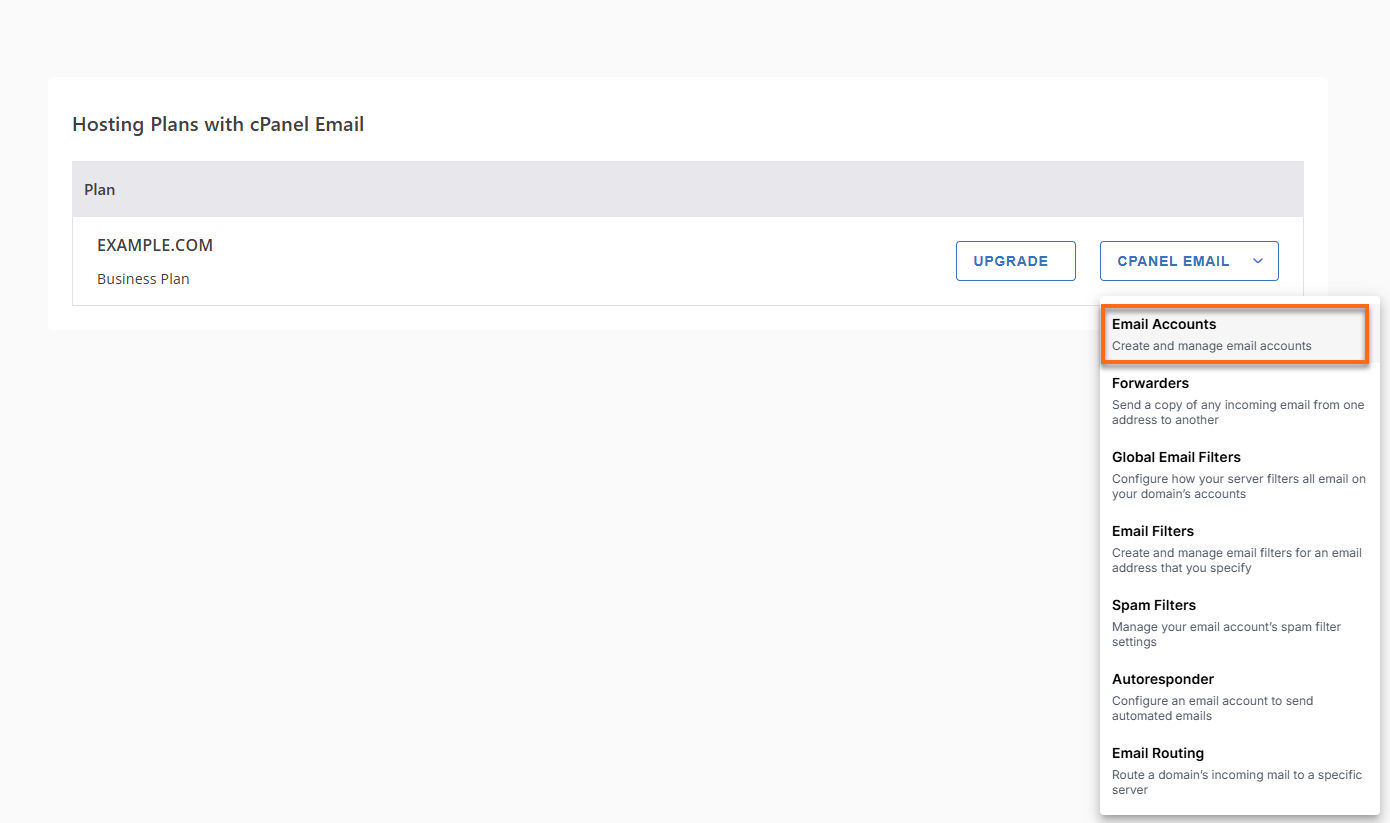
This will take you to the Email Accounts page, where you can manage your email accounts.
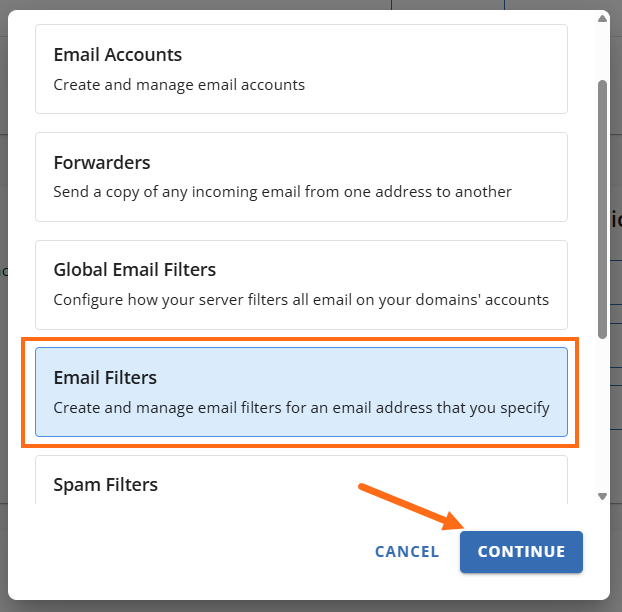
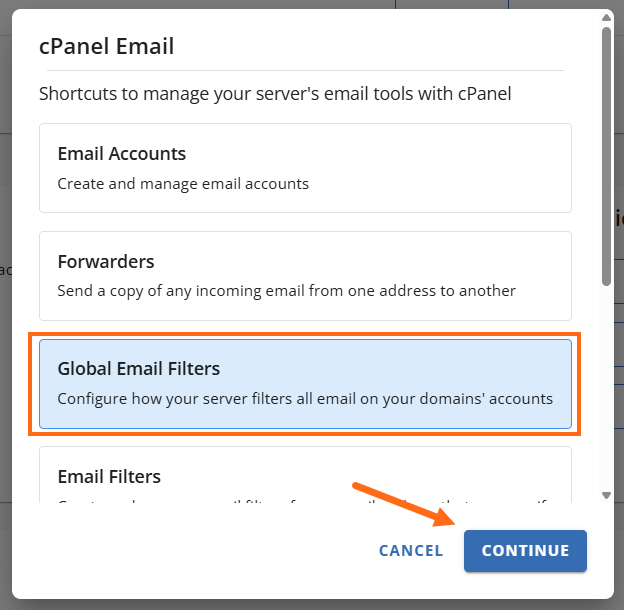
- In the pop-up, select the Email Filters, then click Continue.
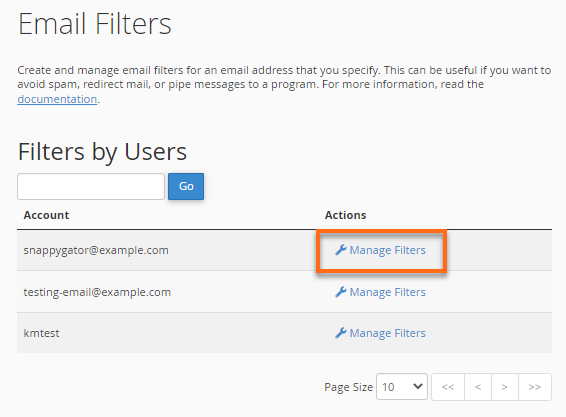
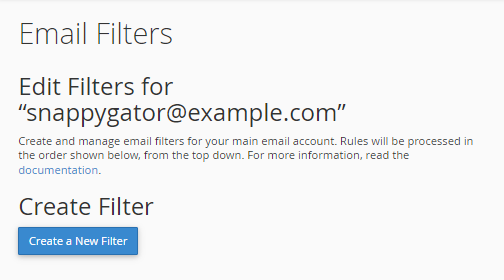
- You will be redirected to the Email Filters page. From here, locate the email account you wish to modify, then click Manage Filters.
- On the next page, click the Create a New Filter button.
- Set up your filters. Enter the required details:
- In the Filter Name field, enter a name for the filter.
- In the first dropdown menu under Rules, select a message characteristic:
- From - address from which the message was sent.
- Subject - the subject line of the message.
- To - address to which the message was sent.
- Any Recipient - a recipient of the message.
- Reply - address to which the reply will be sent.
- Body - body or content area of the message.
- Any Header - a header of the message.
- Has Not Been Previously Delivered - affects messages still in the queue for delivery.
- Is an Error Message - affects error messages received from an auto-response system.
- List ID - the account’s mailing lists.
- Spam Status - the status SpamAssassin has been conferred on the message; it begins with either "Yes" or "No".
- Spam Bar - the content of the Spam Bar header that SpamAssassin has generated for this message. This header contains plus (+) signs to denote the likelihood that the message is spam; more plus signs mean the message is more likely spam.
- Spam Score - the overall spam score assigned to the message by SpamAssassin, expressed in digits.
- In the adjacent dropdown menu, select an operator.
- contains - contains the string you define.
- matches regex - matches a regular expression you define.
- does not contain - does not contain the string you define.
- equals - exactly matches the string you define.
- begins with - begins with the string you define.
- ends with - ends with the string you define.
- does not begin - does not begin with the string you define.
- does not end with - does not end with the string you define.
- does not match - is not equal to the string you define.
The following options are only applicable when the Spam Score option is selected:- is above (numbers only) - scores greater than the number you define will be subject to the action selected.
- is not above (numbers only) - all scores equal to or less than the defined number will be subject to the action selected.
- is below (numbers only) - all scores below the defined number will be subject to the action.is not below (numbers only) - all scores greater than or equal to the specified number will be subject to the action.
- In the field below, enter the filter or characteristics you wish to use. (Regular expressions are accepted.)
For example: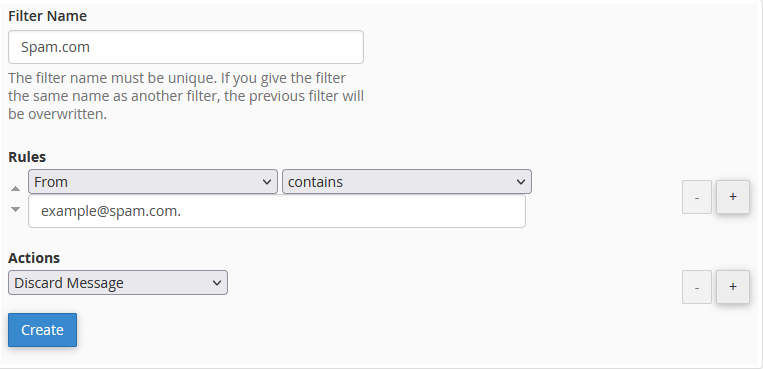
This rule will target any emails from the sender [email protected].
You can add and remove rules by clicking the +/- buttons.
- In the Actions dropdown menu, select an action for the rule you created.
- Discard Message - destroys the incoming message with no failure notice.
- Redirect to Email - redirects the message to another email address that you specify.
- Fail With Message - discards the message and automatically returns a specified failure notice to the sender.
- Stop Processing Rules - skips all filter rules.
- Deliver to Folder - deposits the message into a specified folder.
- Pipe to a Program - sends the incoming message to a program you have specified.
When piping to a program, you should enter a path relative to your home directory. If the script requires an interpreter, such as Perl or PHP, you should omit the /usr/bin/Perl or /usr/local/bin/PHP portion. Make sure your script is executable and has the appropriate hashbang.
- #!/usr/local/bin/PHP -q -- For PHP
- #!/usr/bin/Perl -- For Perl.
- Click Create to initialize the filter.
Adding a Global Email Filter
To create a Global Email filter:
- Log in to your Customer Portal.
- From the left-hand navigation menu, click Email & Office.
- Select cPanel Email from the available options.
- Click the cPanel Email dropdown menu and select Email Accounts.
This will take you to the Email Accounts page, where you can manage your email accounts.
- In the pop-up, select the Global Email Filters, then click Continue.
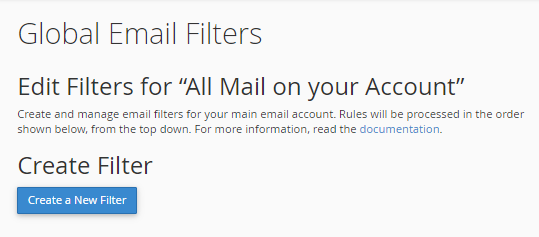
- You will be redirected to the Global Email Filters page, click Create a New Filter.
- Set up your filters. Enter the required details:
- In the Filter Name field, enter a name for the filter.
- In the first dropdown menu under Rules, select a message characteristic:
- From - address from which the message was sent.
- Subject - the subject line of the message.
- To - address to which the message was sent.
- Any Recipient - a recipient of the message.
- Reply - address to which the reply will be sent.
- Body - body or content area of the message.
- Any Header - a header of the message.
- Has Not Been Previously Delivered - affects messages still in the queue for delivery.
- Is an Error Message - affects error messages received from an auto-response system.
- List ID - the account’s mailing lists.
- Spam Status - the status SpamAssassin has been conferred on the message; it begins with either "Yes" or "No".
- Spam Bar - the content of the Spam Bar header that SpamAssassin has generated for this message. This header contains plus (+) signs to denote the likelihood that the message is spam; more plus signs mean the message is more likely spam.
- Spam Score - the overall spam score assigned to the message by SpamAssassin, expressed in digits
- In the adjacent dropdown menu, select an operator.
- contains - contains the string you define.
- matches regex - matches a regular expression you define.
- does not contain - does not contain the string you define.
- equals - exactly matches the string you define.
- begins with - begins with the string you define.
- ends with - ends with the string you define.
- does not begin - does not begin with the string you define.
- does not end with - does not end with the string you define.
- does not match - is not equal to the string you define.
The following options are only applicable when the Spam Score option is selected:- is above (numbers only) - scores greater than the number you define will be subject to the action selected.
- is not above (numbers only) - all scores equal to or less than the defined number will be subject to the action selected.
- is below (numbers only) - all scores below the defined number will be subject to the action.is not below (numbers only) - all scores greater than or equal to the specified number will be subject to the action.
- In the field below, enter the filter or characteristics you wish to use as the filter. (Regular expressions are accepted.)
For example:This rule will target any emails from the sender [email protected].
You can add and remove rules by clicking the +/- buttons.
- In the Actions dropdown menu, select an action for the rule you created.
- Discard Message - destroys the incoming message with no failure notice.
- Redirect to Email - redirects the message to another email address that you specify.
- Fail With Message - discards the message and automatically returns a specified failure notice to the sender.
- Stop Processing Rules - skips all filter rules.
- Deliver to Folder - deposits the message into a specified folder.
- Pipe to a Program - sends the incoming message to a program you have specified.
When piping to a program, you should enter a path relative to your home directory. If the script requires an interpreter, such as Perl or PHP, you should omit the /usr/bin/Perl or /usr/local/bin/PHP portion. Make sure your script is executable and has the appropriate hashbang.
- #!/usr/local/bin/PHP -q -- For PHP
- #!/usr/bin/Perl -- For Perl.
- Click Create to initialize the filter.
Testing a Custom User-Level Filter
To test your user-level email filters:
- Navigate to cPanel's Email section, then click Email Filters.
- For a user-level filter, locate the email account you wish to test, then click Manage Filters.
- In the Filter Test textbox, type a test email message and click Test Filter on the next page. (Be sure to include the characters or words that you have set your filter to catch.)
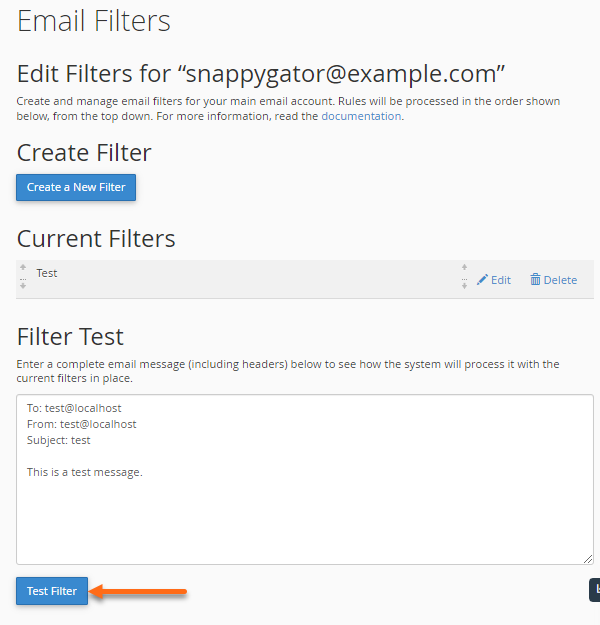
- When the test is run, the next screen should display the results. This screen summarizes the actions taken by the filter. Again, it is important to read over the data to ensure that the filter produces the desired result.
Testing a Custom Account Filter
To test your account email filters:
- Navigate to cPanel's Email section, then click Email Filters or Global Email Filters.
- For a user-level filter, locate the email account you wish to test, then click Manage Filters.
- In the Filter Test textbox, type a test email message and click Test Filter on the next page. (Be sure to include the characters or words that you have set your filter to catch.)
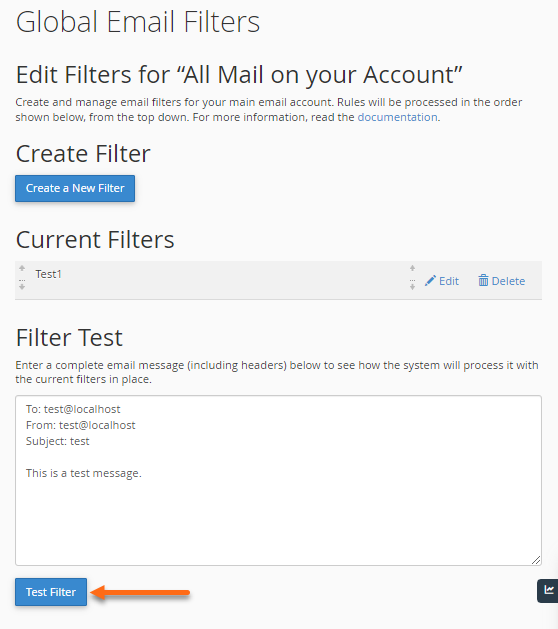
- When the test is run, the next screen should display the results. This screen summarizes the actions taken by the filter. Again, it is important to read over the data to ensure that the filter produces the desired result.