Configuring Servers - WHM (Part 2)
This is the continuation video on how to set up your server via WHM. If you are new to WHM, you may find yourself lost when trying to set up your server. This extensive video* (2 of 2 parts) walks you through some of the most vital first steps and initial configurations for your server.
*Your control panel interface may look or be organized differently than what is shown in this video above, depending on the WHM/cPanel version, theme, and operating system you are using. However, their functionalities should still be the same.
This tutorial will continue with the initial configuration of a cPanel server. Click the links below for more information.
Skeleton Directory
The skeleton directory is the default directory structure (files and folders) that is used to create the structure of the accounts you create. It allows you to copy the same files into every new cPanel account's /public_html and /public_ftp directories when you create the account.
To set up the skeleton directory:
- Log in to WHM.
- Look for the Skeleton Directory section. The quickest way is to type a keyword in the Search boxes either io the left-side panel or at the top of the WHM homepage.
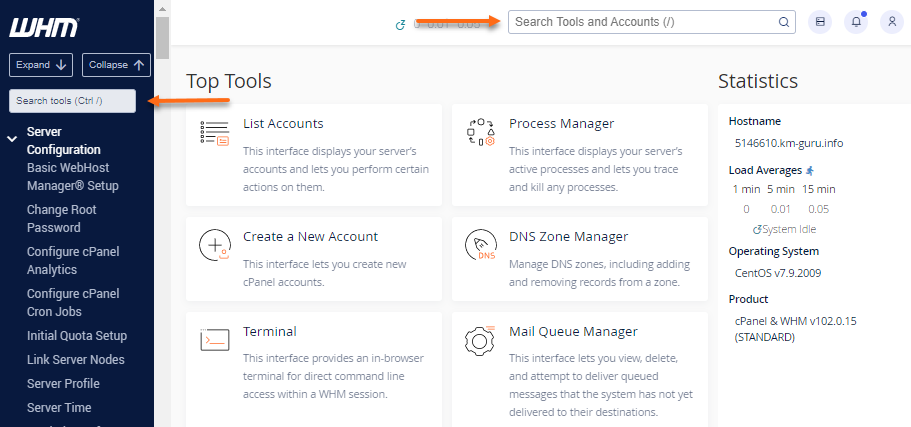
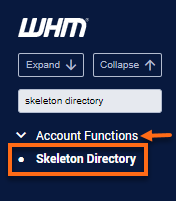
You can also manually locate and expand the Account Functions section in the left-side panel, then select Skeleton Directory from the list of options.
- On the right panel, the system path to the location of the skeleton directory for the root user will be displayed at the top of the page. (For example:
/root/cpanel3-skel)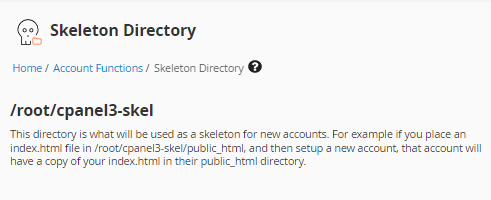
If it's necessary for you to modify the skeleton directory, follow the steps below.
- Plan and create the directories.
- Upload the files you want to be copied to the new accounts into the appropriate directory by using either an FTP (or SCP) program or from the shell.
- The system copies these files to the new accounts' directories when it creates accounts.
Unlike skeleton directories for resellers, the skeleton directory for the "root" user is not accessible via the File Manager. For security reasons, it is recommended that FTP access be disabled for the "root" user. It is also recommended that you use a client that supports SCP to facilitate file transfers to directories that are only accessible to the "root" user, such as the above.
Add the Account for the Primary Domain
WHM allows you to create an account for the primary domain. For the details instructions on creating a cPanel account in WHM, please check the following article.
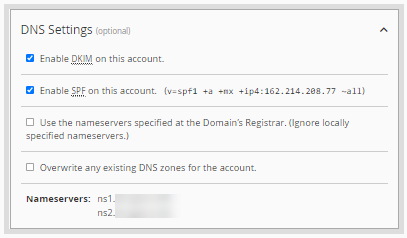
If you wish to overwrite an existing DNS zone, put a checkmark next to Overwrite any existing DNS zones for the account in the DNS Settings section.
DNS Zone
Next, we need to add the DNS records for our hostname and name servers to the zone for our primary domain.
There are several steps to accomplish this task.
Step 1. Navigate to your DNS zone.
To go to the DNS zone editor in WHM:
- Log in to WHM.
- Go to the DNS Functions section by typing a keyword in either the left-side panel or at the top of the page.
You can also manually locate and expand the DNS Functions section in the left-side panel to see the list of options.
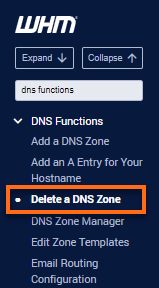
Step 2: Remove preconfigured DNS zones
To remove the preconfigured DNS zone of your domain:
- Select Delete a DNS Zone from WHM's DNS Functions menu.
- Choose zones to delete from the list. (Hold the CTRL key to add additional zones to the selection.)
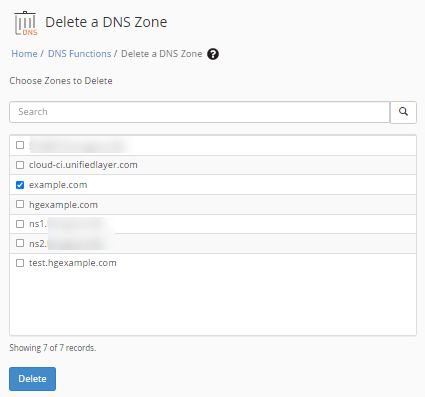
- Click the Delete button.
Step 3: Manage the DNS records
Because there was no zone for the domain when the server was provisioned, individual zones were created for the original hostname and the name servers. Since we now have a zone for the domain, we are going to remove these zones and then add the DNS records we need to the zone for the domain to avoid conflicts.
To manage the DNS zone within WHM:
- In WHM, select DNS Zone Manager under the DNS Functions section.
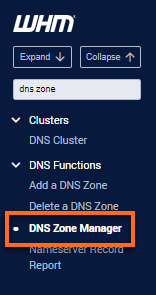
- Look for the domain you need to update, then click the Manage button.
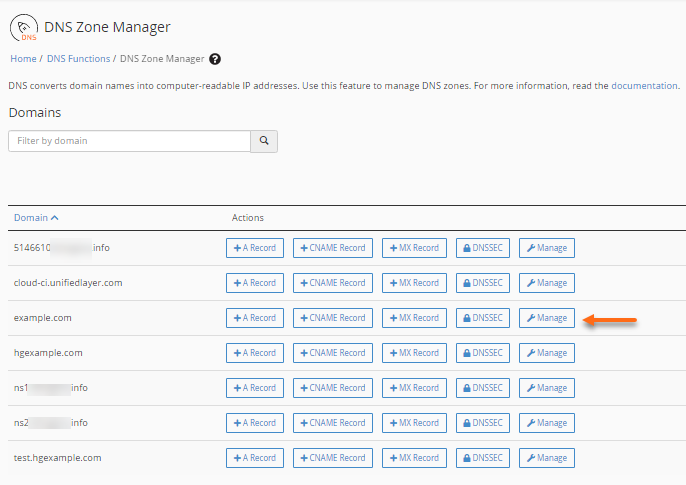
- Make the necessary changes. Use the +Add Record or Edit buttons to manage the DNS records.
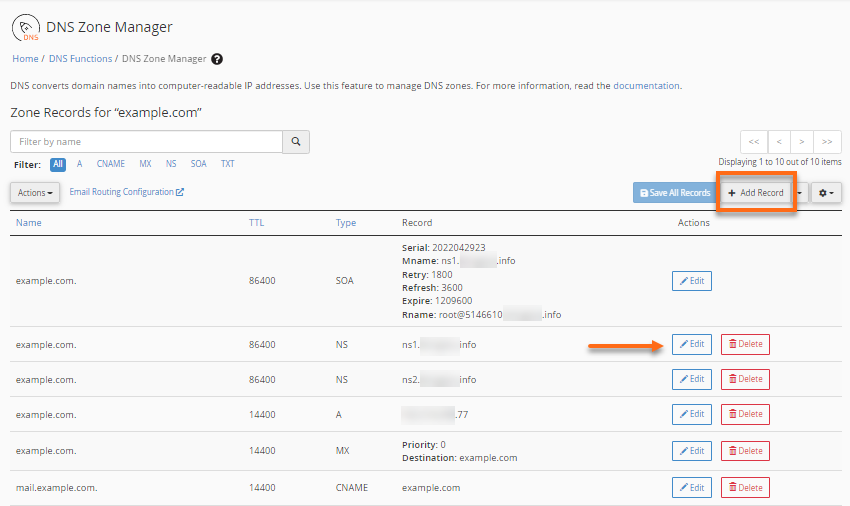
- Click on the Save Record button to save the update.
For more information on managing the DNS zones, please visit the following article:
Since our name servers are currently registered to point to our previous name servers, WHM automatically added A records to point them to the corresponding IP addresses. After the site for our domain is migrated, we will be changing the registration to point IP addresses on this server. Let's change the records to point to the IP addresses that they will be registered to when we update the nameserver registration through our registrar.
Adding an A Record
Now, let's add the A records to our hostname.
When editing DNS records, fully qualified domain names that are meant to be absolute references (for example, "domain.tld" or "www.domain.tld" should be terminated with a dot "." following the top-level domain. Names entered without a terminating "." following the top-level domain (for example," www" or "mail") will be interpreted as relative references to the domain for the zone that contains it.
WHM will allow you to enter a name as the destination address for an A record. This is bad form as relating one name to another name should be done by using a CNAME instead.
Adding an SPF Record
Now, let's add the record for SPF to our domain.
If you remember from part 1 of our tutorial, the Sender Policy Framework (SPF) is a system developed for mail servers where DNS administrators can define what servers have been authorized to deliver mail for a particular domain. Email servers that are configured to check SPF will often reject email from a source if the replaying server isn't explicitly authorized in an SPF record for the sender's domain.
TXT records are used for SPF.
Accept Local Email
- Always set email to accept mail locally, even if the primary MX does not point to this server.
- Since we will also be hosting email for this domain on this server, we will want to leave this checkbox checked. If we were hosting email on a different server, we would uncheck it.
DNS Setting and Email
In this demonstration, we added the records for SPF to our primary domain after the zone was created. As we mentioned in Part 1, since all of your domains will need SPF records, you will likely want to add the information to the zone template so that the record for SPF is created when each zone is created.
You will also want to have the pointer (PTR) record for your primary IP address set to point to your hostname. These are also referred to as "reverse DNS" records. The primary provider maintains reverse DNS records (PTRs), so you must contact your provider to request it.
Some email hosts will also reject emails from mail exchangers where the PTR does not resolve back to the hostname of the relaying server.
Server Contacts
cPanel's mail
cPanel runs under the "cPanel" user, so system messages related to that service will be sent to that user. Let's configure those messages to be forwarded to the same address as used for the previous two users.
Nobody's mail
Apache (the webserver) runs as the user "nobody," so system messages would be typically sent to that user. By default, WHM is configured to forward the messages to the "root" user. Since we are forwarding the "root" user's email to a new address, let's update the "nobody" user's email to be forwarded directly to that same address instead of being double-forwarded.
Root's mail
Many services run on the server as the "root" user, so system messages related to those services will typically be sent to a mailbox for this user. The mailbox for this account is not accessible via webmail or by using a mail client. Let's configure the system to forward these messages to an email account on the domain so that we can check via webmail or a client-side application.
To update server contacts in WHM:
- Within WHM, go to the Server Contacts section by typing in a keyword in either the search box on the left-side menu or at the top of the page.
- Click on Edit System Mail Preferences.
- Enter an email address where it says Forward mail for.
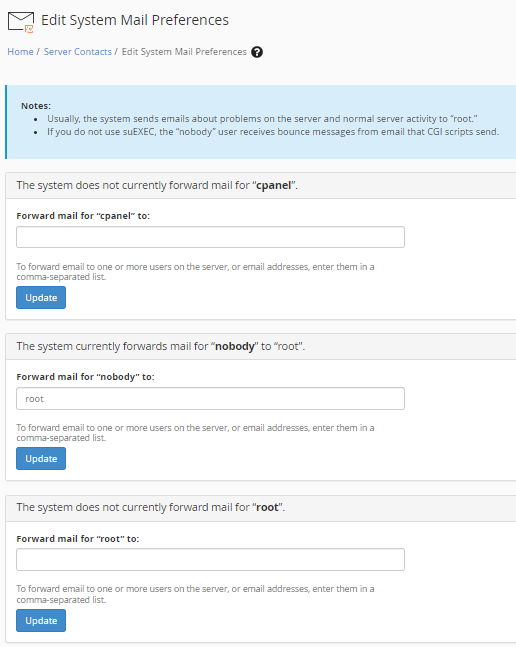
- Once done, click on the Update button.
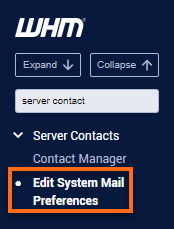
Contact Manager
Here, you can configure what events trigger alert messages to be sent to a user. These alerts will include information about that event, the methods enabled (if contact data for that method has been entered), and the priority given to the messages that are sent.
To update the contact manager in WHM:
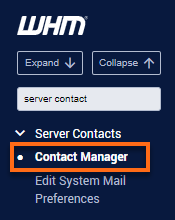
- Within WHM, go to the Server Contacts section and click on Contact Manager.
- There are two tabs under the Contact Manager page - Communication Type and Notifications where you can make the necessary update.
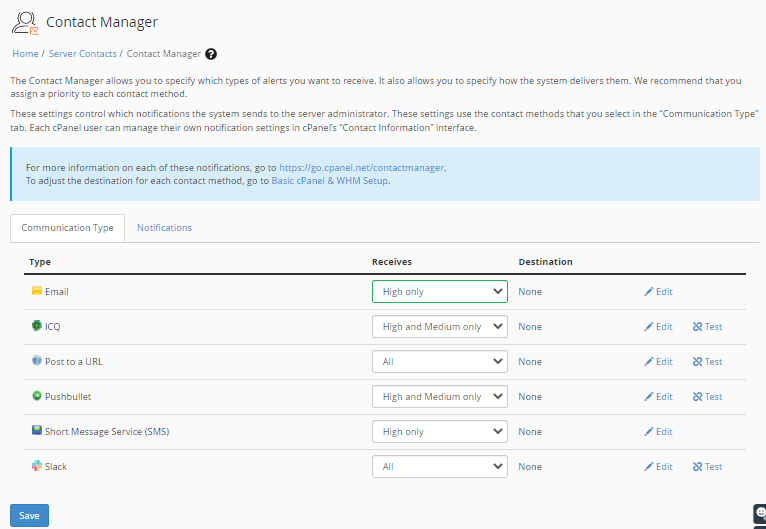
- Communication Type - Under this tab, specify the level of importance of notification for each communication type. For example, if you want to receive email alerts about events with a "High" importance level, choose High only from the Email dropdown menu under the Receives column.
- Notifications - This tab provides a list of available alert types, importance levels, and which communication type will receive each alert.
- Once done, click the Save button to save any changes.
SQL Services
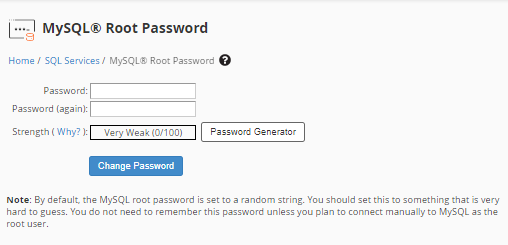
Now, let's set up the password for the "root" MySQL user.
Initially, there is no password set for the "root" MySQL user. As this user has full access to all databases on the server, leaving this blank is considered a security risk and, therefore, not recommended.
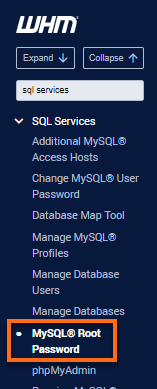
To set up the root password in WHM:
- Within WHM, go to the SQL Services section by typing a keyword in the search boxes either on the left-side menu or at the top of the page.
- Select MySQL® Root Password from the list.
- Enter your preferred password or use the Password Generator button.
- Click the Generate Password button, then put a checkmark on I have copied this password in a safe place.
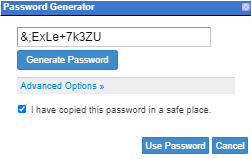
- Click the Use Password button.
- Click Change Password.
Under normal circumstances, we will not need to remember this password to connect to your SQL services. Should you need to access the database as the "root" user, you can simply reset the password. Let's use the password generation tool to generate a secure password for the "root" database user.
Server IP addresses
IP addresses will be assigned by your hosting provider and are usually assigned in contiguous blocks. Your server should be preconfigured with all of the IP addresses in the initial block already bound to the server. Additional IPs that are ordered will likely not be in the same contiguous block as the original set.
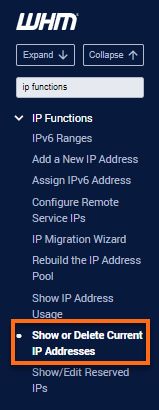
To check IP addresses in WHM:
- Log in to WHM.
- Go to the IP Functions section by typing in a keyword either on the left-side panel or at the top of the page.
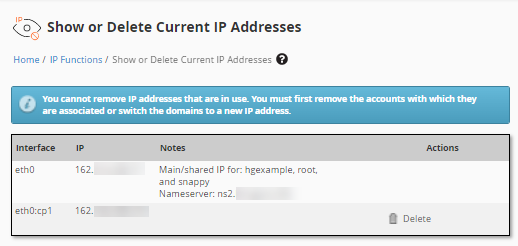
- Select Show or Delete Current IP Addresses.
- The IP addresses associated with your server will be displayed.
Congratulations! You now know how to set up the initial configuration of a new cPanel server.