How Do I Create a cPanel Account?
Once the package is created, you can create a new cPanel account in the Create a New Account section of WHM. You will need to complete several fields to configure the new account.
The video and instructions below will walk you through the process of creating a new account in WHM and help you understand the required information you need to provide.
*The buttons, links, and menus in your WHM may look slightly different from the video above; however, their functionalities should remain the same.
To create a new cPanel account in WHM:
- Log in to WHM.
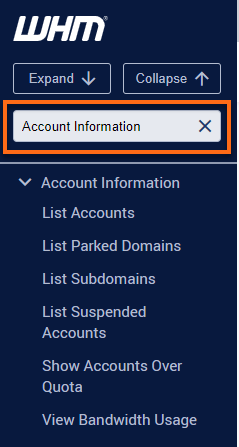
- Look for the Account Functions section. The quickest way is by typing the keyword on the Search box on the left-side panel.
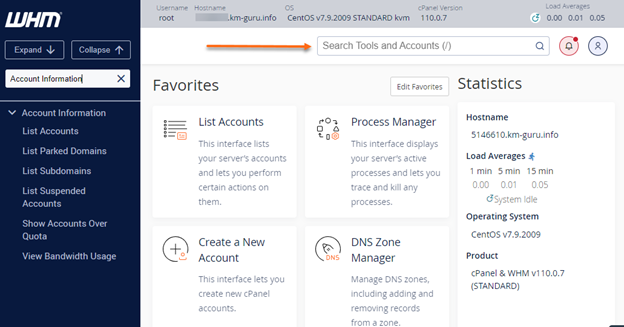
Alternatively, you can use the Search box at the top.
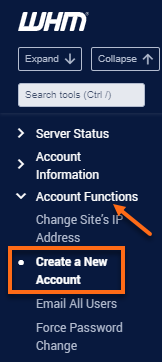
- Select Create a New Account.
You can also manually locate and expand the Account Functions section on the left-side panel, then click Create a New Account from the list.
- Provide the necessary details in the Domain Information section.
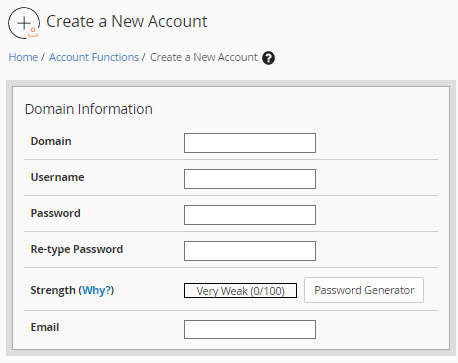
Here are the fields you need to fill out in the Domain Information section.
- Domain - Enter the primary domain name for the cPanel (do not include www. in front of the domain). If needed, you can create a cPanel account for a subdomain.
- Username - WHM will automatically suggest a username when you click this field. Please keep the following criteria in mind when creating a username:
- May consist of 8 characters or less
Due to recent cPanel updates, Reseller accounts and VPS or Dedicated servers with the most current version of cPanel may create usernames 16 characters or less.
- Must be letters and numbers only with no spaces
- May not use special characters or spaces.
- You cannot use the username root as it is already taken by the server.
- May consist of 8 characters or less
- Password - You must use a unique, secure password to create a cPanel account. The password should never contain the cPanel username. It should never be identical to your WHM password (not even as a default or temporary solution), as this is a security risk. It is recommended that you use the Password Generator tool. When you click Password Generator, a pop-up box will appear, allowing you to choose what types of characters you wish to use and how long the automatically-generated password will be.
- Email - WHM uses the email address to notify you about the account issues automatically. Enter your email address instead of the account holder's email address if you want to receive these emails. WHM will automatically send an email with the account information to the address provided when the account is created.
- Select the Package to which you want to assign the new cPanel account. The Package defines the account's limitations. The Choose a Package dropdown will show you a list of Packages you created in WHM. For more information on creating Packages in WHM, please visit the article, What is a Package?

Here are the fields you will see in the Package section.
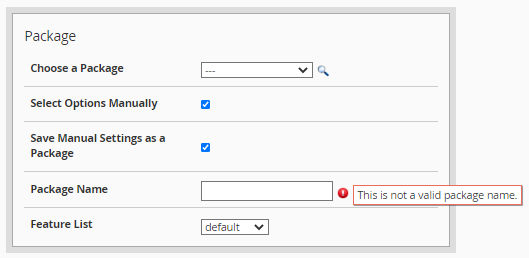 Packages created using a Reseller hosting account will be automatically prefixed with your reseller username and an underscore ( _ ). This prevents package name collisions with other users' packages on the server.
- Choose a Package - Allows you to select a Package.
- Select package options manually - Provides you the option to edit the package settings manually.
- Save Manual Settings as a Package - Appears a checkbox and displays the Package Name and Feature List options.
- Package Name - Name of the new package you want to create.
- Feature List - Defines which features are available to the users. You can create/edit the list via WHM's Feature Manager section.
- Manual Restore Options - This section appears when you put a checkmark on Select package options manually. You need to configure this section similar to how you create a Package in WHM's Add a Package section.
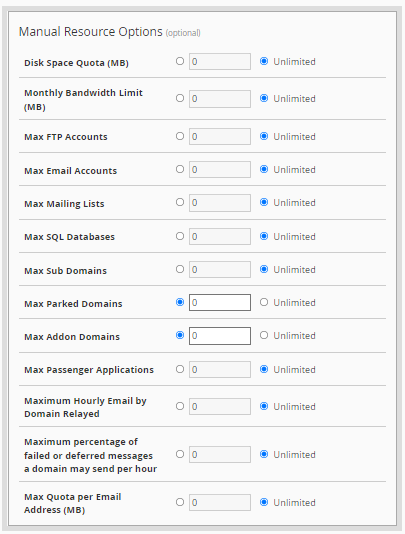
- Configure the Settings section. To access all settings in this section, you must put a checkmark on Select package options manually under the Package section.
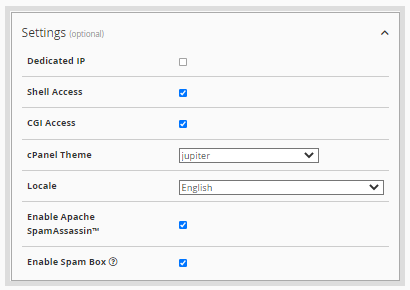
Here are the fields you will see in the Settings section.
- Dedicated IP - It is the static IP address that the account will not share with other accounts unless specified by the user.
- Shell Access - This allows users to use a command line interface to access the server.
- CGI Access - Allows the cPanel account to execute Common Gateway Interface (CGI) scripts.
- cPanel theme - Select a theme for your cPanel (if available).
- Locale - Select a language from the menu.
- Enable Apache SpamAssassin™ - Enables/disables the Apache SpamAssasin's spam filters on the new account.
- Enable Spam Box - Enables/disables the spam box filter for the new account
- Set up the Mail Routing Settings. This allows you to configure how to route emails for the new account.
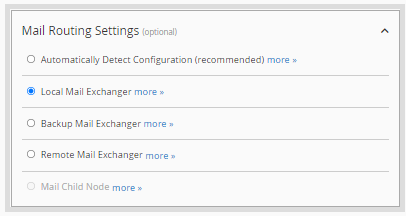
Here are the fields you will see in the Mail Routing Settings section.
- Automatically Detect Configuration (recommended) - Automatically detects which settings to use.
- Local Mail Exchanger - Use this to point your emails to your HostGator server.
- Backup Mail Exchanger - Configure the server as a backup mail exchanger. Mail will be held until a lower number of mail exchangers is available. (For VPS or Dedicated hosting, it requires the cPanel to be specifically configured to function, which may allow spam to bypass filters, and that only includes limited support.)
- Remote Mail Exchanger - Use this to point your emails to a different email service or server.
- If the new account is intended to be a reseller, configure the Reseller Settings. This section is optional.

- Set up the DNS Settings section. This setting has the option Use the nameservers specified at the Domain's Registrar (Ignore locally set nameservers) that allows you to specify if the domain should use its own private name servers or if it should use the locally configured shared name servers.
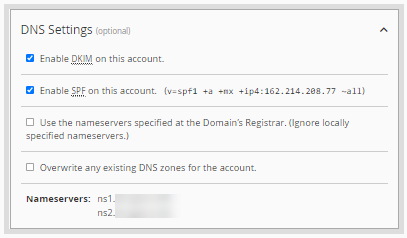 If you have specified private name servers for the domain of this new cPanel account and these private name servers have already been configured at the registrar, put a checkmark on Use the nameservers specified at the Domain's Registrar (Ignore locally set nameservers) so WHM will set the DNS for the private name servers in the zone correctly. Otherwise, leave this box unchecked to use the default name servers configured in the server.
Related Articles
- Configuring Servers - WHM (Part 1)
- Configuring Servers - WHM (Part 2)
- Uploading Your Web Site - Reseller Startup Guide
- What is a Package, and how to create one in WHM?
- WHM Getting Started Guide
- WHM Modify an Account