Manage DNS Zones in WHM
You can manage DNS zones under the DNS Functions section in WHM (Web Host Manager). This area is for advanced users only. Alternatively, you can update your DNS via the Customer Portal.
If you need more assistance, please feel welcome to request any DNS zone changes by contacting us via phone or chat.
This article discusses the following topics.
Where is the DNS Zone Manager?
To access the DNS Zone Manager:
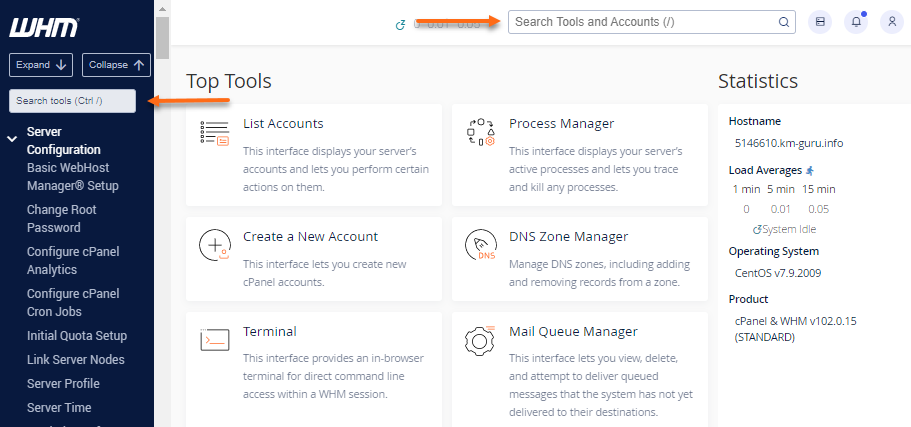
- Log in to WHM.
- Using the search box either on the left-side panel or at the top of the page, search for DNS Zone Manager.
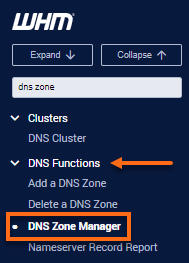
Alternatively, you can expand the DNS Functions section on the left-side menu and click DNS Zone Manager from the list of options.
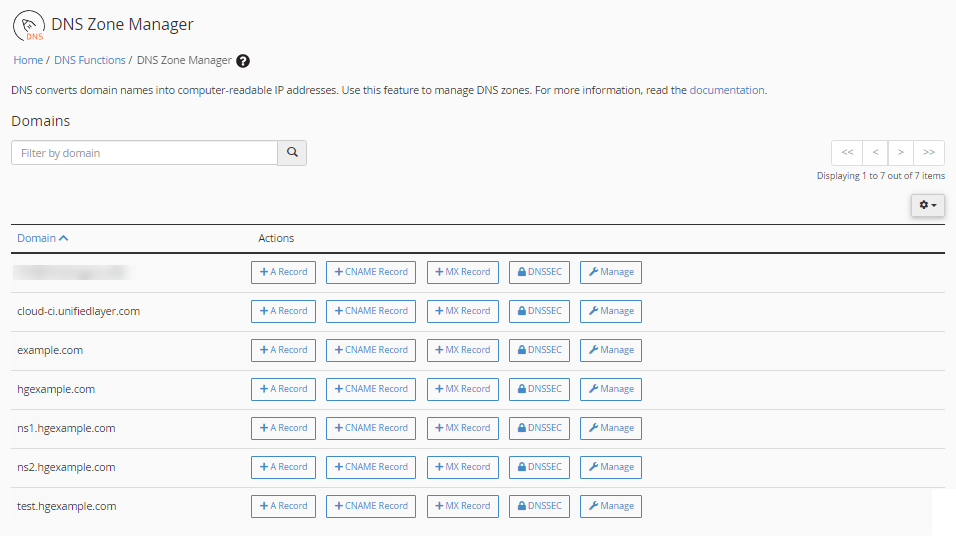
- In the DNS Zone Manager, you can filter your domains by typing the domain name in the search box.
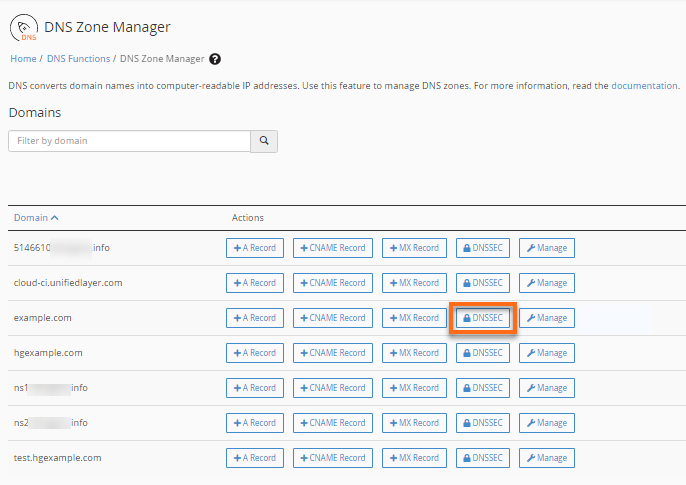
Understanding DNS Zones
The DNS Zone Manager allows you to perform the following actions:
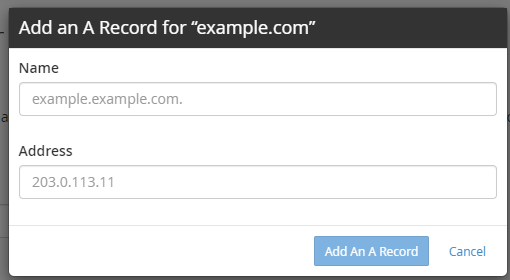
Add A record (+ A Record)
The A record connects your domain or subdomain to an IP address. For example, mydomain.com -> 123.456.78.9 (IP address).
With this option, you can enter a valid domain name in the Name field and a valid IP address in the Address box.
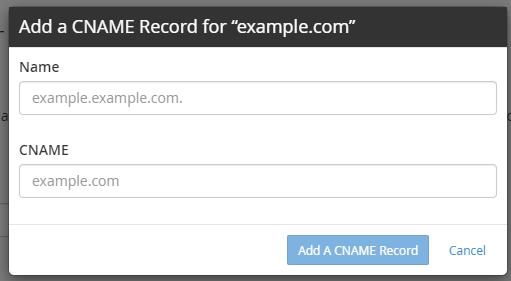
Add CNAME Record (+ CNAME Record)
The CNAME record points your domain or subdomain to another domain name. For example, www.mydomain.com -> mydomain.com.
Once you click this option, you can enter a valid domain name in the pop-up window's Name field and a Fully-Qualified Domain Name (FQDN) in the Destination box.
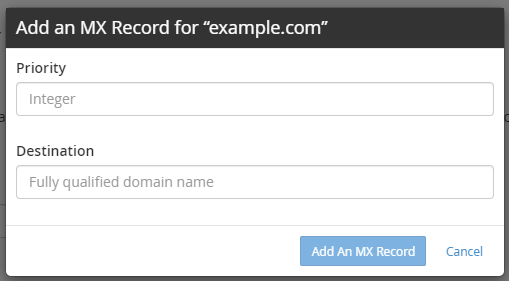
Add MX Record (+ MX Record)
The MX records control where your emails are received. If mail is hosted on another server, this is what you'll need to change.
On the pop-up window, enter the mail's Priority value and Fully Qualified Domain Name (FQDN) in the Destination box.
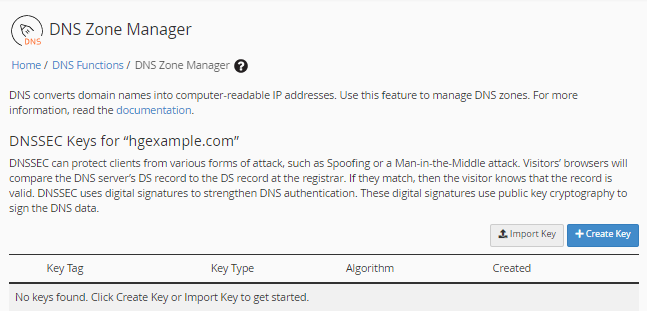
DNSSEC
This option allows you to manage your Domain Name System Security Extensions (DNSSEC) records within the DNSSEC Keys section.
This is the DNSSEC Keys interface.
Manage
The Manage button will take you to the Manage DNS Zone Records section, where you can search, add, edit, and delete DNS records. More information is provided below.
For in-depth learning about DNS records, you may visit the following article.
DNS Zone Manager within WHM
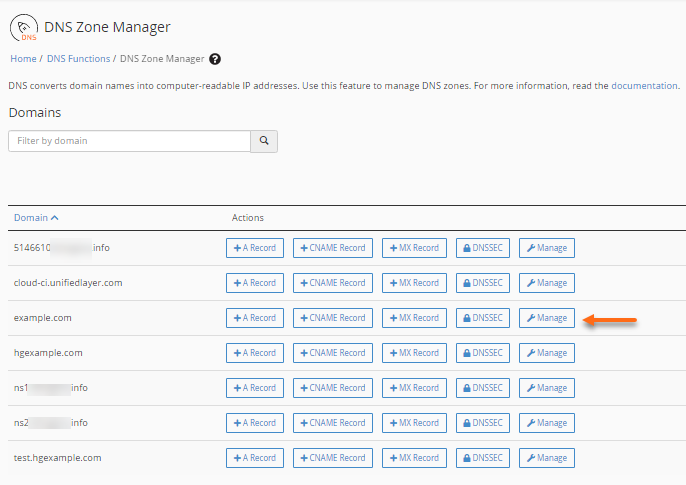
The DNS Zone Manager section is where you can manage the DNS records of all domains within your server. You can use the filter below the search box to search the DNS record by its record type.
In this section, you can do the following:
Add a DNS zone record
To add a DNS record to WHM:
- Within WHM's DNS Zone Manager, locate the domain you want to modify, then click its Manage button.
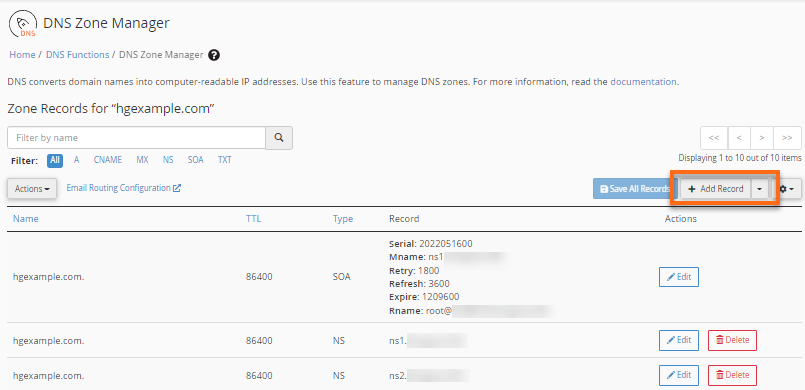
- On the next page, click the + Add Record button on the right side.
- You can click the dropdown arrow to select the record type you want to add to the domain.
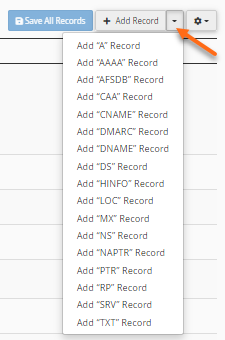
Alternatively, on the pop-up text boxes, select the record type from the Type dropdown.
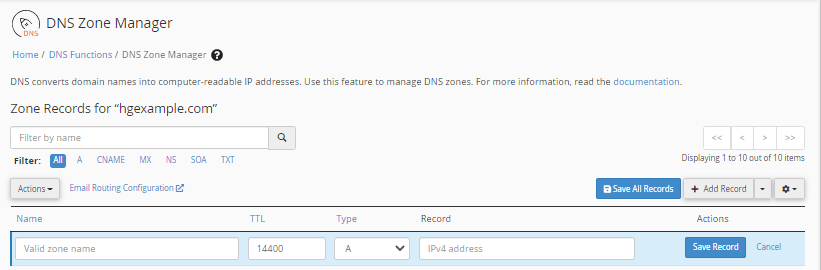
- Enter the necessary record information.
- Once done, click on the Save Record button.
Edit a DNS zone record
To edit a DNS record in WHM:
- Within WHM's DNS Zone Manager, locate the domain you need to modify.
- Click the Edit button on the right.
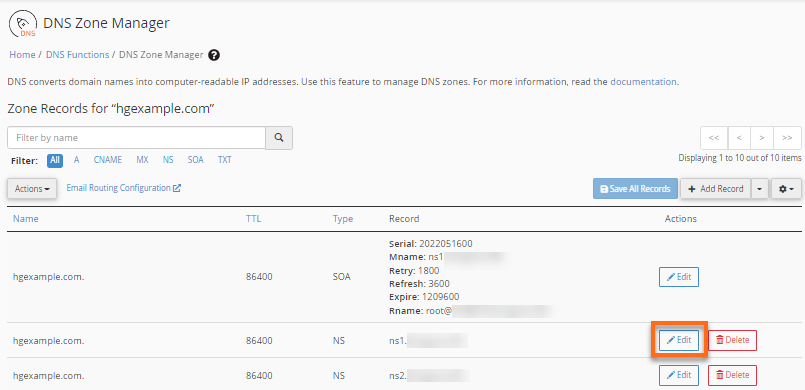
- Make the necessary changes, then click Save Record.
Delete a DNS zone record
To delete a DNS record in WHM:
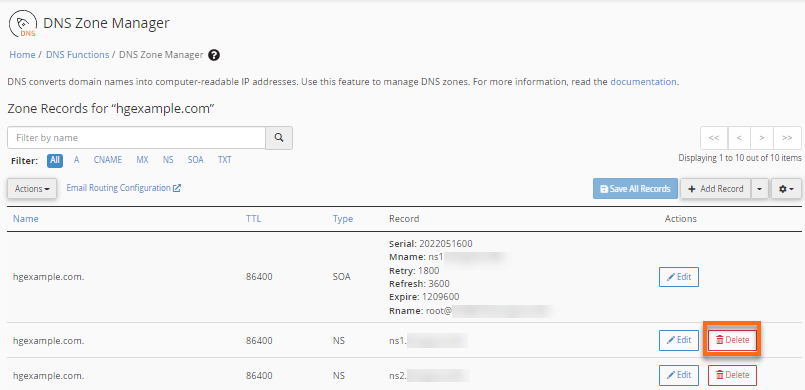
- Within WHM's DNS Zone Manager, locate the domain you need to remove.
- Click the Delete button on the right.
View raw DNS zone file
To view the DNS zone in raw format:
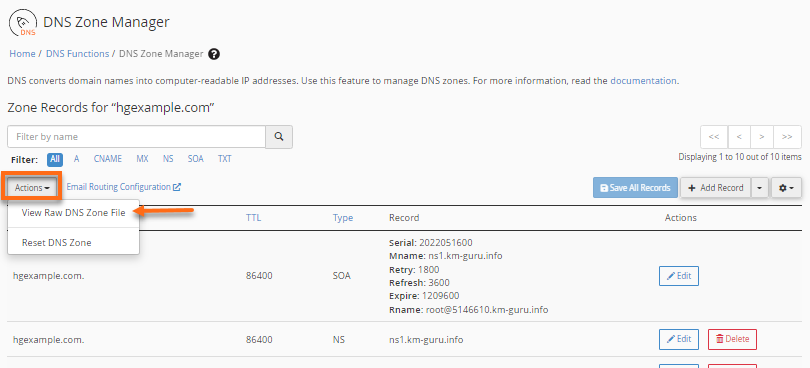
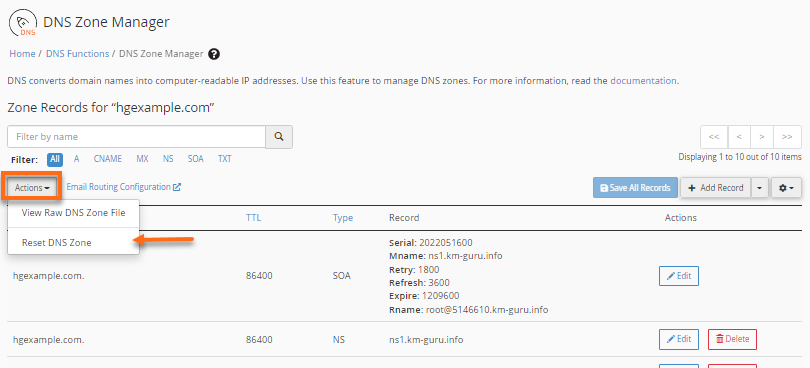
- Within WHM's DNS Zone Manager section, click the Actions dropdown below the search box.
- Select View Raw DNS Zone File.
- On the next page, the DNS records will be displayed in their raw format.
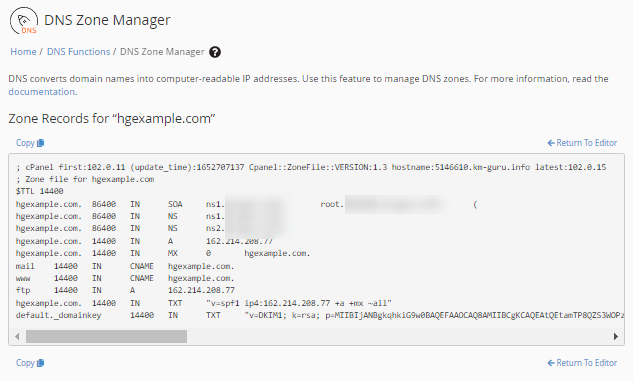
- You can click the Copy link at the bottom left to copy the raw DNS records or the Return to Editor link to go back to the DNS Zone Manager section.

Reset the DNS record
To reset the DNS zone file:
- Within WHM's DNS Zone Manager section, click the Actions dropdown below the search box.
- Select Reset DNS Zone.
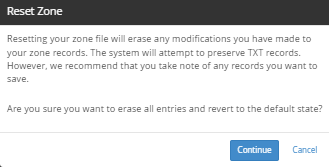
- On the pop-up window, click Continue to reset the selected domain's DNS zone file.
How to change the NS records when using private name servers
The NS (Nameserver) records delegate a DNS zone to use the specified authoritative name server and must be a fully-qualified domain name (FQDN). Your NS records must match the HostGator name servers in your account. These records should be configured in your WHM during the initial setup; however, you can also add or change these within your WHM.
There are several ways to manage your NS records within WHM.
Managing the NS records via DNS Zone Manager
To manage your NS records via DNS Zone Manager:
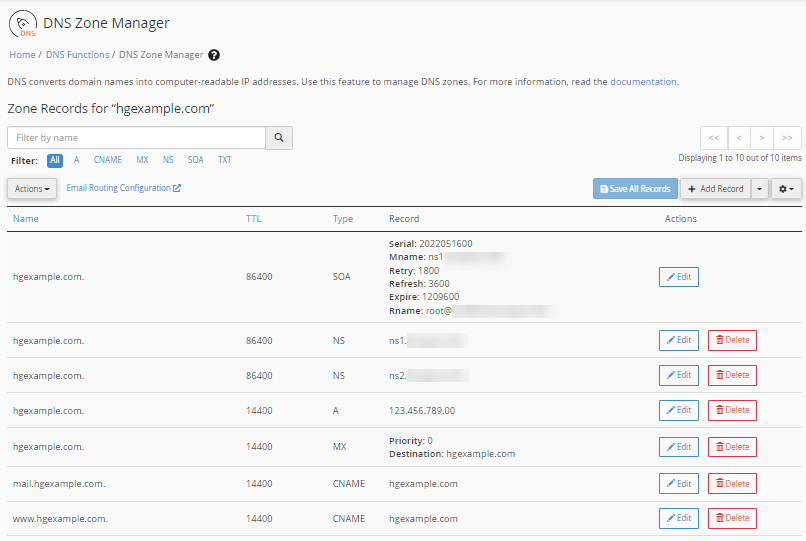
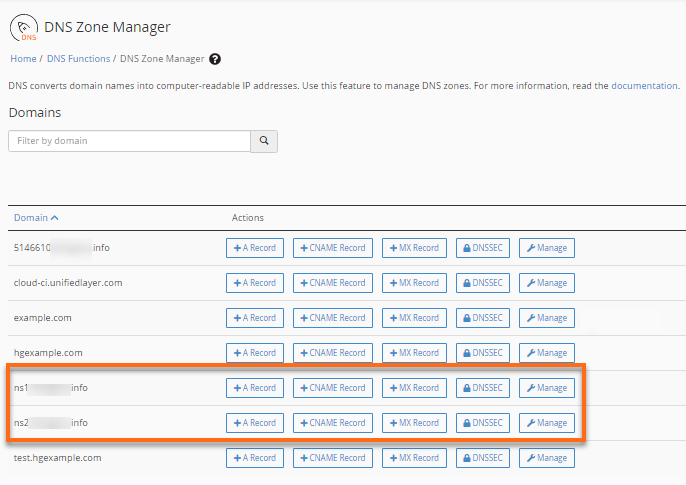
- Within WHM's DNS Zone Manager section, your NS records will be displayed. Click on the Manage button.
- You will see the SOA records on the next page.
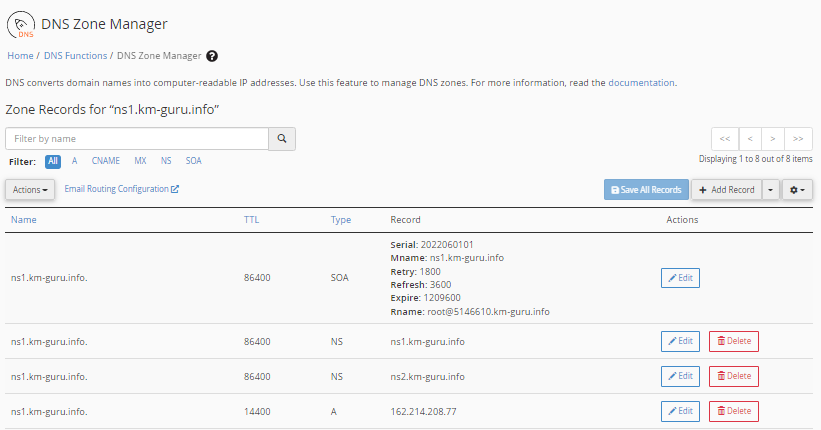
- Make the necessary updates. Please use the private name server information you have for your account, which was provided to you in your HostGator Welcome email.
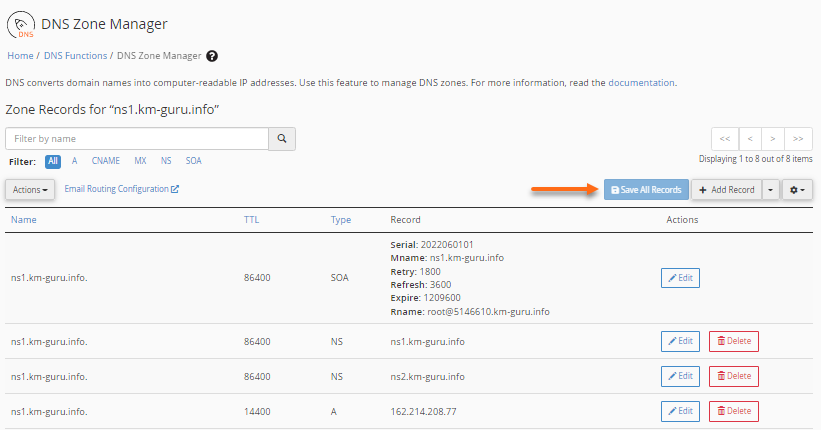
- Once done, click on the Save All Records button at the top right.
Managing the NS records via Basic WebHost Manager® Setup
To manage your NS records via Basic WebHost Manager® Setup:
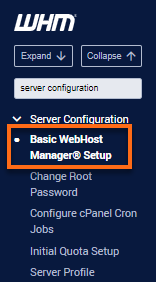
- In WHM, look for the Basic WebHost Manager® Setup section using the search boxes on the left-side panel or at the top of the page.
- On the Basic WebHost Manager® Setup page, scroll down to the Nameservers section. This is where you can specify your server's name servers.
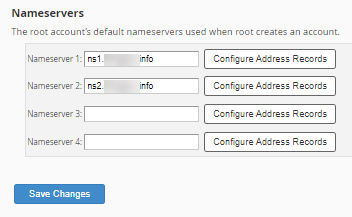
- Click the Configure Address Records button to add your A entry. The system will do a DNS lookup on the name server you entered and list the results in the IP Addresses column.
- In the pop-up window, check that the IP address you entered matches what you have in your HostGator Welcome email.
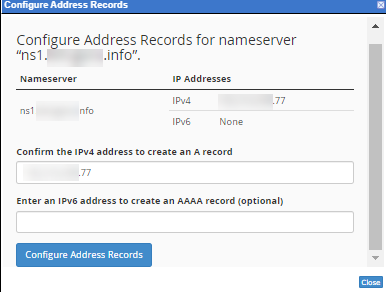
- Once done, click Configure Address Records.
- Click Close.
How to configure MX records in WHM
The MX records specify where the server should send the emails for a domain, as it contains the mail server's IP address.
WHM allows you to manage your domains' MX records within the DNS Zone Manager and configure your email delivery method (or email routing) within the Email Routing Configuration section.
Here are the steps in configuring your MX records within WHM.
Step 1: Set up your MX records
- Set up the MX records. If you haven't set up the MX records for your domain yet, follow the instructions in the Add a DNS zone record section above to add them to your WHM.
If your MX records already exist and you want to edit them, make the necessary updates within the Edit a DNS zone record section or in the Email Routing Configuration section as described below.
- Once the MX records are set up, check the DNS zone files for the relevant A records (IP address).
- Please allow your MX records to propagate fully.
Step 2: Configure your email routing
To point the MX records to either a remote or local server:
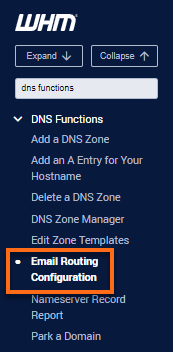
- Within WHM, look for the Email Routing Configuration section using the search boxes either on the left-side panel or at the top of the page.
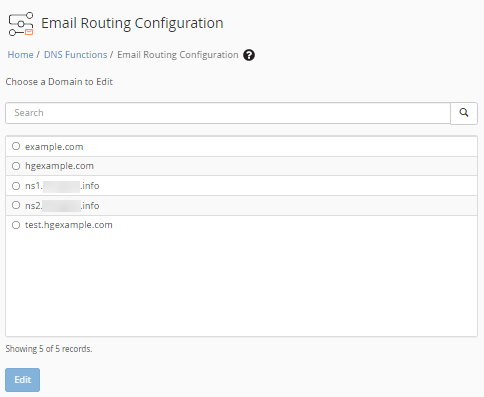
-
Select the domain you wish to update, then click Edit.
- Select your preferred email delivery method – Local, Backup, or Remote Mail Exchange. Please visit the article Local, Backup, and Remote Mail Exchanger to know the differences between these routing options.
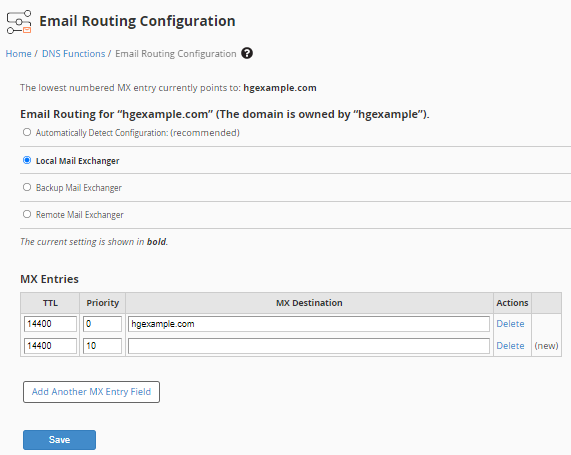
- Enter your preferred MX destination (MX records) in the MX Entries section.
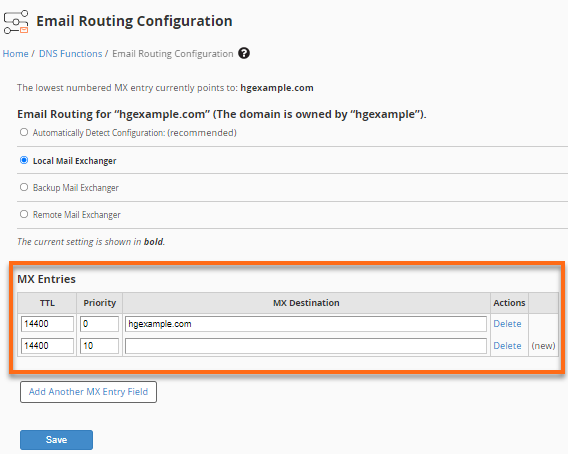
- Once done, click Save.