DNS Glue
After you've registered your private name servers at your registrar and added your A records (as discussed in Step 1 and Step 2 of this article series), checking your DNS glue is your final step in configuring your private name servers.
Make sure your SOA and NS records are correct
This article is all about fixing your glue by checking the SOA and NS records in your domain's DNS zone and making sure they match exactly the name servers used at your registrar.
The SOA (Start of Authority) and NS (Name server) records tell the internet that your private name servers are authoritative and contain the most up-to-date information about your DNS settings. If these are not set correctly, some DNS servers will not trust your private name servers. Other DNS servers may get confused because there is a mismatch between what the registrar says and what your name servers say. This typically results in some people reaching your domain while others cannot. So, it is always a good idea to double-check these settings.
Fixing the DNS Glue
Depending on your hosting plan, the instructions for making the proper changes for your DNS Glue will vary. Please refer to the appropriate sections below with instructions for your control panel.
- WHM ⤵ - If you're on VPS or Dedicated hosting, see the instructions in this section.
- Plesk ⤵ - If you're on Windows hosting, jump into this section.
WHM
The following steps will walk you through how to change the NS records within your WHM when using private name servers.
- Log in to WHM.
- Look for the DNS Zone Manager section. Use the search bar in the left pane or at the top.
- Locate your domain and click on its Manage button.

- In the SOA field, click Edit.

- Make sure the Mname textbox is using your primary private name server with the trailing dot (ns1.).
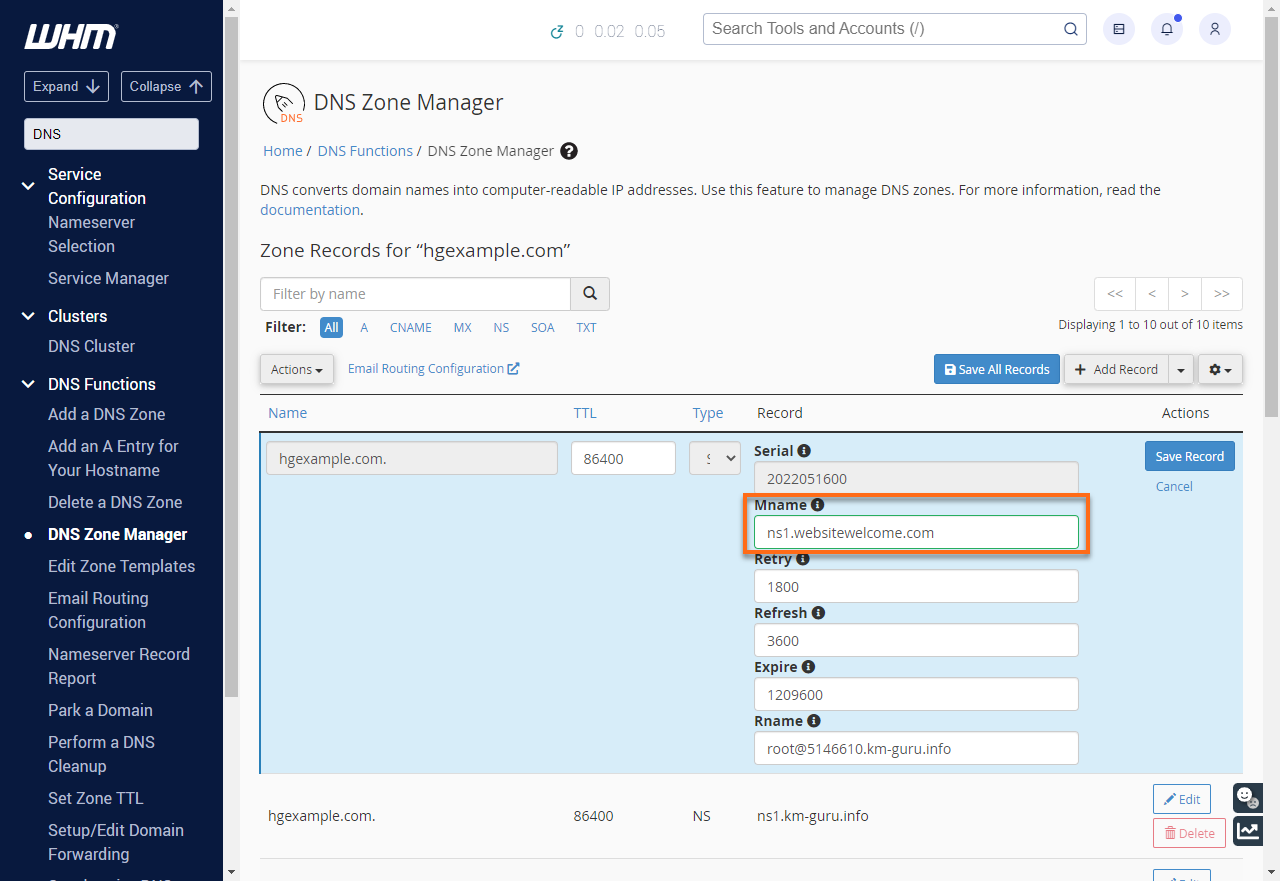
- Click on Save Record.
- In the same section, look for the NS records and click Edit.
- In the NS fields, make sure they are using your private name servers (ns1. and ns2.). Make sure to include their trailing dots!
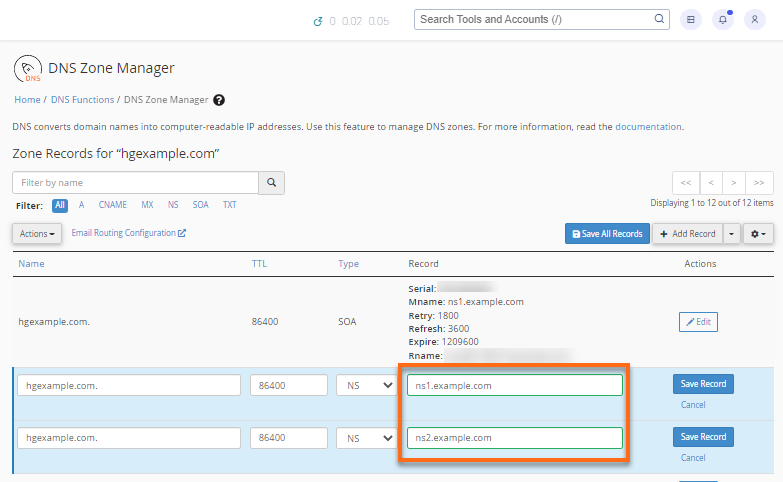
- Click the Save Record button.
Be sure this is done for every domain name you host.
Plesk
The following steps will show you how to change the NS records when using private name servers with Plesk on Windows Dedicated hosting.
- Log in to Plesk.
- Go to your domain's control panel.
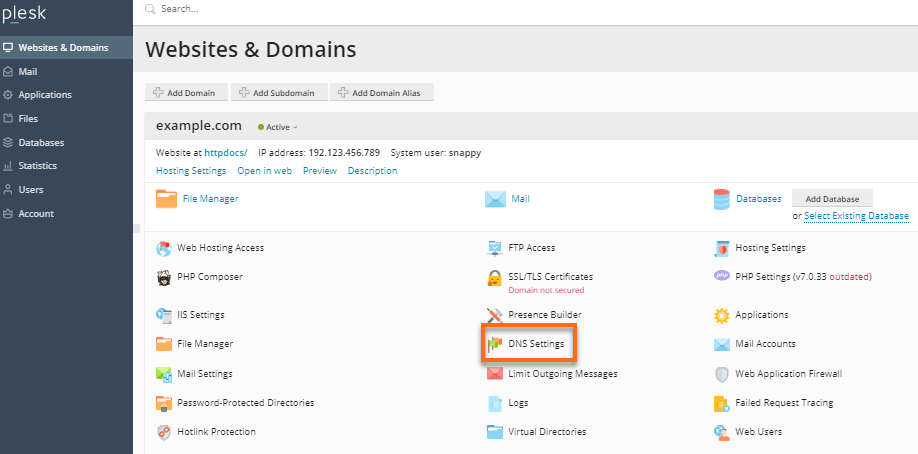
- Click on Websites & Domains in the left-side menu.

- Click the DNS Settings link.
- Click the domain name that you need to manage.
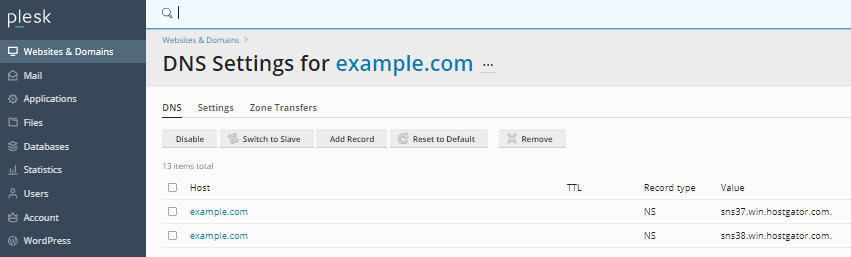
- In the Edit the Resource Record section, you can edit the existing NS records by selecting the host entry or adding a new NS record if needed.

- Once done, click on Apply, then hit the OK button.