Setting up CodeGuard – Database
After backing up your website files, don't forget to back up your databases! Website databases must be manually added to the CodeGuard Dashboard so CodeGuard can create a backup for it.
Is your website built with WordPress? If yes, you will need to add your database to CodeGuard manually. Much of your WordPress website is contained within the database and is required to restore your site if something happens.
- Databases will NOT be automatically added to CodeGuard and must be manually connected.
- CodeGuard will notify you if you have exceeded the CodeGuard limit or if you need to upgrade to the next plan or delete old backups to free up space.
- CodeGuard will not affect or be affected by CDN networks because it is set up via FTP/SFTP.
- CodeGuard only creates backups of your website files and databases and does not back up email accounts associated with your website's domain.
- CodeGuard does not offer malware scans and monitoring. As a HostGator customer, check out our SiteLock security plans.
Adding a Database to CodeGuard
Step 1: Gather the database information
To add your database manually to the CodeGuard Dashboard, you'll need to find your database information:
| Items Needed | Description |
|---|---|
| Database Hostname or IP | Use the server IP address or server name. Please refer to this article to find your server address: What is My Server Address? |
| Database Name | The Database Name is a unique name assigned to the specific database that your site uses. |
| MySQL Username | The MySQL Username is the account used to access the database. This might be similar to your Database Name if you used Softaculous to install your app or WordPress. |
| MySQL Password | The password was created to log into the database. If you used Softaculous, it automatically generated the MySQL password. |
| MySQL Port Number | 3306 |
Where do I find my Database Name, MySQL Username, and MySQL Password?
To obtain the database information, you must access the account's files to open the WordPress wp-config.php file containing the database information. The following are the steps to instruct you on accessing this file.
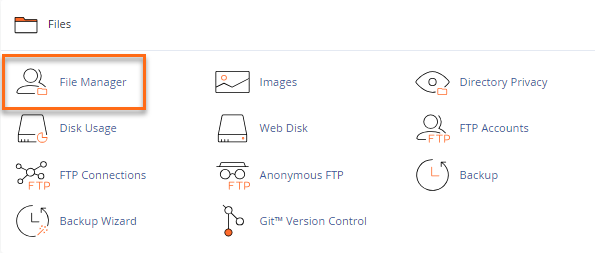
- Log in to cPanel.
- Navigate to the Files section, then click on the File Manager icon.
- This will log you directly into your File Manager for your hosting account.
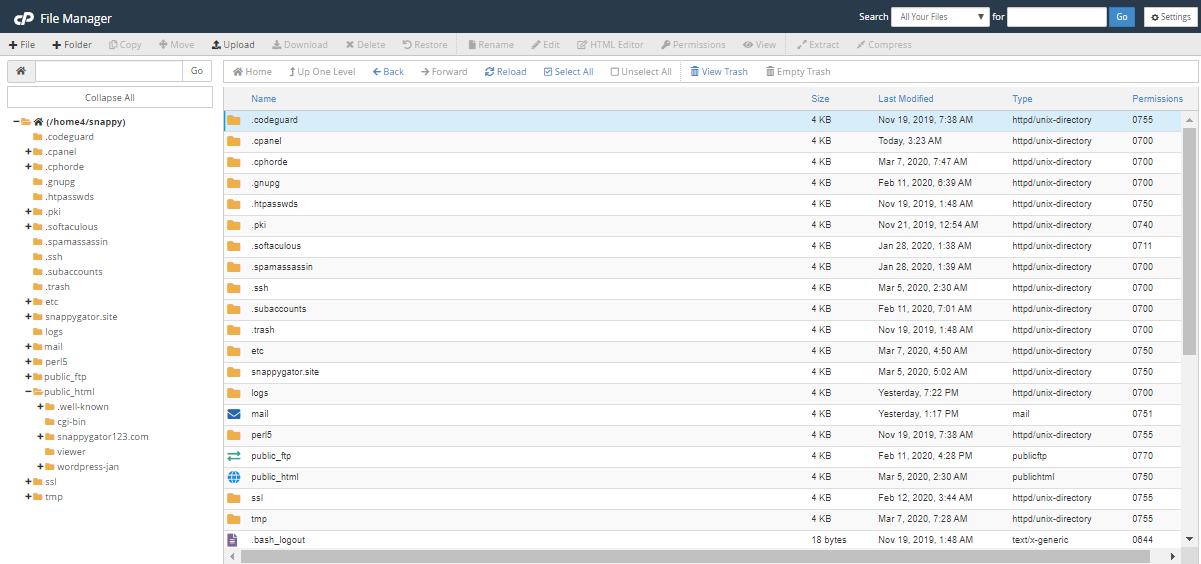
- Access the folder where the WordPress application is located. Look for the wp-config.php file.
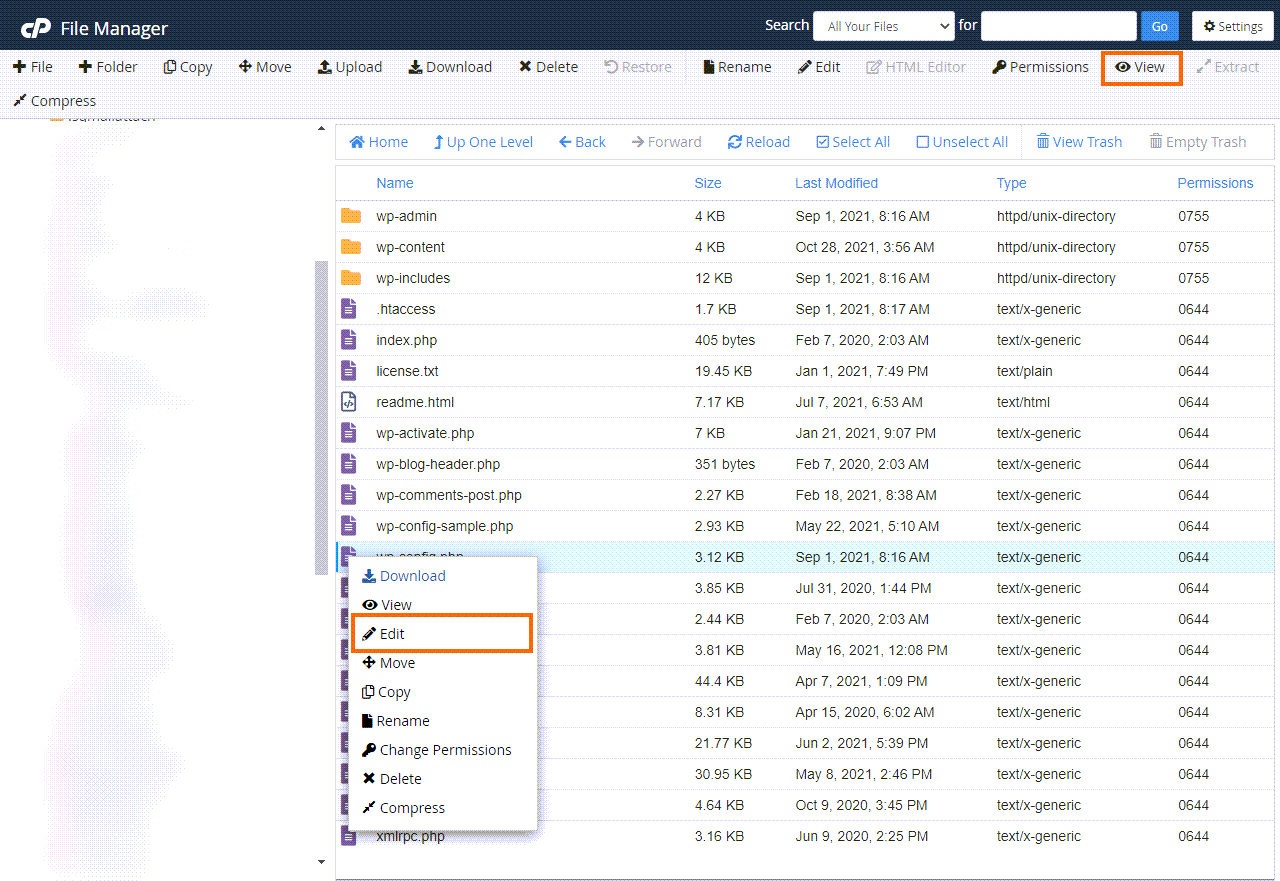
- Right-click on the wp-config.php and click View from the menu. Alternatively, you can click on the icon for the wp-config.php file and then click on the View icon at the top of the page.
- In the wp-config.php file, find the line that says:
- DB_NAME
- DB_USER
- DB_PASSWORD
- DB_HOST
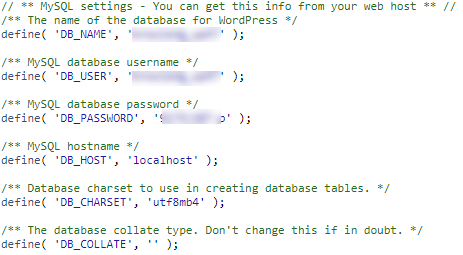
- Take note of what is stated between the quotes for your database information, as this is needed to configure the database connection in the CodeGuard dashboard.
Items Needed Where it's located in the wp-config.php file What information do you need for CodeGuard Database Hostname or IP - 111.222.333.444
(Located in cPanel to the right under Shared IP Address if you are on a Shared Hosting account)Database Name Define ( ‘DB_Name’, ‘db_example’ ); db_example MySQL Username Define ( ‘DB_USER’, ‘db_user77’ ); db_user77 MySQL Password Define ( ‘DB_PASSWORD’, ‘dbp@sswOrd’ ); dbp@sswOrd MySQL Port Number - 3306
Step 2: Configure the database
Once you've gathered this information, you should:
- Log into your CodeGuard Dashboard in your Customer Portal.
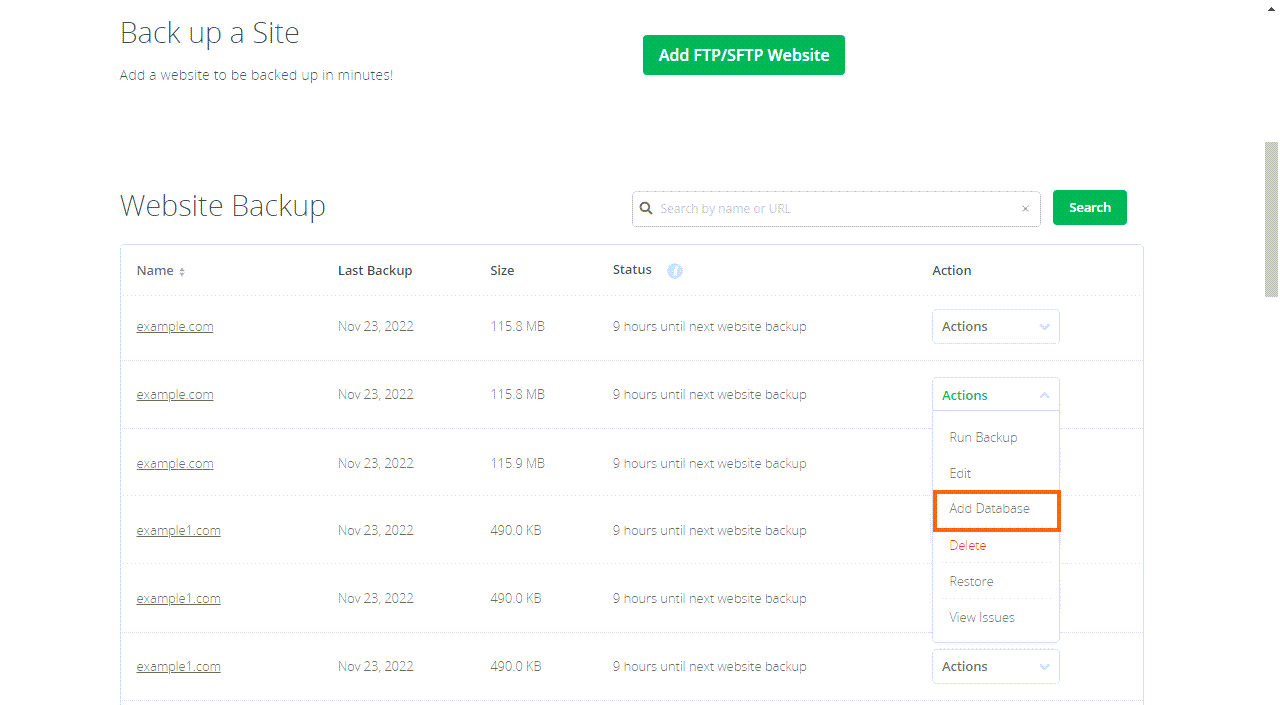
- In the CodeGuard dashboard, next to your website, click the gear icon and select Add Database.
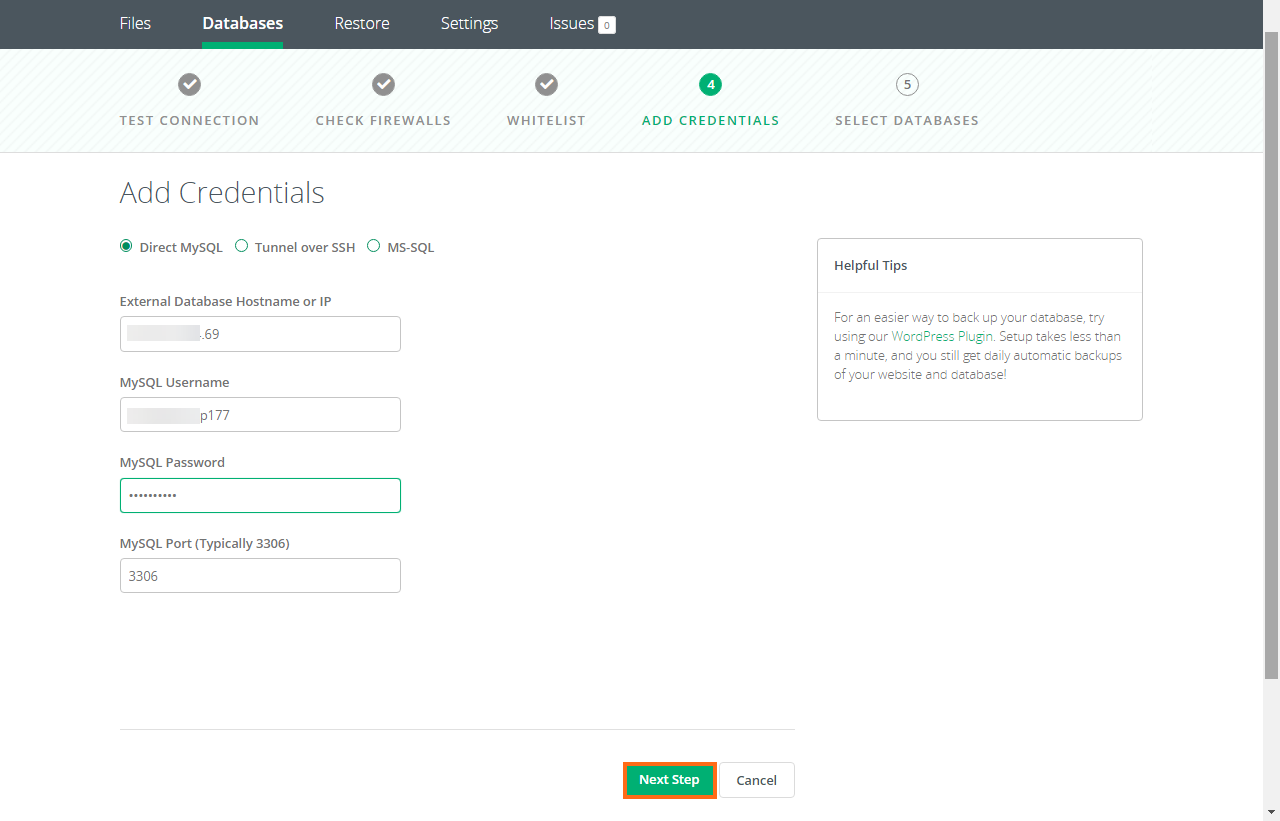
- Enter your database hostname or IP address and click Test Connection.
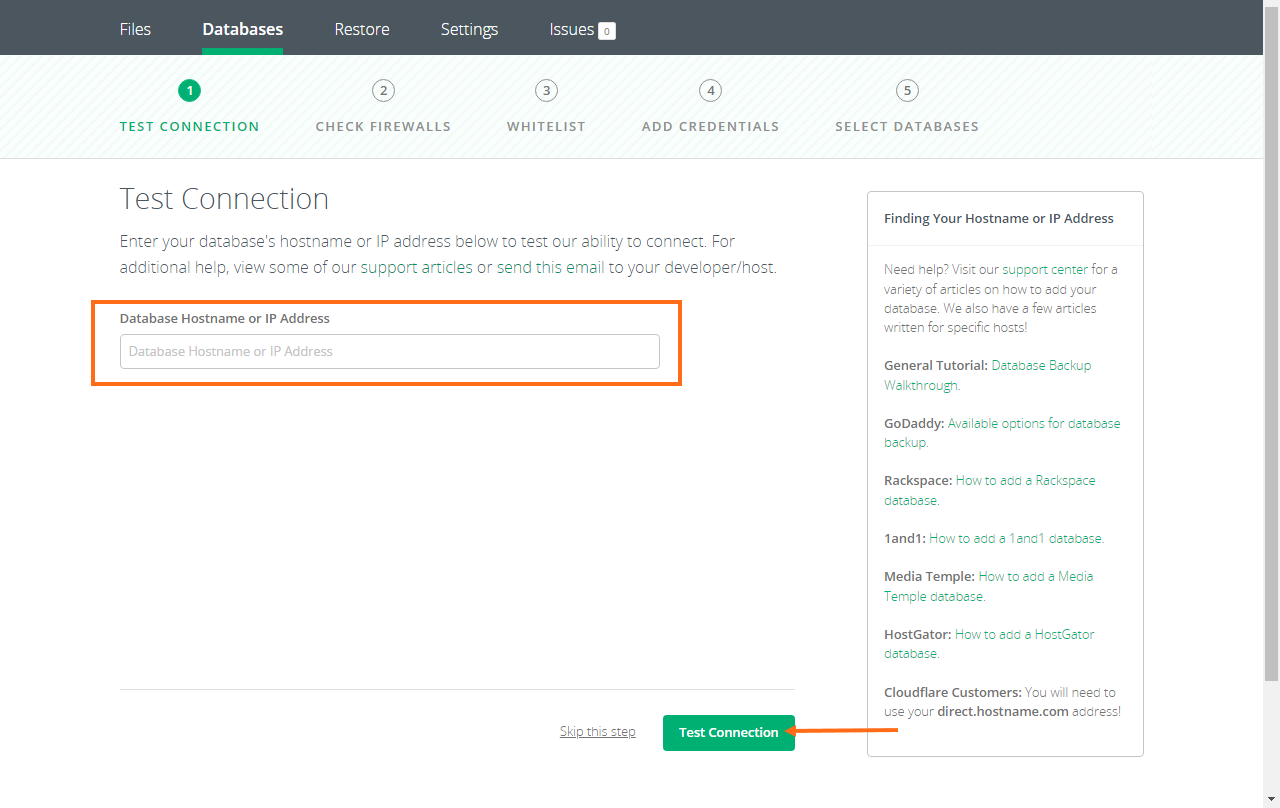
- The Test Connection ensures that no firewall rules block a connection from our IP addresses. When all of the checks passes, select Next Step.
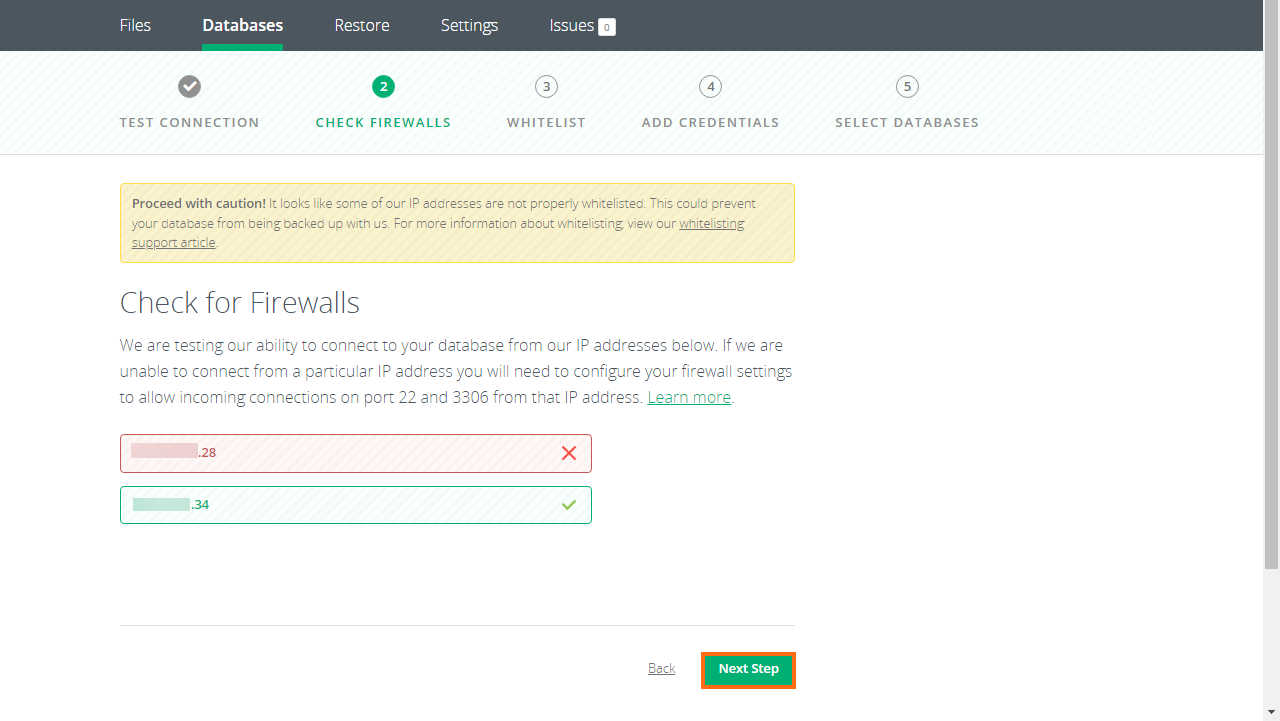
- Ensure that the IP addresses provided by CodeGuard are whitelisted in your hosting control panel.

Below are the instructions for whitelisting your IP address provided by CodeGuard within cPanel:
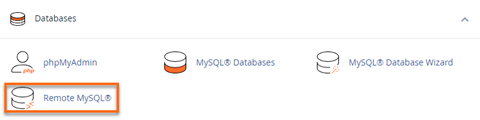
- Log in to your cPanel.
- Scroll down to the Databases section.
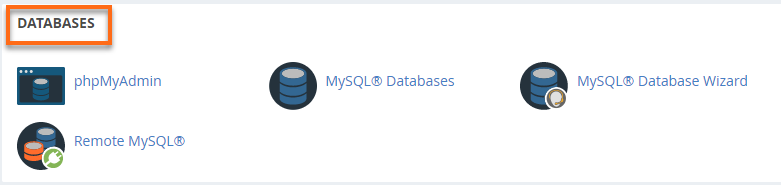
- Click on the Remote MySQL icon.
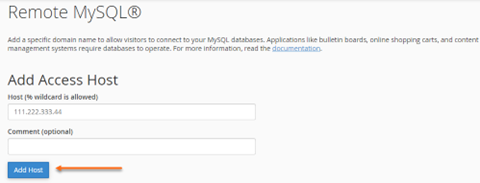
- In the Host field, enter the IP address provided by CodeGuard.
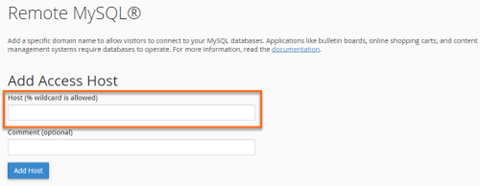
- Click the Add Host button.
- Enter the username and password for your MySQL database and click on Next Step.
-
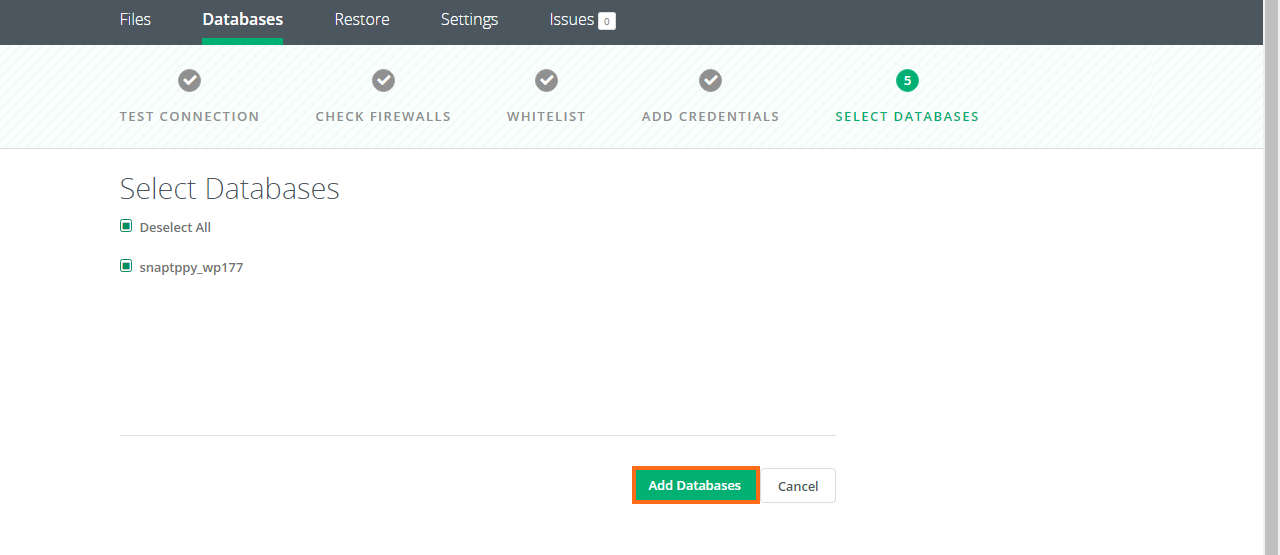
You'll see a list of all the databases to which you've added your MySQL user. Select the databases that you'd like to back up. If you want them all, click Select All. Once selected, click Add Databases.
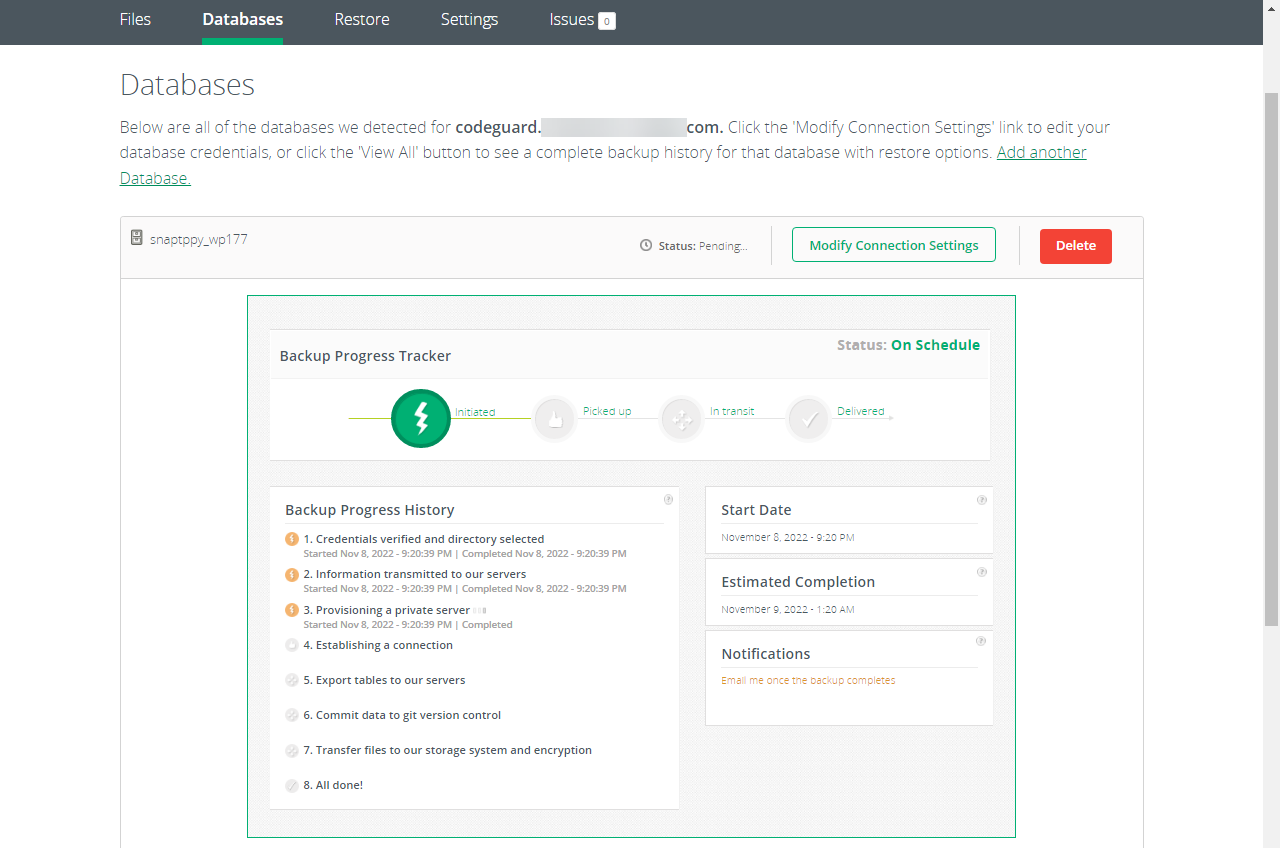
- The backups of your database have begun! For the initial backup, you will be shown a progress tracker. It will walk you through the initial backup of the database step by step. You are not required to watch this if you do not wish to. When the initial backup is completed, you will be notified via email.
-
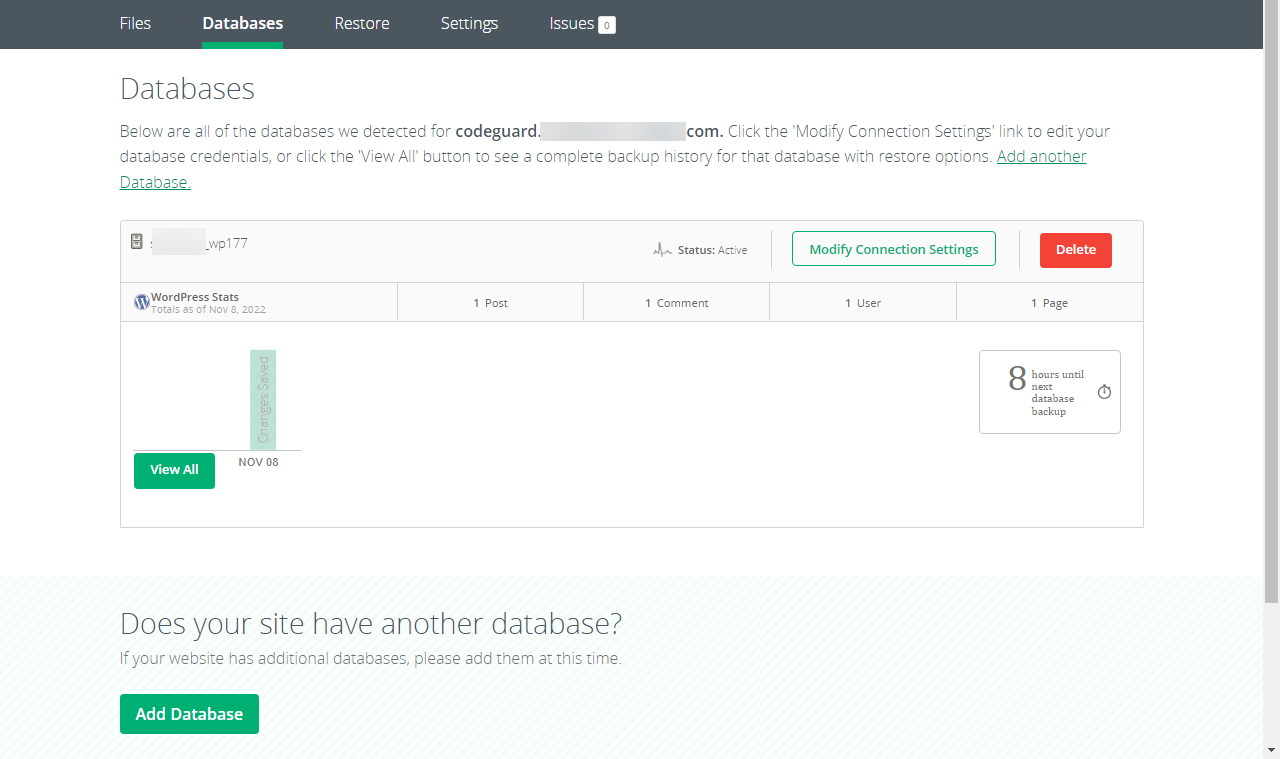
Once the backup is complete, you'll see your backup in the dashboard.
Congratulations! You have added your database(s) to CodeGuard successfully!