How to Create, Edit, or Delete Files in File Manager
To get started, we recommend familiarizing yourself with the File Manager to help you complete the steps in this article more efficiently. If you need a quick refresher, refer to our Navigating the File Manager article for step-by-step guidance, or watch the video below for a visual walkthrough.
This article discusses the following topics:
- How to Create a File or Folder ⤵
- How to Edit a File ⤵
- How to Delete a File or Folder ⤵
- Additional File Manager Functions ⤵
To access your cPanel, see the How to Log in to cPanel article.
How to Create a File or Folder
- Log in to your Customer Portal.
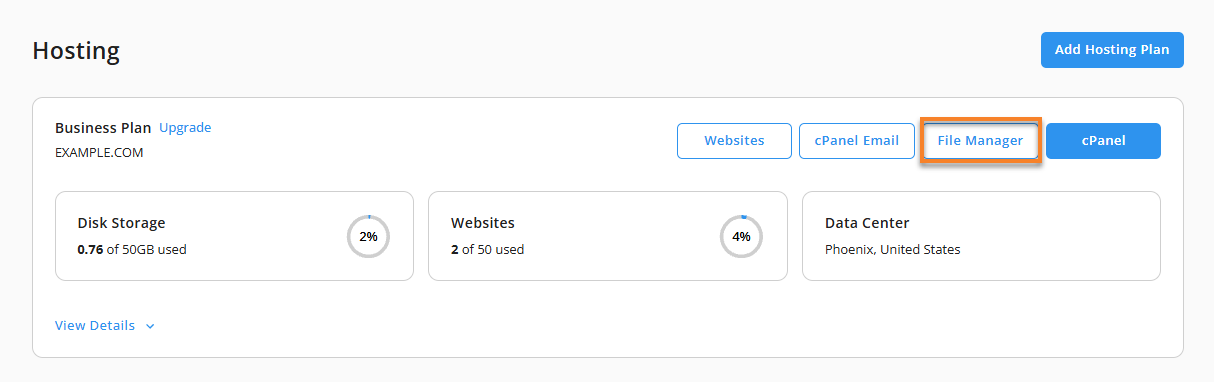
- Click Hosting on the left-hand menu.
- Click File Manager in the top-right corner of the hosting plan panel to open and manage your website files.
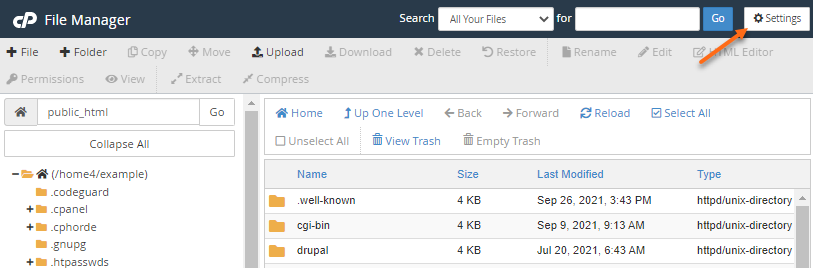
- In the File Manager, then click Settings in the upper-right corner.
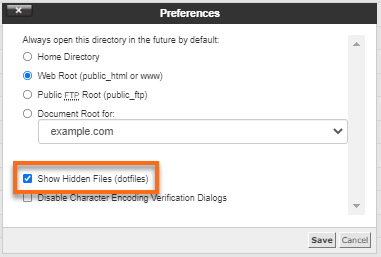
- Select Show Hidden Files (dotfiles), then click Save. This setting allows you to view all files in the selected directory, including hidden files.
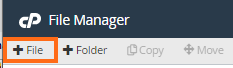
- Click + File or + Folder in the upper-left corner.
- In the pop-up window, enter a name for the new file or folder, then click Create New File or Create New Folder.
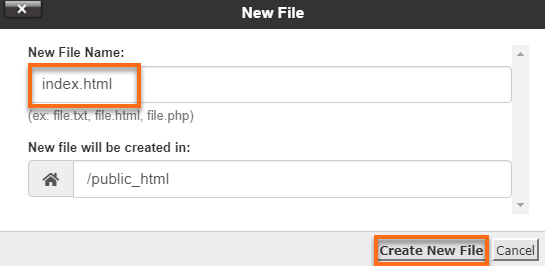 File names typically include a filename and extension separated by a period (.), while folder names do not use extensions. Files without an extension may be displayed as generic text documents.
Your new file or folder will appear in the selected directory.
How to Edit a File
- Navigate to your File Manager.
- Select the file you want to edit, then click Edit from the top menu. You can also do a right-click, then select Edit.
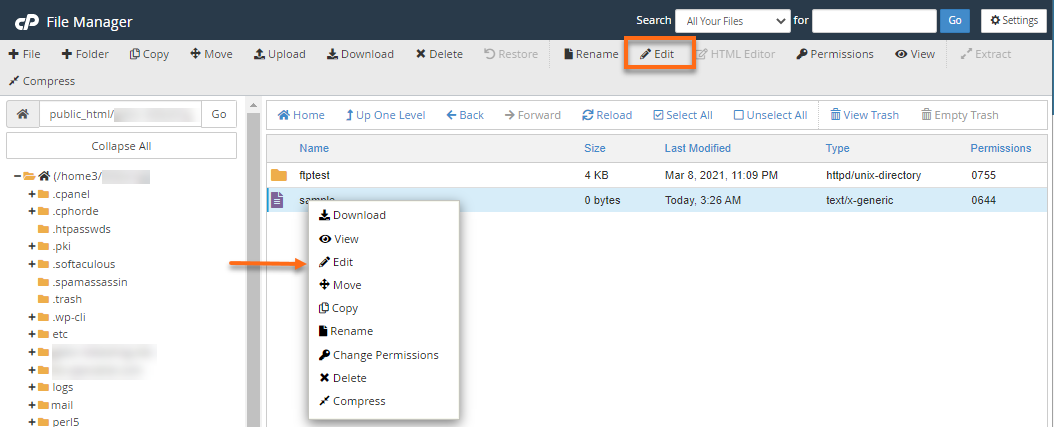
- In the pop-up box, click Edit again to open the editor in a new window.
- Make the necessary changes in the file.
- Once done, click Save Changes in the upper-right corner of your editor.
How to Delete a File or Folder
- Navigate to your File Manager.
- Select the file or folder you want to delete.
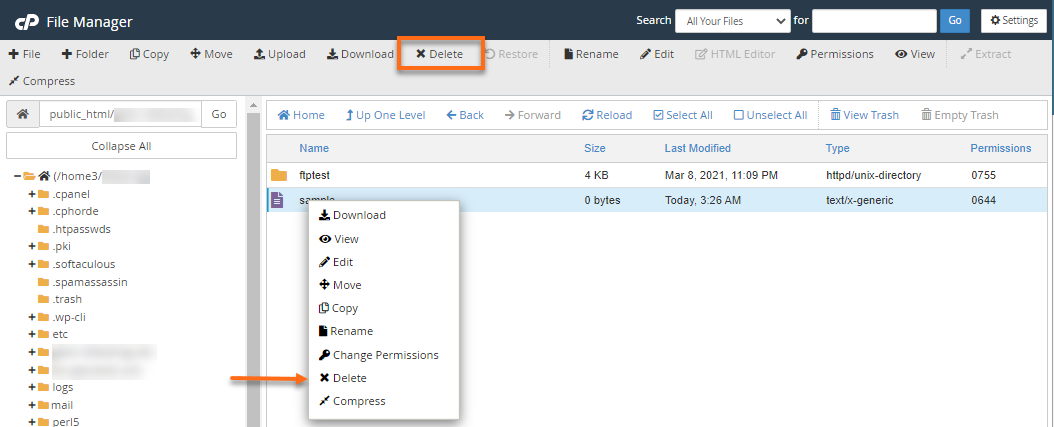
- From the top menu, click Delete. You can also do a right-click and select Delete.
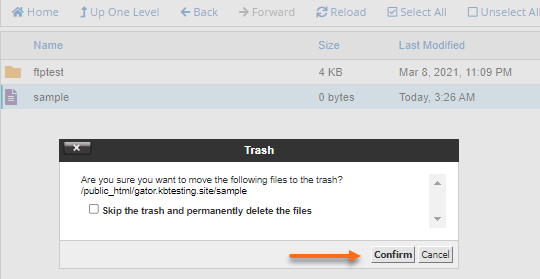
- In the pop-up window, click Confirm to delete the selected file or folder.
Additional File Manager Functions
Here are some other functions you may find useful in managing your files and folders in the File Manager.
- Rename a File or Folder ⤵
- Download a File ⤵
- Upload a File ⤵
- Copy or Move a File ⤵
- Change File or Folder Permissions ⤵
Rename a File or Folder
To rename a file or folder:
- Navigate to your File Manager.
- Select the file or folder you want to rename.
- Click Rename at the top menu or do a right-click, then select Rename.
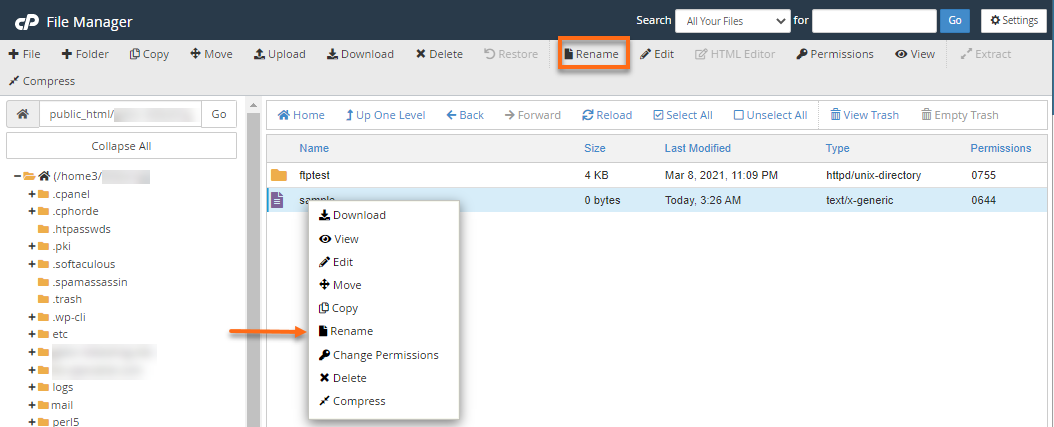
The file or folder is now updated with its new name.
Download a File
You can download a file from your File Manager to your local computer for quick transfers.
- Navigate to your File Manager.
- Select the file or folder you want to download.
- Click the Download button at the top menu or right-click, then select Download.
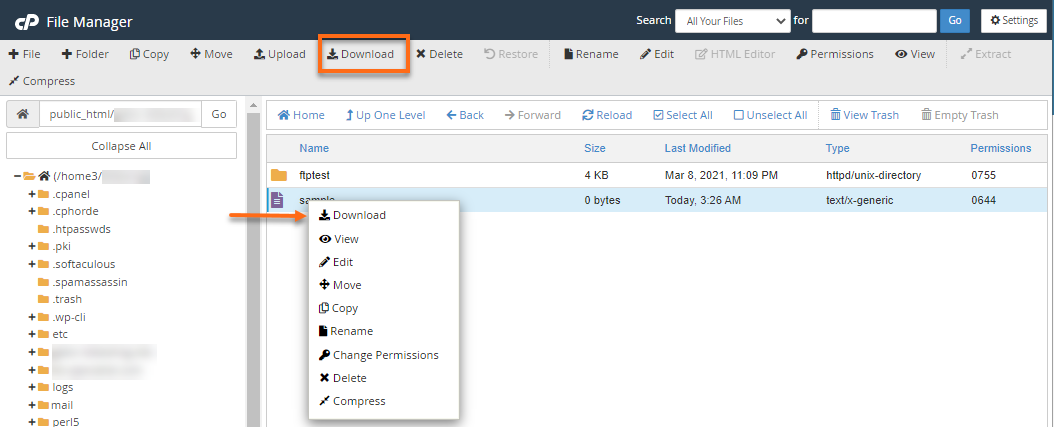
The download will begin automatically.
Upload a File
You can upload files to File Manager. Please note that the maximum file size allowed for uploading is 500 MB. If the file exceeds this limit, you can use an FTP client, such as FileZilla, to upload it. For more information about using FTP, refer to the following articles.
If you use FileZilla as your FTP client, refer to the following articles.
For more information on uploading your files into your File Manager, please visit the article, How to Upload a File Using the File Manager.
Copy and Move a File
You can copy or move files between directories in the File Manager. Please visit the article, Copying and Moving Files in File Manager, for the instructions.
Change File or Folder Permissions
File permissions control access to files and directories on your hosting account. For the complete instructions on managing your file permissions, please check out the article, How to Change Permissions (chmod) of a File.