How to Configure FileZilla
What is FileZilla Used For?
File Transfer Protocol (FTP) is a useful tool for sending and receiving files between networks. FileZilla, one of the most widely used FTP programs, is free software that allows users to transfer files from their local computers to their remote servers.

To learn more about FileZilla, please visit our support articles:
How to Connect to FTP Server Using FileZilla
The quickest and easiest way to establish a connection between a local machine (the computer you are connecting from) and a remote server (the computer/server you are connecting to) using FileZilla is through Quickconnect.
We created a video to guide you in connecting your local computer to your remote server using FileZilla FTP.
Here are the steps outlined in the video above.
Step 1: Gather Your FTP Credentials
To establish a connection using FileZilla FTP, you will need to collect the following information:
- FTP Host/Address: (Your IP address or server hostname, which you can see within your Customer Portal and cPanel.)
- FTP Username: (Your cPanel / complete FTP username*)
- FTP Password: (Your cPanel / FTP password)
- Port: 21, or you can leave it blank**
* When you purchase your hosting account, a default FTP account is created for you. You will need your cPanel username and password to connect to your default FTP account. You can also create your own FTP account in your cPanel if you wish. Here is a helpful article on how to create an FTP account: How to Create an FTP Account in cPanel.
** The port will automatically default to 21 if left blank. Please note that only VPS/Dedicated plans have root access. To connect via FTP using the root, it must be a secure connection. Changing the port to 22 will automatically set the host to https://, making it secured. If there is no secure connection available, the connection will fail.
Step 2: Enter Your FTP Credentials
Now is the exciting part! We will use the FTP credentials you gathered and enter them into your FileZilla FTP.
To connect to your FTP server:
- Open your FileZilla FTP program.
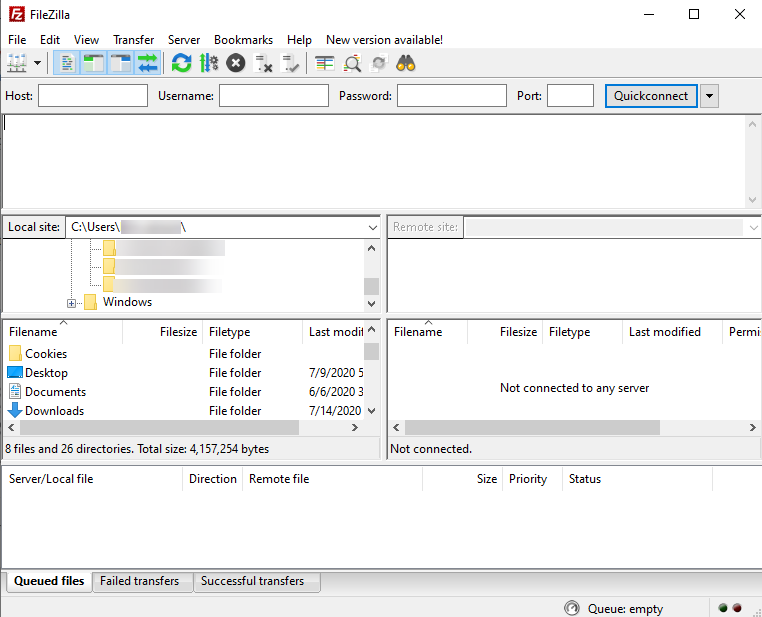
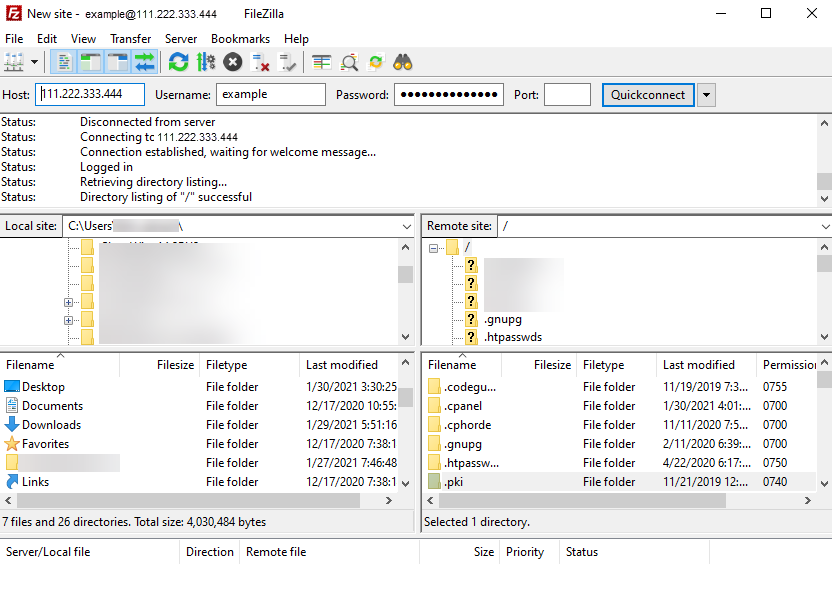
- Enter your FTP credentials into their appropriate fields.
 Host: Your Site IP or your server hostname
Username: Your cPanel username/FTP account username
Password: Your cPanel password /FTP account password
Port: 21, or just leave it blank
- Click the Quickconnect button. In the window below, the results of the connection will be shown. A successful connection will end in "Directory listing successful."

You can now go ahead and transfer files from your local computer to your remote server. You can check out this article to guide you in transferring files using FileZilla FTP.

How to Set Up and Maintain Multiple Connections in FileZilla FTP
To establish multiple connections in FileZilla:
- In the FileZilla application, click File on the top menu.
- Select Site Manager.
- Click the New Site button to create additional connections. You can rename your new site connection.
- Provide the login information on the right-hand side under the General tab.
- Select FTP - File Transfer Protocol for the Protocol.
- For Encryption, select Only use plain FTP.
- Choose Normal for the Logon Type.
- Once all login information is entered, click Connect.
To organize your multiple new site connections:
- In Site Manager, click the New Folder button. Rename it as you wish.
- Drag and drop your site connections into your new folder.
To connect to your predefined site connections:
- In the FileZilla application, click the Site Manager icon’s pull-down arrow just below the File menu.

- Select your preferred site connection from the list.
- Click OK on the pop-up window.
You are now connected to your predefined FTP connection!
FileZilla Article Series
- How to Obtain & Install FileZilla
- How to Configure FileZilla
- How to Manage Files in FileZilla
- How to Transfer Files in FileZilla