How Do I Change My Website's MX Record?
A mail server uses an MX record to manage incoming emails. When you change your MX record, it directs emails to a different server. This can be useful if you want to continue using your old email service after migrating your website or if you prefer to use a third-party email service, such as Google Workspace. In such cases, you will need to configure your email settings according to the new server.
This article will guide you in setting up your MX records to use remote settings or a third-party email service while keeping your website hosted at HostGator.
In using the remote settings for your emails, you need to indicate the following:
- MX record - Your new email host will provide this.
- Mail's A record - This is the IP address connecting to your preferred email host.
- Email routing - This is your email delivery method.
Here are the topics we will discuss in this article.
How to Point Your Emails to a Different Email Host
Here are the steps to point your emails (MX records) to another email host.
- Step 1: Obtain your email provider's MX record values and IP address.
- Step 2: Update your MX and mail's A records within your Customer Portal.
- Step 3: Set your email routing (email delivery method) to Remote.
Once you have your email host's MX record and IP address (for your mail's A records), you can proceed with updating your DNS records ⤵ with the Customer Portal and email routing ⤵ within cPanel.
How to Update MX and A Records within the Customer Portal
To manage your MX records, there are two possible scenarios for handling domains:
- Scenario 1: My domain is registered with HostGator and pointed to my HostGator name servers ⤵
- Scenario 2: My domain is not registered with HostGator but is pointing to my HostGator name servers ⤵
In both cases, as long as your domain is pointing to HostGator's name servers, you can manage its DNS records, including the MX records, through your Customer Portal.
Scenario 1: My domain is registered with HostGator and pointed to my HostGator name servers
- Log in to your Customer Portal.
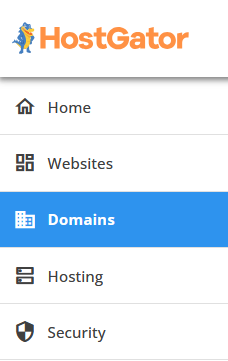
- Click Domains on the left-hand menu.
- Click the domain you need to manage for your emails.
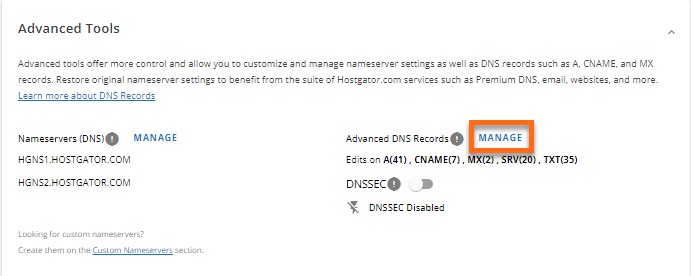
- On the domain management page, scroll down to the Advanced Tools section.
- Click the Manage link right next to Advanced DNS Records.
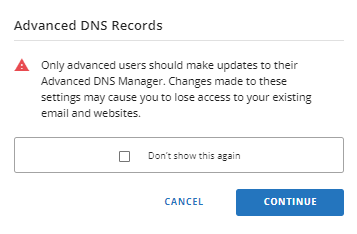
- In the pop-up, click Continue to proceed.
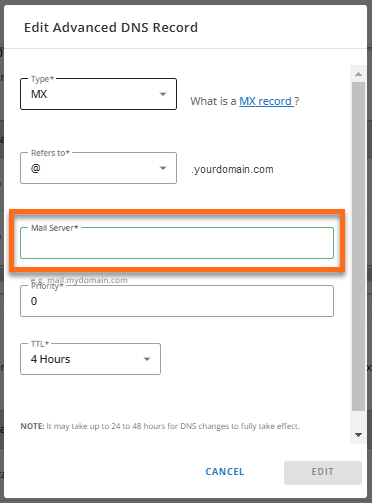
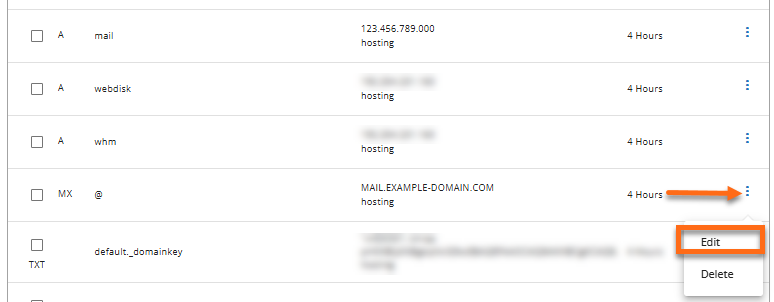
- On the Manage Advanced DNS Records page, scroll down to the MX (Mail Exchanger) section.
- Look for the existing 'mail.yourdomain.ext' MX record, click the vertical-ellipsis icon on the right, and then select Edit.
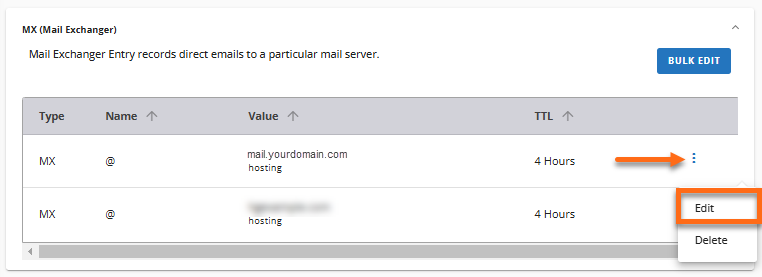
- Enter your email host's MX records in the Mail Server field. We recommend keeping the correct Priority order as specified by your email provider. Click Edit.
- Next, scroll up to the A section and look for the "mail" A record.
- Click the vertical ellipsis on the right, then select Edit.
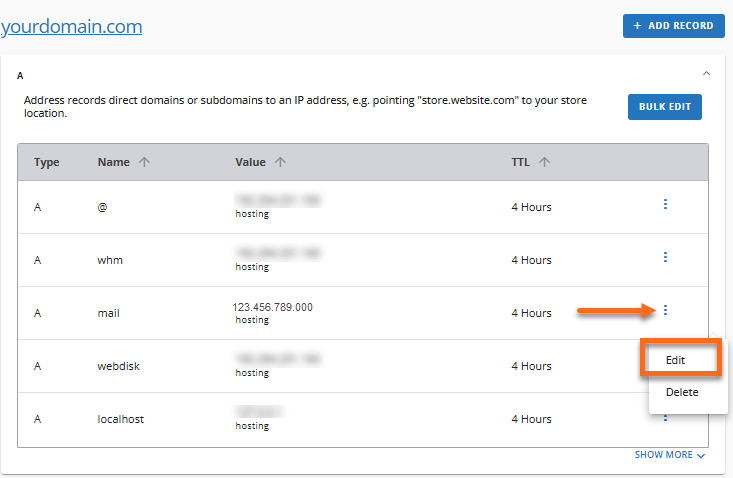
- In the pop-up window, enter your email host's IP address and then click Edit.
Once done, let your DNS records fully propagate. You may want to use DNS lookup tools, such as LeafDNS, to verify that the MX and mail's A records have been updated correctly. You may now proceed to update your email routing ⤵.
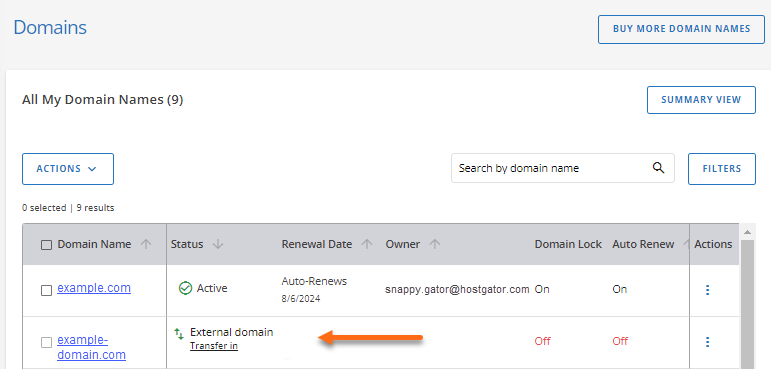
Scenario 2: My domain is not registered with HostGator, but is pointing to my HostGator name servers
For domains not registered with HostGator but pointing to your HostGator name servers, you can still manage your DNS records within your Customer Portal. Your domain will be listed in the Customer Portal as an "External domain."
To update your domain's MX records:
- On the Domains page, click the domain for your emails (labeled as "External domain").
- Under the Advanced DNS Records section, look for the MX record, click the vertical ellipsis icon on the right, and then select Edit.
- In the pop-up, click on Continue to proceed.
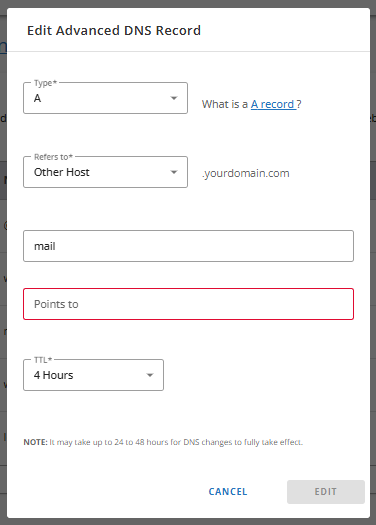
- In the Edit Advanced DNS Record pop-up window, update the Mail Server field with your preferred email host's MX records.
- Next, look for the mail's A records, click the vertical ellipsis on the right, and select Edit.

- A pop-up will appear. Click Continue to proceed.
- In the pop-up window, enter your email host's IP address and then click Edit.
Allow enough time for your DNS records to fully propagate, which can take 4 to 8 hours. You can use DNS lookup tools like LeafDNS to verify that the MX and A records for the mail have been updated correctly. The next step is to update your email routing ⤵.
How to Set Up Email Routing (Email Delivery Method)
Email routing determines how you want your emails to be delivered. Since you will be using another email host, you need to set your email routing to Remote.
To set up remote email routing:
- In your Customer Portal, click Hosting on the left-hand menu.
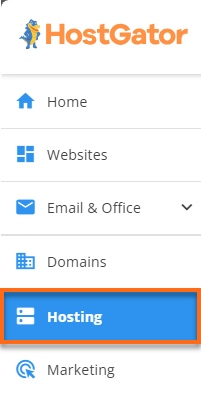
- If you have a single hosting package in your account, scroll down to the Quick Links section and click on cPanel.
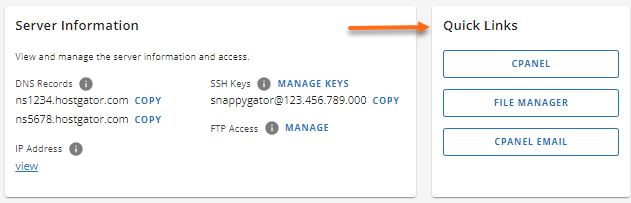
If you have multiple hosting packages in your account, look for the hosting plan where your email domain is hosted, then click the cPanel Email link.

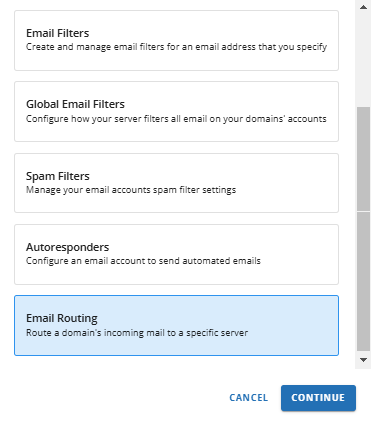
- In the pop-up window, select Email Routing, and then click Continue.
- You'll be redirected to cPanel's Email Routing section, where you can select your email's domain from the dropdown menu.
- Choose Remote Mail Exchanger from the list of options.

- Click Change to save the new setting.
For more information on the different email delivery methods, please see Local, Backup, and Remote Mail Exchanger.