Using the Domains Tab in Your Customer Portal
Easily take control of your domains with HostGator's domain management tools. The Domains tab in your HostGator Customer Portal gives you direct access to essential management features, allowing you to manage both domains registered with us and those registered elsewhere. In this article, we will walk you through how to access and view your domains, update your WHOIS information, manage your domain addons, lock and unlock your domain, configure your name servers, update your DNS settings, and much more — all in one place.
Here are the topics discussed in this article.
Critical Note: As of December 1, 2016, all ICANN-accredited registrars are required to send a Change of Registrant email to protect your domain from theft when certain changes are made to your domain, regardless of whether or not the domain is changing ownership. Because of this, additional confirmation will be required when making any of the changes to your HostGator domain:
- When changing the first, last, or company name in your WHOIS information
- When changing your Registrant email address
- When disabling domain privacy
When making any of the above changes, you will be offered the opportunity to lock your domain to prevent transfer for 60 days following the change. This will need to be done prior to saving your changes. If you are updating your information to transfer your domain, No must be selected.
ICANN requires that the Change of Registrant email be sent to both the old Registrant email address and the new Registrant email address (if you did not change your Registrant email address, these would be the same address). To complete any changes to your domain, you must confirm BOTH Change of Registrant emails, even if they are the same email address.
Once you have confirmed BOTH Change of Registrant emails, please allow 24 hours for the change to your domain's WHOIS information to complete.
If you no longer have access to your previous Registrant email address to confirm the change to your domain, please contact us for assistance.
Navigating the Domains tab
The Domains tab in the HostGator Customer Portal has been enhanced with new domain management features to make it simpler and more convenient for you to manage your domains across various services.
To view your domains:
- Log in to your Customer Portal.
- Click Domains on the left-side menu.
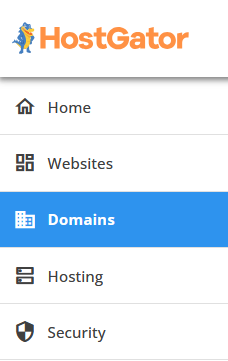
- If you have a single domain in your account, you will be redirected to the domains panel right away.
- If you have multiple domains, a list will appear. Click the domain you want to manage.
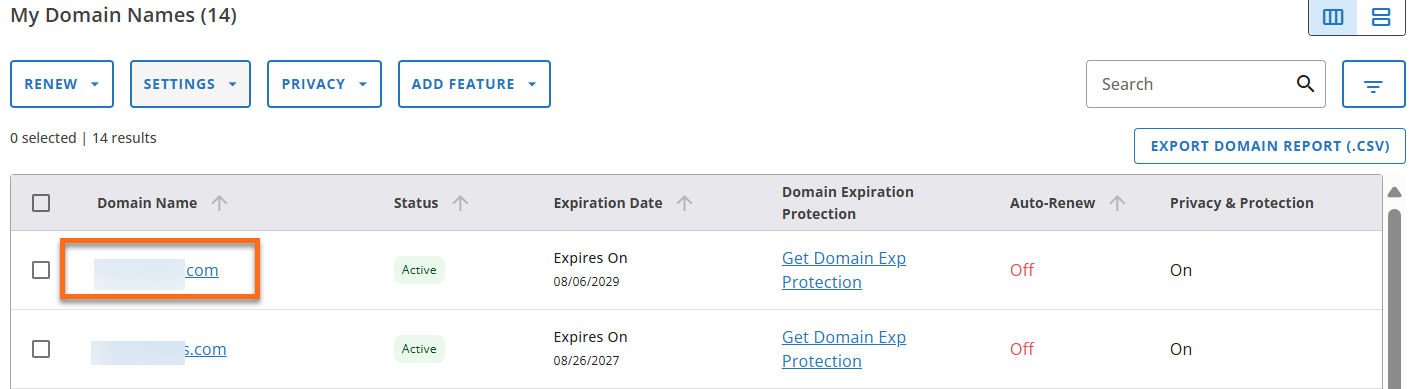
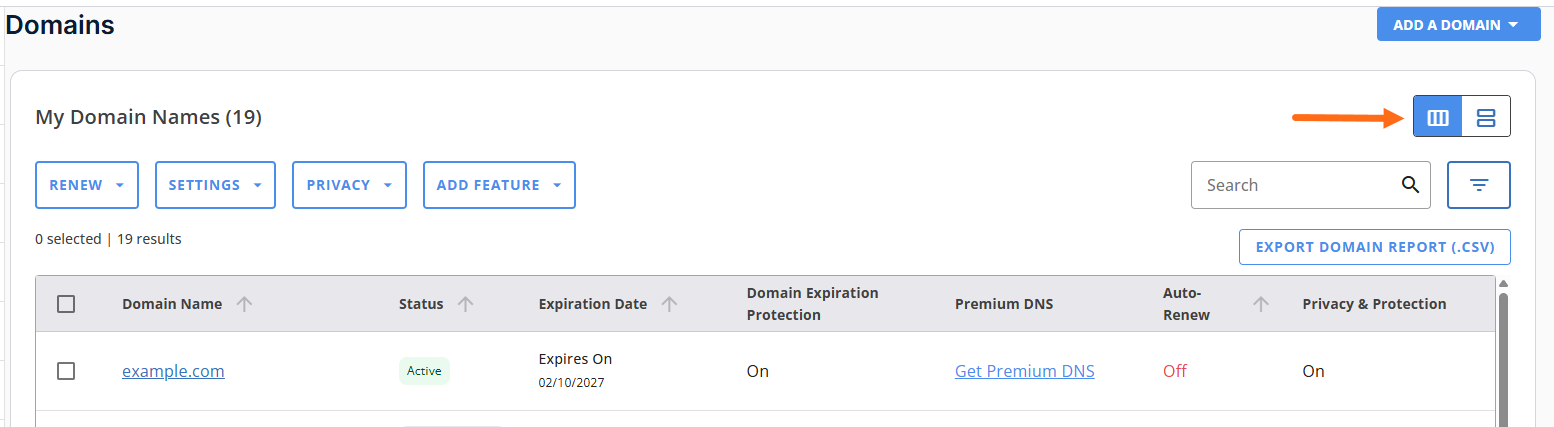
List view:
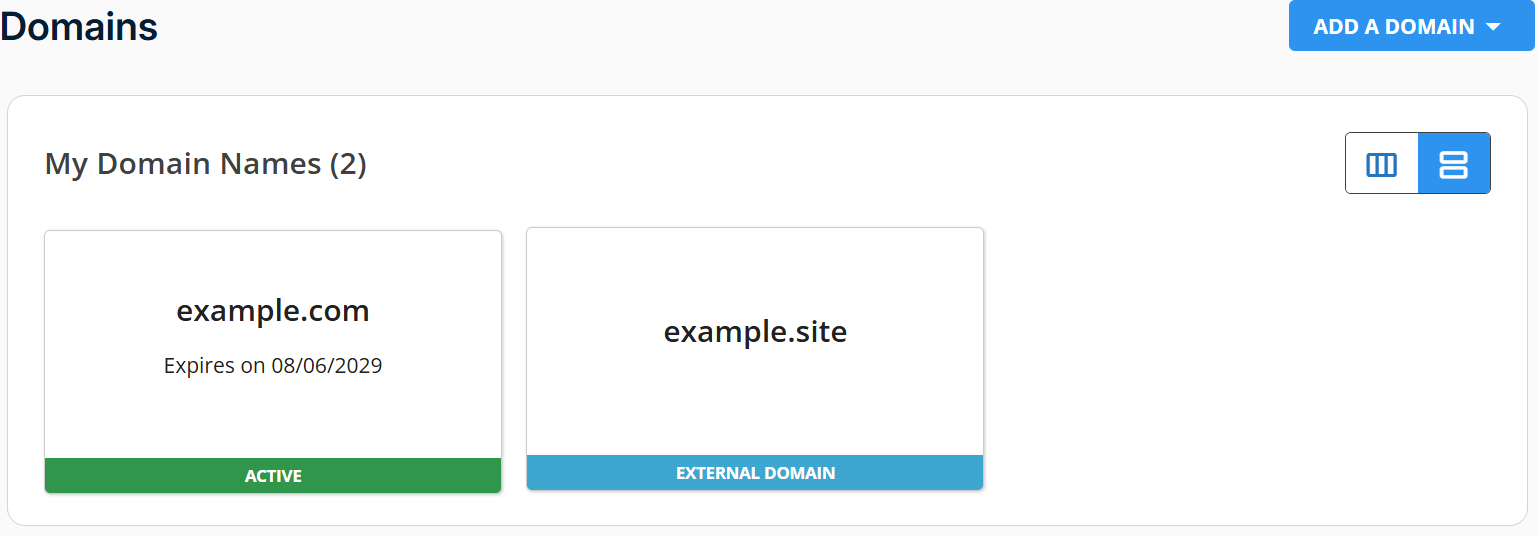
Card view:
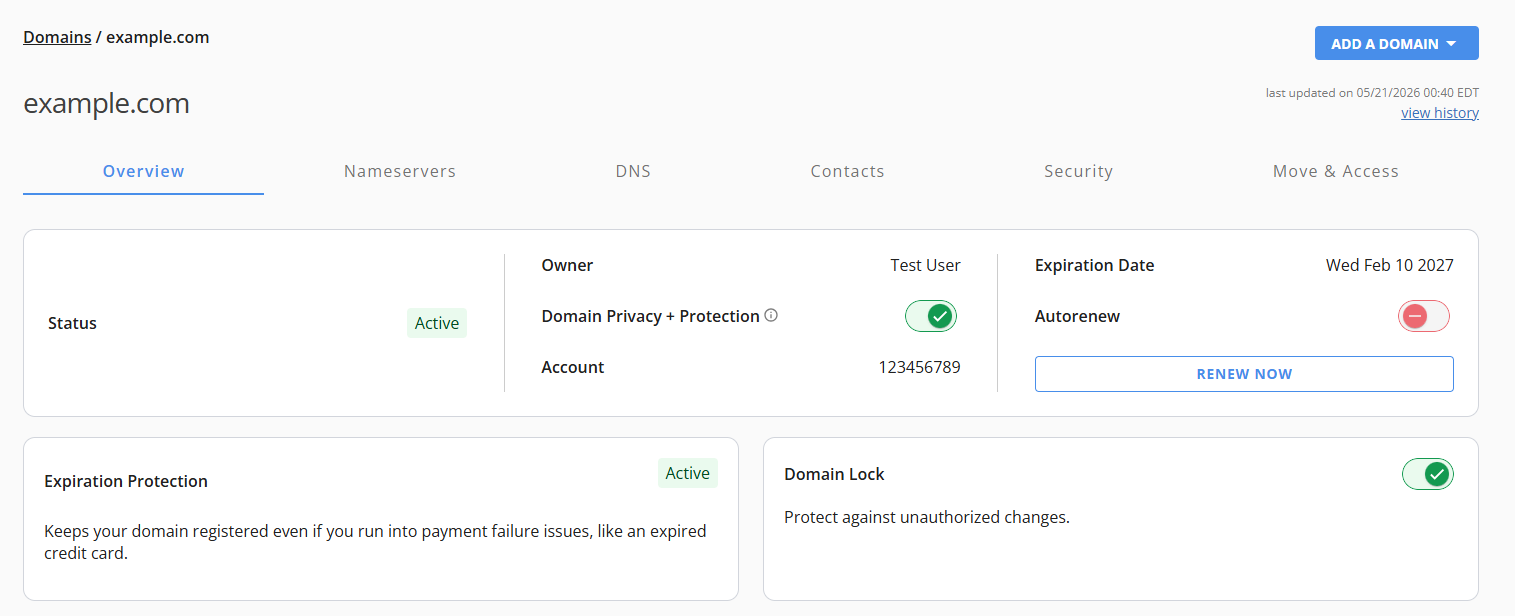
- You'll be redirected to the domain's management page.
How to manage your domains
The Domains tab will show the following management functions:
- View options ⤵
- Search feature ⤵
- Filter feature ⤵
- Add a Domain menu ⤵
- Renew menu ⤵
- Settings menu ⤵
- Privacy menu ⤵
- Add Feature menu ⤵
- Export Domain Report feature ⤵
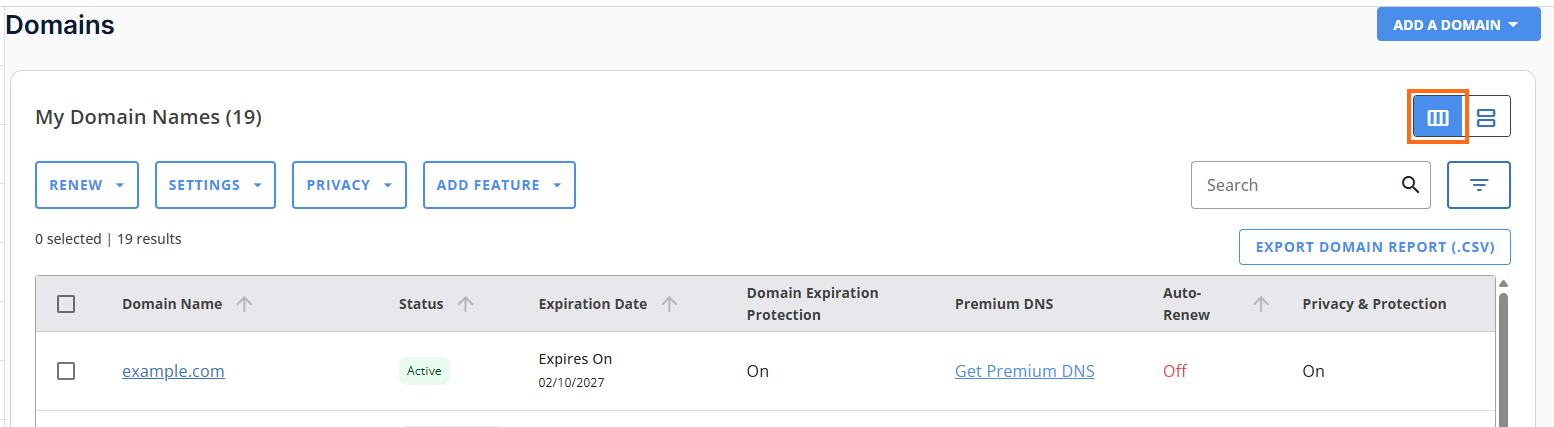
View options
The Domains tab now has two views available - List View and Card View.
List view
The default viewing setting for accounts with multiple domains is the List View. It shows all domains associated with your HostGator account in a table format. Domains registered with HostGator are listed at the top, followed by "External Domains," which refers to domains registered with other registrars.
The List View table contains the following columns:
- Domain Name: Represents the name of the domain.
- Status: Indicates whether the domain is Active, Expired, or an "External domain" (registered with another registrar but connected to HostGator services).
- Expiration Date - Displays the domain's expiration date. For "External domain," users will see the option to Transfer In.
- Domain Expiration Protection: Shows the status of this service. If the domain does not have one, a Get Domain Exp Protection link will appear. This section is blank for "External domain" as we do not offer Domain Expiration Protection for domains registered with other registrars.
- Auto-Renew: Indicates whether the Auto-Renew feature for the domain is enabled or disabled. This column will be blank for "External domain" since renewals for domains not registered with us must be managed through the current registrar.
- Privacy & Protection: Displays the status of this service. If the domain does not have this feature, a Get Privacy link will appear. This is blank for "External domain" as Domain Privacy + Protection is unavailable.
The List View also shows the following menus:
Card view
Domains are displayed in individual "cards" in the Card View, creating a well-organized and tidy appearance that enhances user experience.

You can click on the domain cards to navigate the various management functions available for your domains.
If you do not have a domain in your account yet, you will have the option to register a new one.
If your existing domain is not yet connected to a service, you will be prompted to link it to a website, hosting, or email service.
Search feature
If you have multiple domains in your account, you can use the Search box to look for a particular domain.

Filter feature
Use the Filter function to categorize your domains.
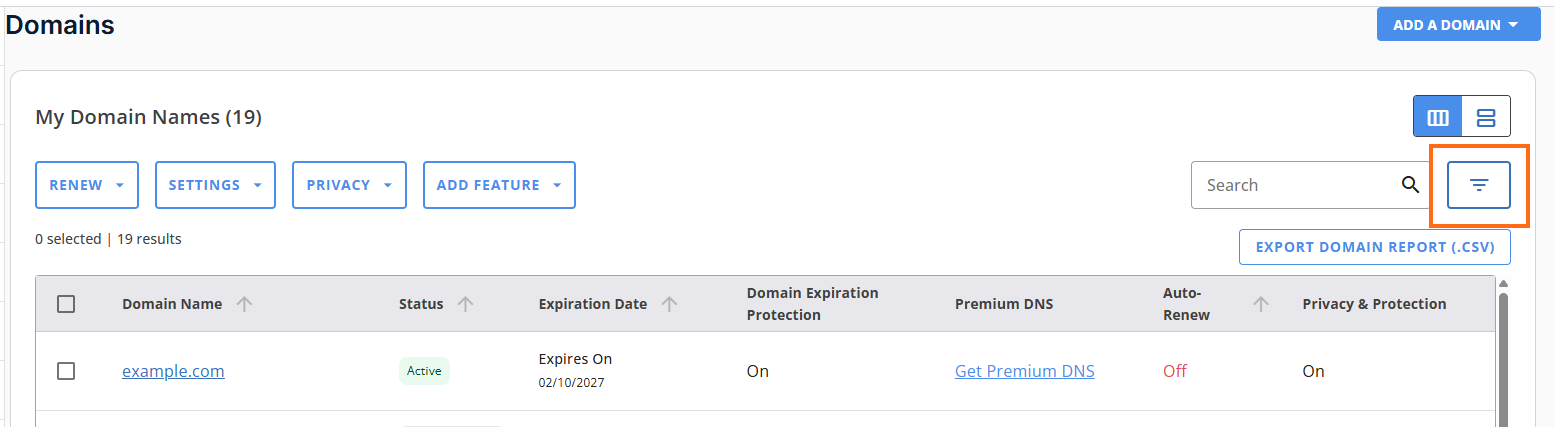
You can filter domains by the following:
- Date Range: Filters domains expiring within 30, 60, or 90 days.
- Status: Filters domains according to their current status.
- Active
- Inactive
- Pending Verification
- Suspended
- Expired
- Pending Transfer In
- Redemption
- Domain Extension: Filters domains according to their TLDs.
Add a Domain menu
The Add a Domani menu in the top-right enables you to do the following actions:
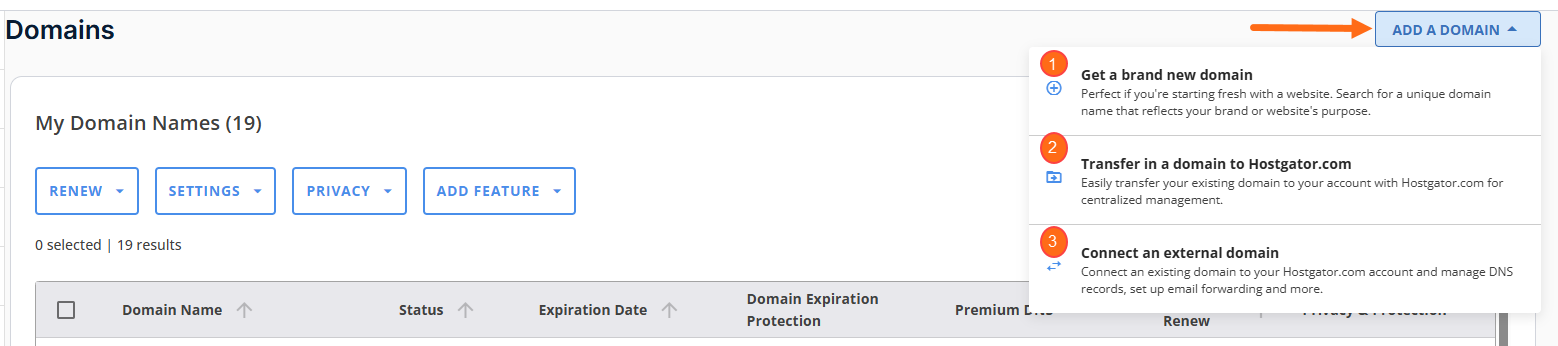
- Register a new domain.
- Transfer "in" a domain to us.
- Connect an external domain to our services.
You can select your preferred action and follow the on-screen prompts to complete it.
Renew menu
On the Domains page, click Renew to immediately renew your domain or manage its Auto-Renew feature by enabling or disabling it.
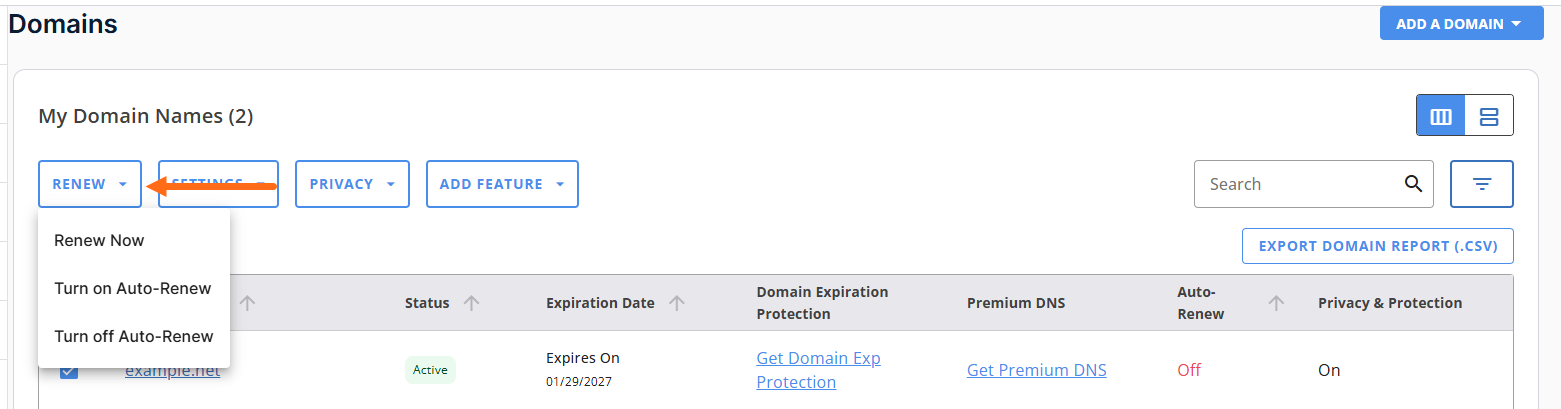
Click Renew in the top menu and select your preferred action.
- Renew Now: You'll be redirected to the Cart page, where you need to complete the payment for your domain renewal.
- Turn on Auto-Renew/Turn off Auto-Renew: A pop-up window will appear, requesting confirmation on the selected action.
Settings menu
The Settings button in the top menu will provide you with the following functionalities to manage your domain.
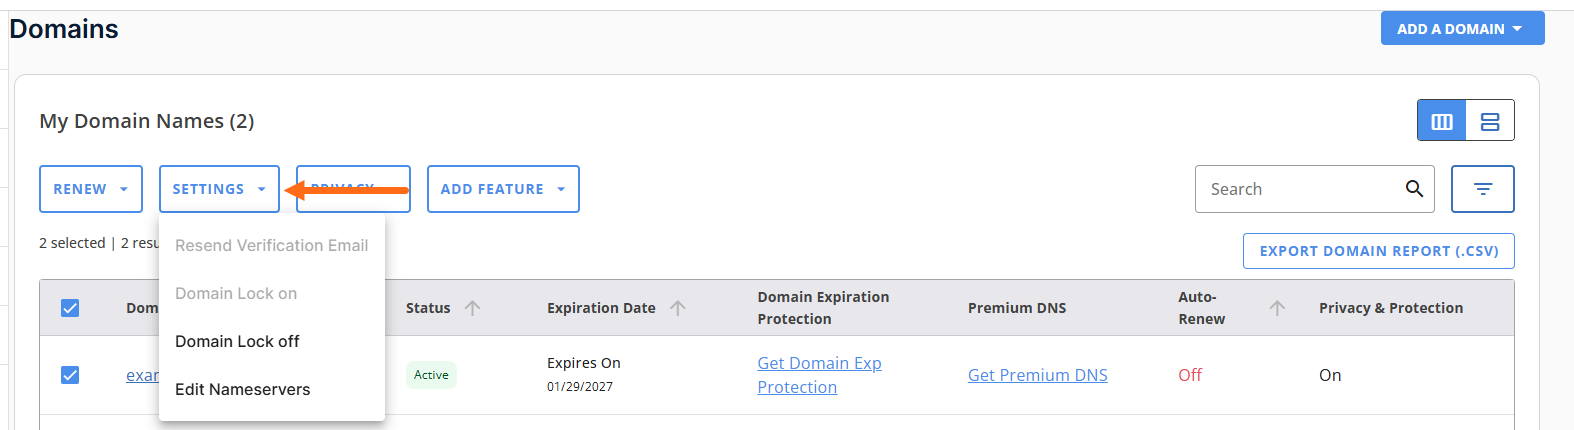
- Resend Verification Email: If your domain is pending verification, you can resend the verification email to the domain registrant's email address to complete the required process.
- Domain Lock on: This lock feature safeguards your domain from unauthorized transfer to another registrar. When activated, your domain cannot be easily transferred out of the account.
- Domain Lock off: If the lock is deactivated, the domain can be transferred out of your Bluehost account.
- Edit Nameservers: You can manage your nameservers in this section. Once the nameservers are updated, allow a propagation time of 24-48 hours.
You can select your preferred action and follow the on-screen prompts to complete it.
Privacy menu
You can enable or disable your Domain Privacy + Protection service by clicking the Privacy menu.
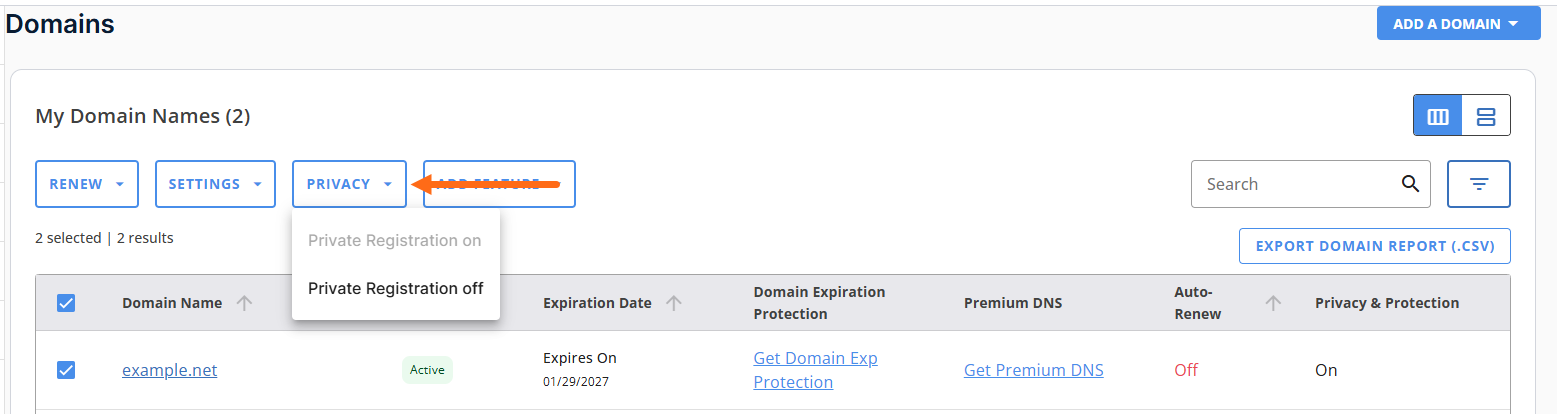
- Privacy Registration on: A pop-up will appear, requesting confirmation to enable the service.
If you do not have Domain Privacy + Protection for the domain, you will be prompted to purchase it.
- Privacy Registration off: A pop-up will appear, requesting confirmation to disable the service.
If you do not have Domain Privacy + Protection for the domain, this option is disabled.
Add Feature menu
You can add Domain Expiration Protection and/or Domain Privacy + Protection service for your domain by clicking the Add Feature menu.
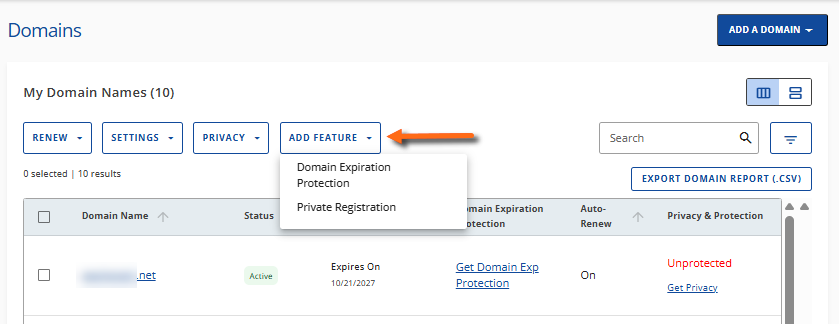
You can select your preferred action and follow the on-screen prompts to complete it.
Export Domain Report feature
You can download a list of your domains and their information as a .csv file by clicking the Export Domain Report (.CSV) button located in the top-right menu, just below the search box.

Additional domain management options
Once you click the domain, you will be redirected to its management page, where you'll see the following tabs.
For a list of domain-related resources, please visit the following article.