How to Configure SSL to Work with SiteLock CDN
To configure SSL with SiteLock effectively enhances your website's security and performance. HostGator offers services like SSL Certificates with SiteLock, which are essential in safeguarding your site and encrypting data. However, proper configuration is vital, as conflicts can arise between SSL settings and the SiteLock CDN and firewall.
In this article, we will provide step-by-step instructions on how to configure SSL with SiteLock, ensuring your website remains secure while optimizing its functionality.
To configure SSL with SiteLock CDN, you will need to do the following:
- Get Your SSL Information and Convert it to a SiteLock-Compatible Format ⤵
- Configure the Firewall and CDN within your SiteLock Dashboard ⤵
- Related Articles ⤵
Are you experiencing other SSL-related issues? If yes, here is an article to help you troubleshoot your SSL.
Get Your SSL Information and Convert it to a SiteLock-Compatible Format
To set up your SSL Certificate for SiteLock CDN, first obtain the .crt and .rsa keys from your cPanel. Then, convert these files to a format compatible with SiteLock. You will need these files to configure the SSL Certificate for SiteLock CDN.
Step 1: Get your SSL Info from cPanel
To get your SSL Certificate info:
- Access your cPanel directly or through your Customer Portal. For more information on how to log in to your cPanel, please visit the How to Log into cPanel article.
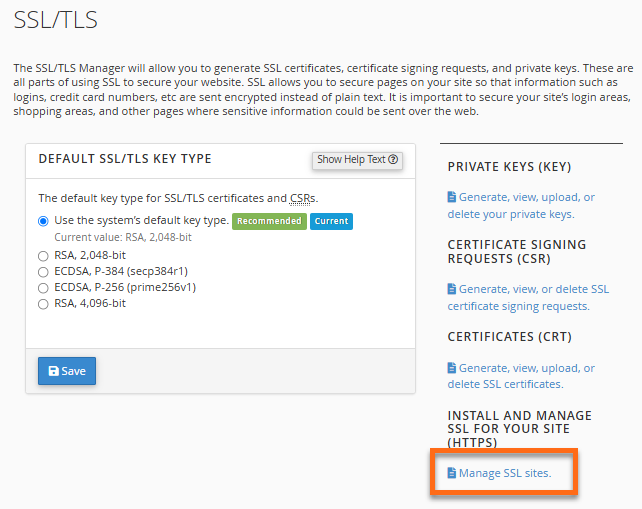
- Within cPanel, look for the Security section, then click SSL/TLS.
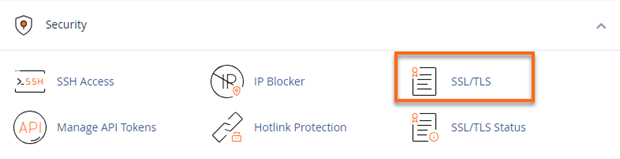
- Click the Manage SSL sites link under Install and Manage SSL for Your Site (HTTPS).
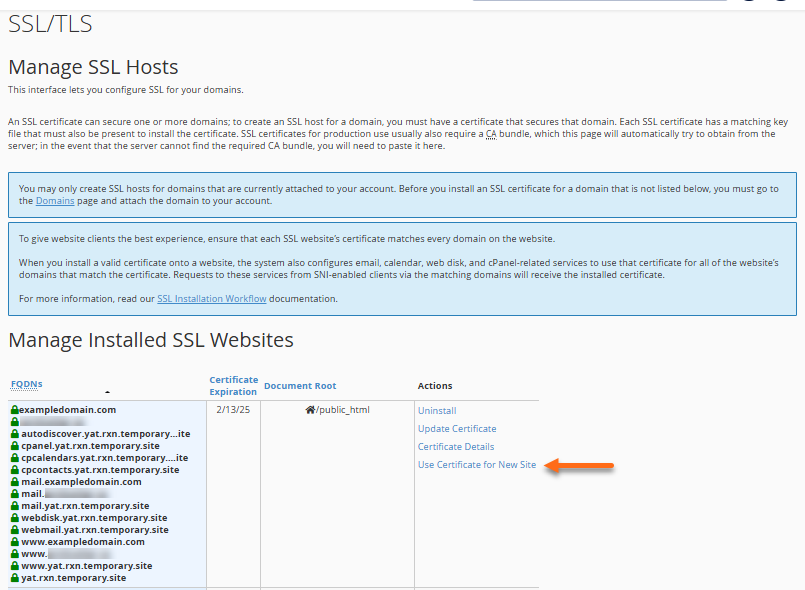
- Look for the certificate that includes both your "root-level" domain (for example, exampledomain.com) and the 'www' sub-domain (for example, www.exampledomain.com).
If you have multiple entries in the SSL/TLS section, check the domains carefully to choose the correct certificate. The correct one will match the domains you want to secure and will have an expiration date in the future.
- Once you found the correct certificate, click its Use Certificate for New Site link under the Actions column.
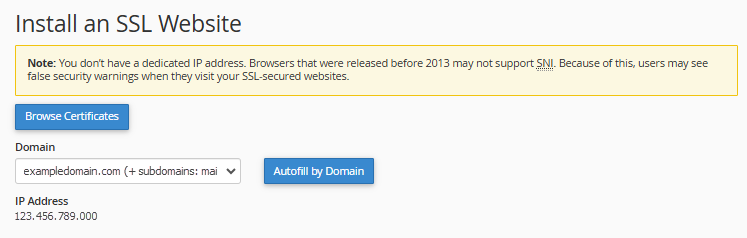
- Select your domain from the dropdown.
- Open your Notepad application and copy and paste the following values separately:
- Certificate (CRT)
- Private Key (KEY)
- Certificate Authority Bundle (CABUNDLE)
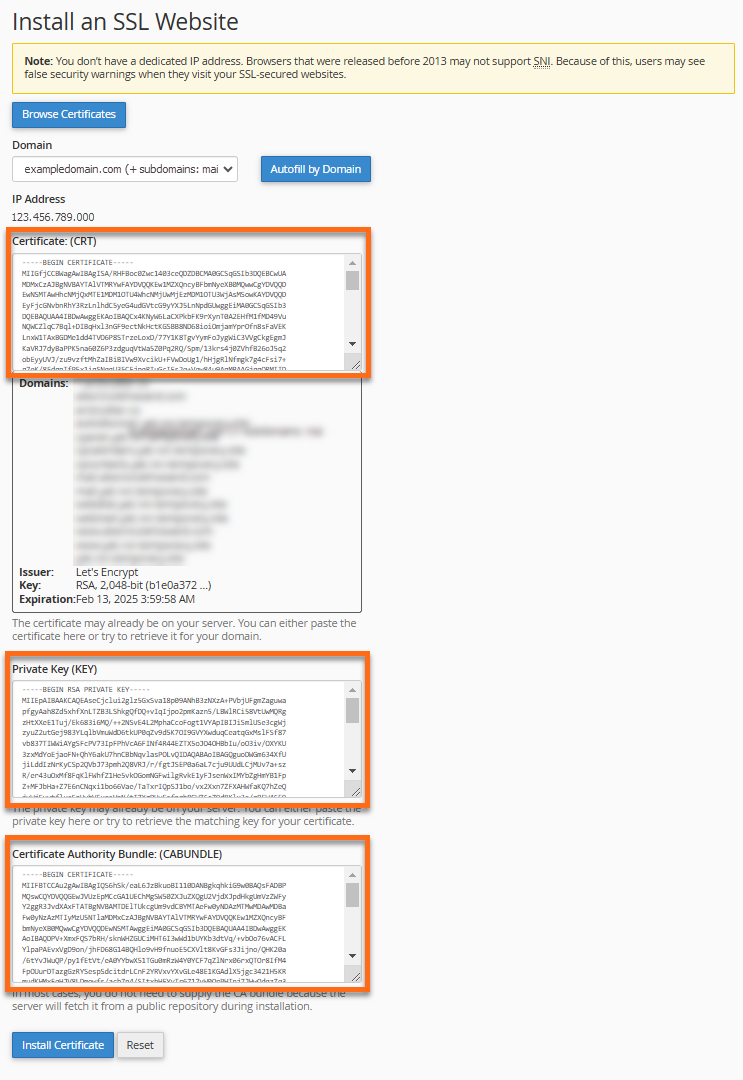
- Save them separately as .txt files (for example, 'ssl-crt.txt,' 'rsa.txt,' and 'ca.txt').
Make sure to copy and paste the entire contents of each section with no empty spaces before or after the texts. Each file will begin with "-----BEGIN CERTIFICATE-----" line and should end with the "-----END CERTIFICATE-----" line.
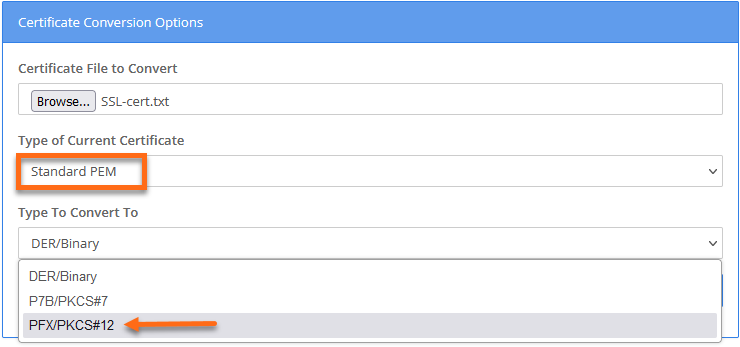
Step 2: Convert your SSL Files
For this step, you need to convert your SSL files to a SiteLock-compatible format. The SSL on our servers is in the .PEM format, which is not compatible with SiteLock, which requires the .PFX format.
To convert your SSL files:
- Once you have these 3 files ready, open a browser and navigate to an SSL converter website, such as SSL Shopper | SSL Converter.
- Upload your Certificate (CRT) file.

- Change the conversion from DER to PFX while keeping the top format as PEM.
- Upload the Private Key (RSA) and Certificate Authority Bundle (CA) .txt files to their corresponding fields.
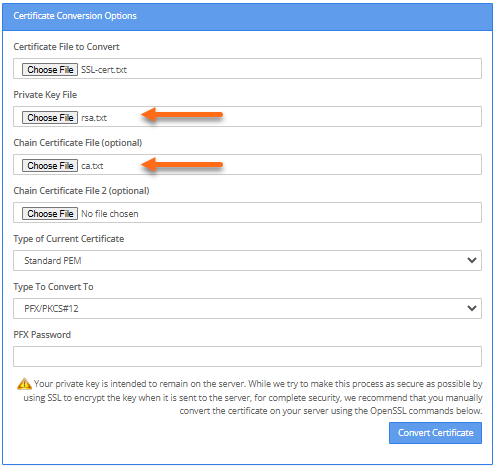
- Enter the password in the PFT Password field.
- Click Convert Certificate.
- Once the converted PFX file is downloaded to your computer, you may upload it to your SiteLock Dashboard. The instructions are shown below.

Configure the Firewall and CDN within your SiteLock Dashboard
Once you have the.crt and rsa keys, you will need to upload these SSL files into your SiteLock Dashboard.
Step 1: Manage SSL
To upload your SSL files into SiteLock:
- Access the SiteLock Dashboard through your Customer Portal.
- Navigate to the Set Up Wizard section of the the domain you need to manage.
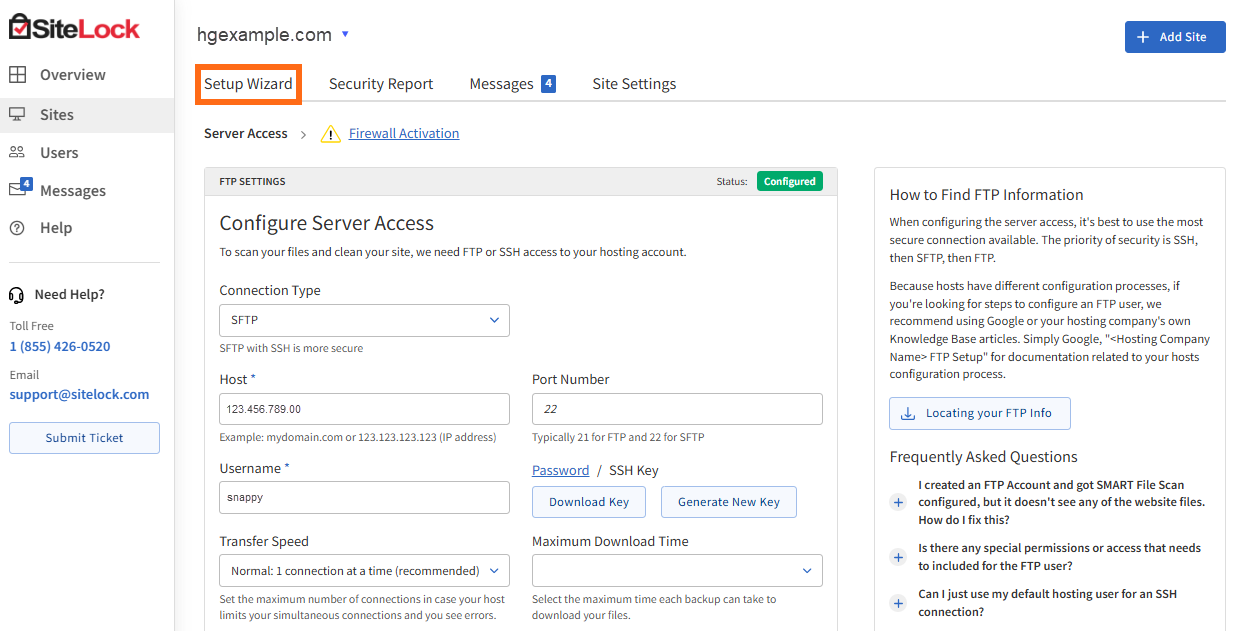
- Click the Firewall Activation tab.
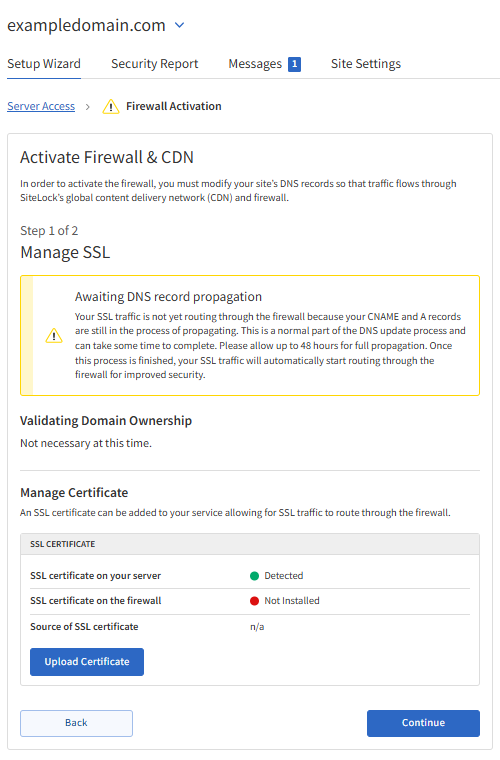
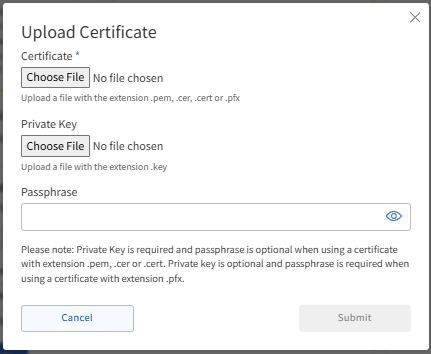
- Click the Upload Certificate button.
- In the pop-up, click the Choose File button to browse for your Certificate (.crt) and Private Key (.rsa key) files, and then click Submit.
- When the pop-up window closes, click the Continue button to complete this step.
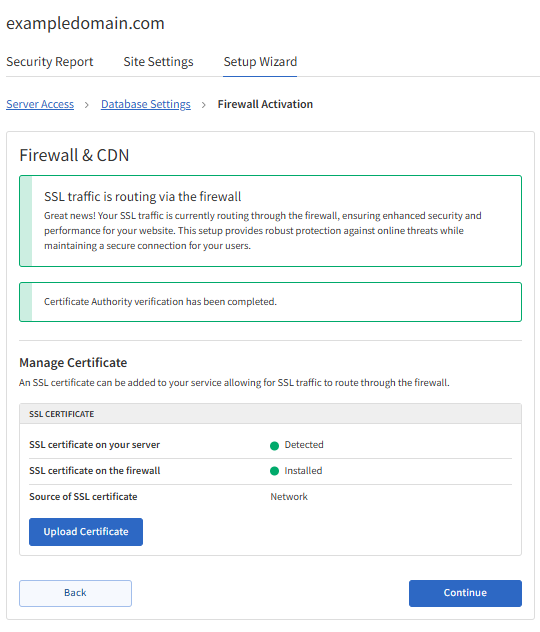
- Once the verification is completed, the Firewall Activation tab should display like this:
Step 2: Manage Routing
The next step is to edit your DNS records to route traffic through the Firewall and CDN. Please be aware that DNS changes may take up to 24-48 hours to propagate and appear in the SiteLock dashboard.
For instructions on how to manage your domain's DNS records, please refer to the following article.
To update your DNS records:
- In the Setup Wizard, the Remove DNS records table will show the DNS records you need to delete for your domain.
- Add the DNS records shown in the Add DNS records table.
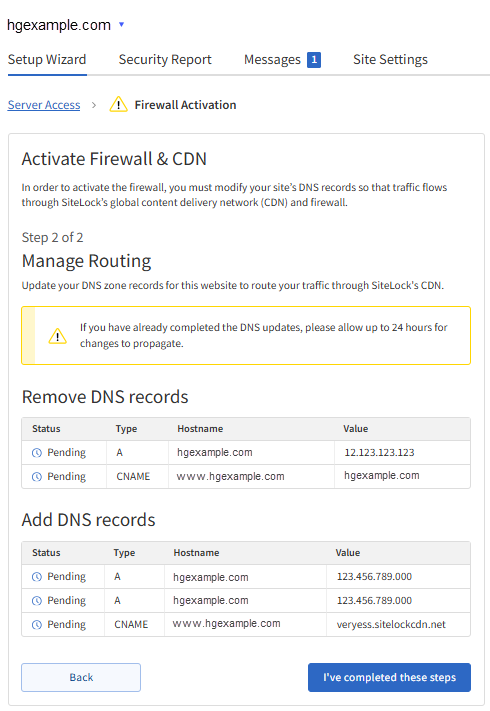
Please note that the values displayed in the tables in the image above are sample values only. Your SiteLock Dashboard will provide the exact DNS record values you need to remove and add to your domain.
- Click the I've completed these steps button once done. Allow your DNS records to fully propagate.