Making DNS Changes to the Domain Bought from HostGator
This article explains how to manage a domain's DNS in cPanel and manage the name servers in the Customer Portal.
DNS Zone Functions
The following information will assist you in understanding the purpose of each DNS zone.
| DNS Terms | Description |
|---|---|
| Name Servers | These assist in locating the server and correcting the DNS zone for a domain to get the information on other DNS zone records. |
| NS Records | These must match the nameservers being used. |
| A Records | This points the domain to an IP address (for example, mydomain.com -> IP address). |
| CNAME Records | These point subdomains to another domain name, like www and mail (for example, www.domain.com -> domain.com). |
| MX Records | These control where emails are sent and received. If the mail is hosted on another server, then the MX records need to be changed (for example, domain.com -> mail server). |
| TXT Records | These are custom records that contain machine-readable data. TXT records must be formatted according to whichever technology you are trying to use. |
For more information on the purpose and use of each DNS record, please refer to the following article:
Managing Domain Name Servers
If your domain was registered with us, it is automatically added to your Customer Portal's Domains section. This is where you can manage the WHOIS information, name servers, and other domain functionalities for HostGator domains.
To manage the name servers of the domain registered with HostGator:
- Log in to your Customer Portal.
- Click Domains on the left-hand menu.
- Locate the domain you wish to update the name servers for.
If you have a single domain in your account, you will be redirected right away to the domain management page.
If you have multiple domains in your account, you can do the following:
In Advanced view:
- Click the domain or click the domain's vertical ellipsis icon on the far right, under the Actions column.
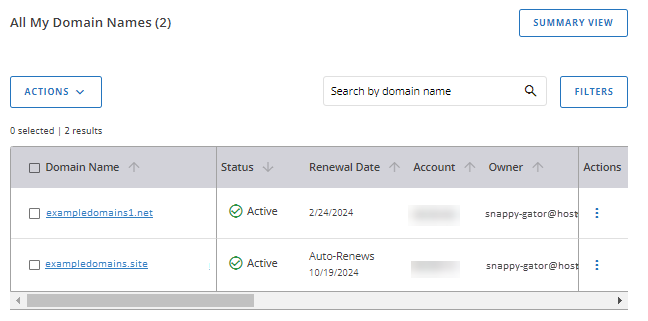
- Select Manage.
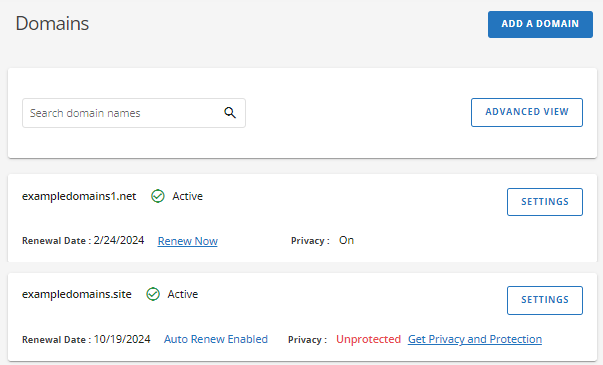
In Summary view:
Locate the domain and click its Settings button.
- Click the domain or click the domain's vertical ellipsis icon on the far right, under the Actions column.
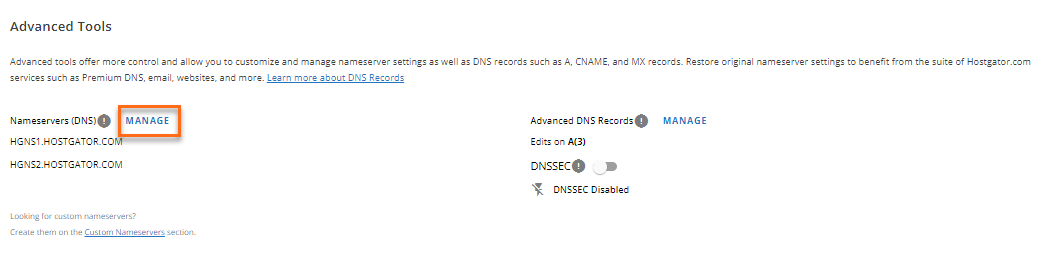
- On the domain management page, scroll down to the Advanced Tools section.
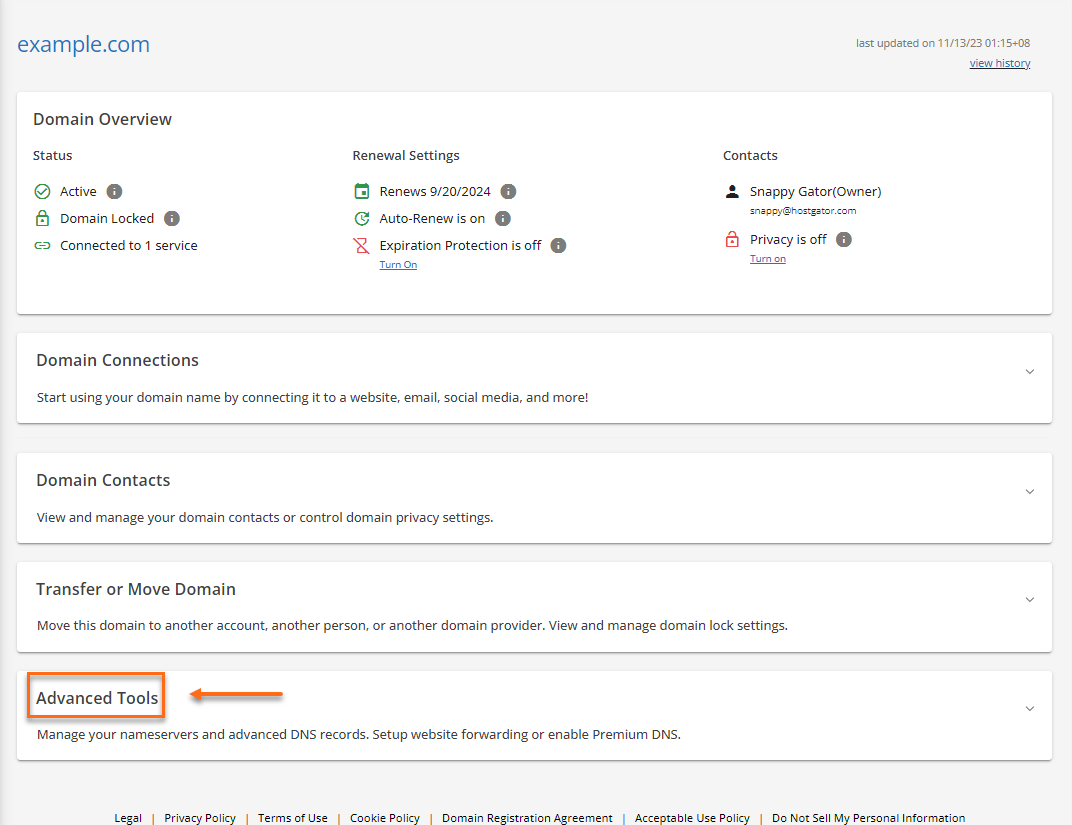
- Click the Manage beside Name servers (DNS).
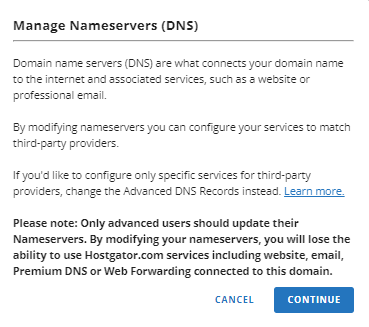
- Click Continue on the pop-up screen.
- Enter your HostGator name servers. (For more information on where to find your name servers, please visit the What are my Name Servers? article.

- Click Save.
- Please allow your name servers to fully propagate, which may take 24 to 48 hours.
Looking for support guides on how to manage your domains? Please visit the following article.
Do you have a third-party domain that you want to point to your HostGator servers? You will need to add it as an addon domain to your cPanel and as an "external domain" to your Customer Portal. Please visit the following article for more details.
Managing Domain's DNS Records
For your convenience, you can now manage the DNS records of domains registered with HostGator in your Customer Portal.
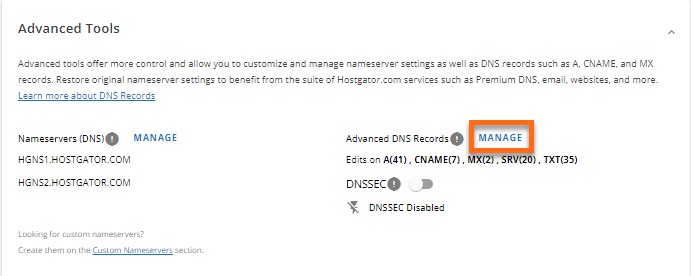
- Within your Customer Portal, go to your domain's Advanced Tools section.
- Click the Manage link right beside Advanced DNS Records.
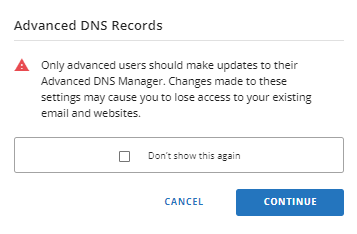
- In the pop-up, click Continue to proceed.
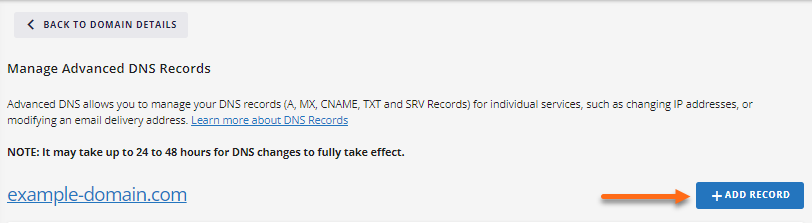
- On the Manage Advanced DNS Records page, you can perfom the following actions:
- Add a new DNS record.
- Click the + Add Record button on the right.
- In the pop-up window, select the DNS record you want to add from the Type dropdown menu.
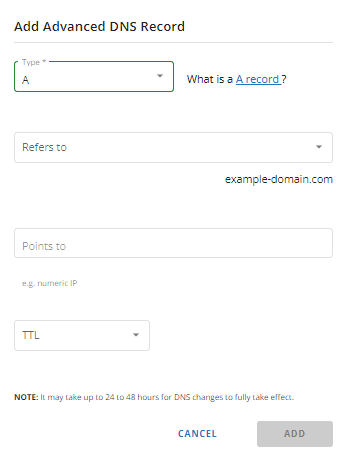
- Enter the value of the new DNS records, then click Add.
- Click the + Add Record button on the right.
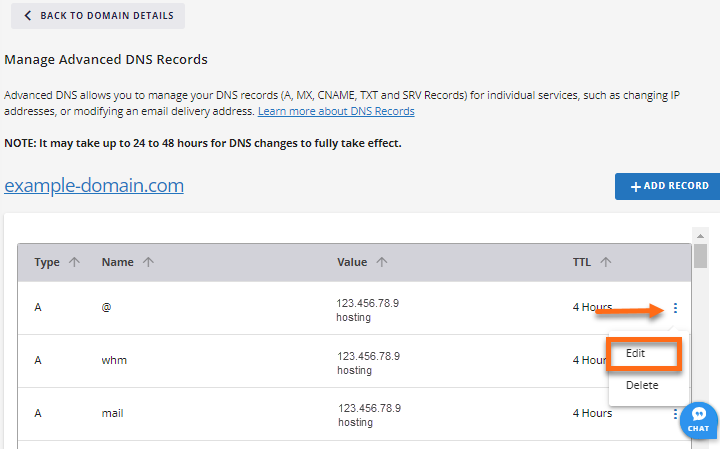
- Edit a DNS record.
- Look for the domain you want to edit
- Click the vertical ellipsis on the right of the domain.
- Select Edit.
- In the pop-up, make the necessary edit.
- Click the Edit button to save your changes.
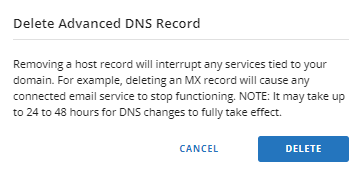
- Delete a DNS record.
- Look for the domain you want to remove.
- Click the vertical ellipsis on the right of the domain.
- Select Delete.
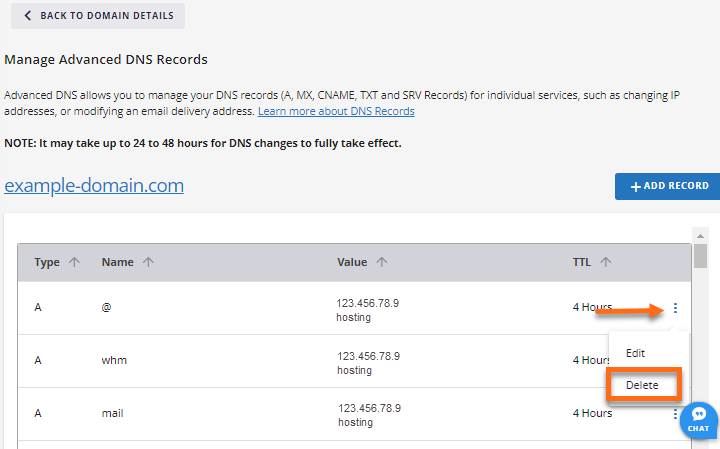
- In the pop-up, click Delete to remove the domain.
- Add a new DNS record.
- Please allow your DNS records to fully propagate, which may take 0 to 4 hours.