Customer Portal - Navigating the Hosting tab
HostGator aims to provide you with a seamless experience in managing your hosting account. In line with this, the Customer Portal was upgraded to provide you with a more optimized design and easy-to-use features!
While the Customer Portal shows a completely new look, its functionalities and support sections are similar to the old one, with a few tweaks here and there. Don't fret! This article will guide you in navigating the Customer Portal's Hosting tab and managing your hosting plans from there.
Here are the topics discussed in this article.
The Hosting tab
Within the Customer Portal, you will find several options on the left-side menu. One of them is the Hosting tab, where you'll see all hosting plans and websites in your HostGator account.
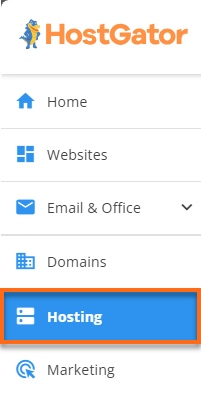
In this section, you can do the following actions:
- Add a site to your hosting package
- Buy additional hosting packages
- Configure site settings
- Go to your cPanel Email
- Go to your website's admin dashboard
- Use cPanel shortcuts
- View details about your hosting package
Depending on your hosting package in your HostGator account, the Hosting section's interface may look slightly different. Full descriptions of each feature are discussed below.
I have one hosting package in my account
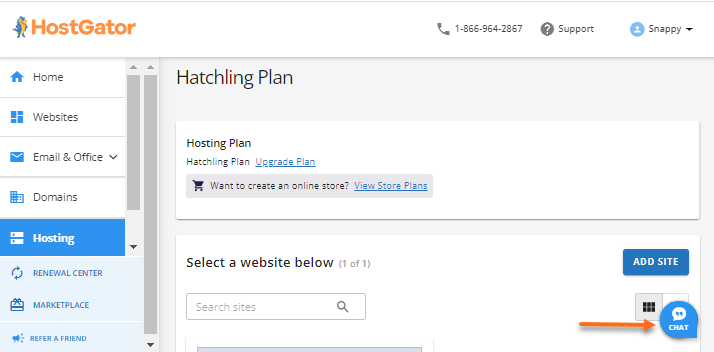
If you only have 1 hosting package in your HostGator account, you will find the Hosting section similar to the image below:
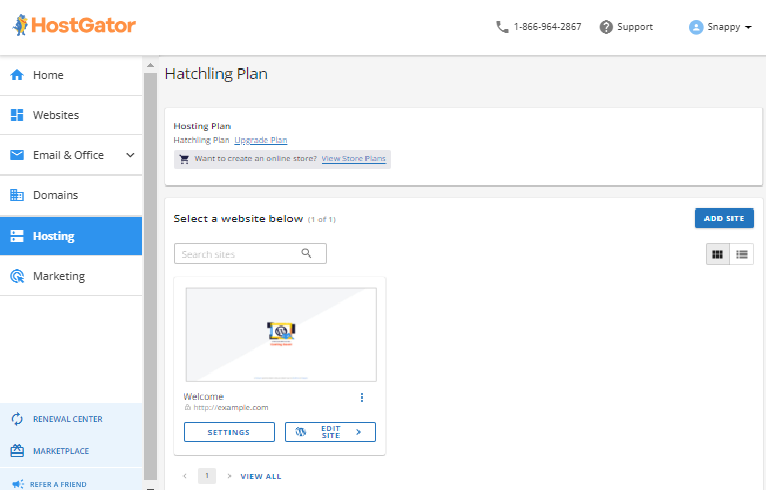
Once you click Hosting from the left-side menu, you will be redirected right away to the management section of your hosting package, where you can see the hosting plan name, server information, usage data, cPanel shortcuts, links to the admin dashboard, and settings.
Read more about your hosting management page below ⤵.
I have multiple hosting packages in my account
Suppose you have multiple hosting packages in your account; the Hosting section will look like this:
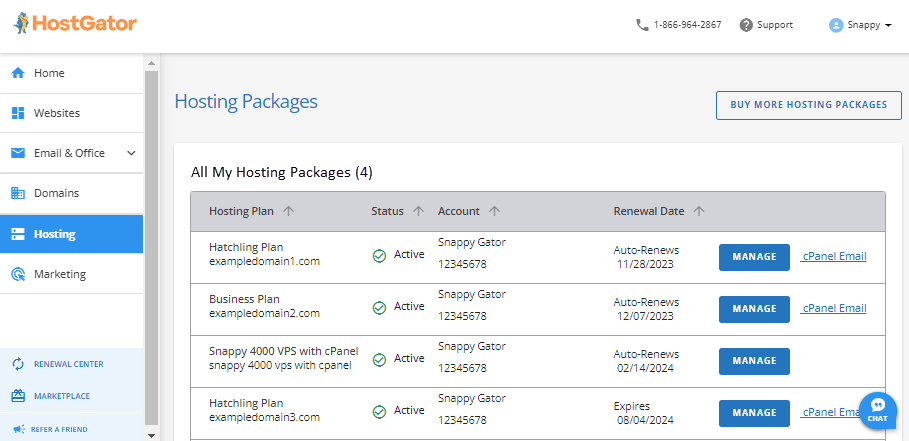
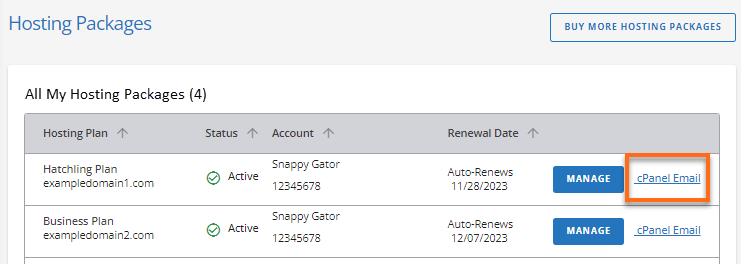
In this section, you will find a list of all hosting packages in your account, together with the option to go to each of your hosting package's management pages or to their cPanel Email sections.
You can also purchase additional hosting packages by clicking the Buy More Hosting Packages button at the top-right.

Once you click the Buy More Hosting Packages button at the top-right, you will be redirected to HostGator's front-of-site page, where you can continue purchasing your preferred hosting package. For more information on how to add hosting packages to your account, please refer to the following article:
Hosting package management page
Within the Hosting section, you can go to your hosting's management page.
- If you only have a single hosting package in the account, you will be redirected right away to the management page once you click Hosting in the left-side menu.

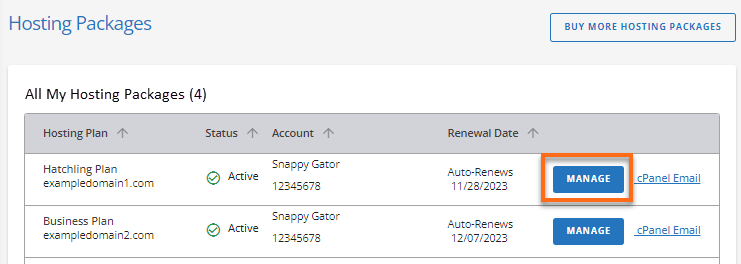
- If you have multiple hosting packages in the account, locate the hosting package you want to access under Hosting, then click its Manage button.
What can I do on the hosting management page?
In your hosting package's management page, you will see the following features and do the following actions.
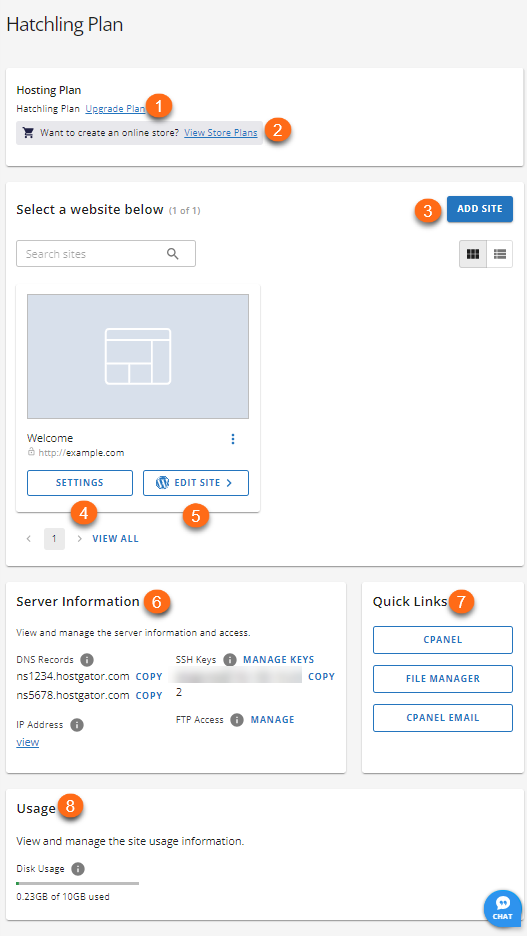
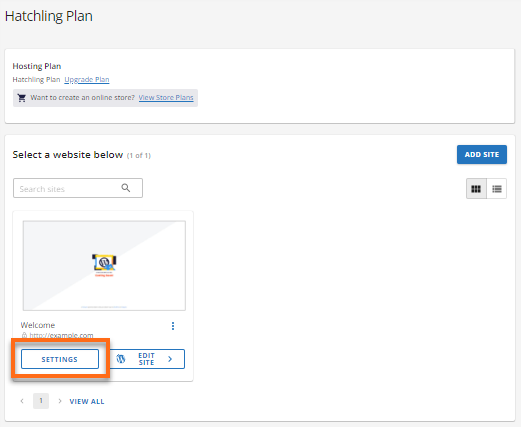
- Upgrade Plan - Click the Upgrade Plan link to initiate the upgrading process of your hosting plan. A popup menu will appear, displaying the hosting plans you can upgrade to. The hosting plan options listed will depend on your current plan. If you're already in the highest-tier hosting plan, you can no longer upgrade. You will not see the Upgrade Plan link, and you may want to purchase a different hosting plan that suits your website needs.
Please visit the How Do I Upgrade My Account to a Better Plan? article for detailed instructions on upgrading your hosting plan.
- View Store Plans - If you want to add an e-Commerce plan to your current plan, click the View Store Plans to see the options.
- Add Site - If you want to add a domain or host another website with your current hosting plan, click Add Site. However, please note that the number of sites you can host depends on your current hosting plan's site limitations. For example, if you're on a Shared Hatchling plan, you won't be able to add a site to your hosting, as your current plan can host only 1 website.
- Settings - If you want to manage your site's settings, click Settings.
For more information about your hosting's Settings page, please visit the Customer Portal - Settings article.
- Edit Site - To go to your website's admin panel or dashboard, click Edit Site.
- Server Information - The Server Information section displays your name servers, and IP address. It also provides you shortcuts to the SSH and FTP sections within your cPanel.
- Quick Links - The Quick Links section provides commonly used shortcuts to your cPanel.
- Usage - Monitor your hosting plan's disk usage via the Usage section.
What's in my hosting product dashboard?
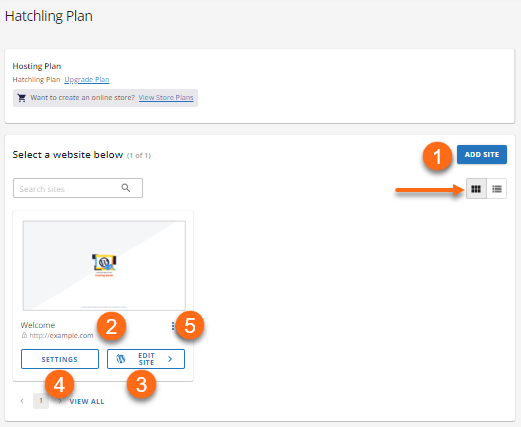
Under the Hosting management section, you'll get to see the hosting product dashboard with two views available – the Card and List views. Select your preferred view.
Card view:
List view:
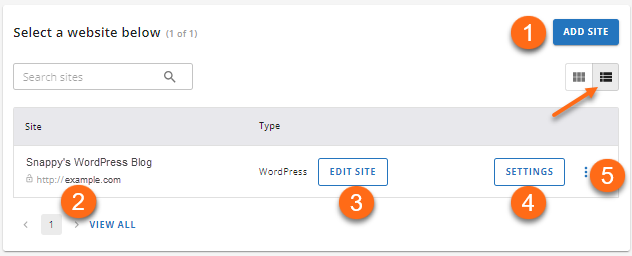
You can do the following actions:
- Add a domain to your hosting plan by clicking Add Site.
- View the website by clicking the website name.
- Edit the website by clicking Edit Site. (Some CMS or site platforms may not display the Edit Site button. Instead, it may show as a separate section with a Login button or none at all, depending on the CMS used in building the website.)
- Configure the website's settings by clicking Settings.
- View your 3 options by clicking the ellipsis.
Where's my server information?
You will find your hosting server information on the Hosting package management page that you can copy and even manage by clicking the Manage/Manage Keys shortcuts to cPanel.
Within the hosting management page, you will find the Server Information section, where you'll find the following details.
- Name servers
- IP address
- SSH Keys
- Shortcuts to cPanel
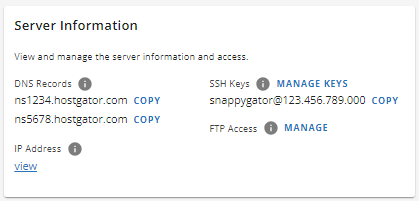
By clicking Manage/Manage Keys, you'll be redirected right away to specific sections in cPanel without the need to log in.
How do I go to my cPanel?
Good news! Shortcuts to cPanel are all over the place in the new Customer Portal! If you're used to using quick links, we have them too here on the management page, just right beside your hosting's server information.

How's my hosting's disk usage?
You can monitor your hosting package's disk usage under the hosting package management page.

How can I get help with my hosting account?
Hey! Let's not forget this little chat icon in the bottom-right corner. You'll find this Chat Support icon all over the Customer Portal, so you can get help whenever you need it.
Hosting's cPanel Email
The Hosting section provides you a shortcut to your cPanel's Email section, where you can access and manage all email accounts hosted in your hosting package.
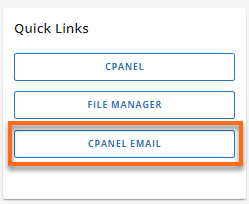
- If you only have a single hosting package in the account, scroll down a bit within the hosting plan's management page until you see the Quick Links section, then click the cPanel Email button.
- If you have multiple hosting packages in the account, locate the hosting package you want to access, then click its cPanel Email link.
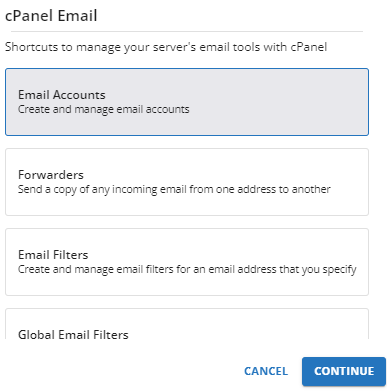
Once you click cPanel Email, a popup window will appear with shortcuts to your server's email tools within cPanel. Select one, then click Continue to get redirected to cPanel's Email section.
For information on how to manage your email accounts within cPanel, please visit the following articles.
- How do I Create Email Accounts in cPanel
- How to Create an Autoresponder
- How to Create/Delete an Email Forwarder in cPanel
For more information about the hosting's Settings page, please visit the following article.