YITH Gift Cards (WooCommerce)
The YITH WooCommerce Gift Cards plugin is an excellent addition to your online store for customers wanting to purchase gift cards. The gift cards contain a unique code that the recipient can use to pay for their purchases on the Cart page.
This article will discuss the following topics:
- How to create a Gift card product ⤵
- How to create Gift card image galleries ⤵
- How to manually create a Gift card code ⤵
- How to add a store logo to the Gift card ⤵
- How to set delivery options for virtual Gift cards ⤵
- How to set up Gift card redemption ⤵
Additionally, HostGator offers YITH WooCommerce products through the Marketplace in your Customer Portal. To learn how to add these products to your WordPress website, please visit the following article.
How to create a Gift card product
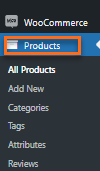
- Log in to WordPress Dashboard.
- Click Products under the WooCommerce tab on the left-hand menu.
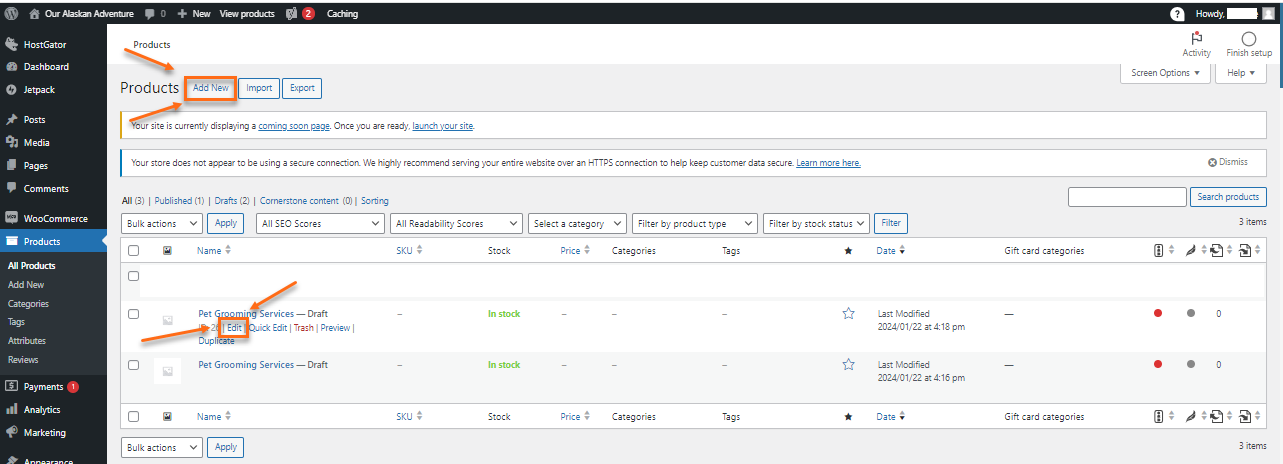
- You can either Add New or Edit an existing product.
- For Product data, select Gift card from the dropdown menu.
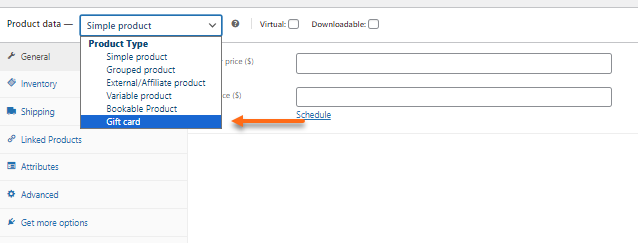
- Set the "Gift card" as a Virtual product. To ensure the gift card is received via email, check the Virtual checkbox. Otherwise, the shop owner must print the gift card and send it to the customer.

- Under the Gift Card Options, you can do the following:
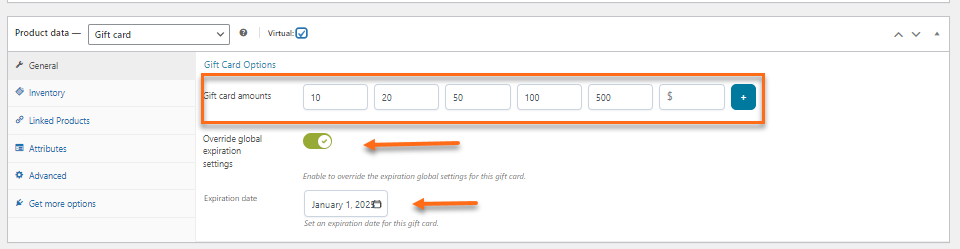
- Set the Gift card amounts (denominations)
- Override global expiration settings
- Set Gift card Expiration date
Once you have created the gift cards, you have the option to add a personalized touch by including a description and image that represents the gift card.
How to create Gift card image galleries
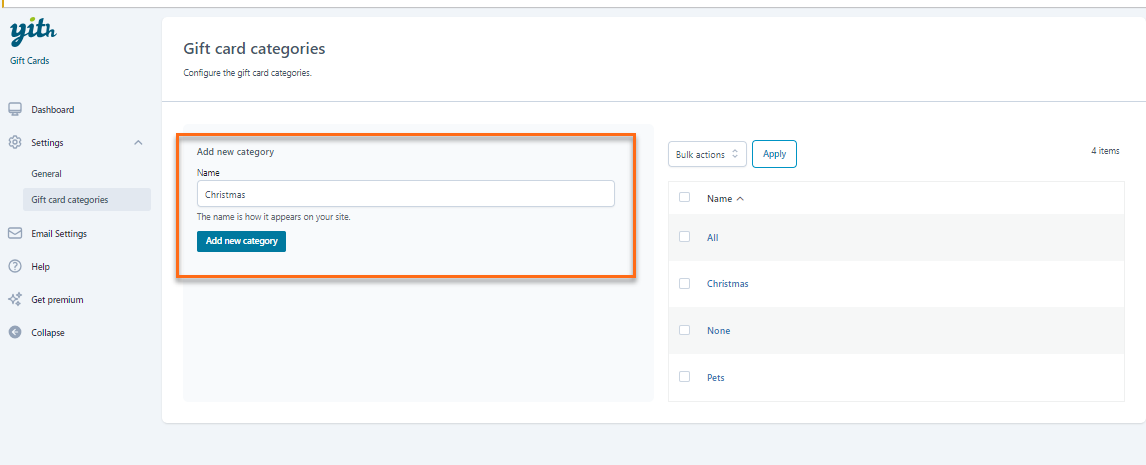
This plugin is a great tool to create a variety of gift cards for your store. With it, you can create different types of gift cards, such as "Christmas" or "Birthday" gift cards, and more. You can also set up a gallery of images for each gift card to give users the option to customize the gift cards they send to their loved ones.
You can create a "Christmas" gallery for the images, which will appear on your product page.
- Create a "Christmas" category in the Gift card categories section of the YITH plugin.
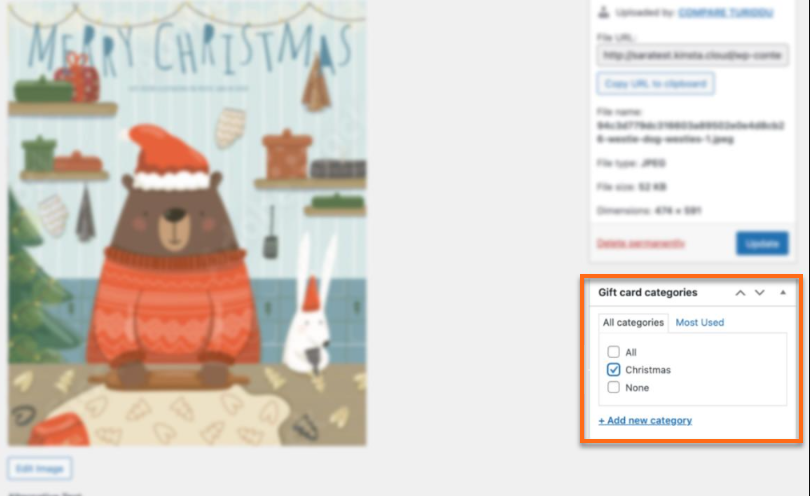
- To assign images to a category, upload them in Media » Add New, then click Edit on each image to associate it with a category in the Categories section. Remember to save changes by clicking Update.
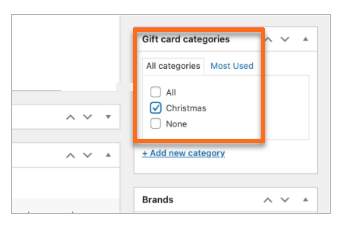
- Open the gift card product and assign the same category.
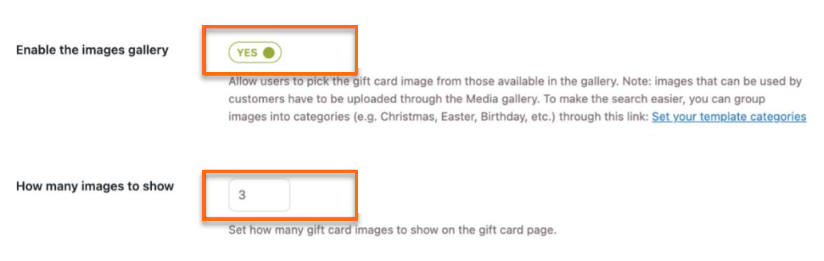
- Under the General tab, enable the image gallery and choose the number of images to show on the gift card page.
How to manually create a Gift card code
- In the Dashboard tab, click the Create Code button.

- Fill out the required fields. You can also manually enter or generate a code.
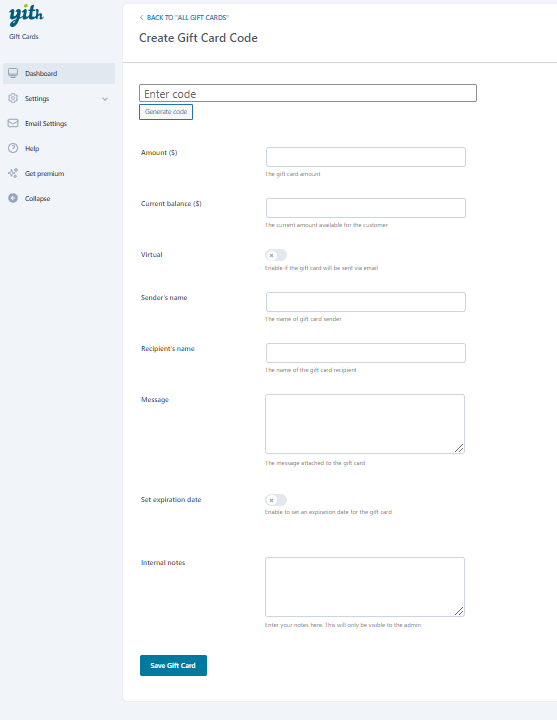
- Once done, click the Save Gift Card button.
How to add a store logo to the Gift card
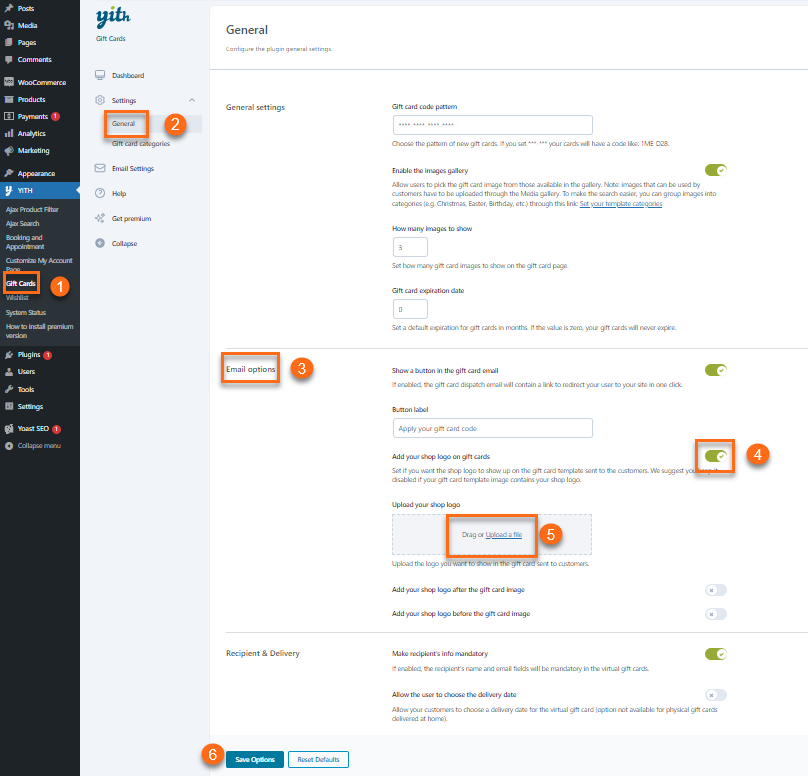
- Under the YITH tab, click on Gift Cards.
- On the right pane, navigate to the General tab.
- Go to the Email options.
- Enable the Add your Shop logo on the gift cards option.
- Upload your shop's logo. The shop's logo will automatically be added to your gift cards.
- Click the Save Options button.
How to set delivery options for virtual Gift cards
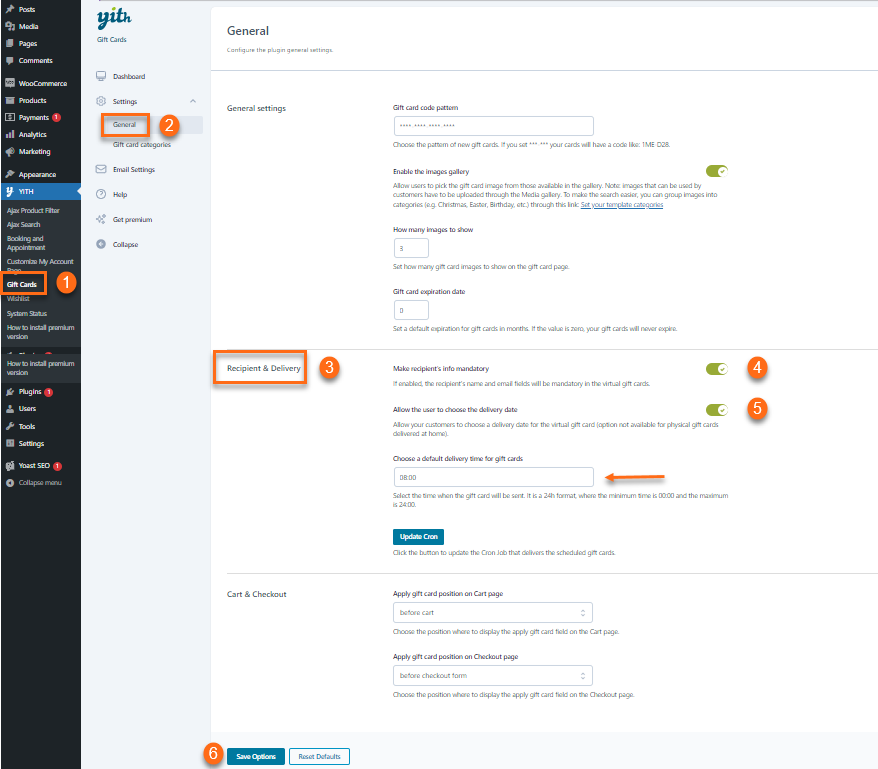
- Under the YITH tab, click on Gift Cards.
- On the right pane, navigate to the General tab.
- Go to the Recipient & Delivery.
- Enable the Make recipient's info mandatory if you want the email and the recipient's name in the virtual gift cards.
- Enable Allow the user to choose the delivery date. A default delivery date is required.
- Click the Save Options button.
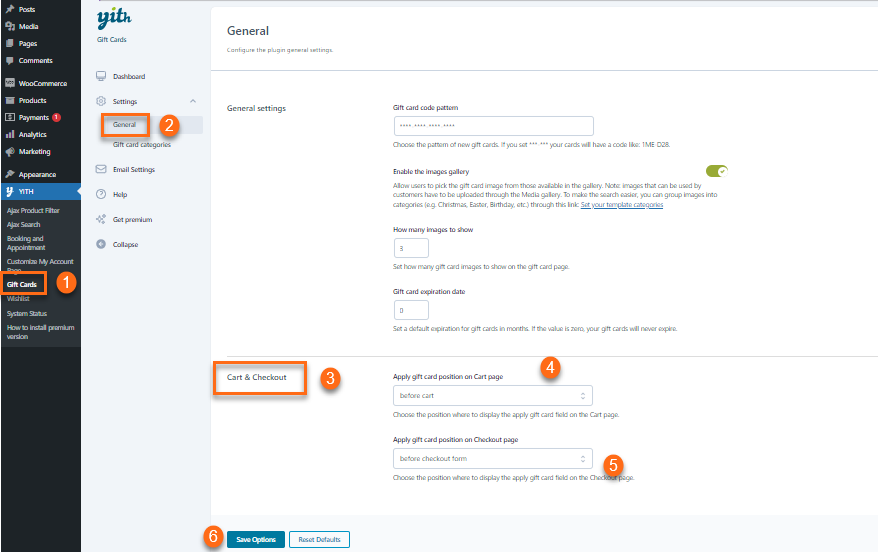
How to set up Gift card redemption
- Under the YITH tab, click on Gift Cards.
- On the right pane, navigate to the General tab.
- Go to Cart & Checkout.
- Select the position of the Apply gift card code field on the Cart page.
- Select the position of the same field on the Checkout page.
- Click the Save Options button.