Knowledge Base
How to Log In and Preview - Plesk
This example uses Plesk 18; however, the steps will be the same for other versions of Plesk.
When you signed up for a Windows Dedicated Server with Plesk web hosting, the link to your Plesk login page, along with your username and password, was emailed to you.
Basic URL Information
Be sure to replace server-IP and domain.com with the actual values.
Secure Login Page:
Plesk username: admin
https://server-IP:8443
Site Preview URL:
https://server-IP:8443/sitepreview/http/domain.com/
Webmail:
POP/SMTP Server:
mail.domain.com
How to log in to Plesk
After you signed up and paid for your hosting, you were sent a link in your new account email. Inside the email is a link to your Plesk login page and your Plesk password.
- Click the link in your email or type it into your browser.
- Your username is admin.
- Please type your password exactly as it appears. If you copy and paste the password, be careful not to copy any extra blank spaces (this is a common mistake when copying and pasting passwords).
- Leave the Interface Language as default or change it to your preferred language.
- Click Log in.
Site Preview on Windows Dedicated Servers
Site Preview may not be pre-configured on Windows Dedicated Servers, and you may need to turn on the Website Preview feature, which is not enabled by default before use.
Windows Shared Hosting with Plesk is pre-configured with the Website Preview option enabled.
To turn on Website Preview:
- Navigate to Tools & Settings.
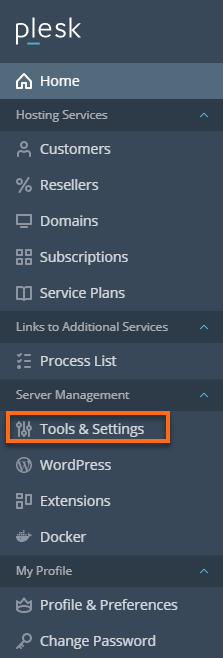
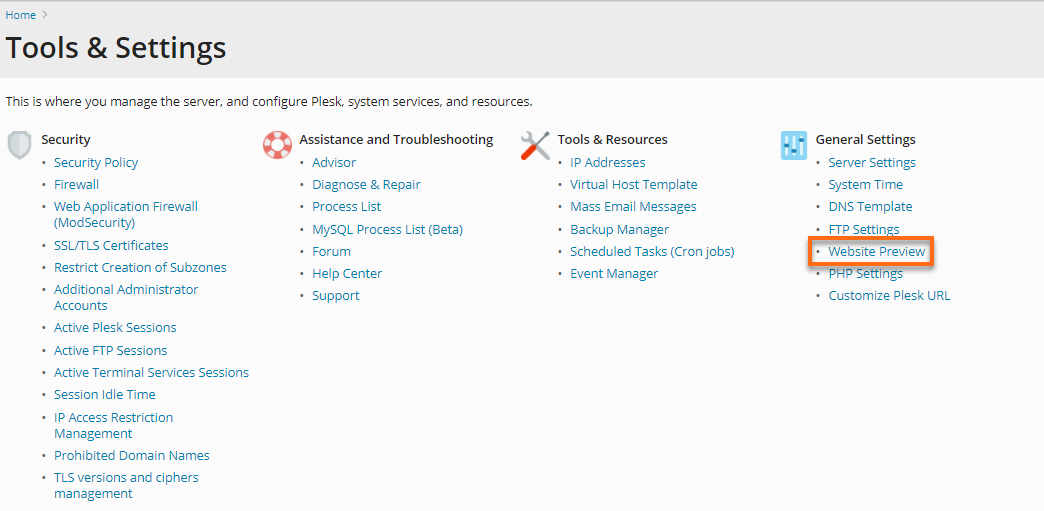
- Select the Website Preview option from the General Settings group.
- You can choose one of the three available options:
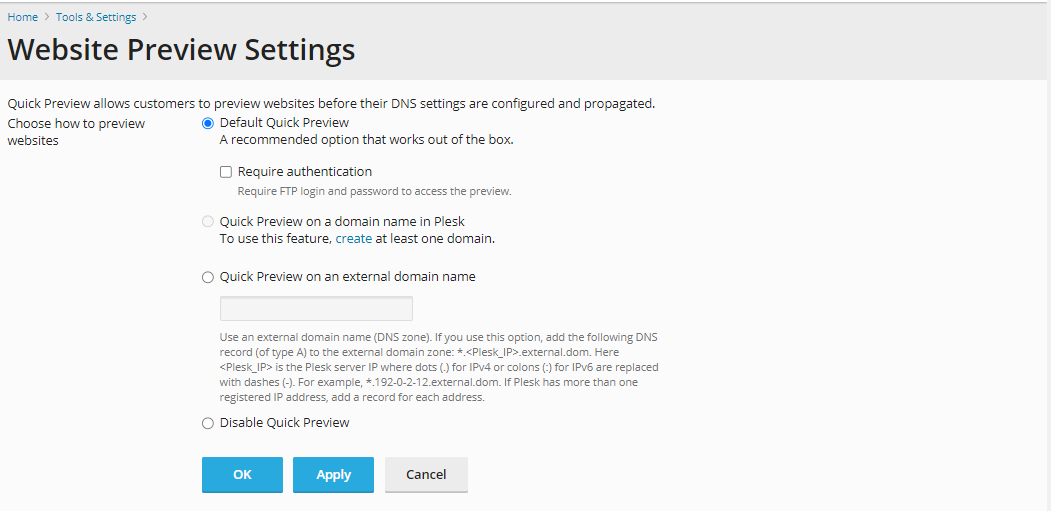
- Default Quick Preview. This is a recommended option, and it is enabled by default. It uses the Plesk IP address for site preview purposes.
»Require authentication - select this option to switch on password protection for website preview. In this case, a user will have to provide the system user credentials (specified during the subscription creation) to preview a website. This option is disabled by default and is only available in Plesk for Windows. - Quick Preview on a domain name in Plesk. Select this option if you want to use a different domain hosted in Plesk for site preview. You will need to select one of the domains to be used for site preview. Note that the site preview functionality will be disabled for the chosen domain.
- Quick Preview on an external domain name. Select this option if you want to use a different domain hosted outside for site preview. You will need to specify the domain's name to be used for site preview. You will also need to configure an "A" DNS record for that domain.
- Default Quick Preview. This is a recommended option, and it is enabled by default. It uses the Plesk IP address for site preview purposes.
To preview a website:
- Go to Website & Domains.

- Click Preview under the name of the website you want to preview.
Your website will open in a new browser tab. You can share the preview link with other people - it works anywhere in the world.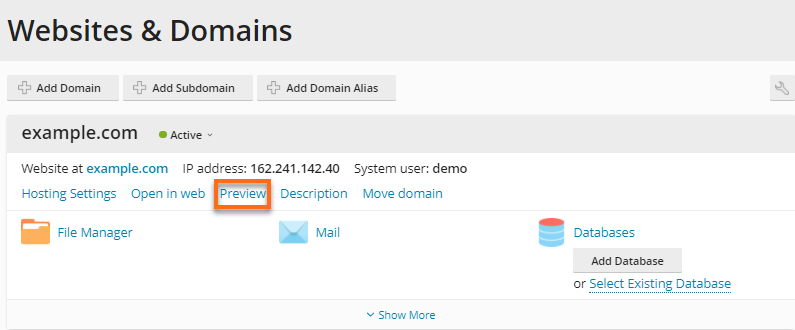
Did you find this article helpful?