How to Add/Remove an Email Account
By default, cPanel comes with one primary email account. Instead of using the default email account, we strongly recommend setting up a new email account using the steps below.
Tired of cluttered inboxes and privacy concerns? HostGator's Professional Email helps you streamline your workflow, increase productivity, and provide a secure and user-friendly email interface for your business.
Are you setting up an email client application, such as Outlook? Please visit the following article for email settings you can use on your email client.
This article discusses the following topics.
How to Add an Email Account
- Log in to your Customer Portal.
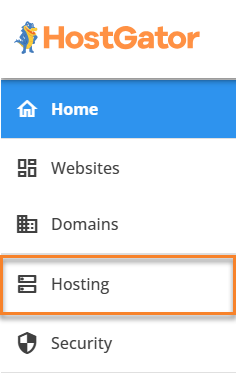
- Click the Hosting tab from the side navigation menu to the left.
- Scroll down to click the CPANEL EMAIL button under Quick Links.

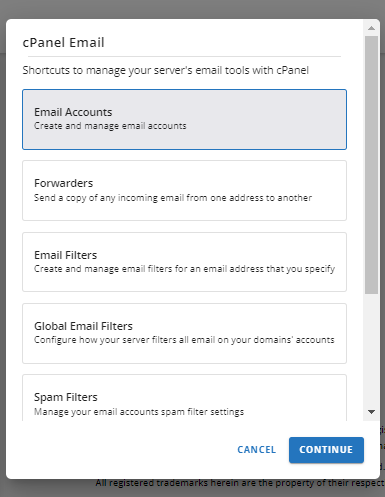
- In the pop-up, select Email Accounts and then click on CONTINUE.
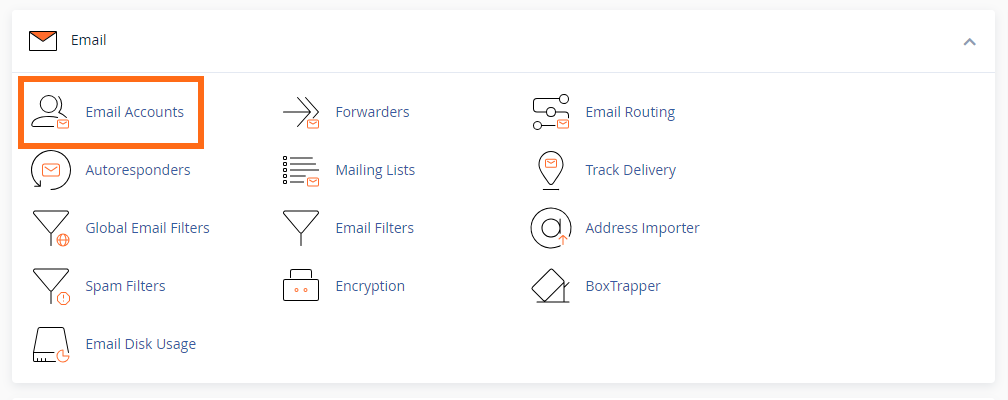
- Within cPanel, click Email Accounts under the Email section.
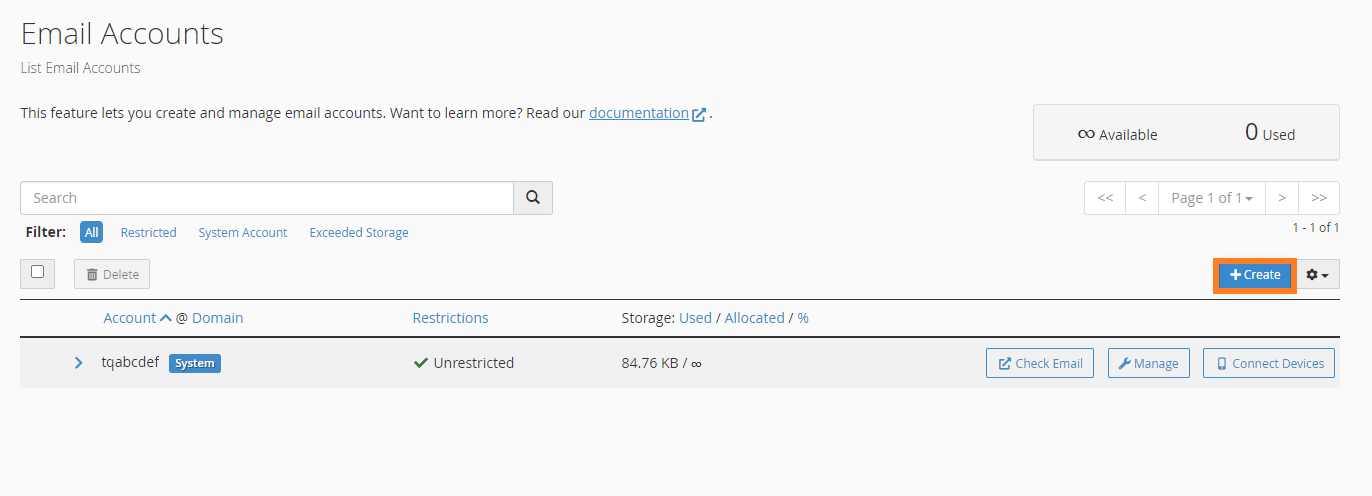
- To create a new email account, you need to click on +Create.
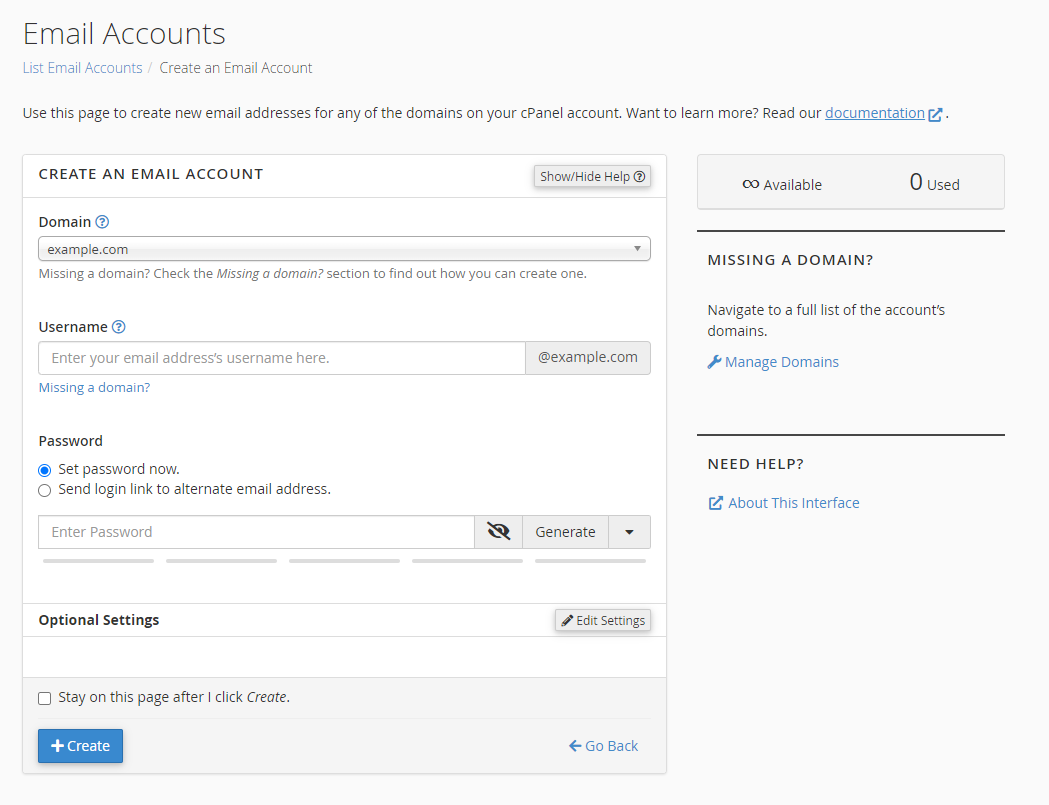
- On the Email Accounts page, do the following actions:
- Select the domain to associate with the email from the Domain drop-down menu.
- Enter the desired email in the Username field.
- Enter a password for the email address in the Password field. This will be useful when you set up a third-party email program or enter the email account via webmail.
Pay attention to the Strength indicator for the password. You may opt to use the Password Generator button to create a strong password.
- Next to Optional Settings, click Edit Settings to view more options.
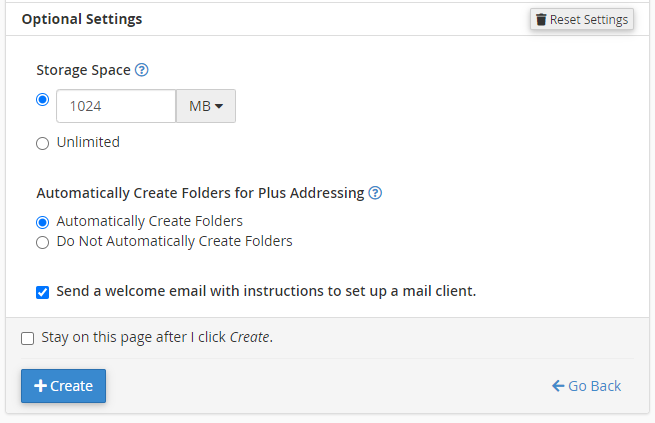
- In the Storage Space section, enter a custom mailbox quota storage size or select Unlimited.
- To automatically create folders for plus addressing, select Automatically Create Folders.
- To send a message with client configuration instructions to the account, select the Send a welcome email with instructions to set up a mail client check box.
- Select Stay on this page after I click Create to create another email account after creating this one.
- Once done, click +Create.
Your new email account will appear in the Email Accounts section.
How to Remove an Email Account
To delete an email account:
- Go to the Email section of cPanel and click Email Accounts.
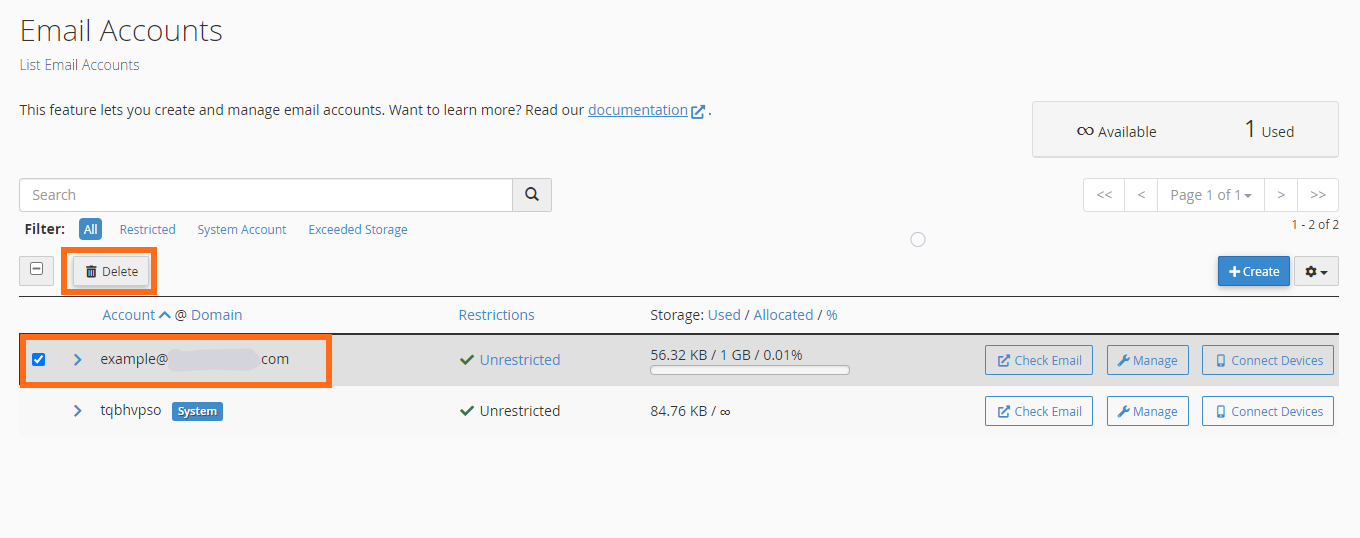
- In the Email Accounts section, select the email you want to be removed and click the Delete button in the top menu.
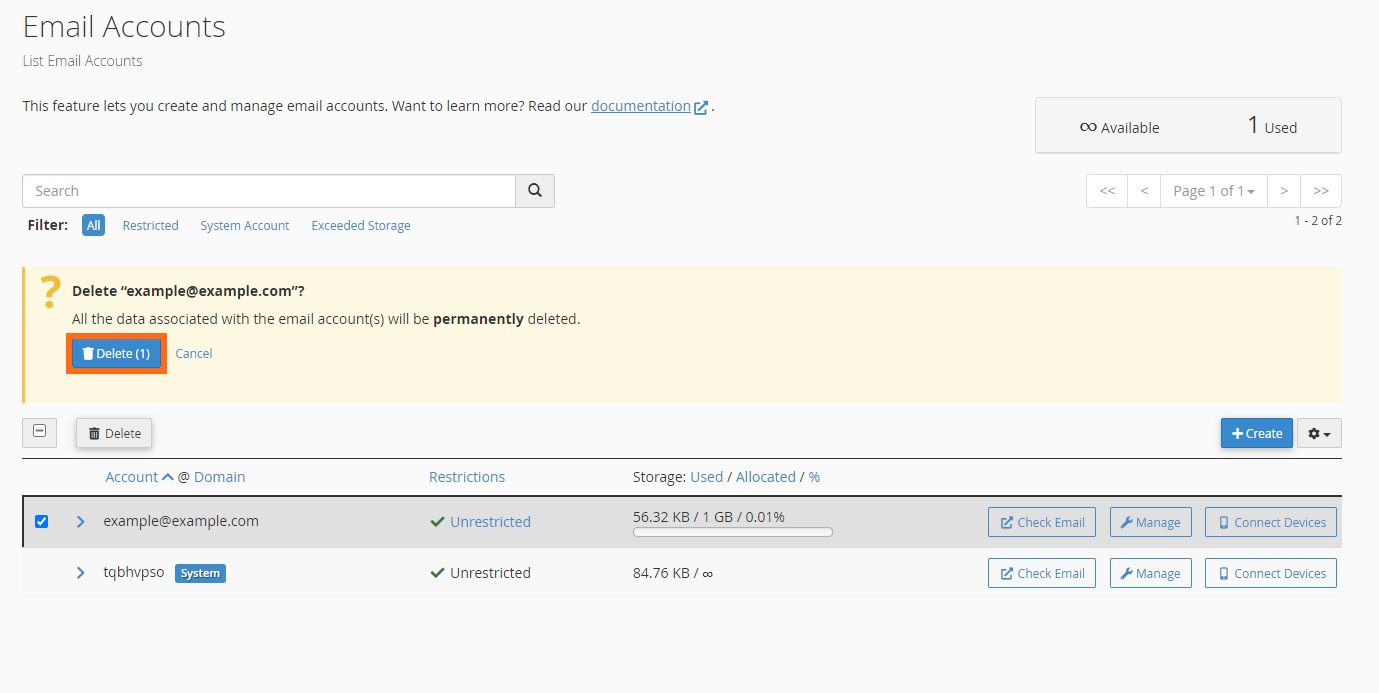
- A prompt will appear. Click Delete to confirm that you want to delete that specific email.
The email account and its emails are now permanently deleted.
Related Articles
Need assistance with setting up your email client apps? After creating your email account, you can proceed to set up your preferred email client. Please visit the following articles for the necessary settings.
- Email Connection Settings
- Email Client Settings - Outlook, Eudora, Thunderbird, Mac, iPad, Phone. etc.
Interested in using Professional Email? For more details, please visit the following articles.
