How do I point my existing domain to HostGator?
Pointing a domain means you will be connecting it to your HostGator servers. This is an essential step in web hosting if you want HostGator to manage your website, emails, and DNS records.
Depending on who your registrar or domain provider is, you always have the option to point your domain to your HostGator account by changing your name servers or DNS records. With this article, we will walk you through pointing your existing domain to HostGator using your HostGator name servers.
This article will walk you through the following topics.
Step 1: Get your HostGator name servers
You will want to ensure you have your HostGator name servers handy, which you can see in your Customer Portal and Order Confirmation email.
Option 1 - Customer Portal
To find your name servers in the Customer Portal:
- Log in to your Customer Portal.
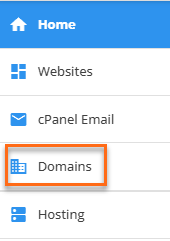
- Once logged in, click on Domains on the left-hand menu.
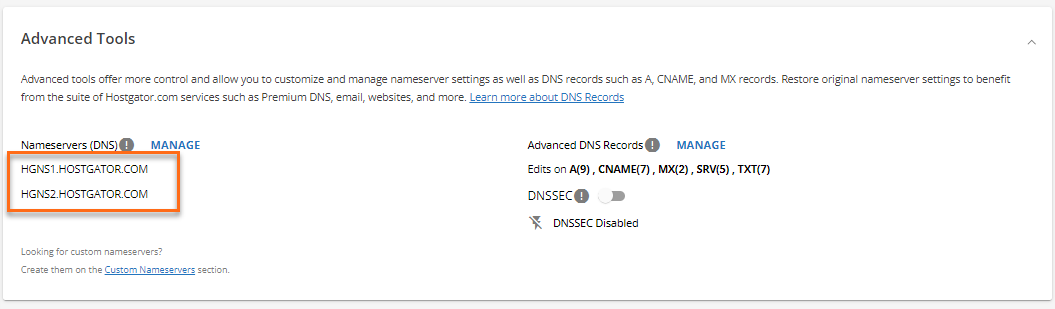
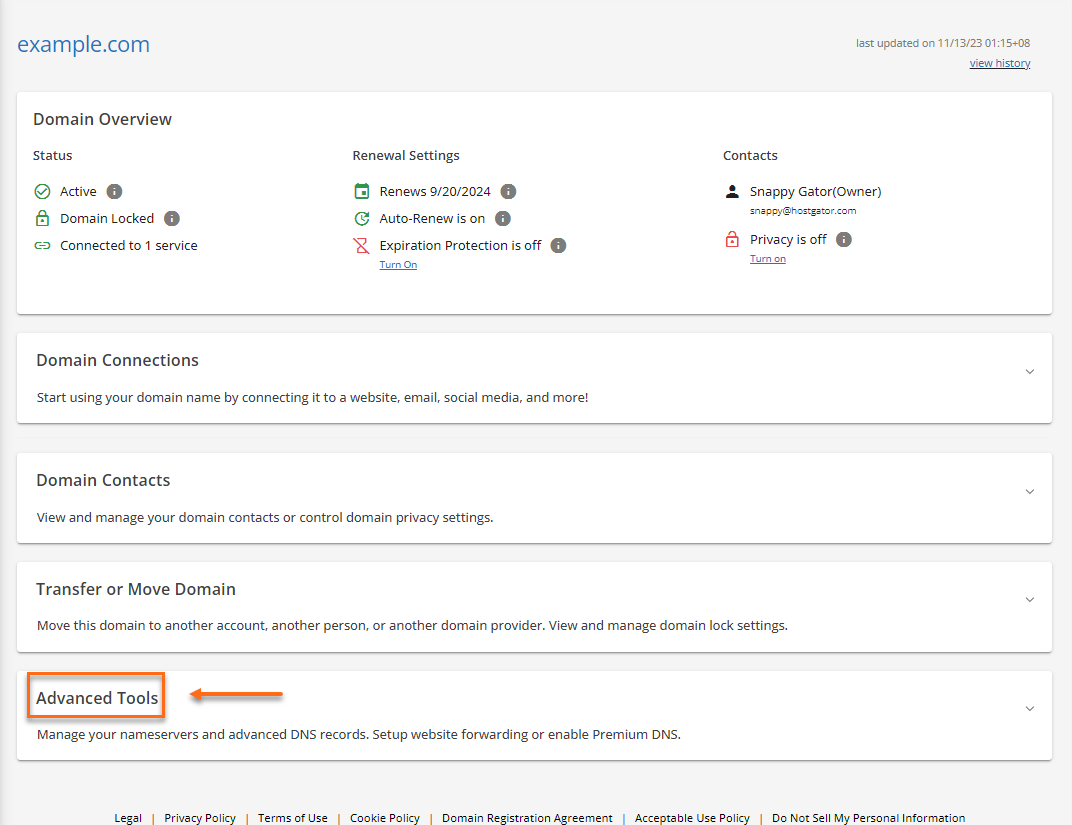
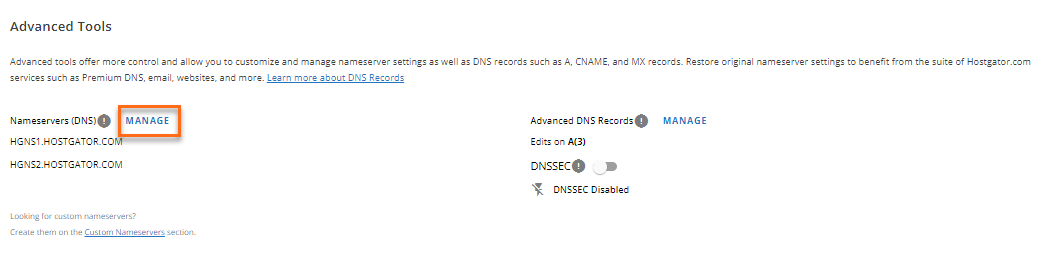
- Look for the domain you need to manage and navigate to its Advanced Tools section.
- Under Nameservers (DNS), you will find your HostGator name servers.
Option 2 - Order Confirmation Email
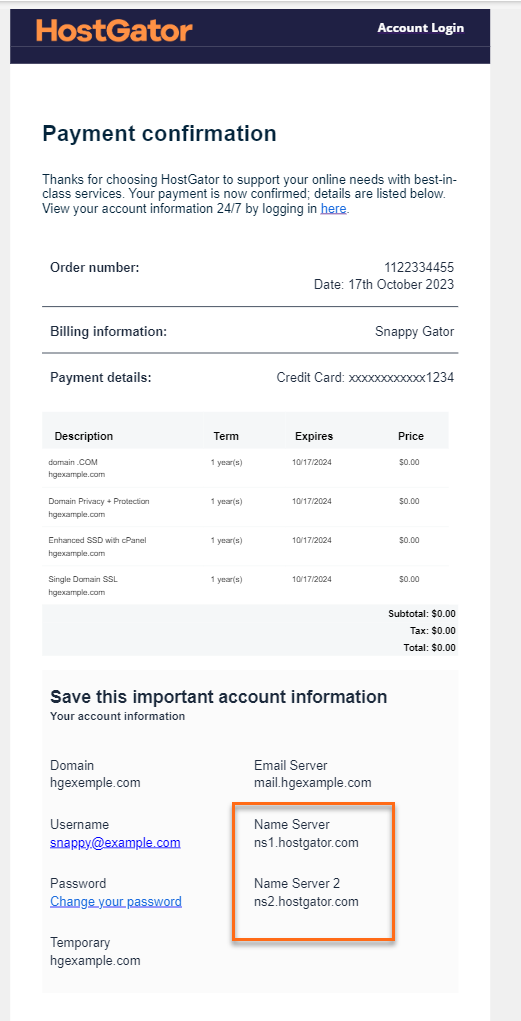
When you purchase a new hosting plan, a HostGator Order Confirmation or Welcome email will be sent to you providing complete details about your hosting package, including your HostGator name servers. Your email should be similar to the sample image below.
If you haven't received your Order Confirmation email, we recommend checking your Spam folder or any email filters you might have set up.
For more information on how to find out your name servers, please read the following article:
Step 2: Change your name servers through your current registrar
Please note that you can only change your domain's name servers through your current registrar or domain provider.
My current registrar is HostGator
If you purchased or transferred your domain to HostGator, pointing or connecting your domain to your HostGator account is easy! To do this, please follow these steps.
- Go to the Customer Portal.
- Once logged in, click on Domains on the left-hand menu.
- Locate the domain you need to manage and navigate to its Advanced Tools section.
- Click the MANAGE link beside Nameservers (DNS).
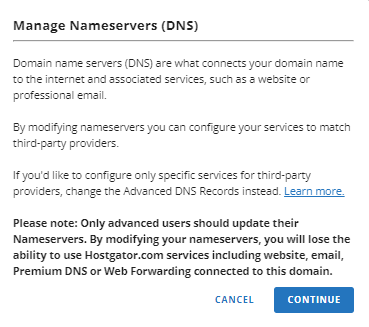
- Click CONTINUE on the popup screen.
- Enter the HostGator name servers you got from Step #1.

- Click SAVE. Please give your name servers time to fully propagate.
My domain is not with HostGator
If you registered or transferred your domain to a different registrar, that's completely okay! You can still point or connect your domain to your HostGator servers. To do this, you need to update your domain's name servers via your current registrar. Reach out to your current registrar, give them your HostGator name servers you got from Step 1, then give your domain time to propagate.
Related Articles
- How can I transfer my domain to HostGator? - If you want to transfer your domain registration to HostGator, so you can manage both your website and domain name with one company, please refer to this article for the instructions.
- How do I change my DNS or name servers? - If you have a domain registered with another registrar or need more information on making changes to your DNS records, please visit this article.
- Pointing my domain to HostGator when using DNS elsewhere - If you want HostGator to host only your website or just your emails but you want to use different name servers, please check out this article.