Customer Portal - Profile
This article guides you in managing your contact information within the HostGator Customer Portal. It covers updating your email address, name, phone number, and fax (if applicable). There are two ways to update your contact information: via the Accounts & Users ⤵ tab and the My Profile ⤵ tab.
Accounts & Users
How to Edit Email
- Log in to your Customer Portal.
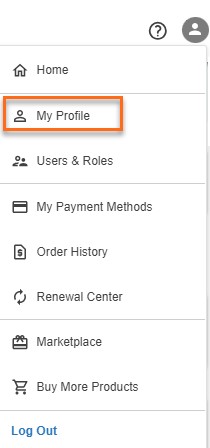
- Once logged in, click on the person icon in the upper-right corner, then select Accounts & Users.
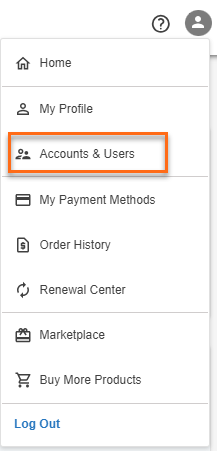
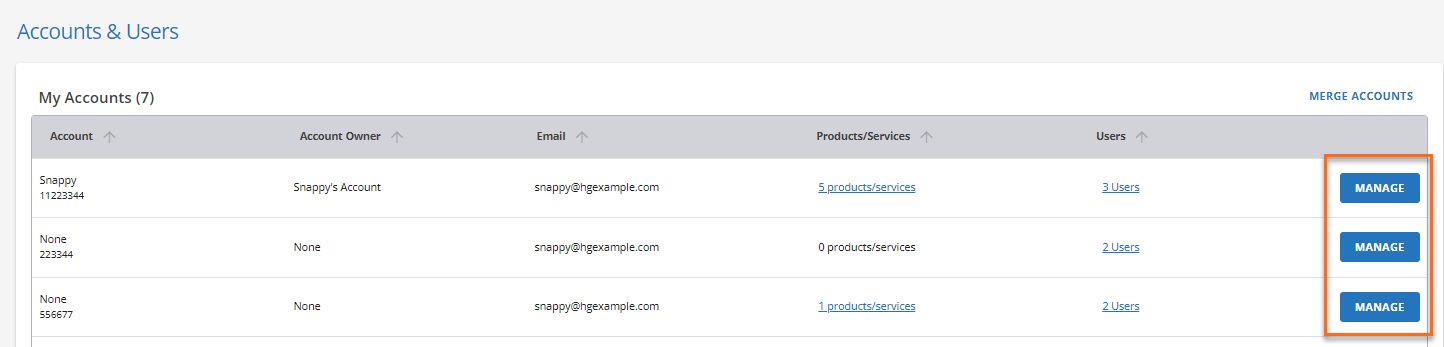
- Click the MANAGE button for the account that you are updating.
- Click EDIT.

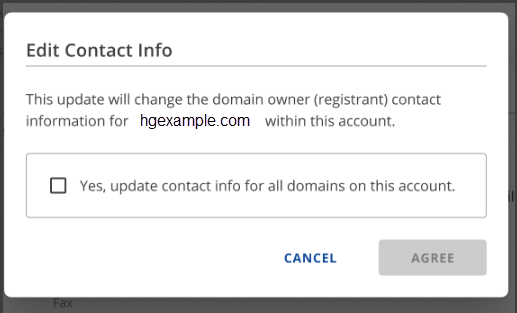
- If you have a domain or multiple domains in your account, tick the checkbox to update contact information for all domains, then click AGREE.
- If you do not have a domain in your account, proceed directly to Step 5.
- If you have a domain or multiple domains in your account, tick the checkbox to update contact information for all domains, then click AGREE.
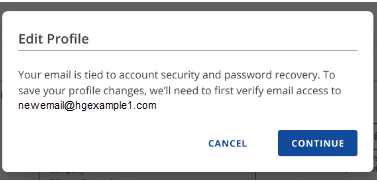
- Update your email address and click SAVE to save the changes.
- A pop-up will show. Click CONTINUE to verify your email address.
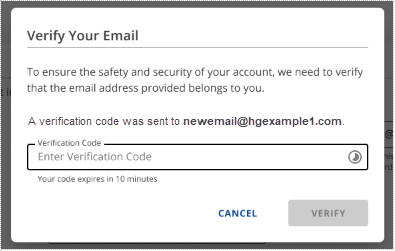
- A verification code will be sent to the new email address. Enter the code and click VERIFY.
- Once you have verified your new email address, an approval request via email will be sent to both the current and new registrants, as required by ICANN.
Important: Please read the important reminders shown in the pop-up.
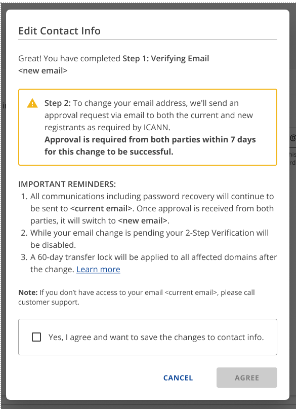
- After reading the important reminders, check the box to agree and save the changes to the contact info, then click AGREE.
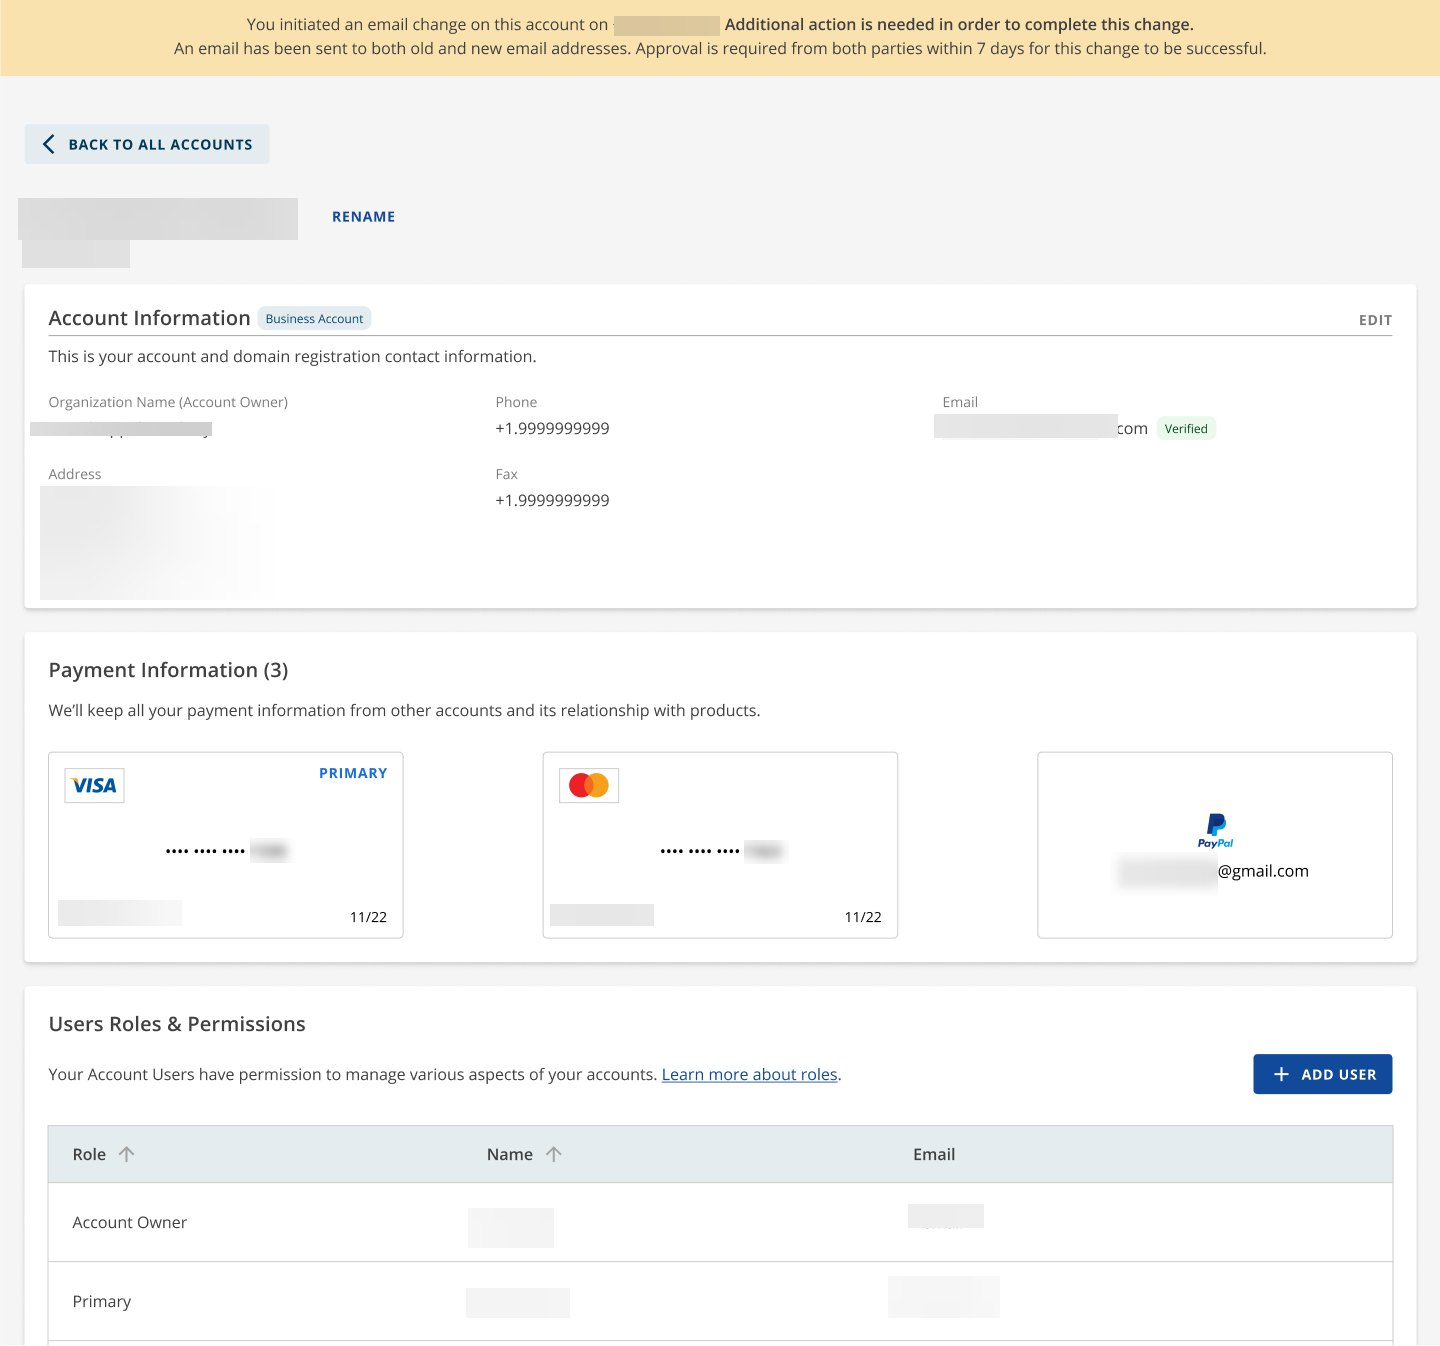
- The email change has been initiated. Approval is required from both parties within 7 days for the change to be successful. Updates will be reflected in the Account Manager within 15 minutes once confirmation is made to the previous and new email addresses.
-
Updates will be reflected in the Account Manager within 15 minutes once confirmation is made to the previous and new email addresses.
-
If you do not have access to the old email address on file and cannot confirm the email sent to that address, you will be required to submit a certain requirement. Visit the How Do I Complete a Primary Contact Replacement, an Email Reset, or Change of Ownership? article for more information.
How to Edit Name, Address, Phone, or Fax
- Log in to your Customer Portal.
- Once logged in, click on the person icon in the upper-right corner, then select Accounts & Users.
- Click the MANAGE button for the account that you are updating.
- Click the EDIT link.
- Tick the checkbox to update contact information for all domains, then click AGREE.
- Update your email address and click SAVE to confirm the changes.
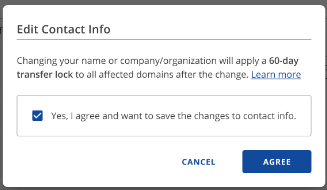
- If you update your name or company name, a pop-up will ask you to agree to a 60-day transfer lock. Check the box and click AGREE to proceed.
- If you update your name or company name, a pop-up will ask you to agree to a 60-day transfer lock. Check the box and click AGREE to proceed.
- A pop-up will show. Click CONTINUE to verify your email address.
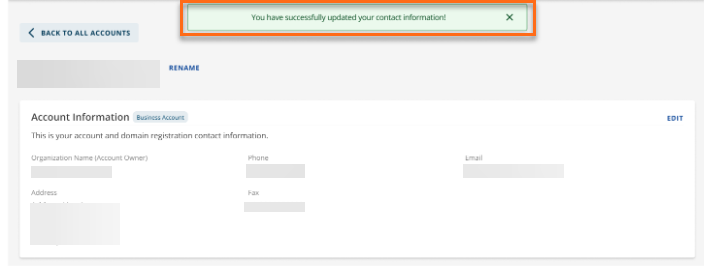
- The changes you made to your contact details have been saved.
My Profile
How to Edit Email
- Log in to your Customer Portal.
- Once you're signed in, tap the person icon in the top right and select My Profile.
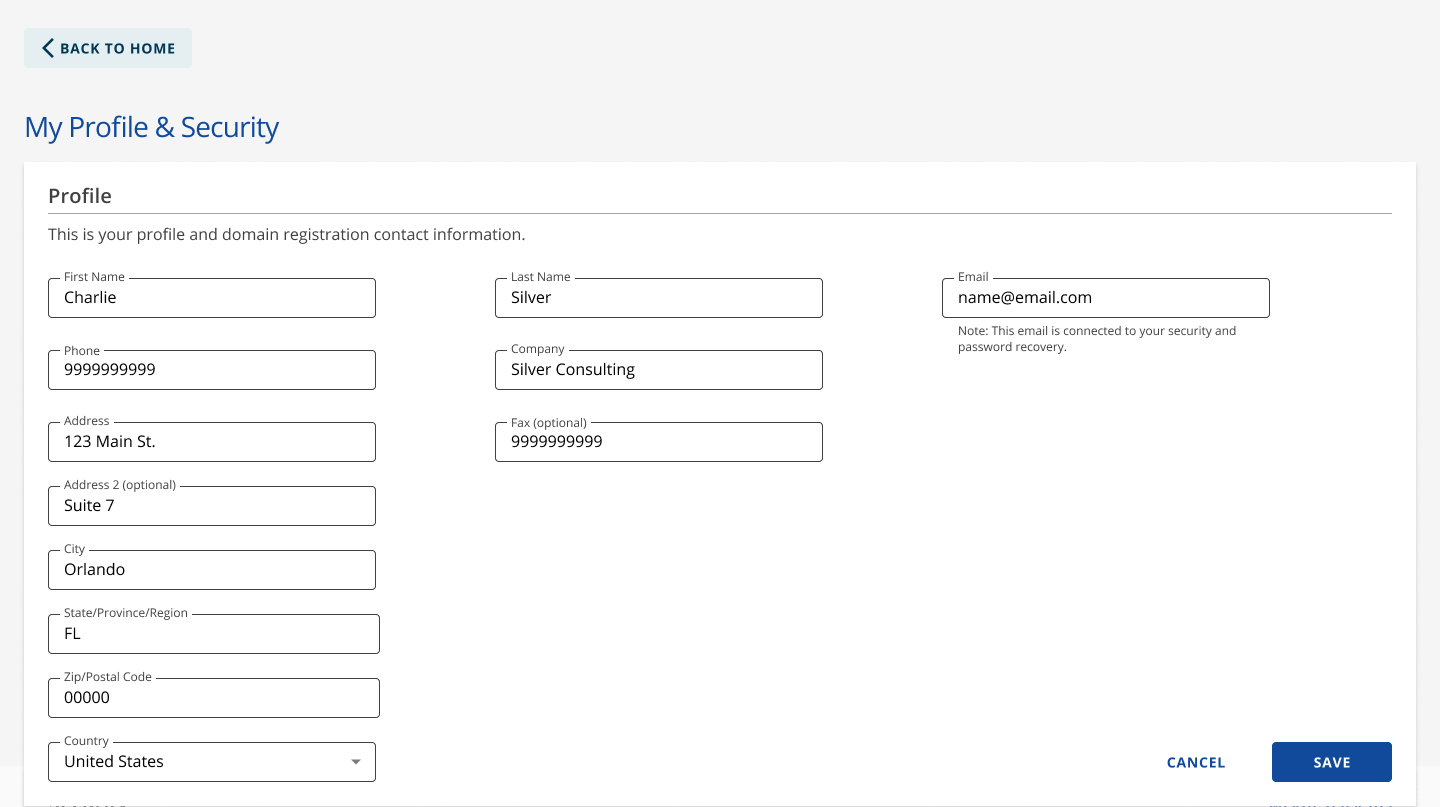
- Click the EDIT link.
- To update contact details for all your domains, select the checkbox and click AGREE.
- Modify your email address and then click SAVE to confirm.
- To verify your email address, click CONTINUE.
- Enter the verification code provided and click VERIFY.
- After verifying your new email address, an approval email will be sent to both the current and new registrants as required by ICANN. Please read the important reminders shown in the pop-up.
- After reading the reminders, select the checkbox that confirms your agreement and desire to save the contact information changes. Then, click AGREE.
- Your email address change is underway. Both parties must approve it within 7 days for it to be successful. Updates will be reflected in your Account Manager within 15 minutes once both parties have confirmed the update.
How to Edit Name, Address, Phone, or Fax
- Log in to your Customer Portal.
- Once you're signed in, tap the profile icon in the top right and select My Profile.
- Click the EDIT link.
Note: The Company Name is only available to Organizational Accounts. You will only see Full Name, Email, Phone, and Address fields in the Profile section if you have a Personal Account. If you have an Organizational Account and are in a European Union country, you will see a Tax Certificate Number field in the Profile section for VAT.
- Check the box to apply the contact information changes to all domains in your account. Then, click AGREE.
- Modify your information and then click SAVE to confirm.
- If you are updating the Name or Organizational name, check the box to agree to save the changes to your contact info, even if it results in a 60-day transfer lock. Click AGREE.
- If you are updating the Name or Organizational name, check the box to agree to save the changes to your contact info, even if it results in a 60-day transfer lock. Click AGREE.
- The changes you made to your contact information have been saved.
- Please follow the instructions outlined in the Customer Portal - Change Primary Email article if you can no longer access the email in your HostGator account.
- Follow the instructions outlined in the How to Change the Primary Contact on Your Account if you need to change the primary contact person in your account.