New Account Sign Up
Signing up for new services with HostGator is fast and easy! This article will discuss the typical new user signup processes for the following services:
Are you an existing HostGator customer? You can go ahead and add a new hosting package or register a domain within your Customer Portal. If you need help logging into your account, please visit the following article.
How to Sign up for a Hosting Plan
HostGator offers many different hosting plans to fit your hosting needs. The instructions provided in this article are for Shared hosting services. However, these steps apply to all types of hosting plans available on our front-of-site.
- Go to https://www.hostgator.com.
- Hover over the top menu, click on Web Hosting, and then select your preferred hosting plan.
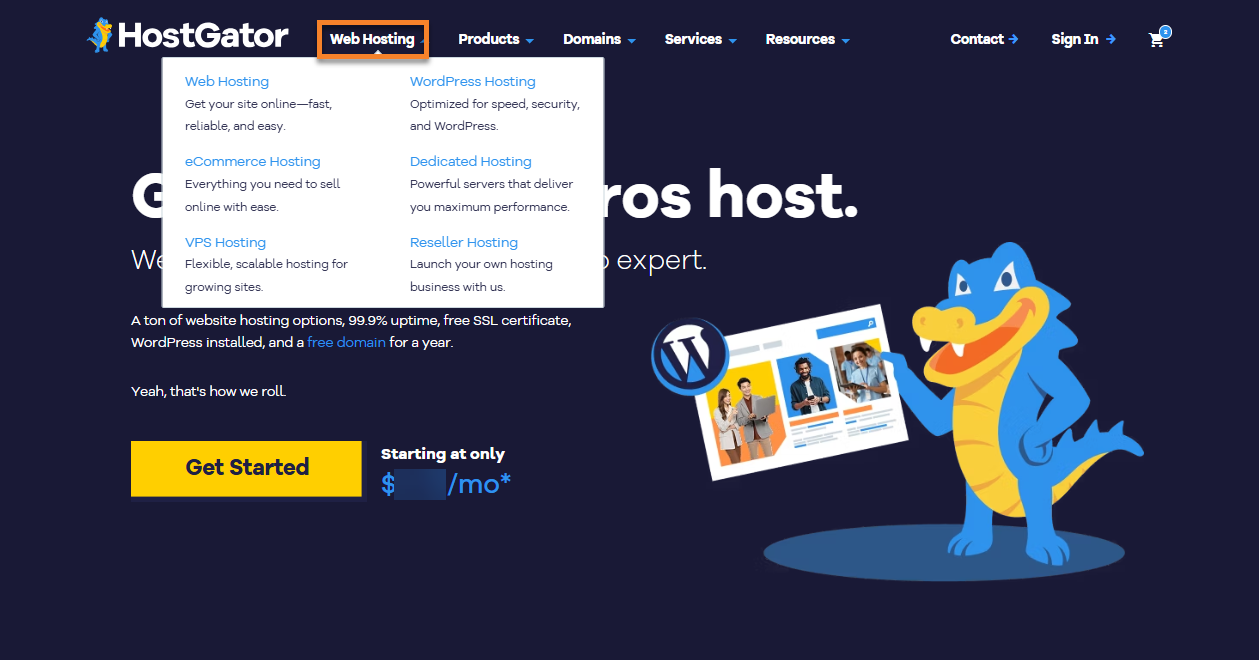
We offer different types of hosting services:
- Web Hosting - Shared Web Hosting is a cost-effective option for getting a website online, allowing multiple users to share space on one server. It's ideal for small to medium-sized websites.
- eCommerce Hosting - eCommerce hosting is suitable for selling products or services online. It makes creating a customized store, managing inventory, processing secure payments, handling shipping, and calculating taxes easy.
- WordPress Hosting - WordPress hosting is specialized web hosting optimized for WordPress websites. It includes pre-installed WordPress, automatic updates, enhanced security features, and tailored support, ensuring better speed and security than standard hosting.
- Dedicated Hosting - Dedicated hosting offers maximum resources, privacy, and control with isolated servers, allowing for complete customization.
- VPS Hosting - Virtual Private Server (VPS) hosting is a solution that shares physical hardware with other virtual servers while maintaining independent operation and privacy through virtualization. It provides a customizable server environment for installing software and optimizing for specific applications.
- Reseller Hosting - Reseller hosting lets you start your own web hosting company by white labeling our products. It's a great way to earn money on the side by becoming your own web hosting company, or by simply adding more value for customers you already have.
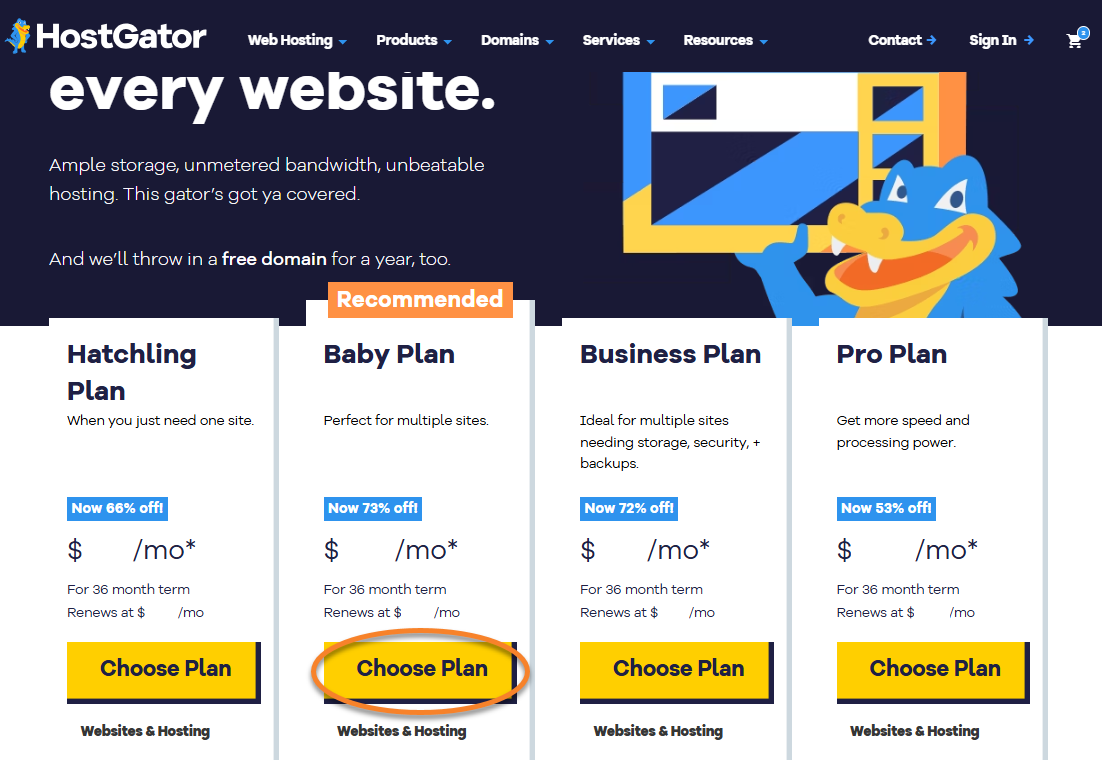
You will know more about each type of hosting plan by clicking on one of the hosting services. Each of them has its own page, on which, when you scroll down, you will be able to see the following details:- The Packages Offered
- The Inclusions
- Hosting Category Description
- FAQs
- Once you've decided on the hosting plan you need, click Choose Plan under the package you want to sign up for.
- You will be redirected to a page that will ask for a domain name. You will have the option to do the following:
- You may register a new domain name by typing it in the provided field.
- You can choose an existing domain name if you already own one by clicking the box beside the I want to use a domain I already own.
- You may also skip this part by clicking CHOOSE DOMAIN LATER at the bottom if you don't have anything in mind yet. You can always add the domain anytime afterward, whenever you are ready.
- You can also check/uncheck the box beside the Add Private Registration option if you want to add/opt out of domain privacy.
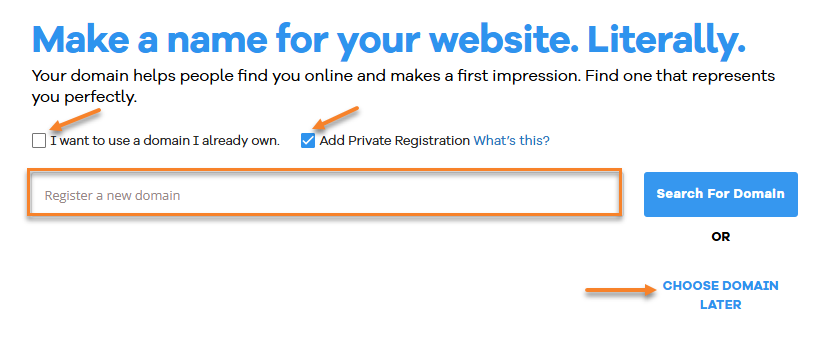 The domain field will turn red if the domain has already been taken. If you already have an existing domain, please select the I want to use a domain I already own tab instead.
 - On the Cart page, select your preferred Billing Cycle.
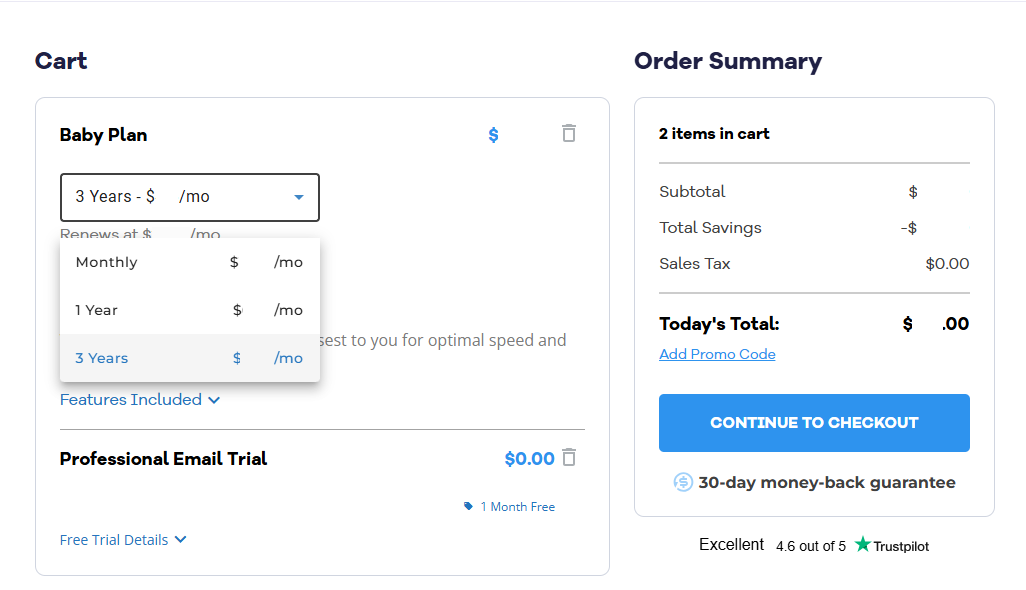
Pricing reflects a discount on the first invoice only. Any subsequent payments will be at a regular price. For more information on the regular pricing, please visit the Hosting Price Chart article.
For International Customers (Non-US and Non-Canada customers), we've selected the closest Data Center location as a default Data Center based on the customer's IP Address for optimal speed and performance. They can still choose which Data Center to use by clicking the pencil icon to edit the Data Center. Once clicked, they will have the option to choose the Data Center they want.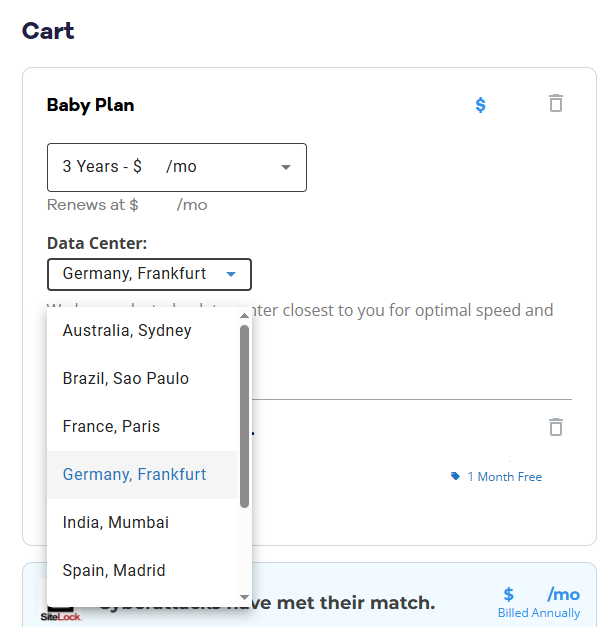
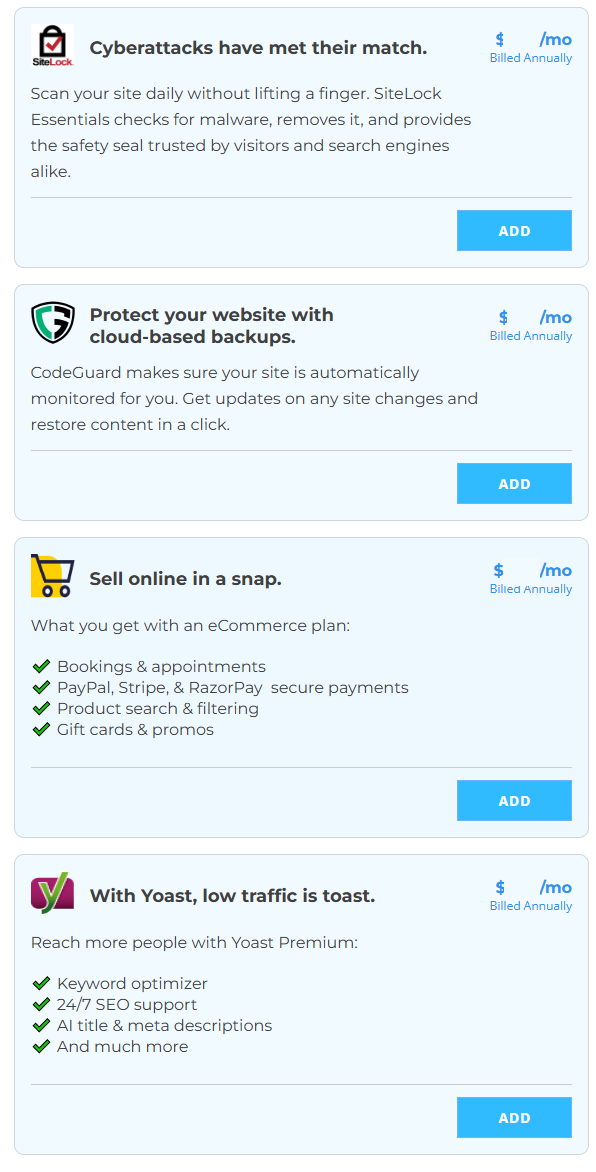
- Choose the add-on products you want to add. If you haven't decided to add any add-on products yet, you can skip this part and proceed to the next step.
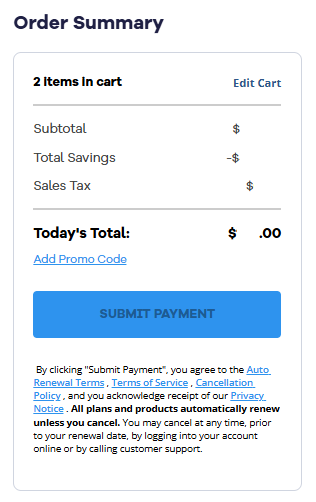
- Review your order and click CONTINUE TO CHECKOUT.
If you have a Promo Code, you can click Add Promo Code just above the CONTINUE TO CHECKOUT button.
- At the Checkout page, fill in the Billing Information, Account Information, Payment Information, and Billing Address in able to complete the payment process.
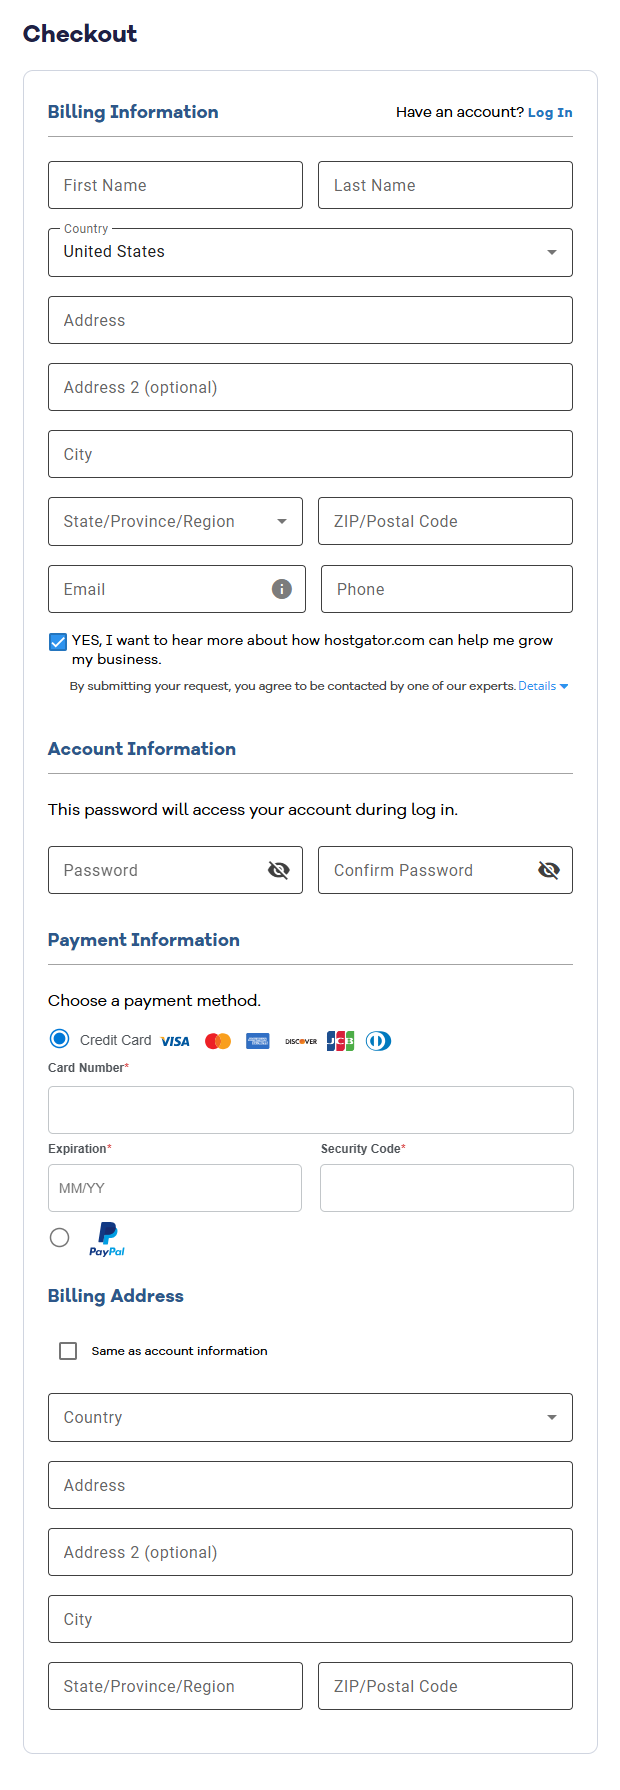
- Once done, click the SUBMIT PAYMENT button to complete the transaction.
You are now signed up with HostGator! Watch out for the Order Confirmation email sent to your signup email address.
How to Sign up for a New Domain
Registering new domain names is now made easy here at HostGator!
If you're an existing customer, you can register a new domain within your Customer Portal. For instructions, please check out the article Registering a Domain Name with HostGator.
If you're a new customer, follow the instructions below.
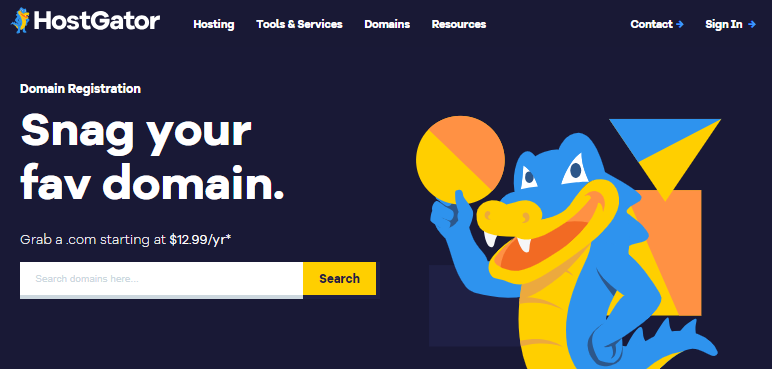
- Go to https://www.hostgator.com/domains.
- Enter the domain you want to register and select Search.
- If the domain is available for registration, it will automatically be added to your Shopping Cart along with Domain Privacy + Protection.
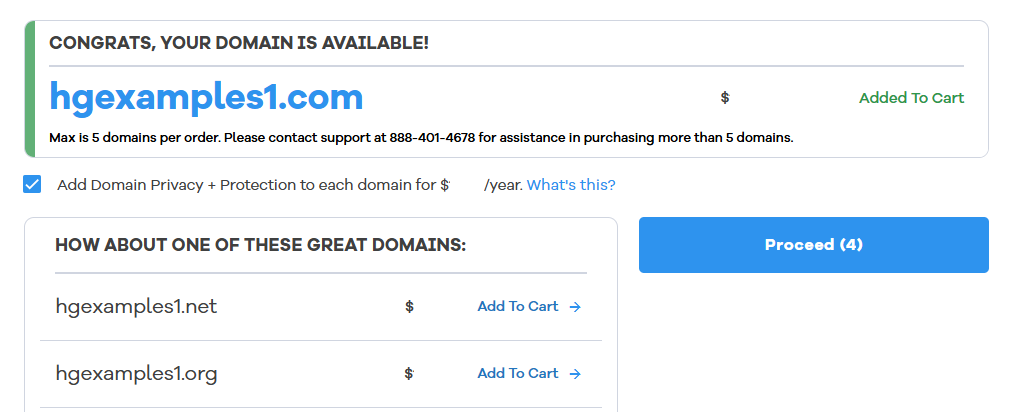
You may search for additional domains you wish to register or just click the Add To Cart button next to any domain recommendations.
- Privacy + Protection may be added or removed from your domain by clicking the X or + next to Add Privacy Protection in your Shopping Cart.
We strongly recommend that you keep Domain Privacy + Protection to protect your domain's personal and business contact information. Please refer to the article How to Enable Domain Privacy for more details.
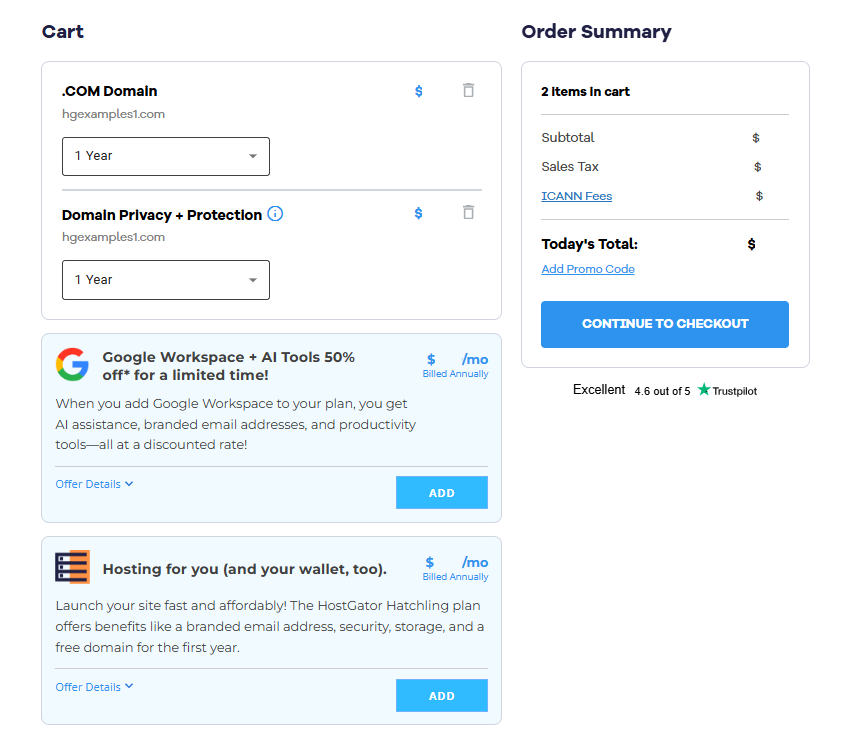
- Once your selection is complete, check your domain(s) to ensure their correct spelling. Please note that we cannot edit the domain name once it's already registered. Once done, click on the Proceed button.
- On the Cart page, you can add other services like Email or Hosting services. You can proceed with only the domain name in your cart by clicking CONTINUE TO CHECKOUT.
Congratulations! Your domain order is now submitted! Watch out for the Order Confirmation email sent to your signup email address.