Knowledge Base
Professional Email - How to Set up and Create an Email Account
This article will walk you through setting up and creating an email account with your Professional Email service within your Customer Portal.
- How to Set up Professional Email (Post-Purchase) ⤵
- How to Create an Email Account with Professional Email (Add Mailboxes) ⤵
- Related Articles ⤵
Need help in configuring your MX and TXT records for your Professional Email service? Please visit the Setup Professional Email MX and TXT records for more information.
How to Set up Professional Email (Post-Purchase)
When you purchase Professional Email, it will appear under the Email & Office tab in your Customer Portal. You will need to set up your email account to get started.
- Log in to your Customer Portal.
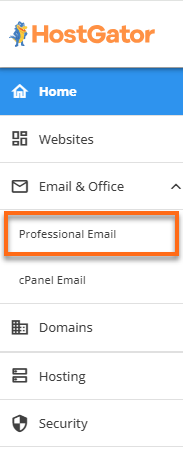
- Click Email & Office on the left-hand menu and select Professional Email.
- Locate your Professional Email plan from the list (if you have multiple plans) and click the SETUP button.

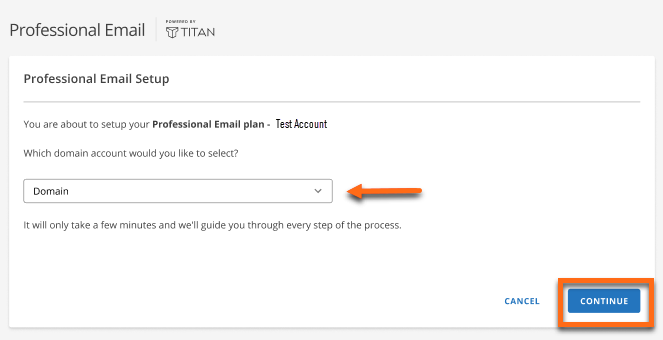
- Select your domain from the dropdown where you want to set up your Professional Email, then click CONTINUE.
- You will be directed to the Professional Email Setup page. Please input your preferred username and first and last name, and create a new password.
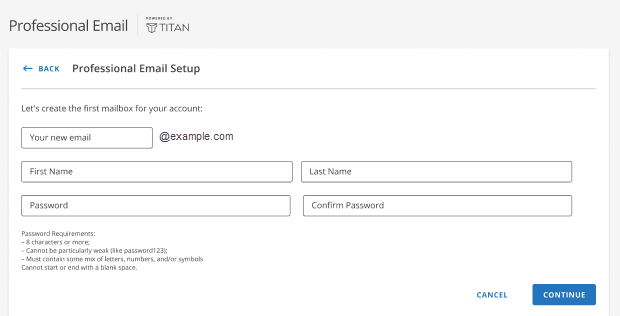
- Once done, click on the CONTINUE button.
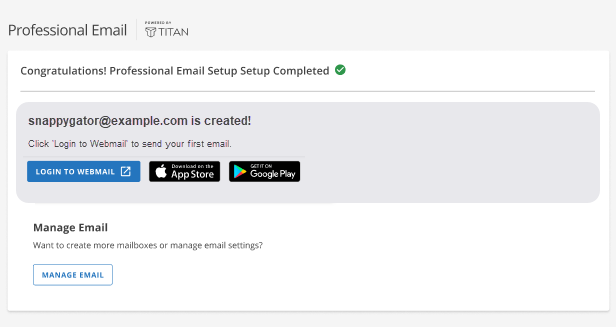
- You'll see a notification that you've successfully created an email account. You can go directly to the Professional Email Webmail by clicking the LOGIN TO WEBMAIL button.
How to Create an Email Account with Professional Email (Add Mailboxes)
To add additional mailboxes to your Professional Email service:
- Log in to your Customer Portal.
- Click Email & Office on the left-hand menu and select Professional Email.

- Locate your Professional Email plan from the list (if you have multiple plans) and then click the MANAGE button.

- In the Manage - Email accounts section, click the Create new email account button.
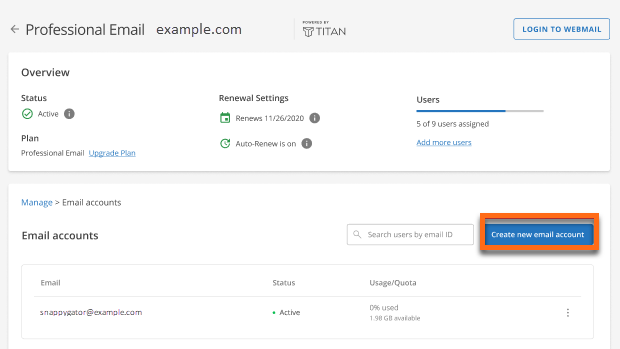
- Enter the new account details, such as the username, first and last name, and a new password, on the Professional Email Setuppage.

- You'll see a notification that the new email account was successfully created. To access the dashboard, click the LOGIN TO WEBMAIL button.

Related Articles
- Enable Professional Email Settings for Third-party Email Clients
- Professional Email - How to Configure IMAP/POP on Third-Party Apps
- Professional Email - How to Order and Manage (Post-Purchase)
- Professional Email Product Overview
- Setup Professional Email MX and TXT records
Did you find this article helpful?