Knowledge Base
Categories: Management
HostGator Organization Ownership – Update Email Address
Updating your organization’s email address in a HostGator account requires verifying ownership through proper documentation and completing the HostGator account recovery process. This guide explains the required documents, acceptable user roles, and step-by-step instructions needed to successfully update your HostGator email address as the Primary Contact or Admin/Tech user.
This article discusses the following:
Required documents
To update the primary contact on an account, gather all the required documents:
- Valid Government-Issued Photo ID (full color): A valid, unexpired, government-issued photo ID of the individual requesting to become the Primary Contact.
- Driver's license
- ID card
- Military Photo Identification
- Passport
- The ID provided must match the name on any supported legal documentation that will be requested.
- The ID must be in color – Black and white scans/photos will be rejected.
- The ID must be legible – All text, including your name, address, and expiration date, must be clearly readable. Avoid blurry or low-resolution images.
- The ID must be valid and not expired – Expired documents will not be accepted.
- Upload must be a scan or clear photo of the physical ID – Screenshot of digital IDs or photos of screens displaying your ID are not accepted.
- Additional Documents: To verify your identity and process your request, please upload two acceptable documents from the list below.
- Utility Bill (dated within 90 days of submission)
- Business License
- Letter of Incorporation
- A Tax Return or Tax ID Document
- Certificate of tax exemption that proves charitable status
- The document must match the organization name and address on the account.
- The document must be clear, legible, and show the full page (do not crop or redact names, addresses, or dates)
- The document must be in color and not outside of the required date range for that document.
- Partial documents will not be accepted – Make sure the full page is visible (do not crop out or redact names, addresses, or dates).
Account user and roles
- Account Owner/authorized rep of the company - Who manages everything on the account, including Admin, Tech, Billing, and Domain.
- Primary – Registered as the main contact/user of the account
- Admin/Tech – Who handles the Technical or Administrative tasks on the account
- Domain Owner – Listed as the domain name registrant on the domain(s) in the account.
- Other - None of the above descriptions fit your role.
For the Domain Owner role, please refer to the How to Change Domain Ownership article.
How to submit a request to update email address
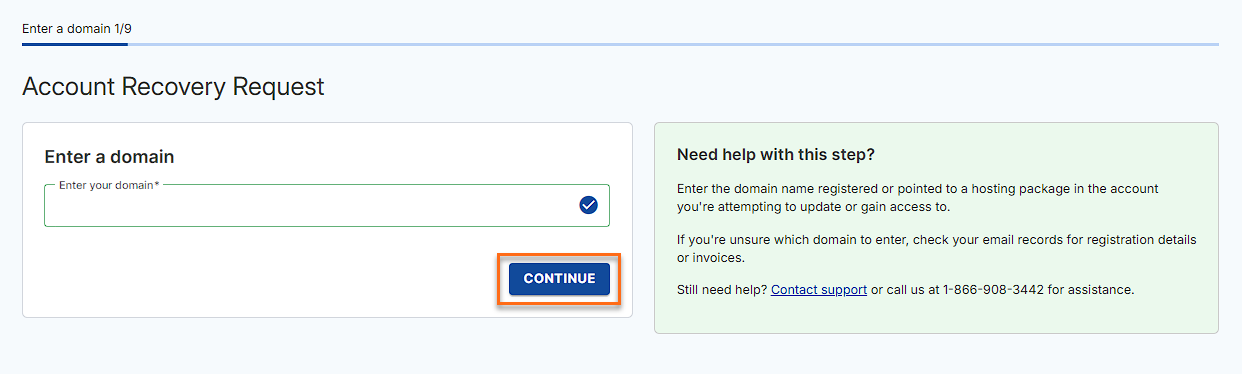
- Go to https://www.hostgator.com/my-account/account-recovery-new.
- Enter your domain and click Continue.
- Select your role from the options and click Continue.
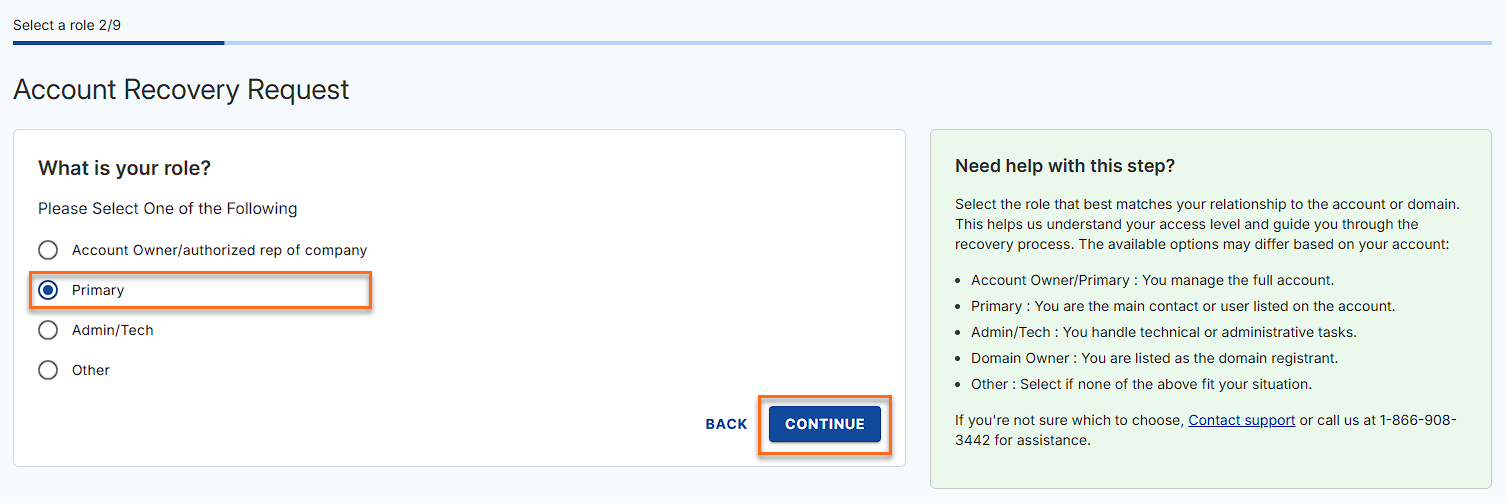
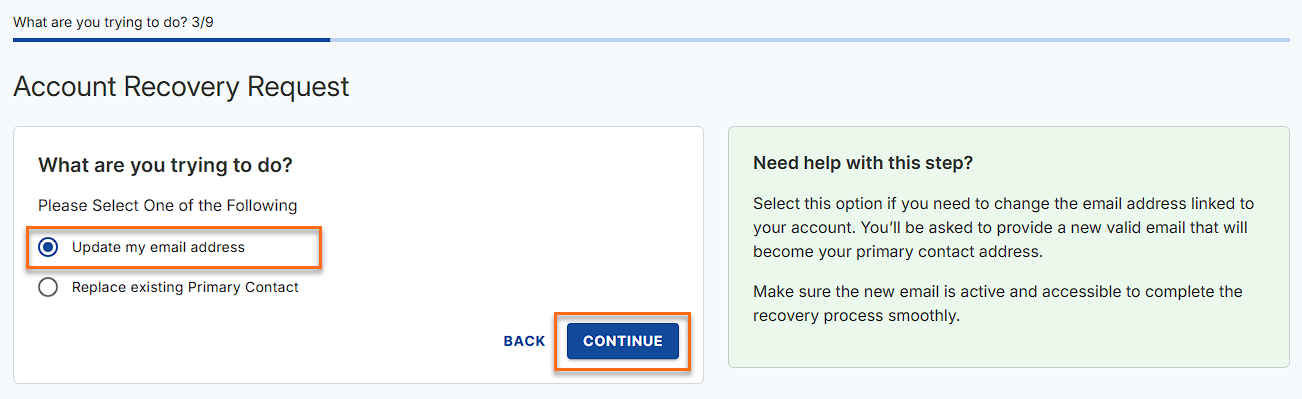
The roles displayed on this step may depend on the available User/Roles added to the account. - Select Update my email address and click Continue.
The options available may depend on the role you select.
If you select Admin/Tech as a role, you will see options below, select Update my email address, and click Continue.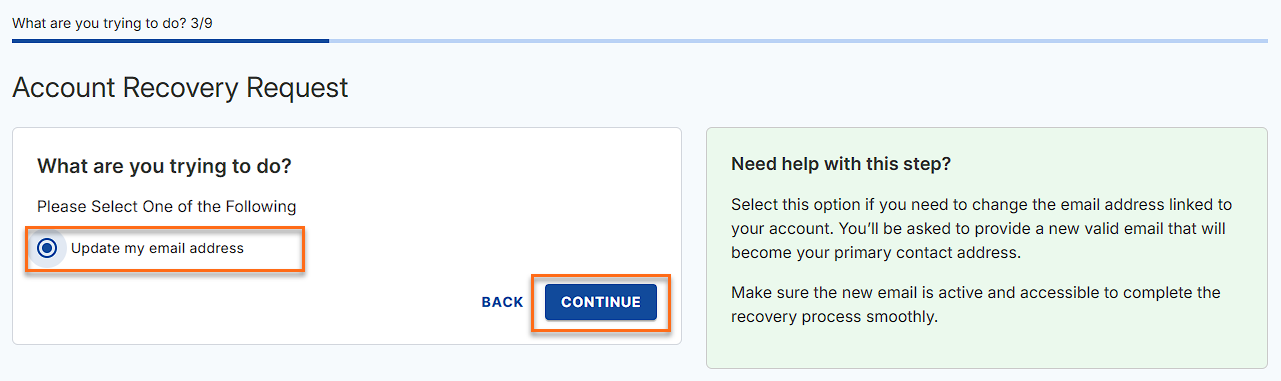
- Enter your User ID and click Continue.
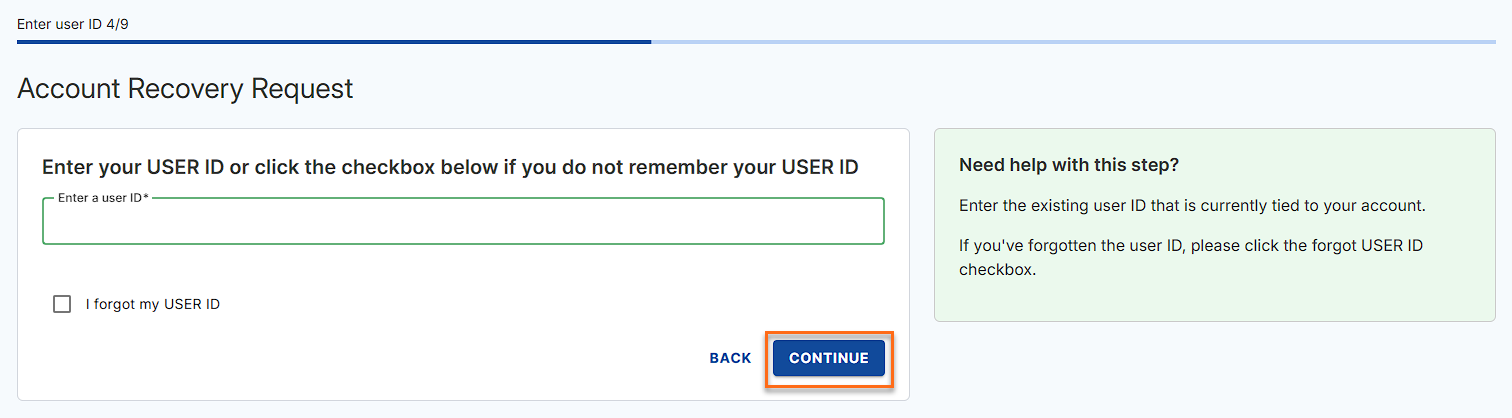
If you forgot your User ID, check the I forgot my User ID and click Continue.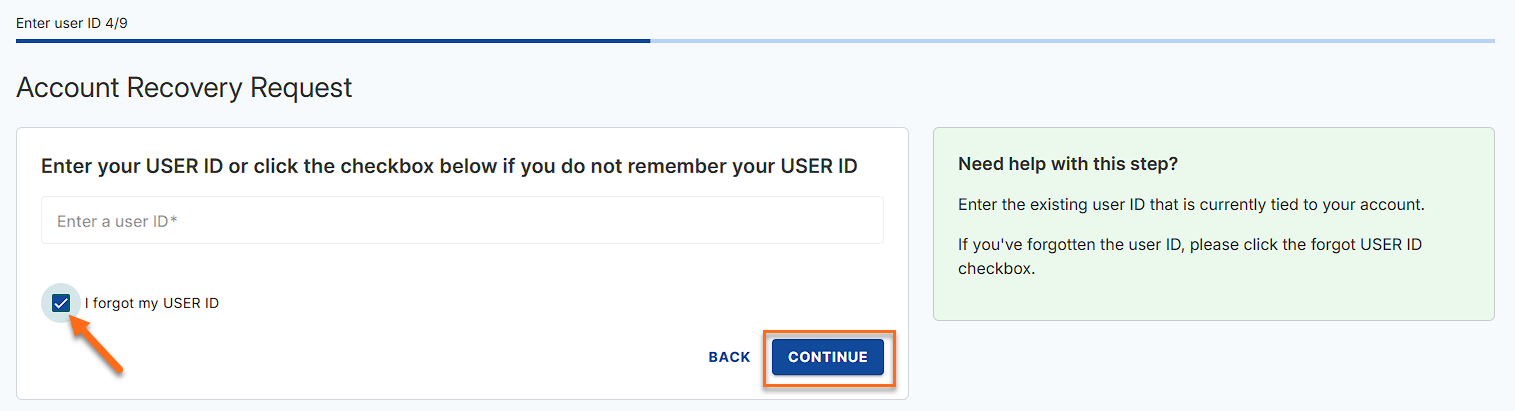
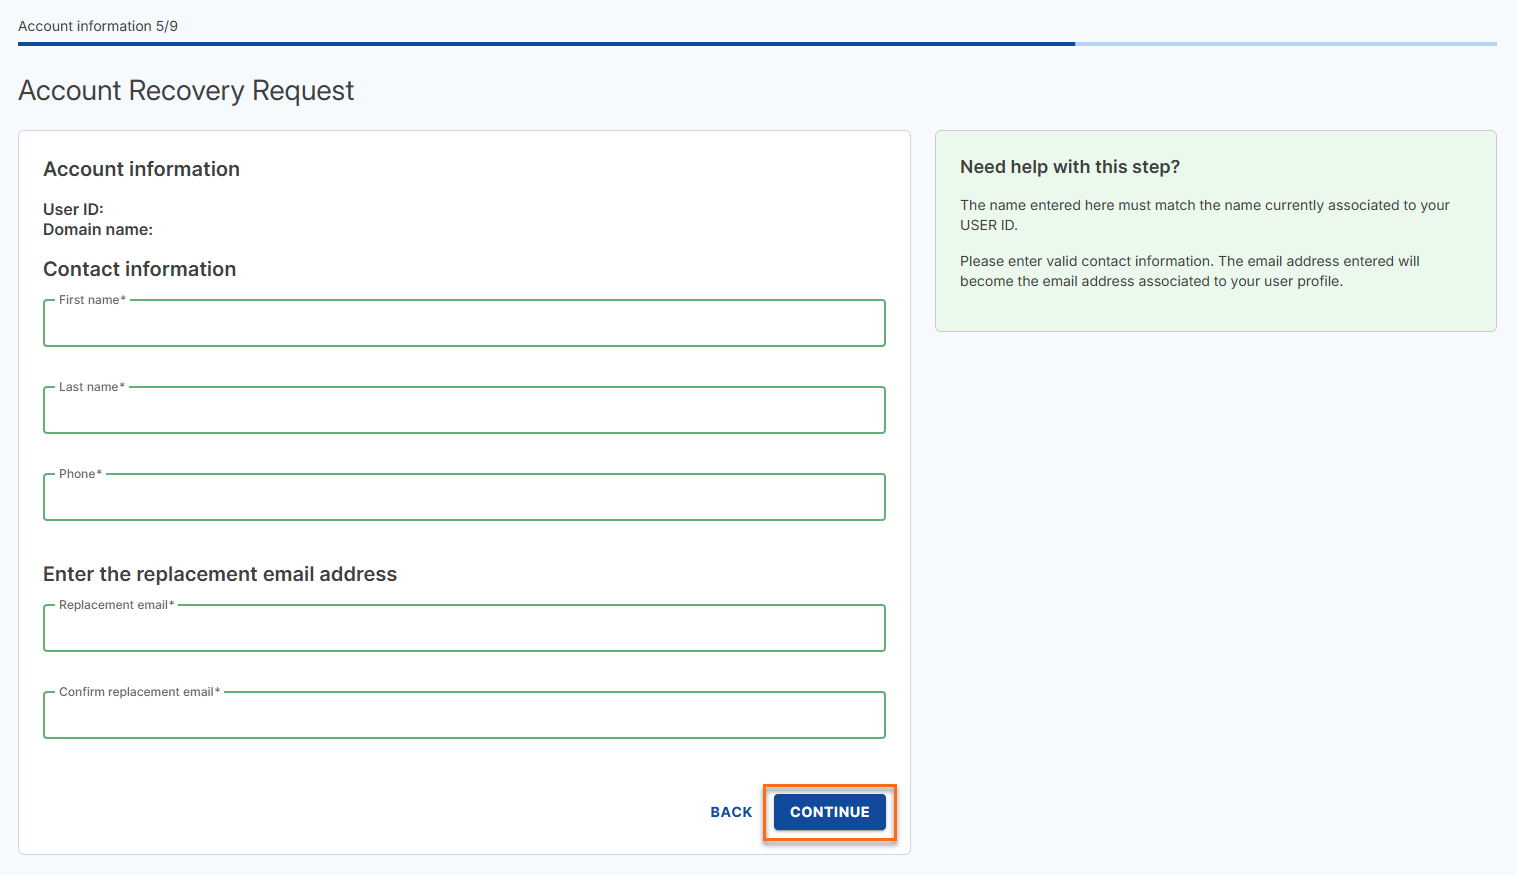
- Fill in the contact information and the email address for replacement and click Continue.
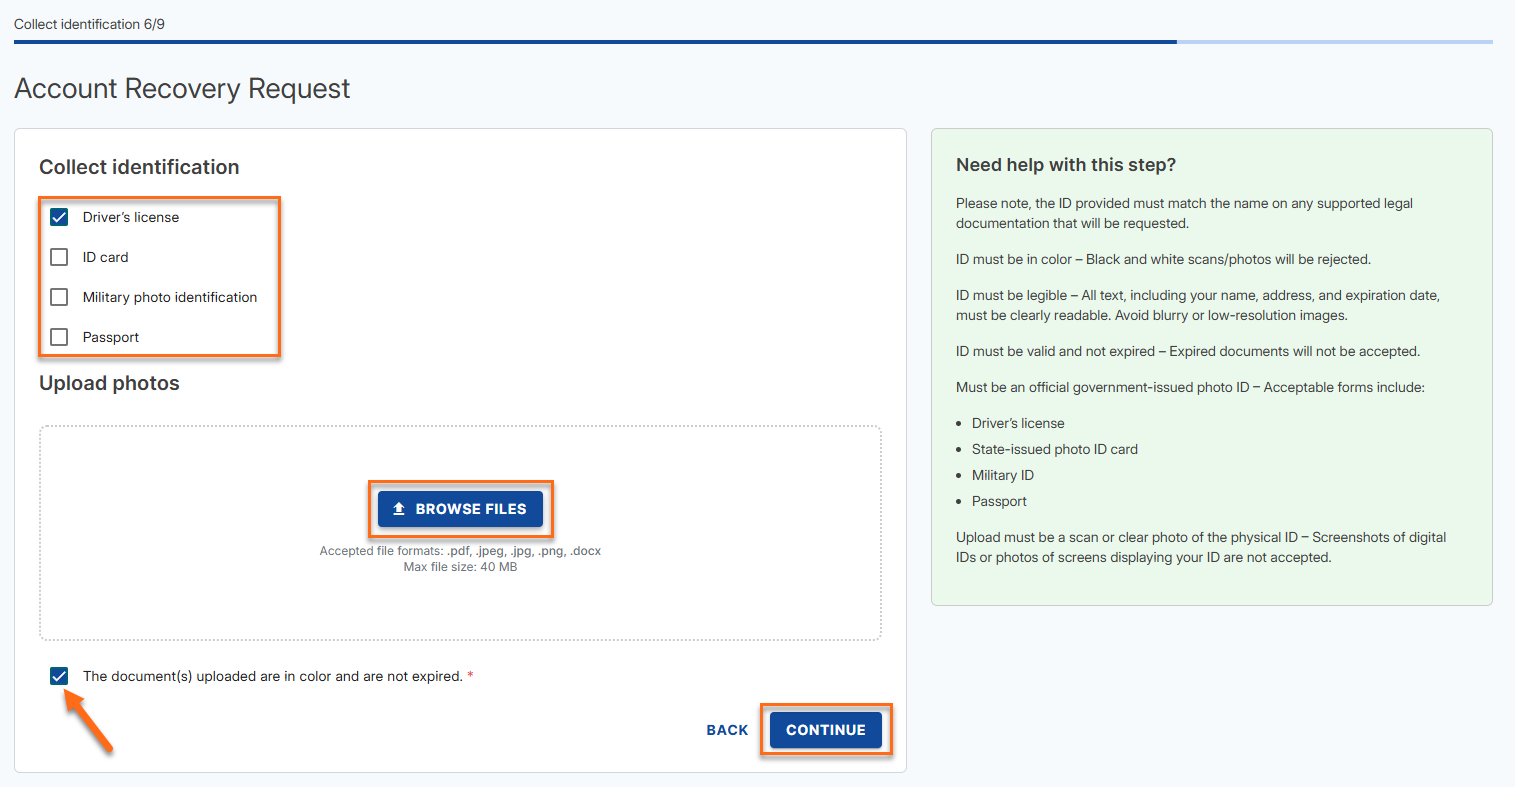
- Select the Government ID that you will upload and click Browse Files to upload your Government ID. Check the box that says The document(s) uploaded are in color and are not expired, then click Continue.
- Select the additional documents you will upload and click Browse Files to upload your documents. Check the box that says The document(s) uploaded match the organization’s name, address, and are valid, then click Continue.

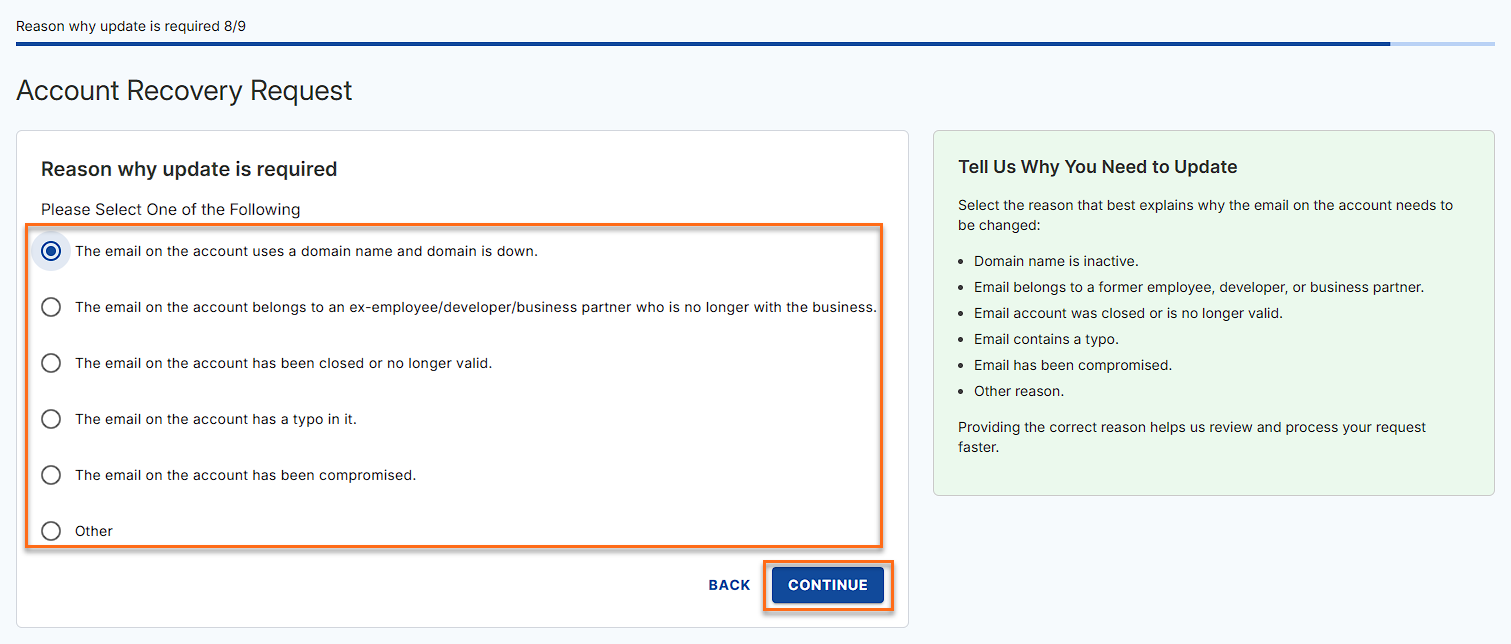
- Select the reason for the update and click Continue.
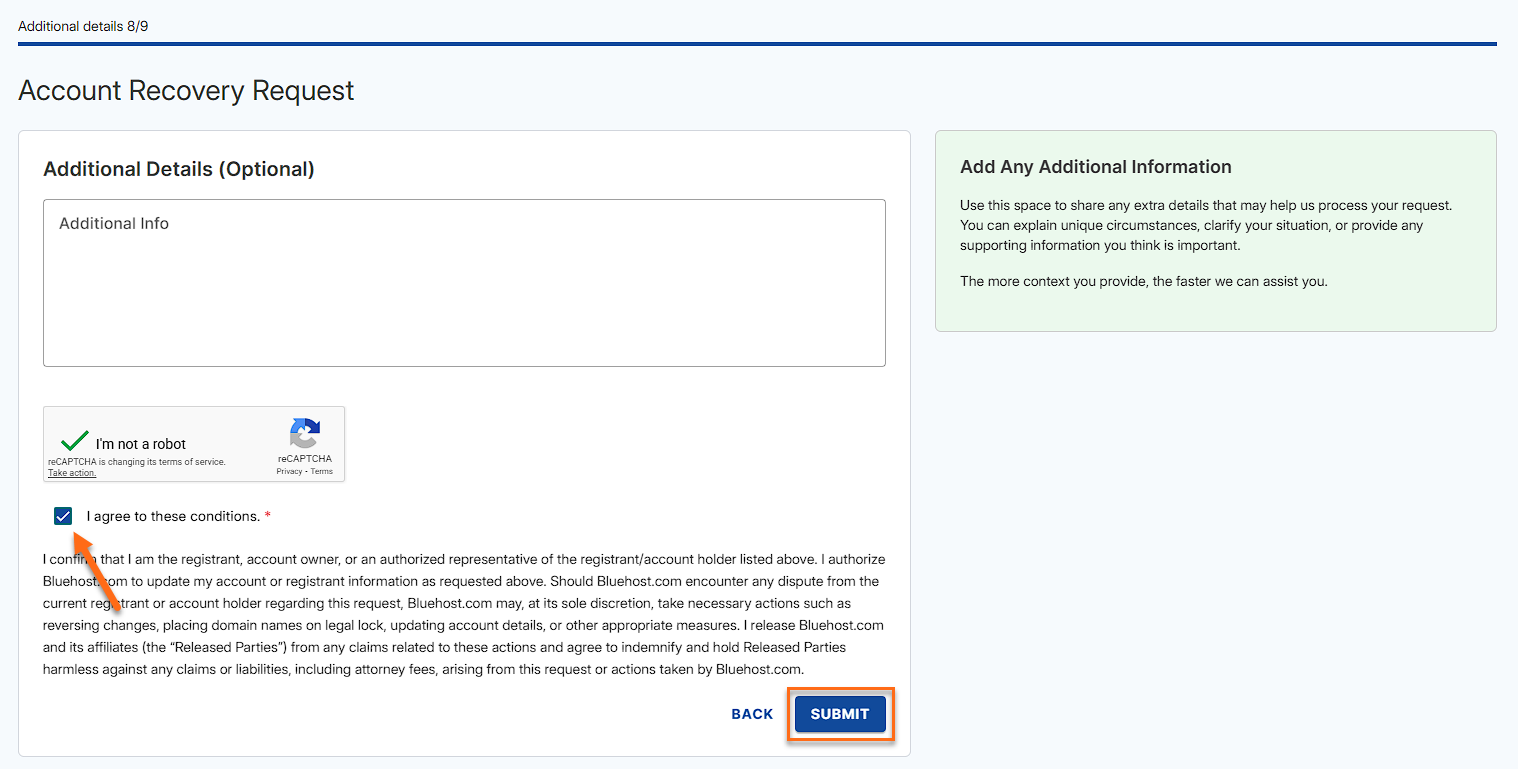
- Provide any additional information, check the I agree to these conditions, and click Submit.
- Lastly, you should see the Request Confirmation page with your ticket number on it.
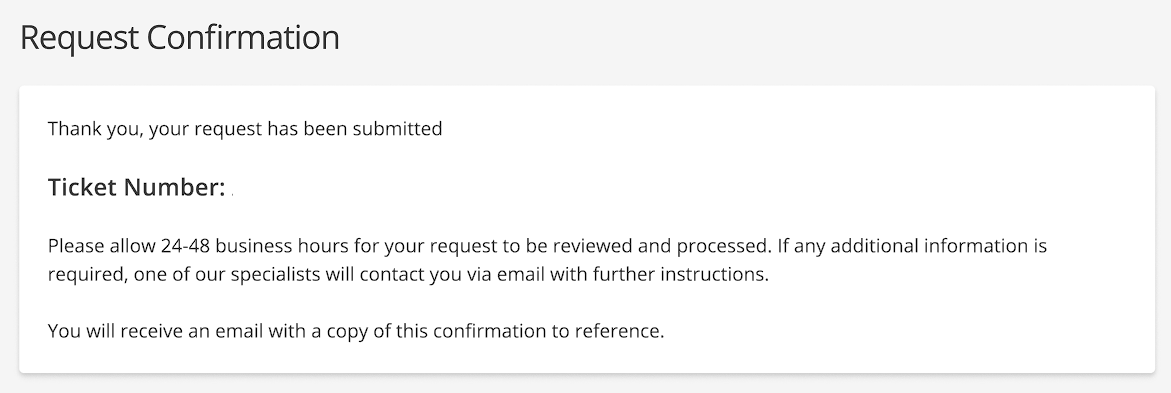
Please take note of your ticket number for your reference.
Related Articles
Did you find this article helpful?