How to Use Google Sites With Google Workspace
Google Sites lets you and your team build simple websites without writing any code, and it comes with your Google Workspace plan from HostGator. Teams use it for project hubs, internal portals, onboarding pages, and knowledge bases.
Embed Docs, Sheets, and Slides in your pages, and they'll show the latest version of each file to visitors who have permission to view it. In this guide, you'll open Google Sites from your Customer Portal, then build, style, share, and publish your first site.
What Is Google Sites?
Google Sites is a drag-and-drop website builder inside Google Workspace. You place content on a page, and Sites adjusts the layout for computers, tablets, and phones. Your sites sit in Google Drive beside your other files. Edits save automatically, yet the public sees nothing until you publish.
These are the most popular ways to put it to work:
| Goal | What You Might Build |
|---|---|
| Company intranet | A single home page that gathers news, policies, contacts, and resources |
| Project hub | Schedules, task trackers, shared files, and progress updates for one project |
| Onboarding and training | Orientation pages, training videos, checklists, and guides for new hires |
| Knowledge base | FAQs, reference documents, and how-tos grouped by topic |
| Basic public page | An event or information page that anyone with the link can open |
What You Need First
| Requirement | Details |
|---|---|
| A plan | An active Google Workspace plan from HostGator. If you don't have one, start with Google Workspace Setup Part 1 |
| A login | Your Workspace email address, such as [email protected], and its password |
| A device | A computer with a recent browser. Building happens on a computer, while anyone can view a published site on any device |
Open Google Sites
Either method below gets you into Google Sites.
From Your Customer Portal
- Log in to your Customer Portal.
- Click Email & Office in the left-side navigation menu.
- Optional: If multiple Google Workspace subscriptions are listed, click Manage for the plan you want to access.
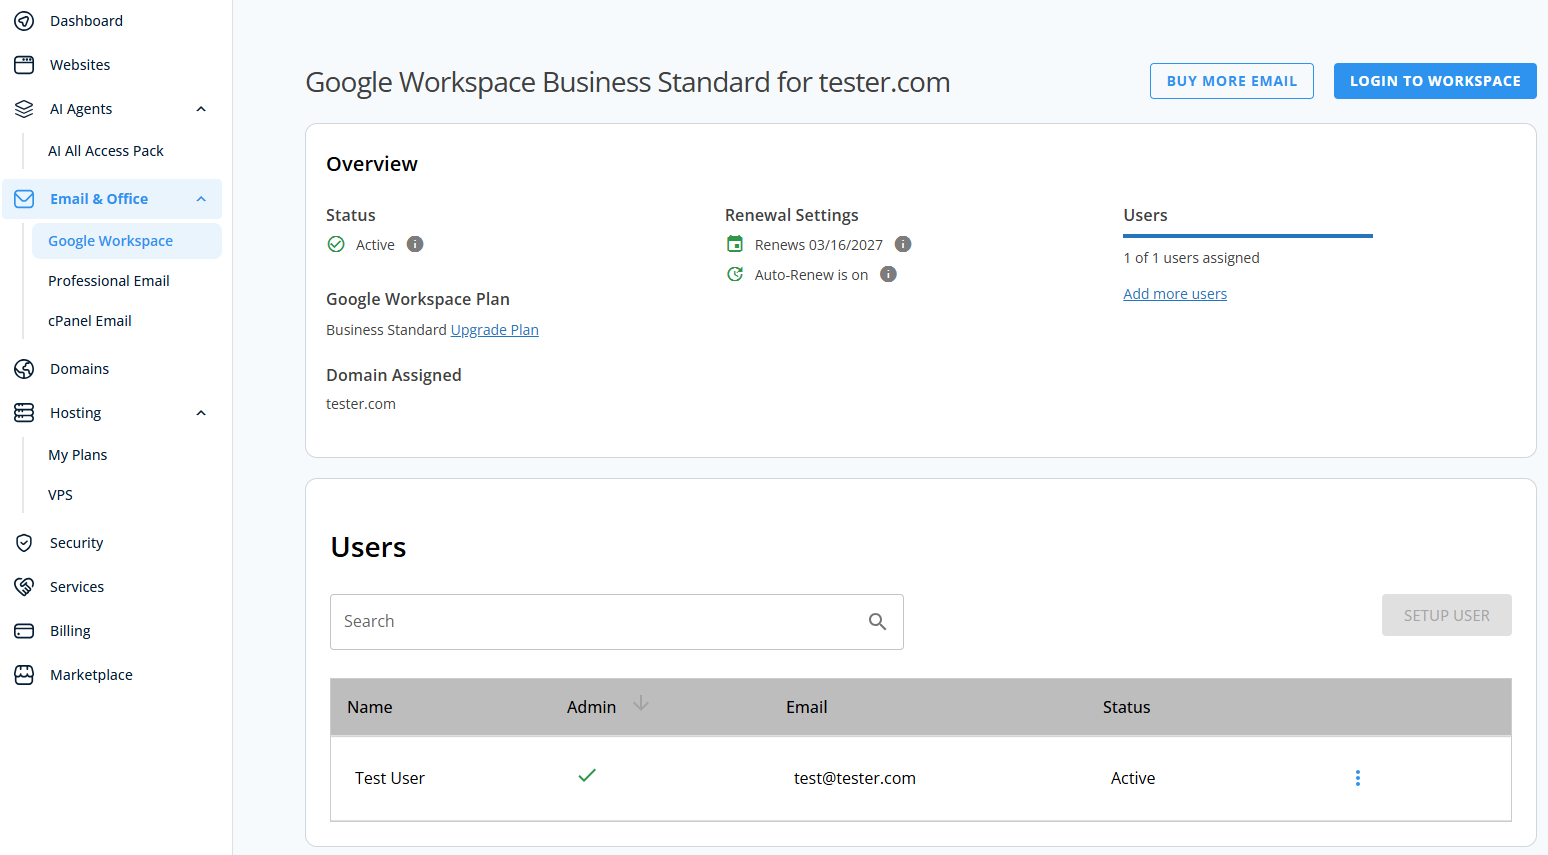
- You’ll be automatically redirected to the Email Management page, where you can manage your email settings and subscriptions.
- Click Log in to Workspace.
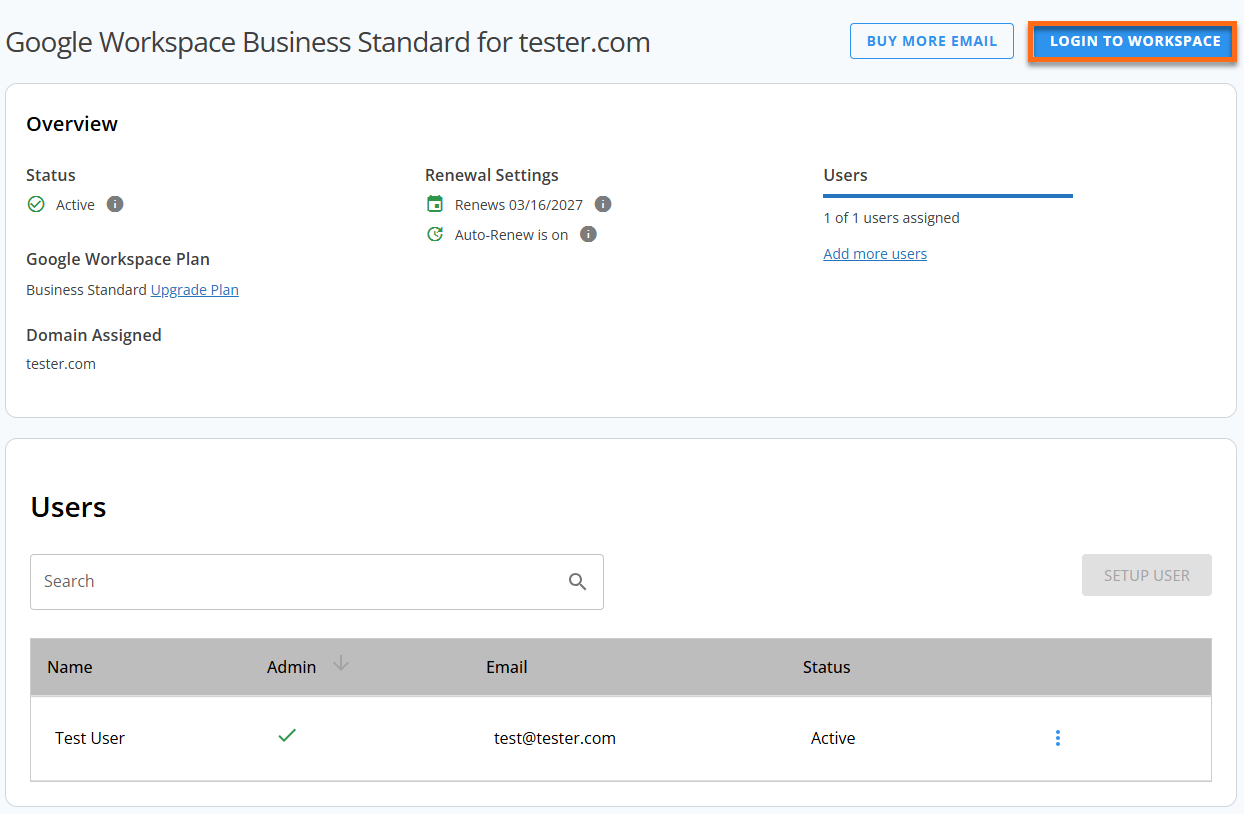
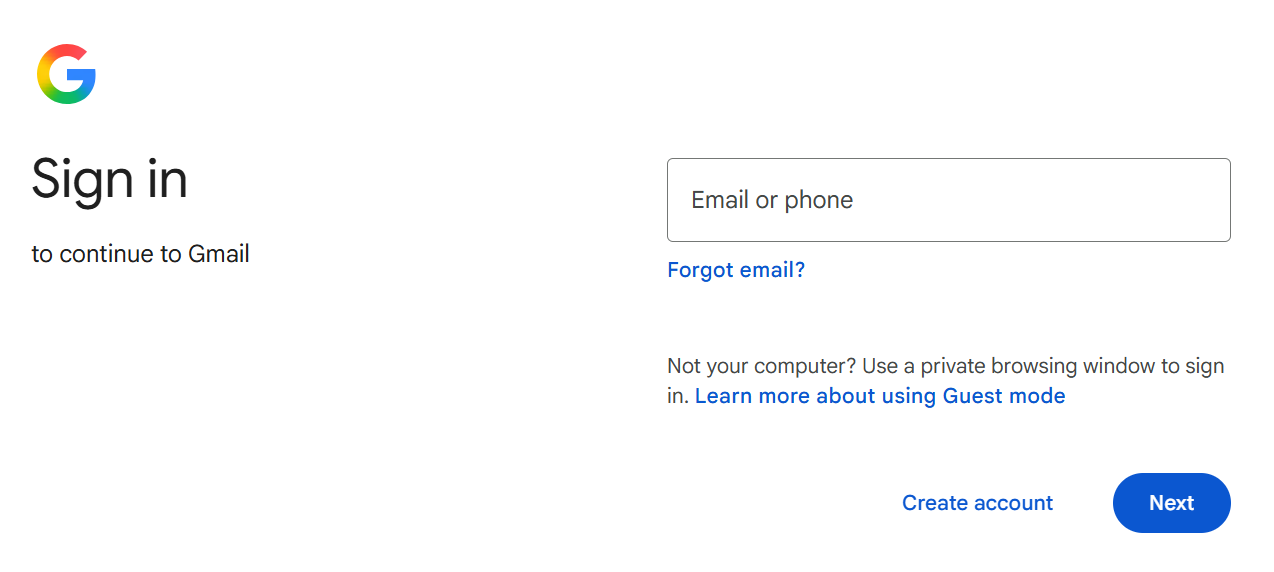
- Enter your Google Workspace email and password if Google asks for them.
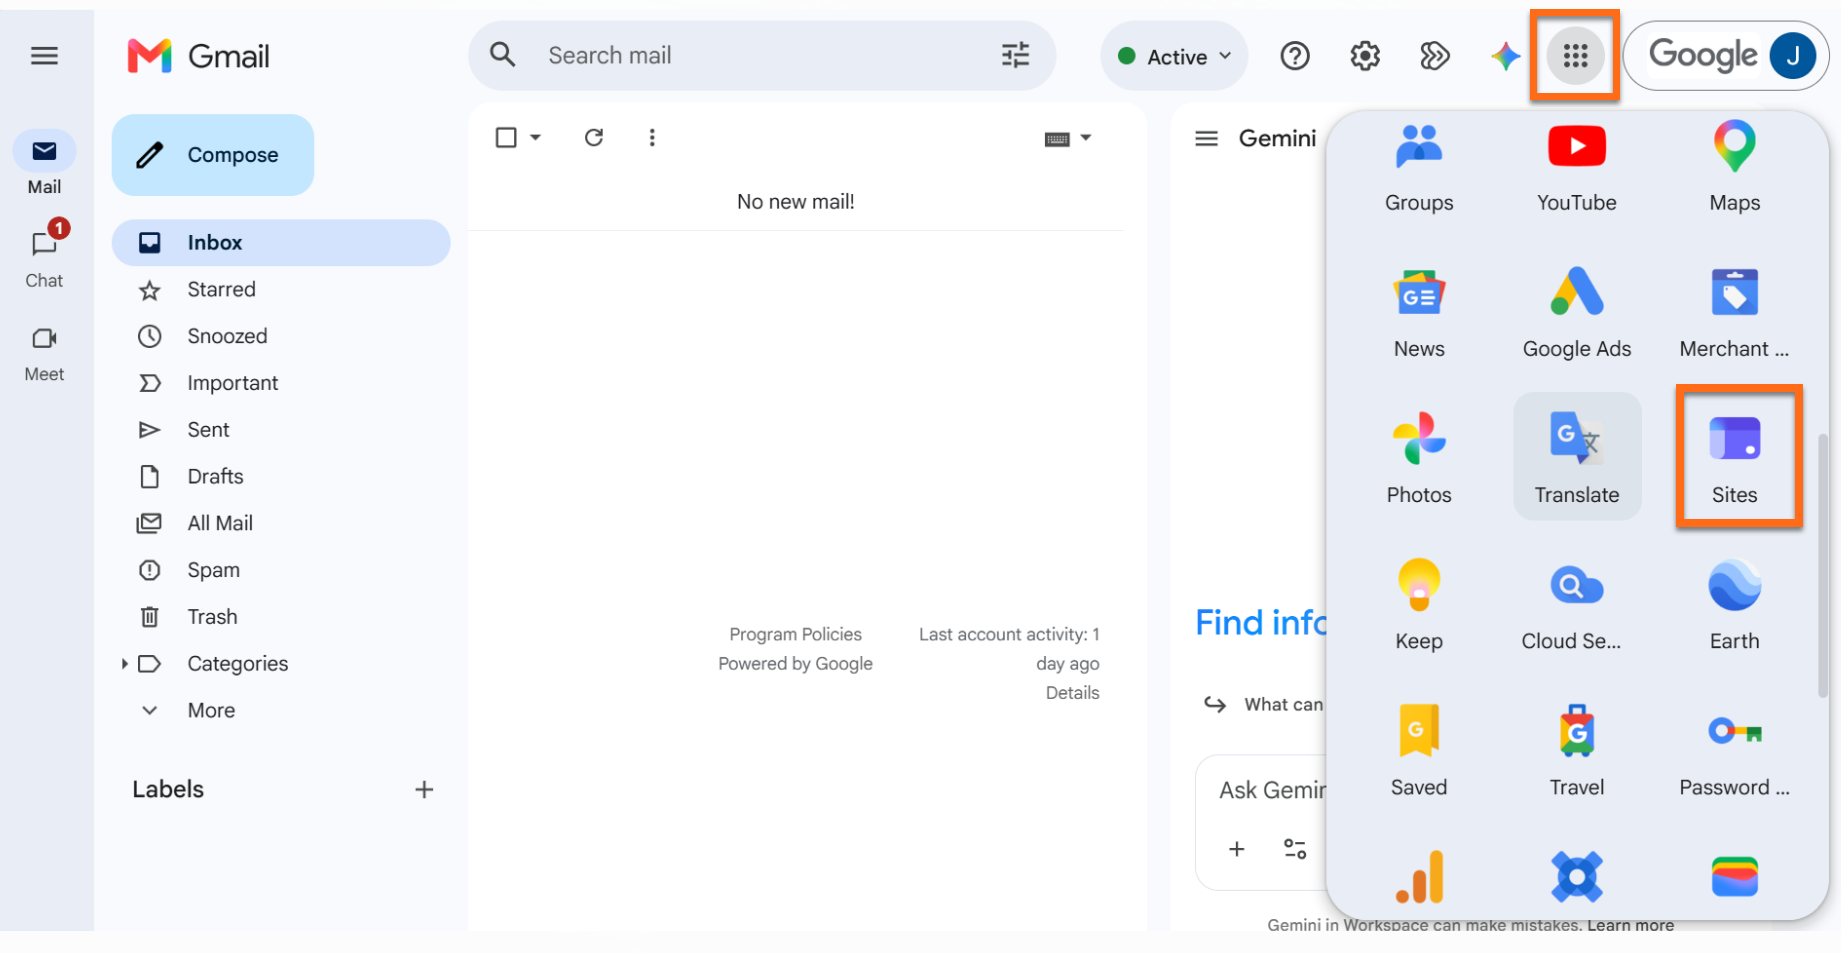
- In Gmail, open the Google apps icon (nine dots) at the top right and pick Sites. Scroll the panel if Sites isn't listed.
Go to Google Sites Directly
- Visit sites.google.com.
- Sign in with your business email address.
Create a New Site
- Go to Google Sites.
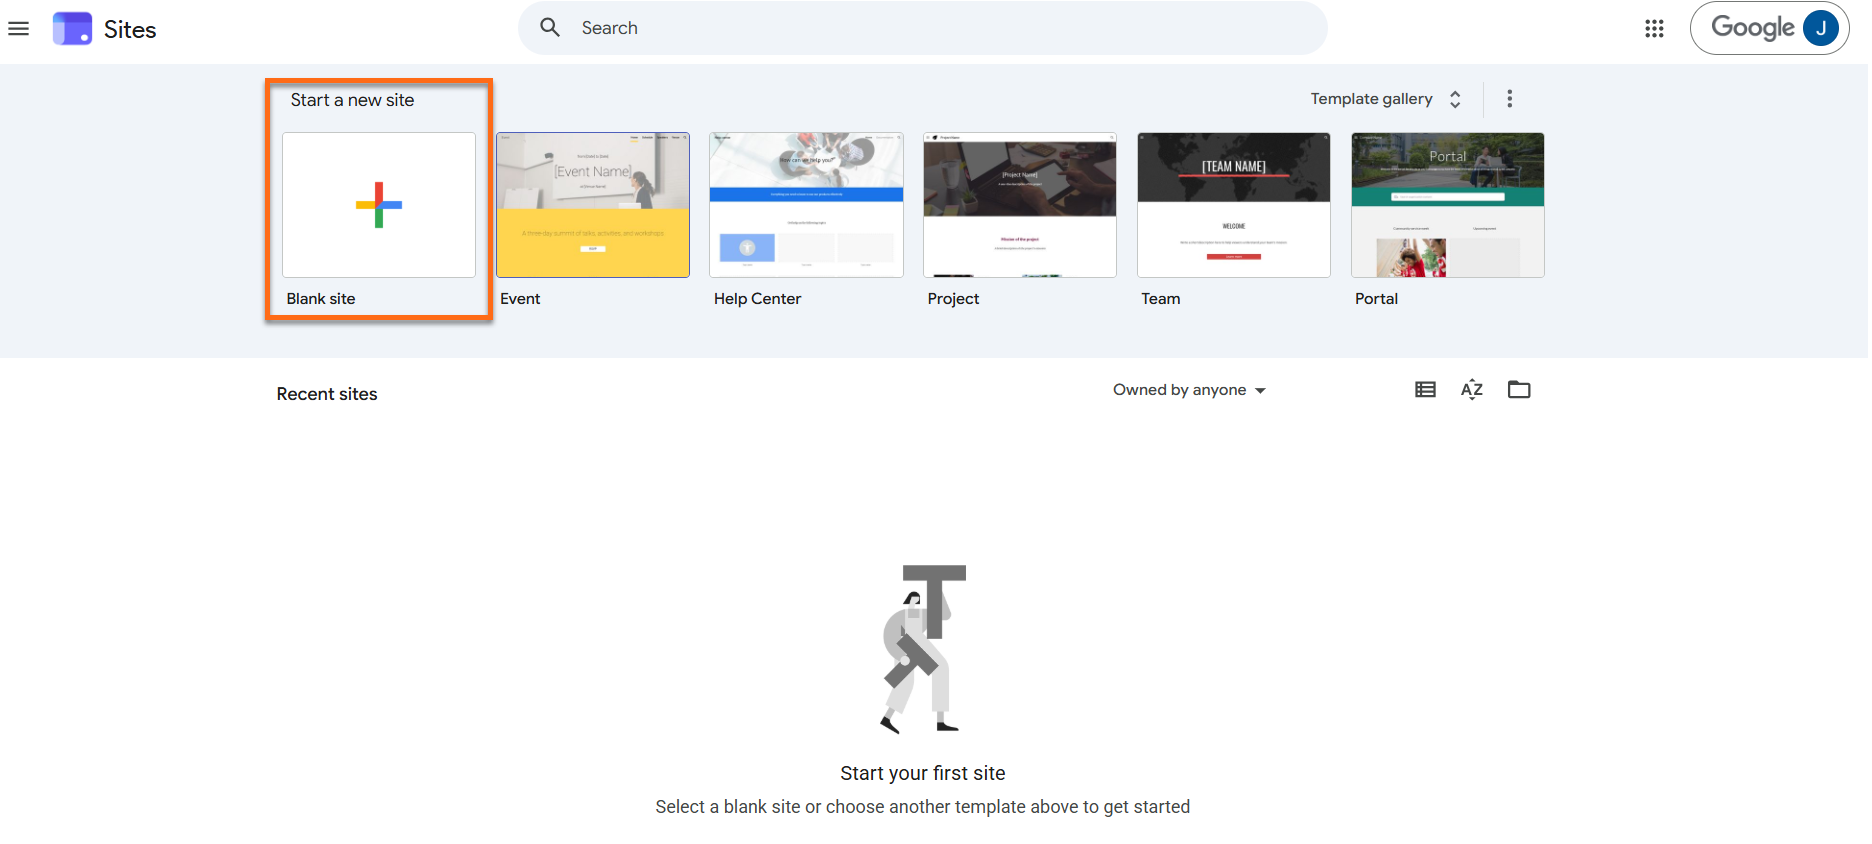
- Under Start a new site, pick Blank for an empty site, or Template gallery to start from a template.
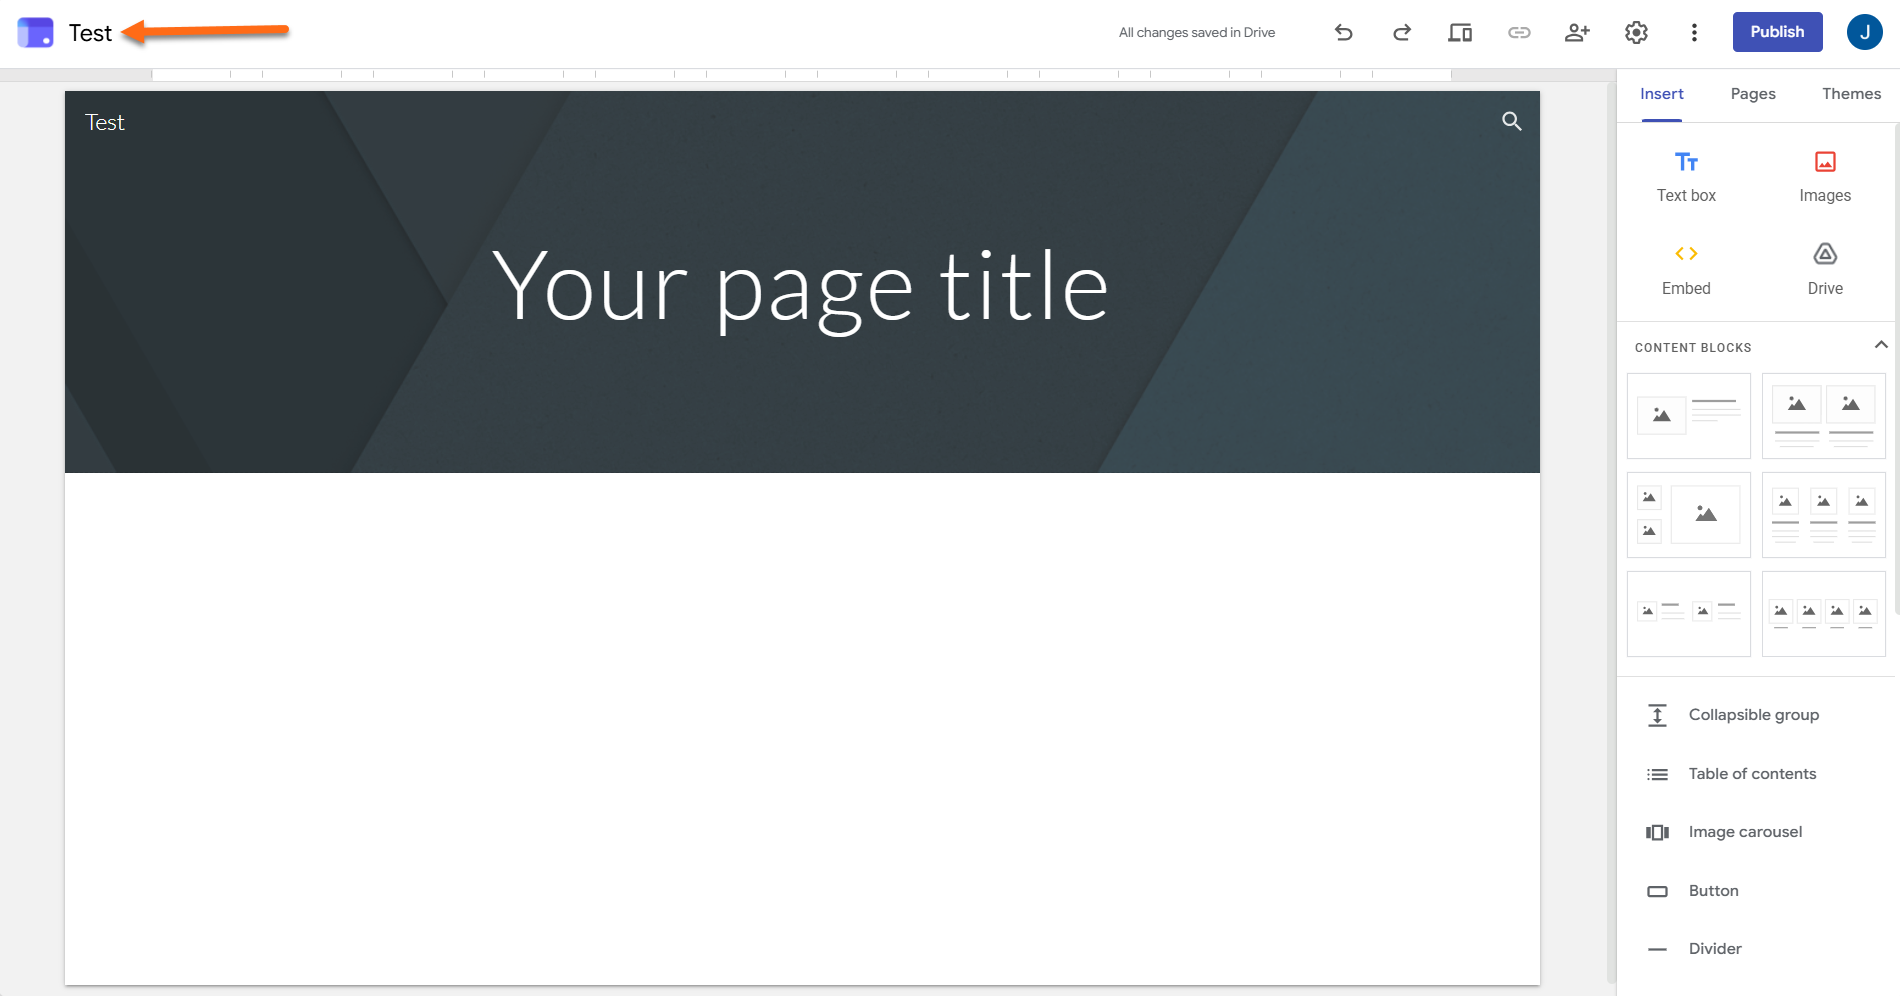
- Type a file name in the box at the upper left and press Enter.
- Click Enter site name in the header, type a title, and press Enter.
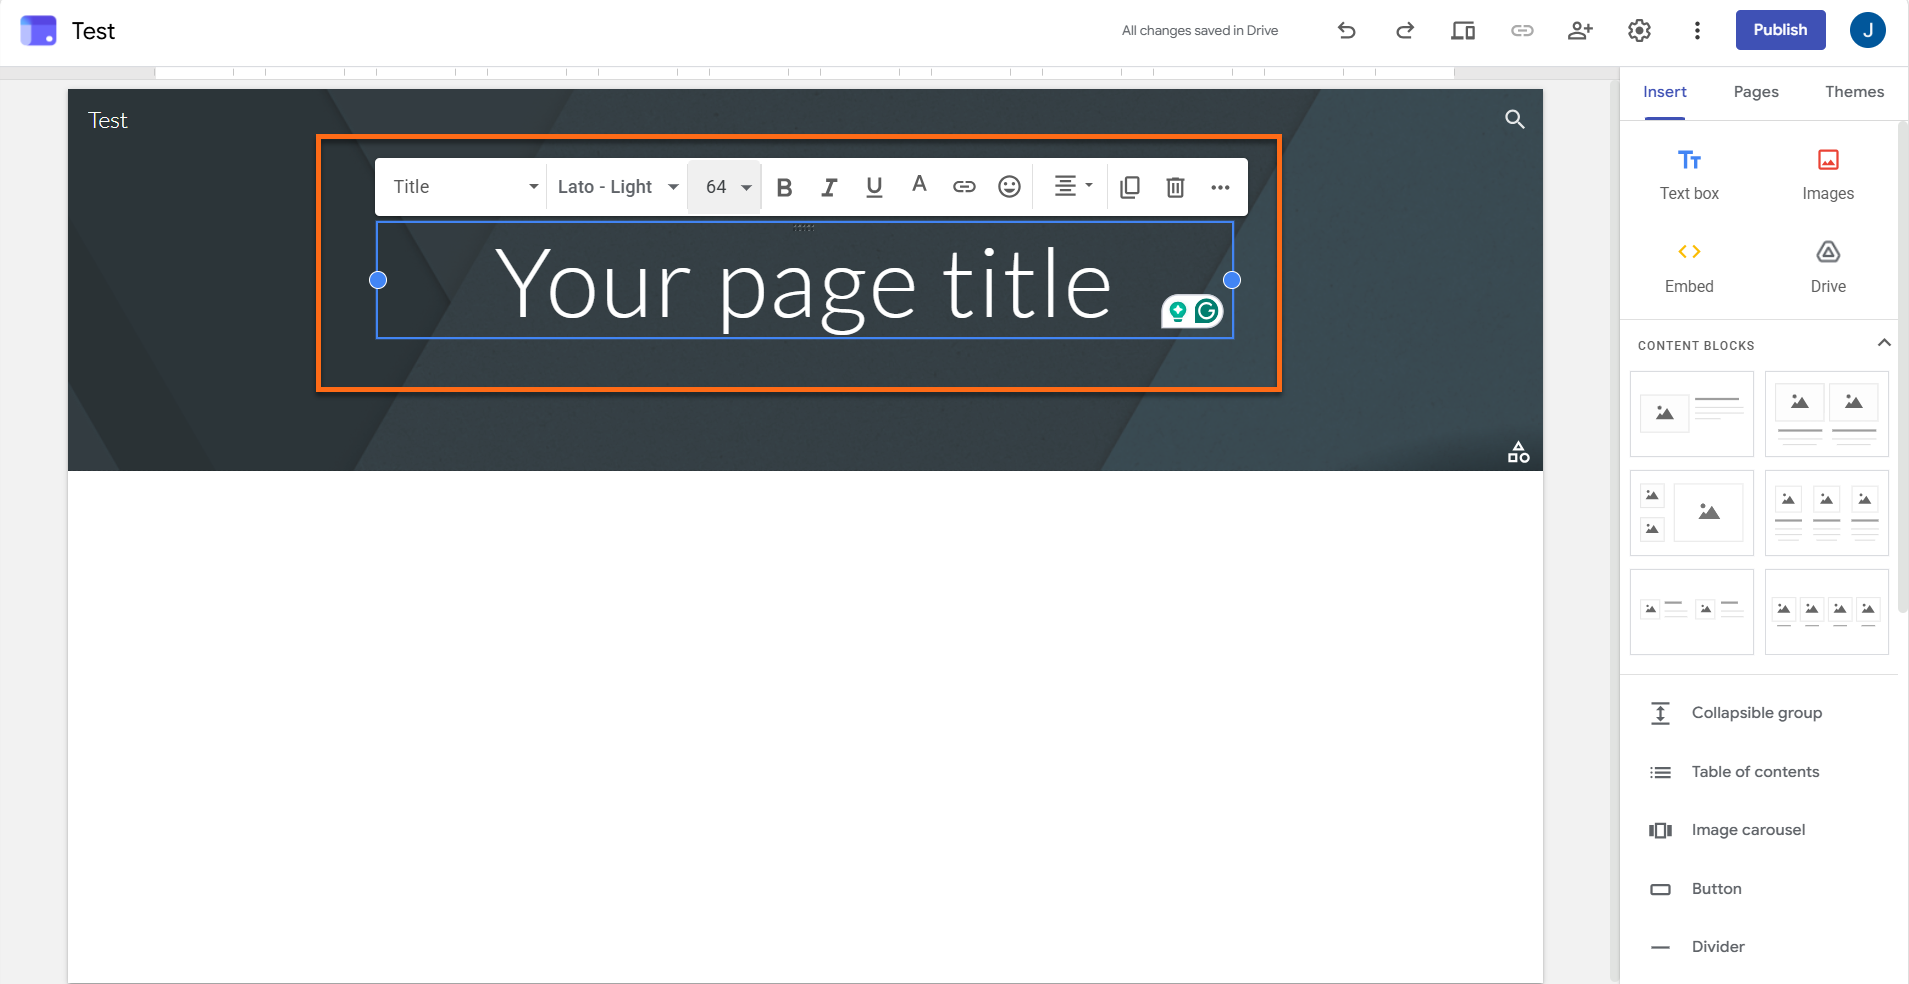
Every site carries three separate names. This table shows where each one appears:
| Name | Appears In | Visible To |
|---|---|---|
| Document name | The file list in Google Drive | You and your editors |
| Site title | The site header and the browser tab of your live site | Visitors, once the site has at least two pages |
| Page title | The banner across the top of each page | Visitors |
Build Your Site's Pages
The tasks below shape your site's structure.
Create a Page
- Open your site in Google Sites and click Pages in the right-hand panel.
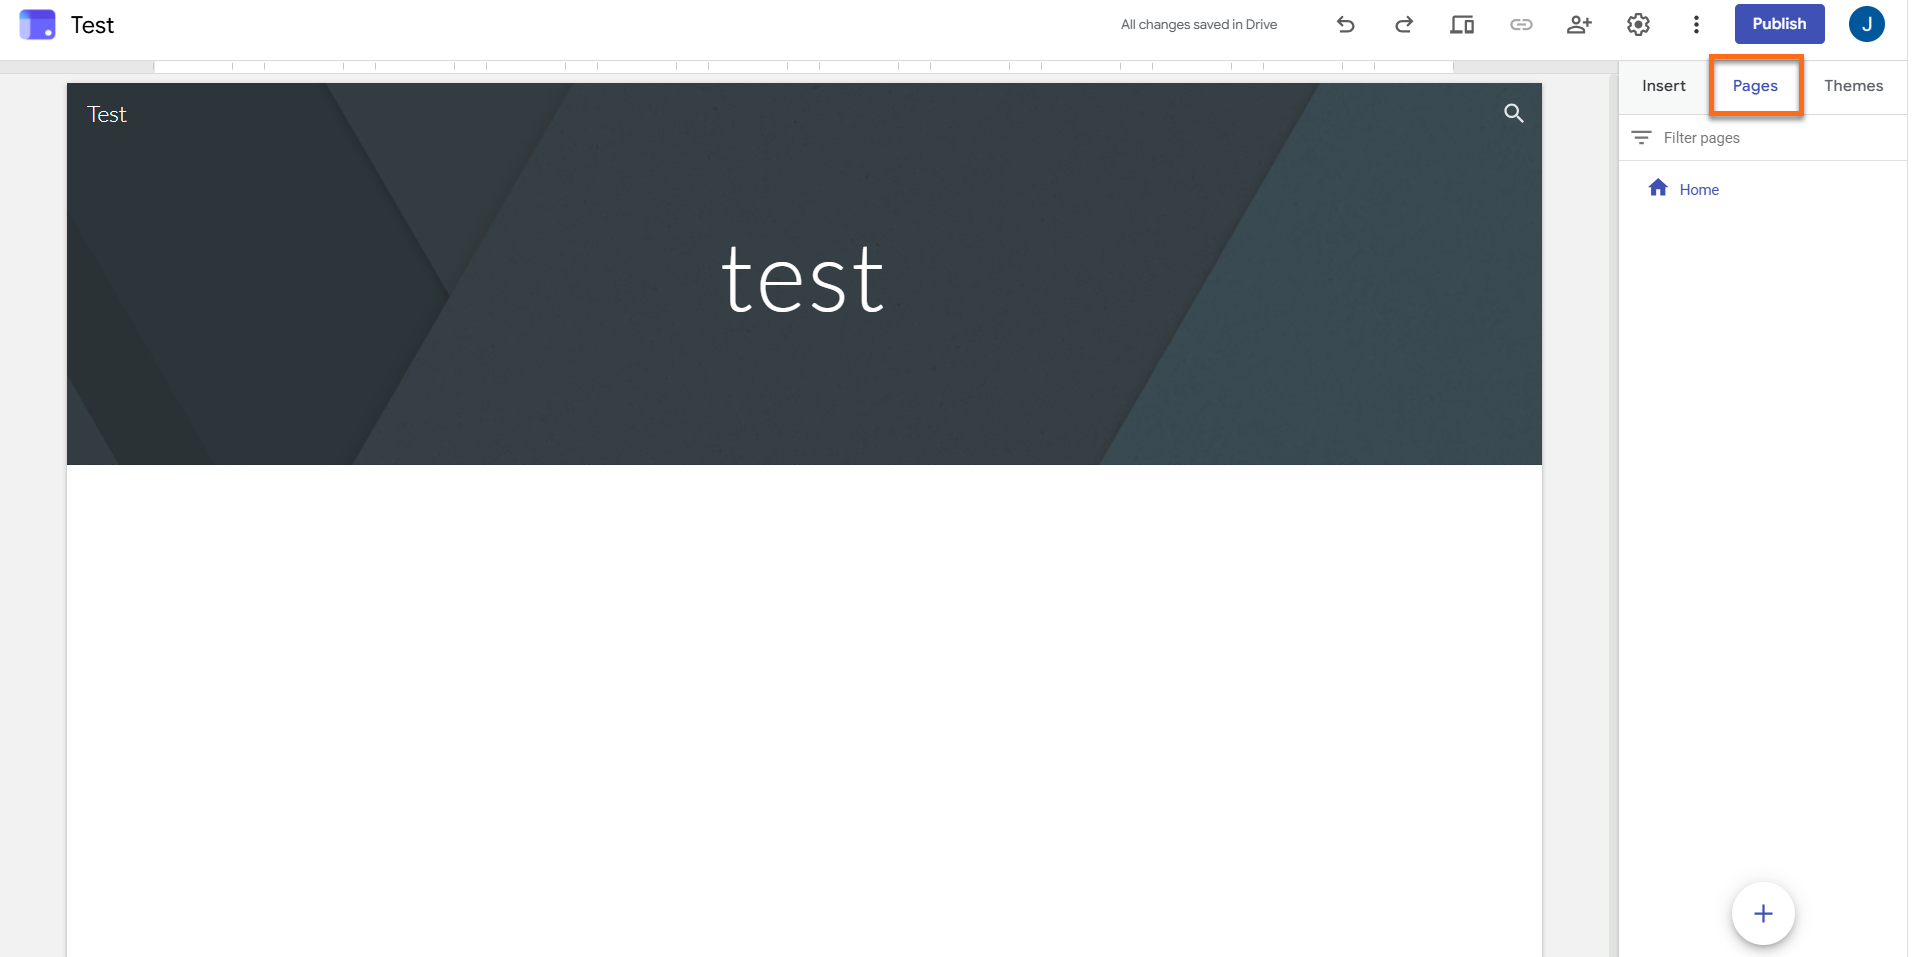
- Hover over Add (+) at the bottom right and choose New page.
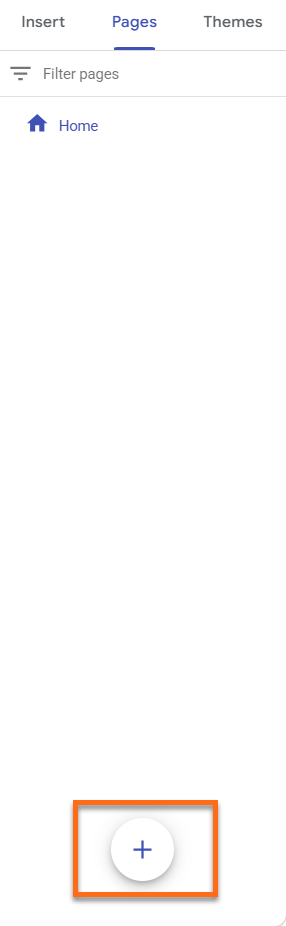
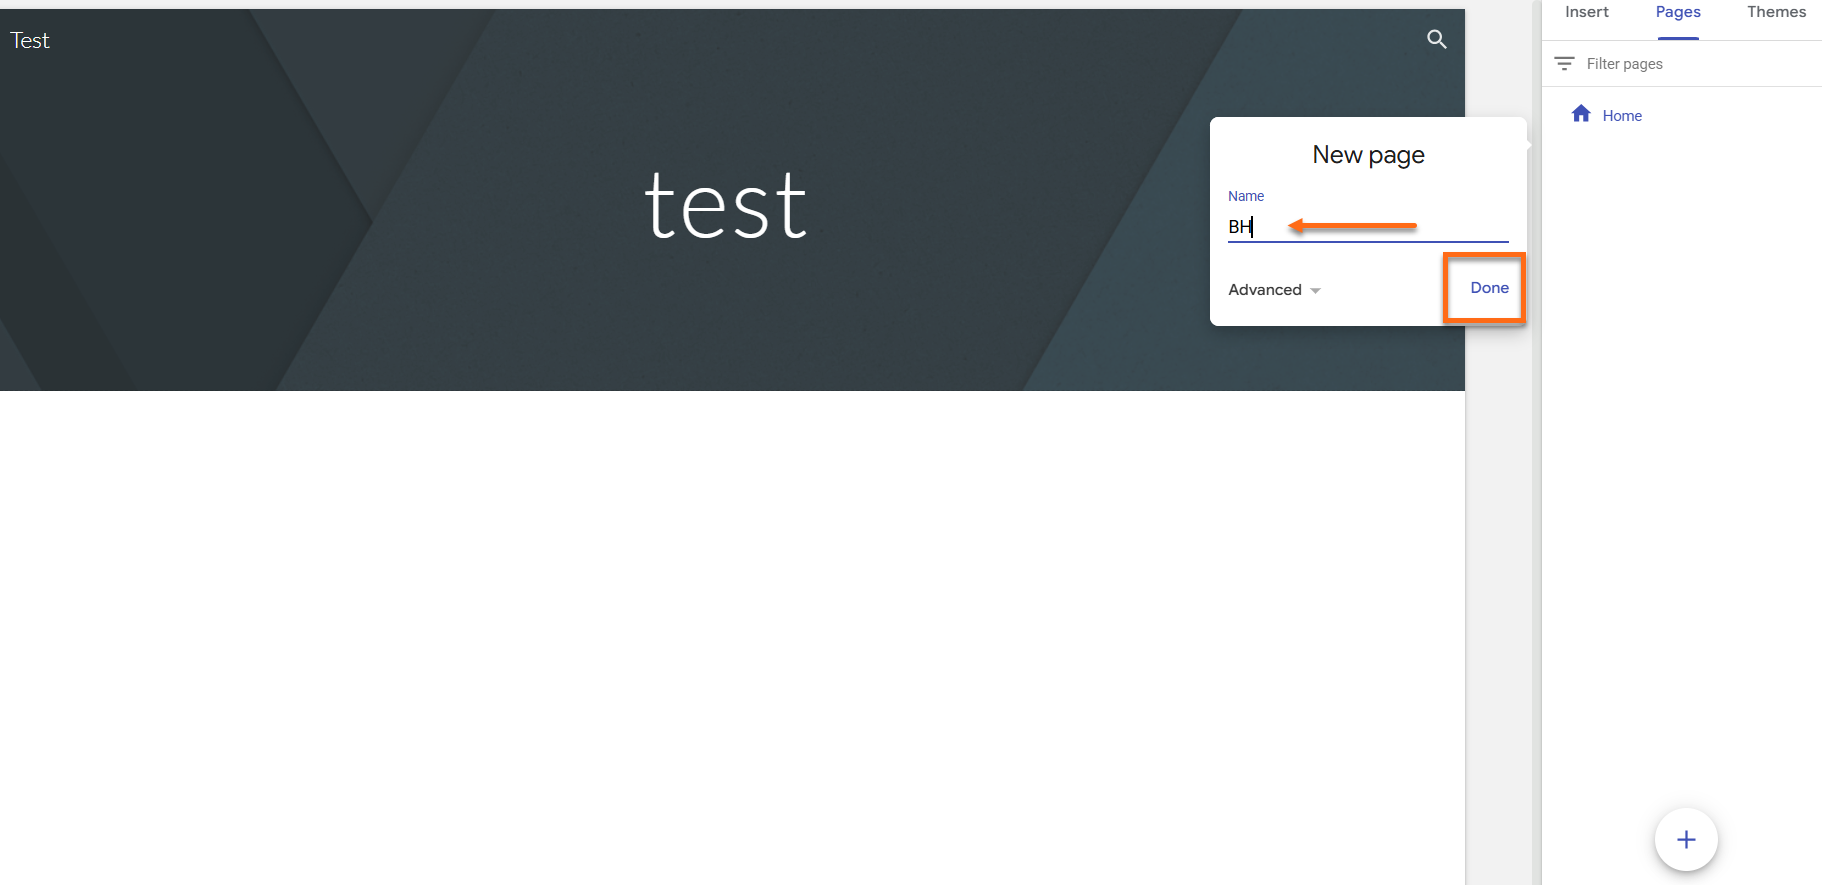
- Name the page, then click Done.
Nest a Subpage
- Under Pages, click the three-dot icon beside the parent page and choose Add subpage.
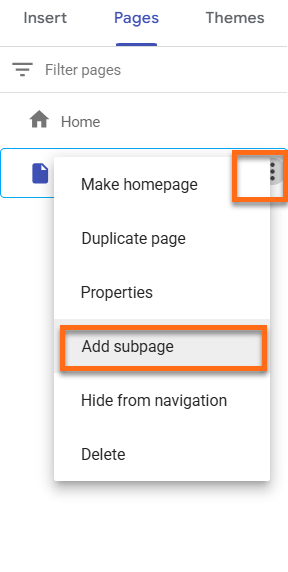
- Name the subpage, then click Done.
Subpages nest up to five levels deep. To rearrange your site, open Pages and drag a page to a new position.
Copy or Remove a Page
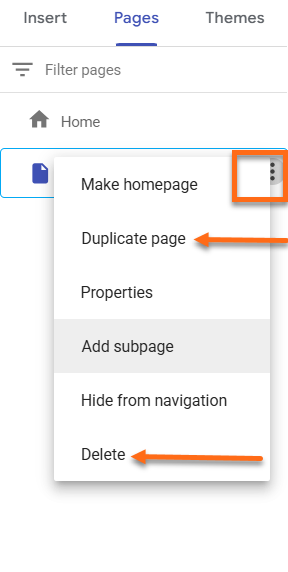
- Under Pages, click the three-dot icon beside the page.
- Choose Duplicate page to make a copy, or Delete to remove it.
Put Content on Your Pages
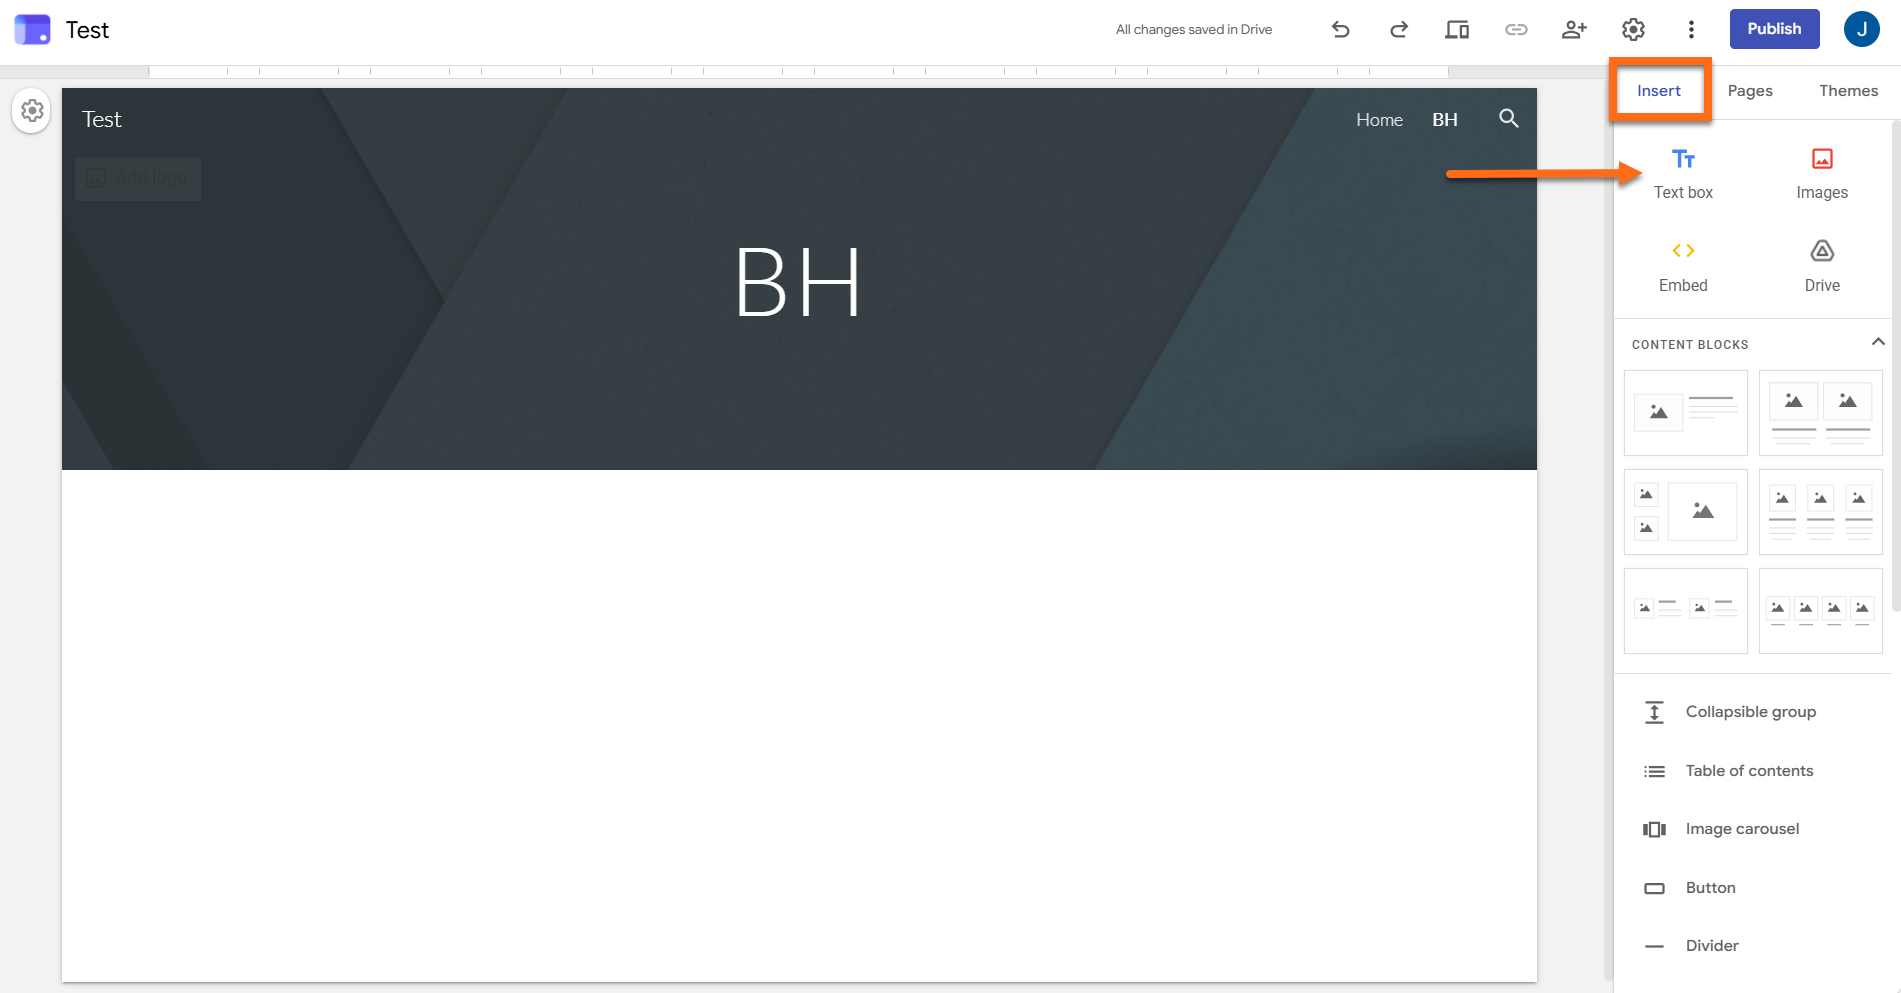
The Insert tab holds everything you can place on a page. This table maps content to menu items:
| To Add | Look Under | Good to Know |
|---|---|---|
| Text and headings | Text box | The toolbar offers text, heading, and title styles |
| Pictures | Images | Accepts .png, .jpg, and .gif files |
| Section layouts | Content blocks | Drag a ready-made layout onto the page and fill it in |
| Google Workspace files | Docs, Slides, Sheets, Forms, Charts | Edits to the original file carry over to your site |
| Other elements | Collapsible text, Button, Image carousel, YouTube, Calendar, Map, and more | Collapsible text suits FAQs |
| Content from other websites | Embed | Paste a URL or embed code |
Insert Text or Headings
- Open Insert in the right-hand panel and choose Text box.
- Select a text, heading, or title style from the drop-down in the toolbar.
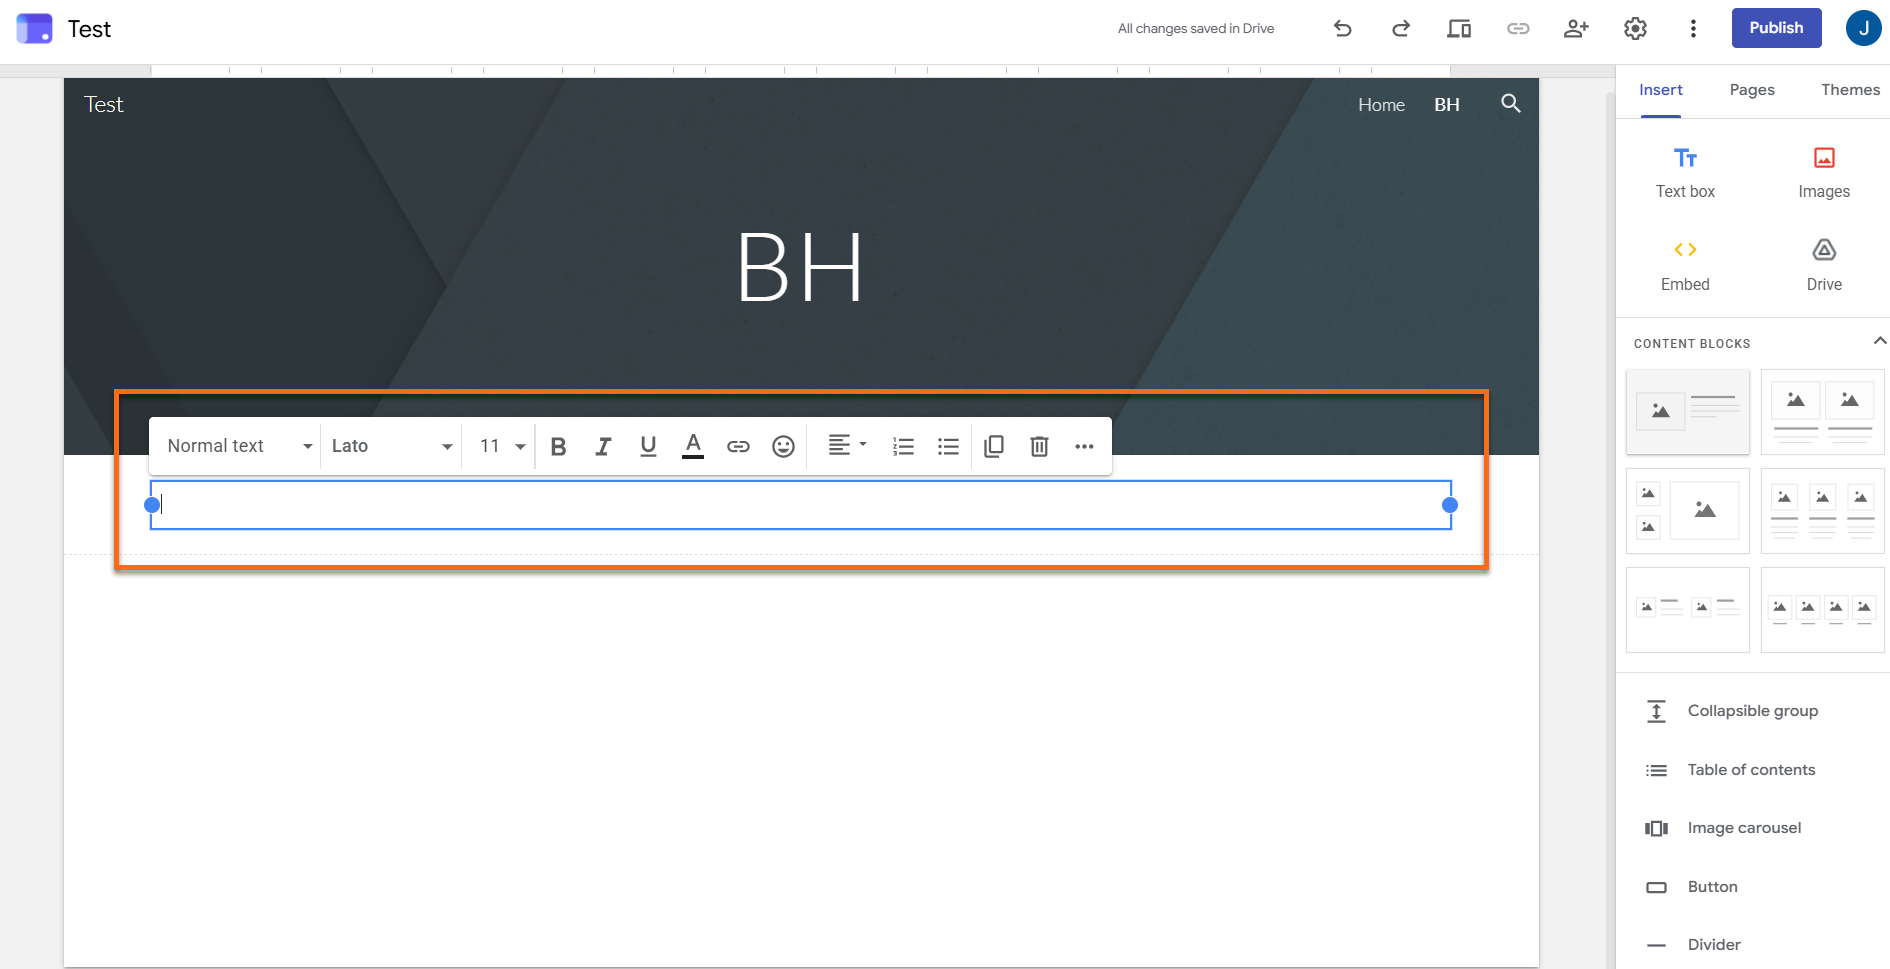
- Type your text into the box.
Insert a Picture
- Choose Insert > Images.
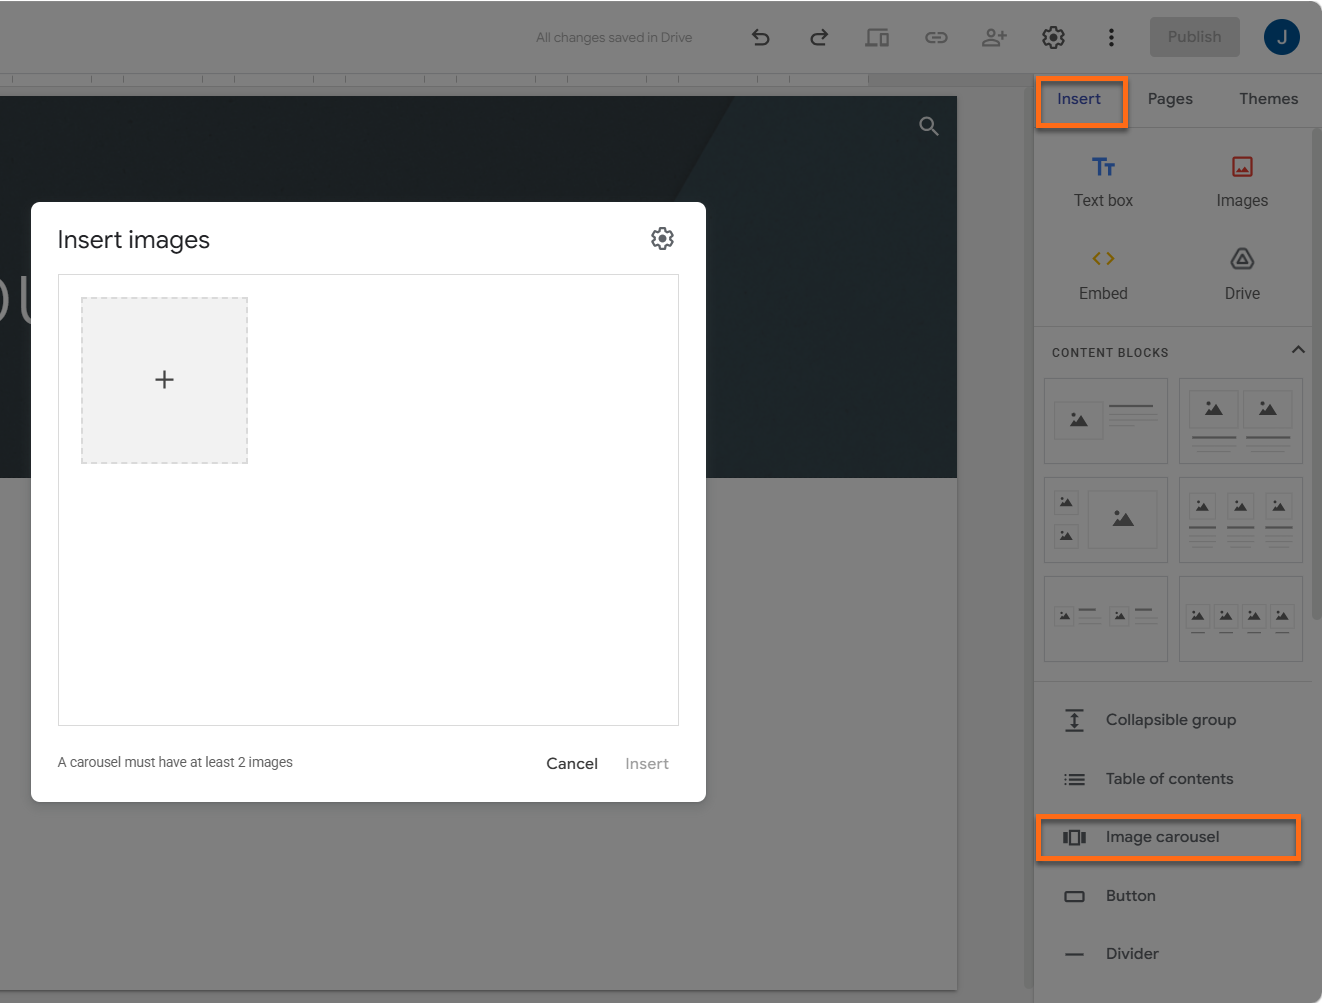
- Decide where the picture comes from, such as your computer or Google Drive, then select it and click Open or Select.
Drop In a Section Layout
- Open Insert and drag a layout from Content blocks onto your page.
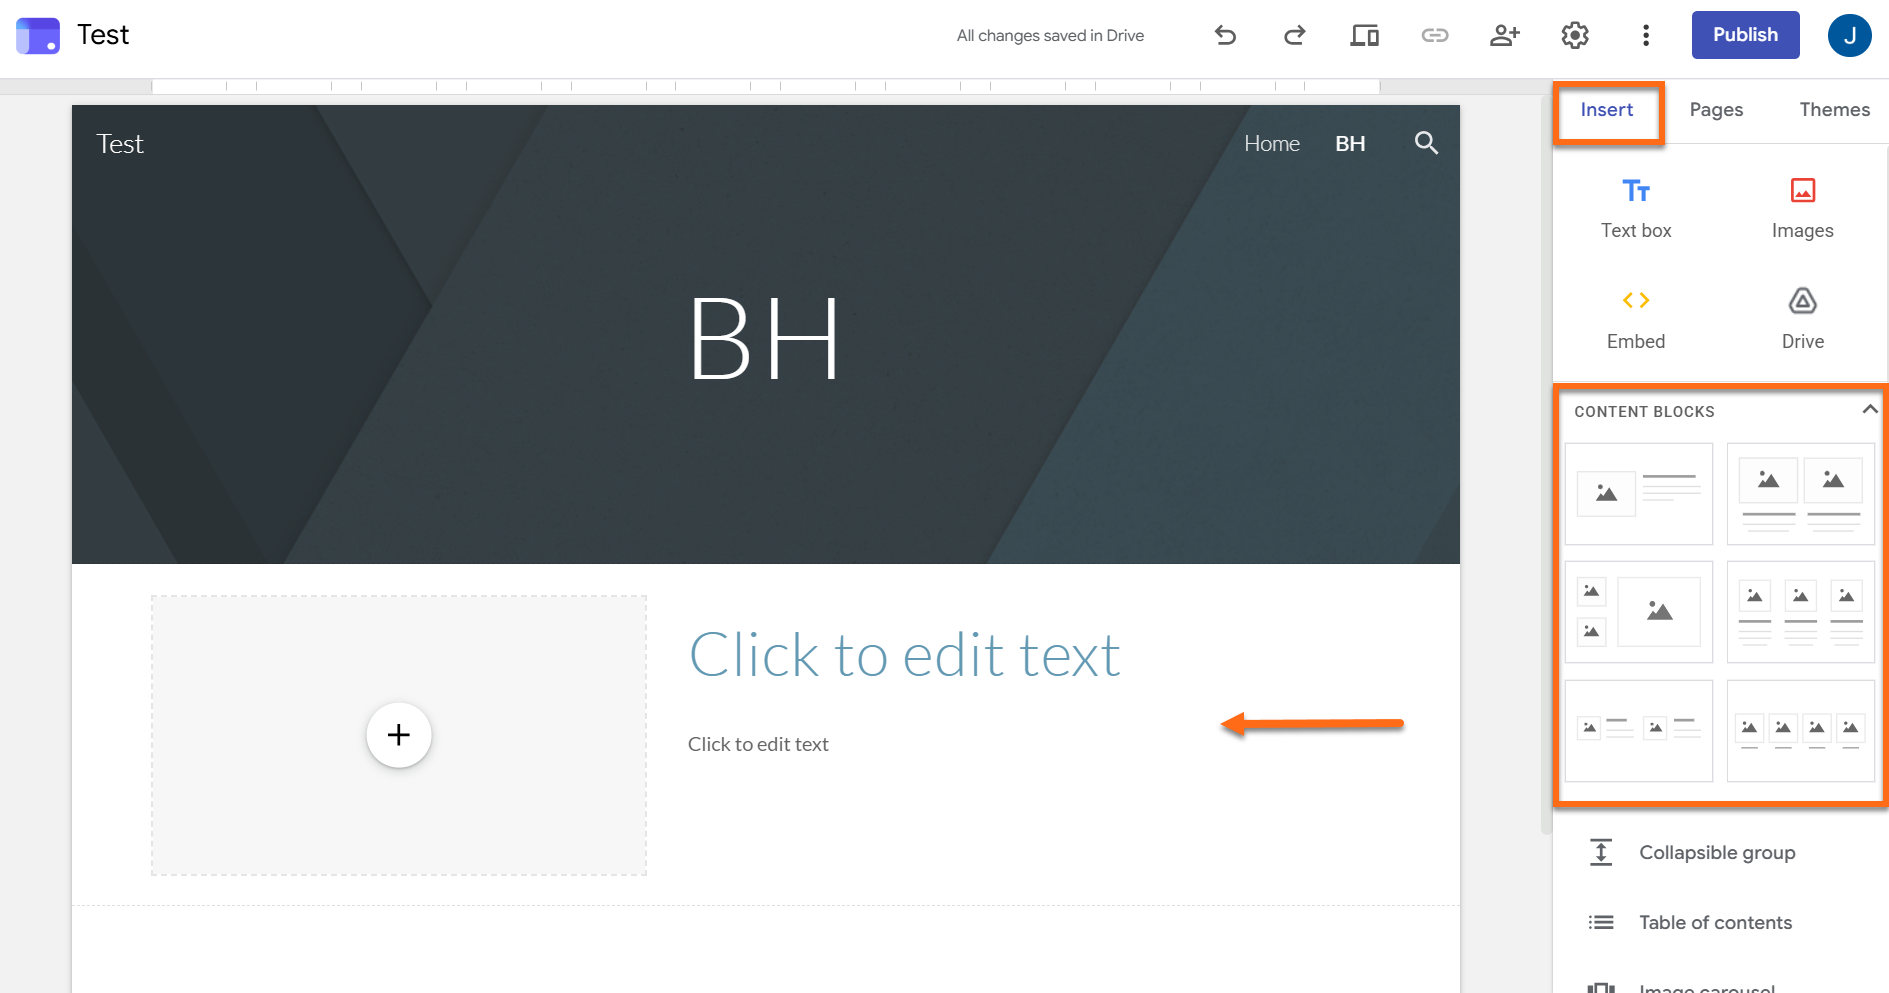
- Fill it with text, pictures, documents, or videos.
Embed Your Google Files
- Open Insert and scroll to Docs, Slides, Sheets, Forms, or Charts. Pick the type you need.
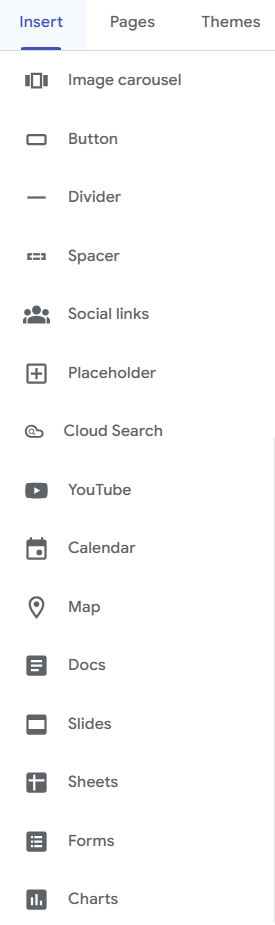
- Select your file and click Insert.
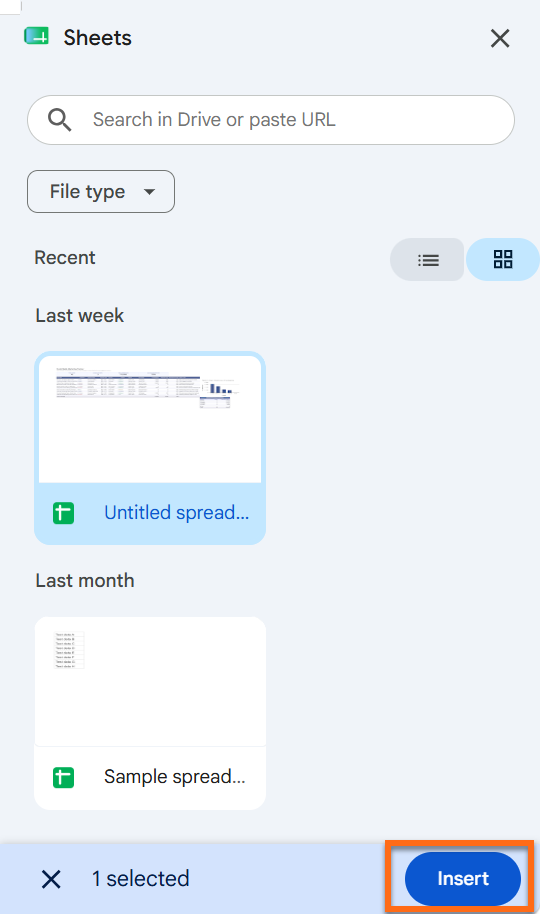
- Resize the file by dragging the blue handles around it.
Style Your Site
Dress up your site with one of Google's themes, or design your own.
Use a Ready-Made Theme
- Click Themes in the right-hand panel.
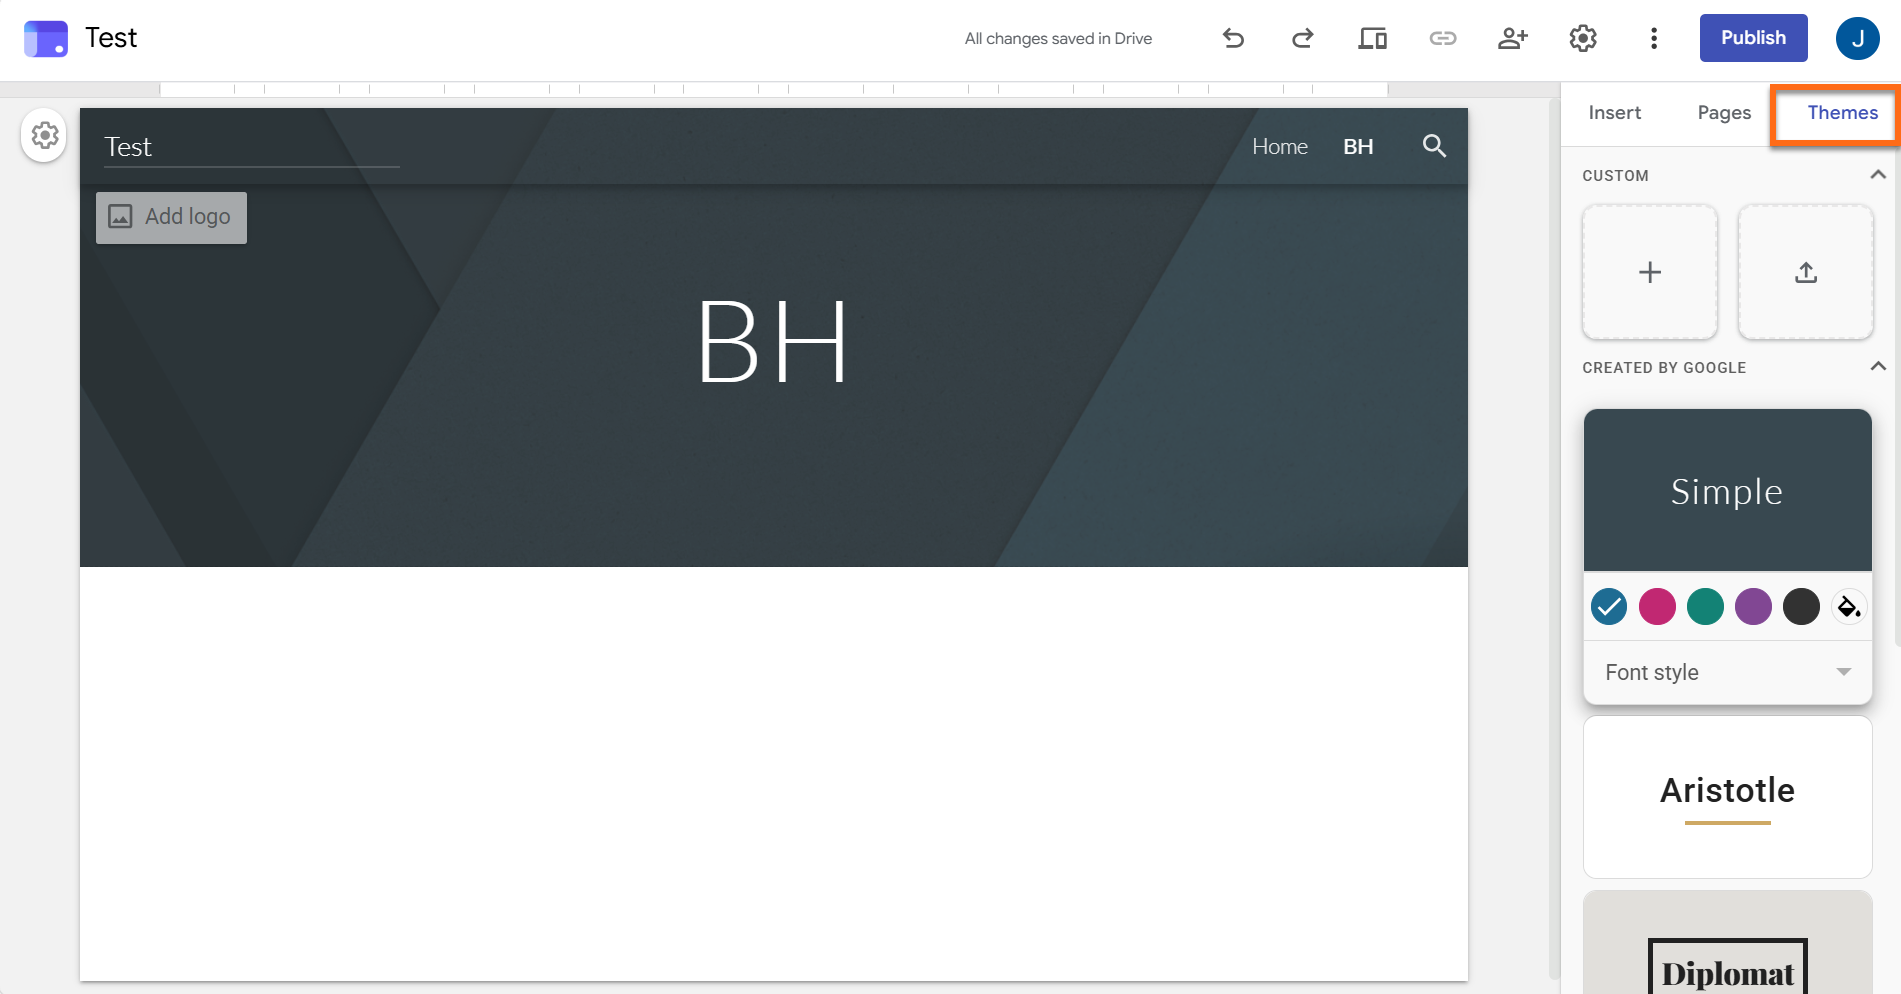
- Pick any theme listed under Created by Google.
Design Your Own Theme
- Go to Themes > Custom and select Create theme.
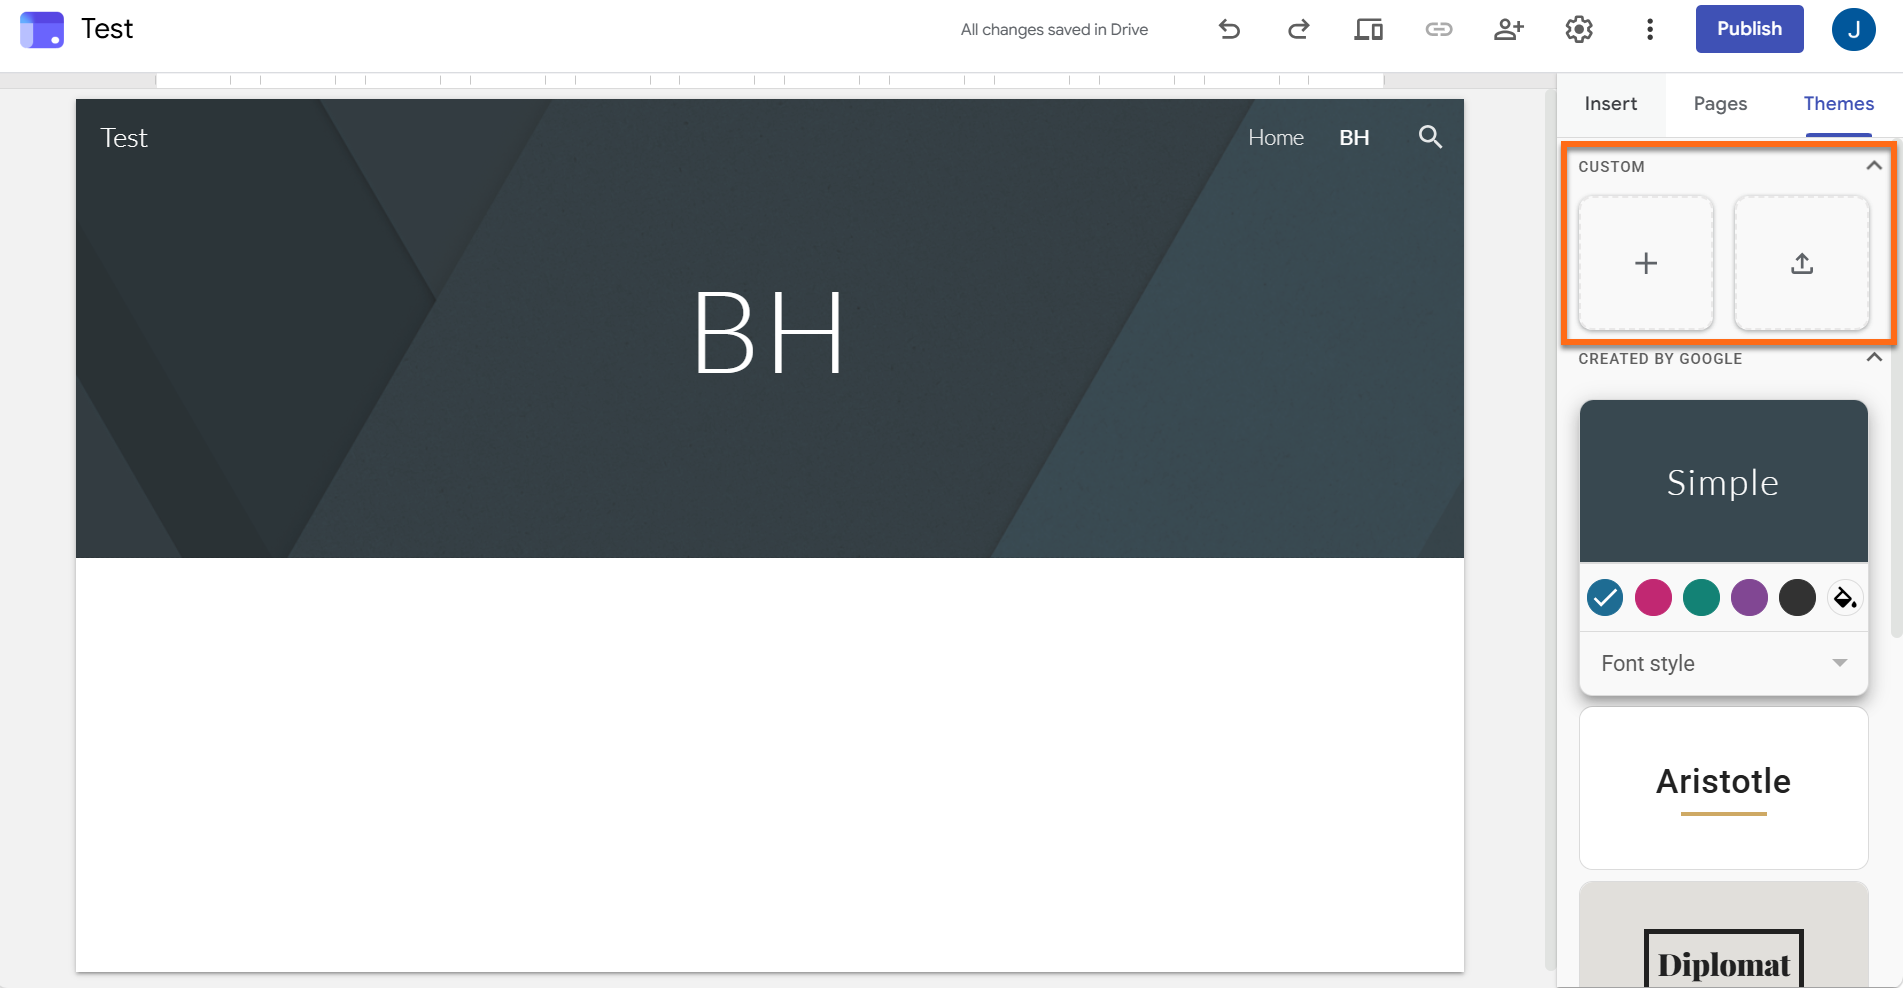
- Name the theme and click Next. A logo and a banner image are optional extras.
- Choose a color palette and click Next. For control over individual colors, select Customize colors.
- Select your fonts, then click Create theme.
Preview and Collaborate
See how your site behaves on different screens, then bring in your team.
Check Your Site on Different Screens
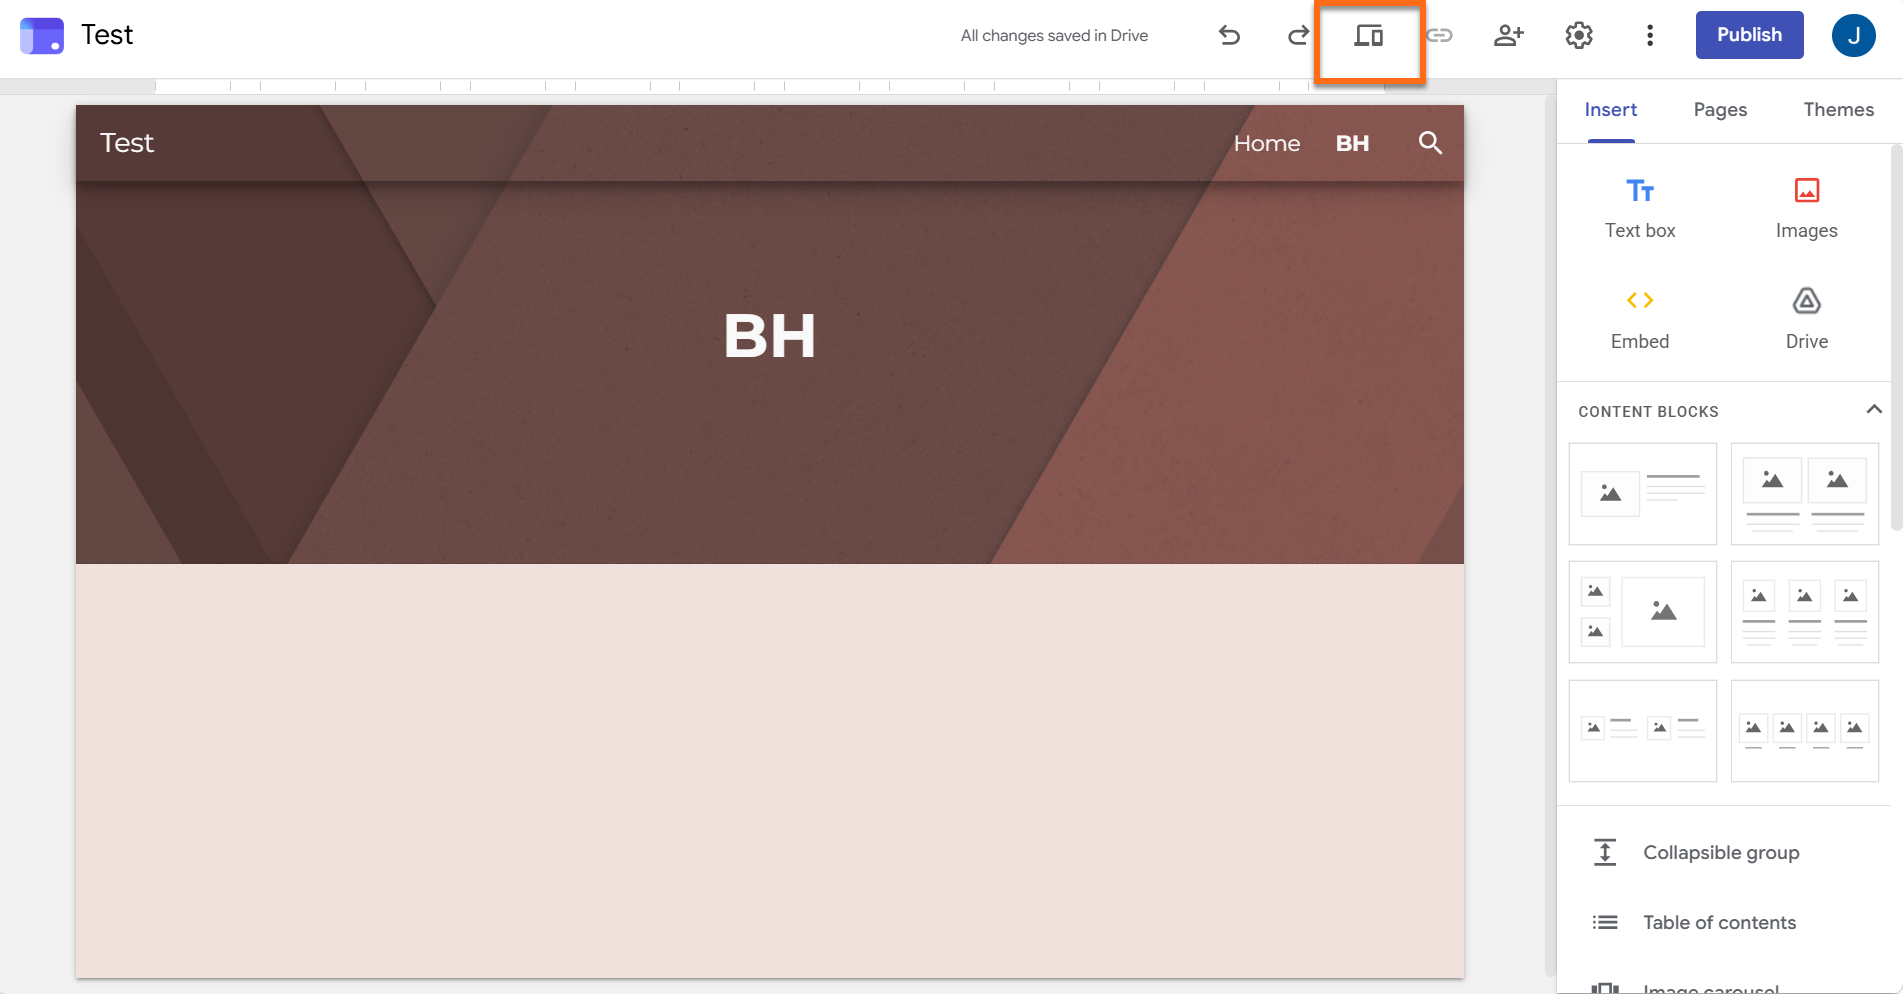
- Click the eye icon labeled Preview at the top of the editor.
- Use the layout choices at the bottom right to preview a phone, tablet, or desktop view.
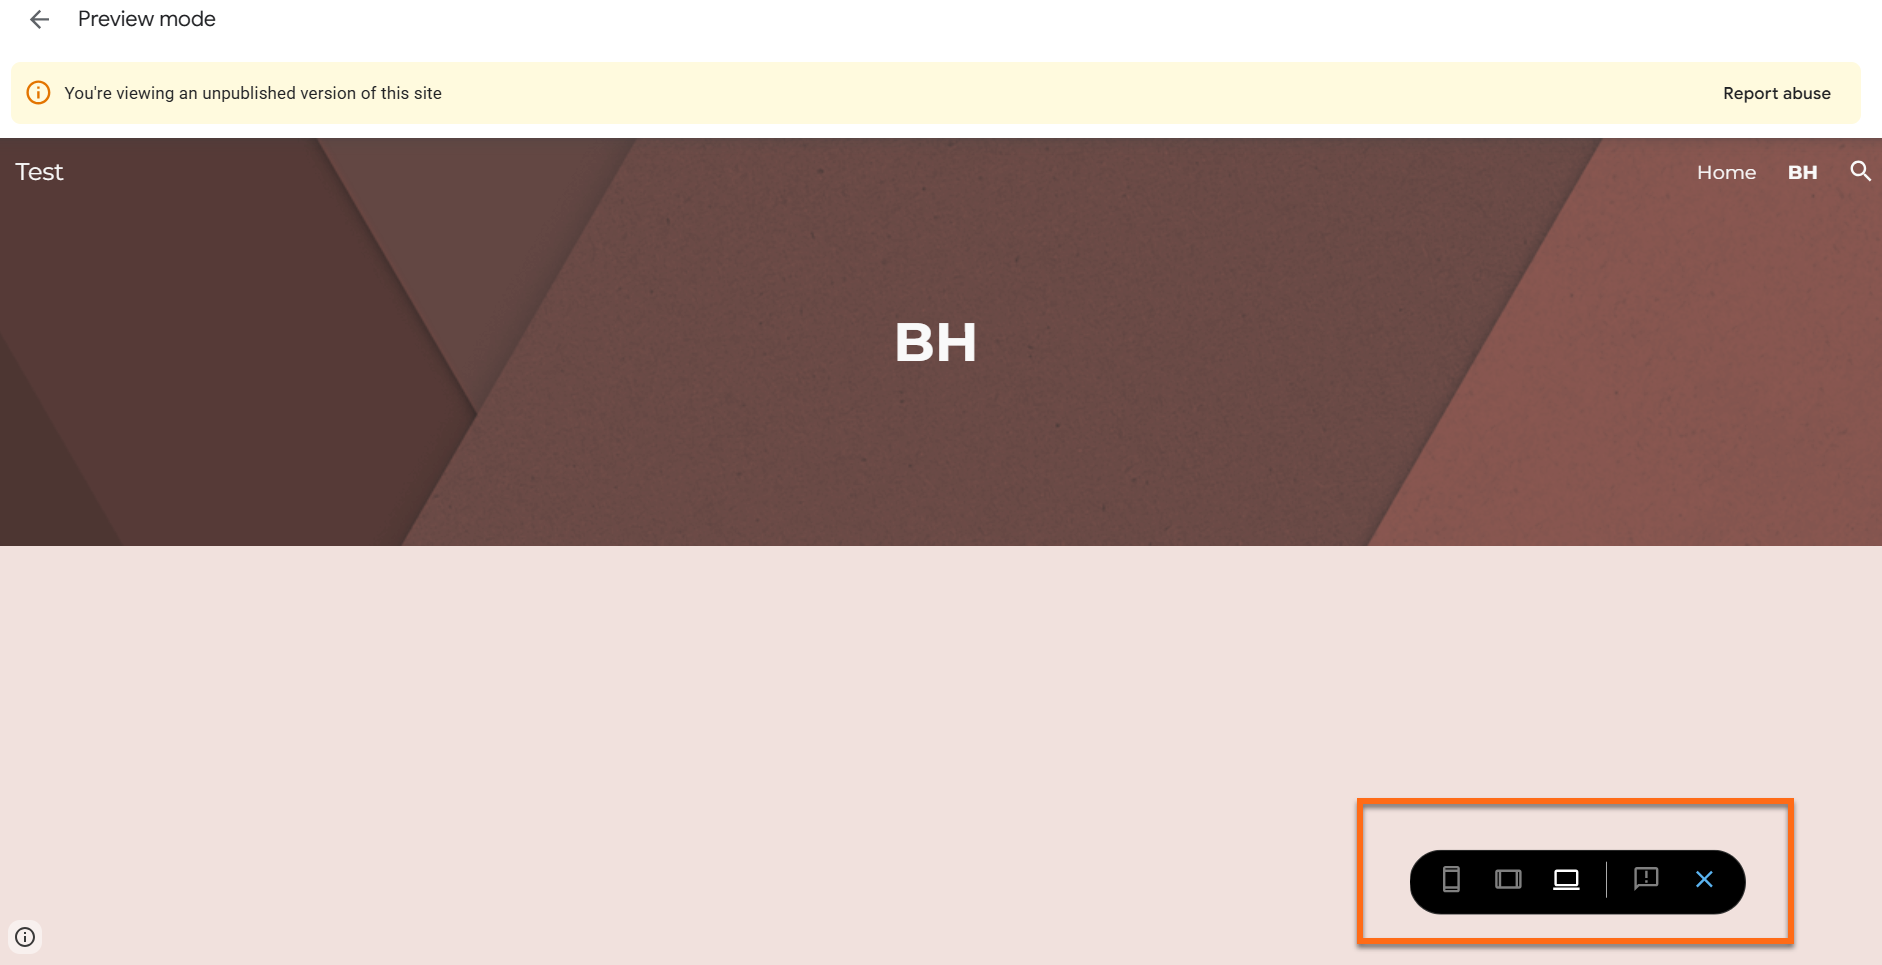
- Click Exit at the bottom right when you want to keep editing.
Add Editors
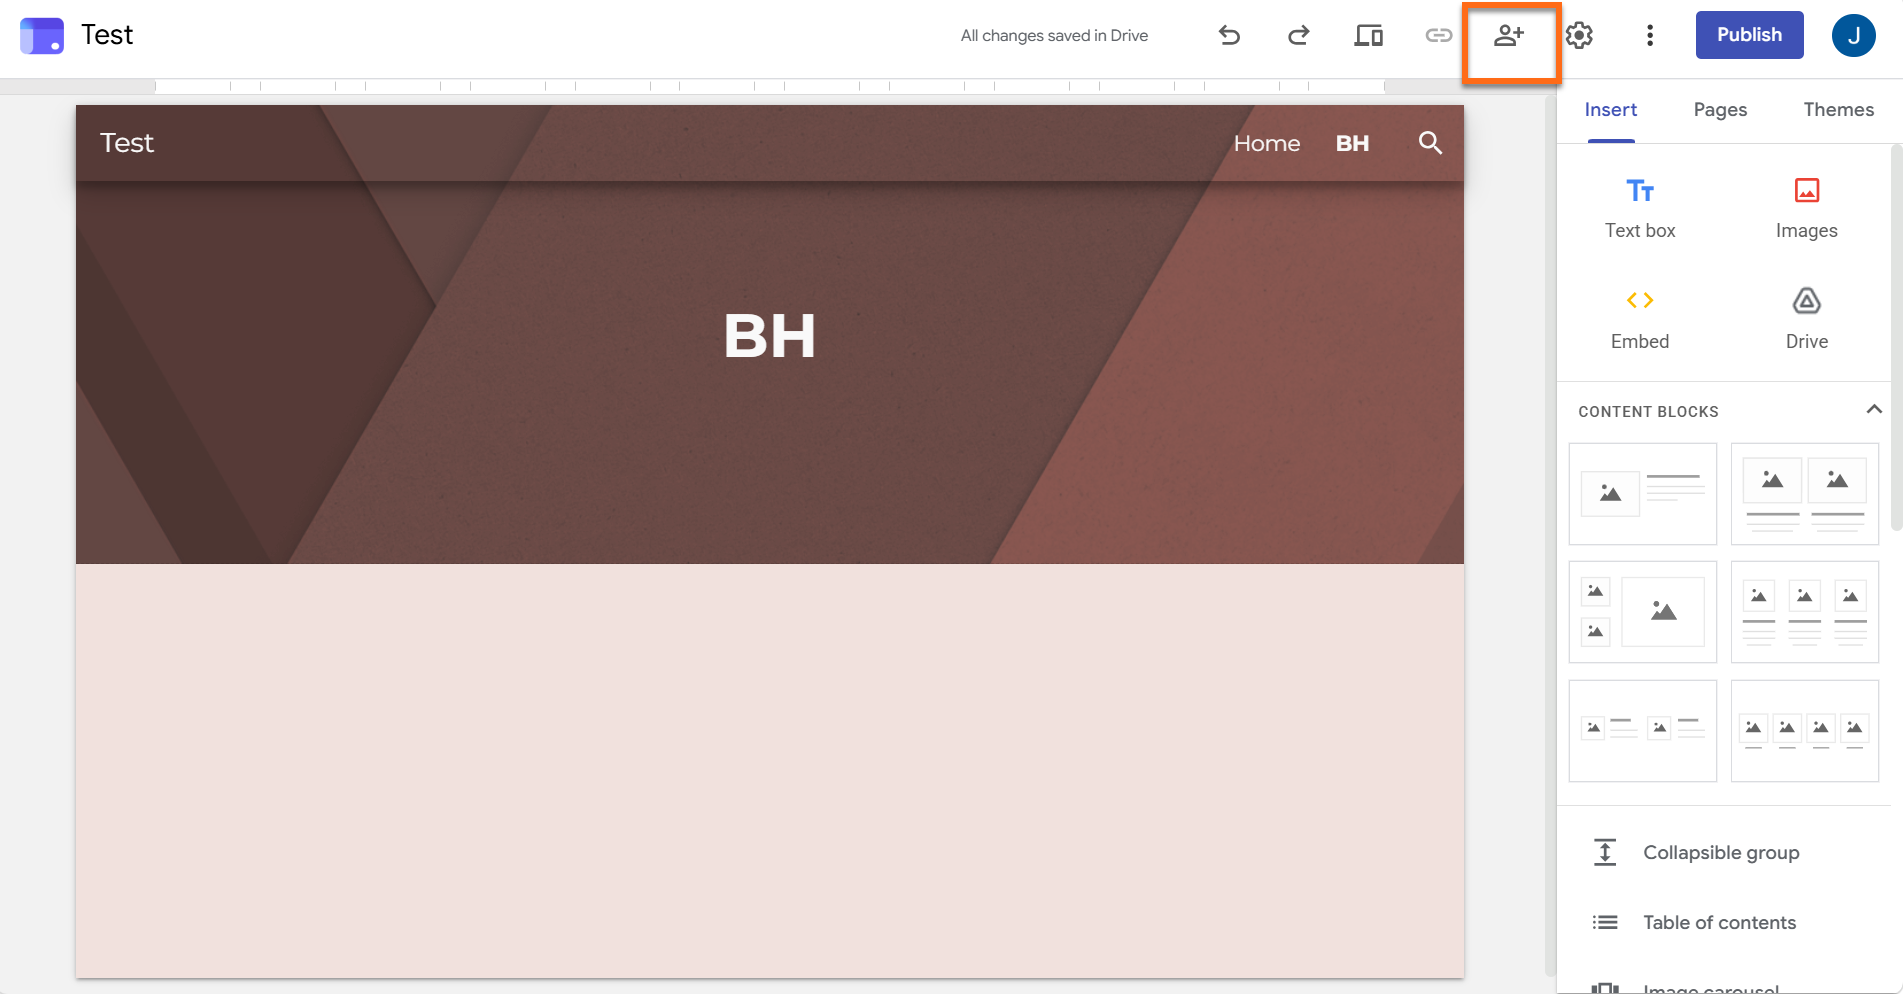
- Click the person-with-plus icon labeled Share with others at the top of the editor.
- Type an email address under Share with people and groups.
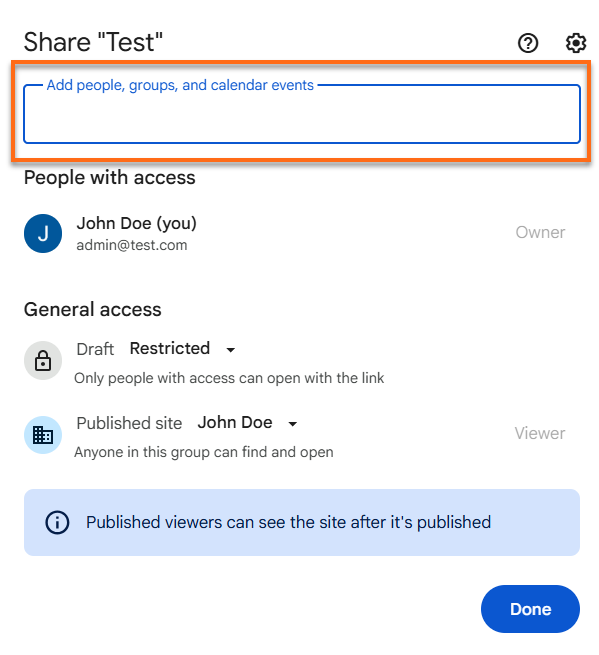
- Switch the role to Editor, then click Done.
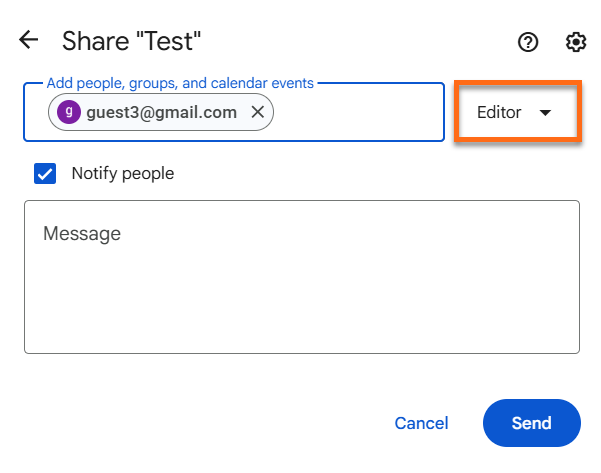
Anyone with a Google account can open and edit your draft once you add them as an editor. Someone without a Google account can read the draft after they enter a verification code that Google emails them, but they can't make changes.
Take Your Site Live
Publishing puts your site online, and the sharing settings decide who gets to see it.
Publish Your First Version
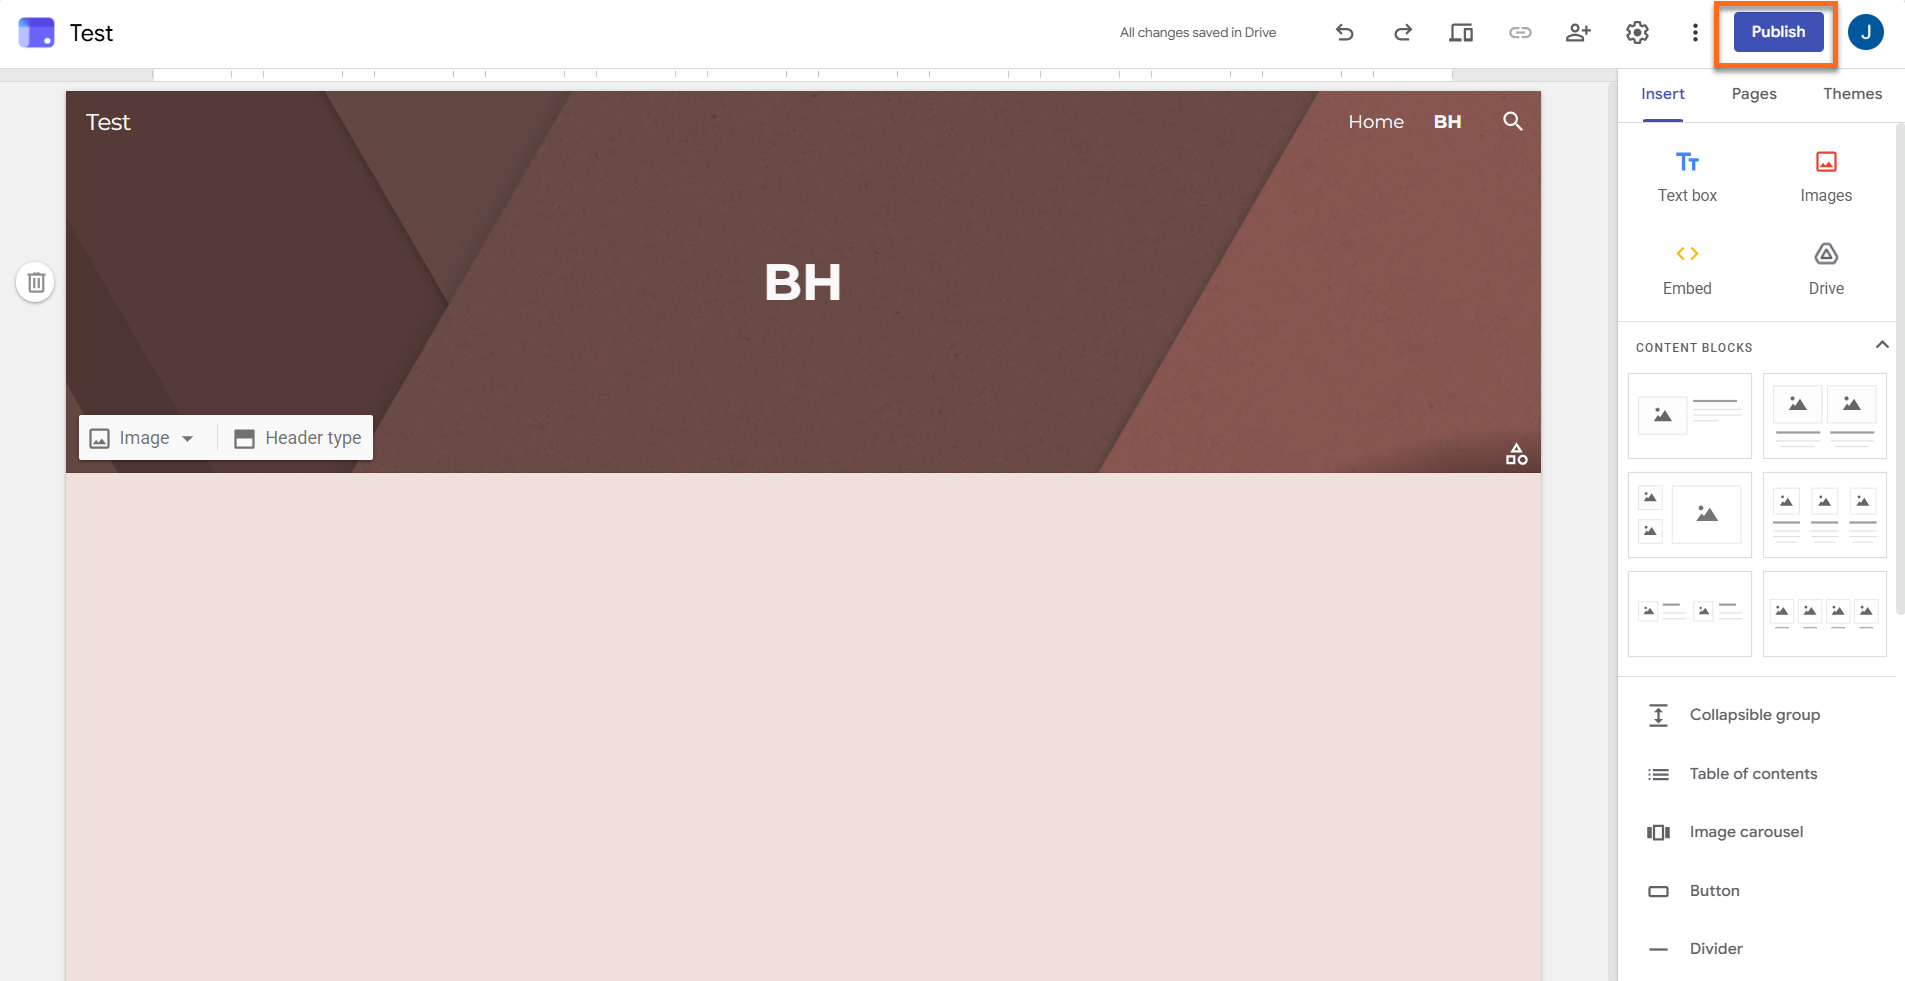
- Click Publish at the top right of the editor.
- Type a name for your site's URL under Web address.
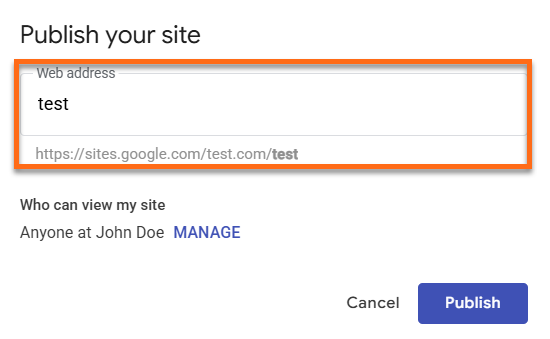
- Click Publish, then open the address to check that the site loads.
With a Google Workspace account, your site's address looks like sites.google.com/yourdomain.com/sitename, and sitename is the name you typed.
Set Your Site's Audience
- Click Share with others at the top of the editor.
- Open the drop-down beside Published site and pick a visibility option, then click Save or Done.
- For Restricted, add each person or group by name or email address, select Published viewer, and click Send. Check Notify people if you'd like them to get an email.
| Option | Who Can View | Best For |
|---|---|---|
| Restricted | Only the people and groups you add as published viewers | Project sites and pages for one team |
| Your organization | Users signed in to your Workspace account, subject to your admin's settings | Intranets, onboarding, and knowledge bases |
| Public | Anyone online who has the link | Event pages and information for everyone |
Make Changes After Publishing
Sites saves each edit as you work, but the live version doesn't change until you publish again. After editing, click Publish at the top right.
To change the end of your site's URL:
- Click the arrow beside Publish and select Publish settings.
- Type the new URL under Web address, then click Save.
Connect Your Own Subdomain (Optional)
Using your own address takes two steps: one in the Google Admin console and one in your Customer Portal.
- Only a Google Workspace admin with the right privileges can add a custom URL.
- Trial accounts can't map a custom URL.
- Only publicly shared sites show the custom URL. Restricted and organization-only sites keep the original Google Sites address.
- Map a subdomain directly under your main domain, such as
team.yourdomain.com. Google doesn't allow mapping to a subdomain of another subdomain, such asteam.intranet.yourdomain.com.
Step 1: Register the Custom URL in the Admin Console
- Open the Google Admin console and sign in as an admin.
- Choose Menu > Apps > Google Workspace > Sites.
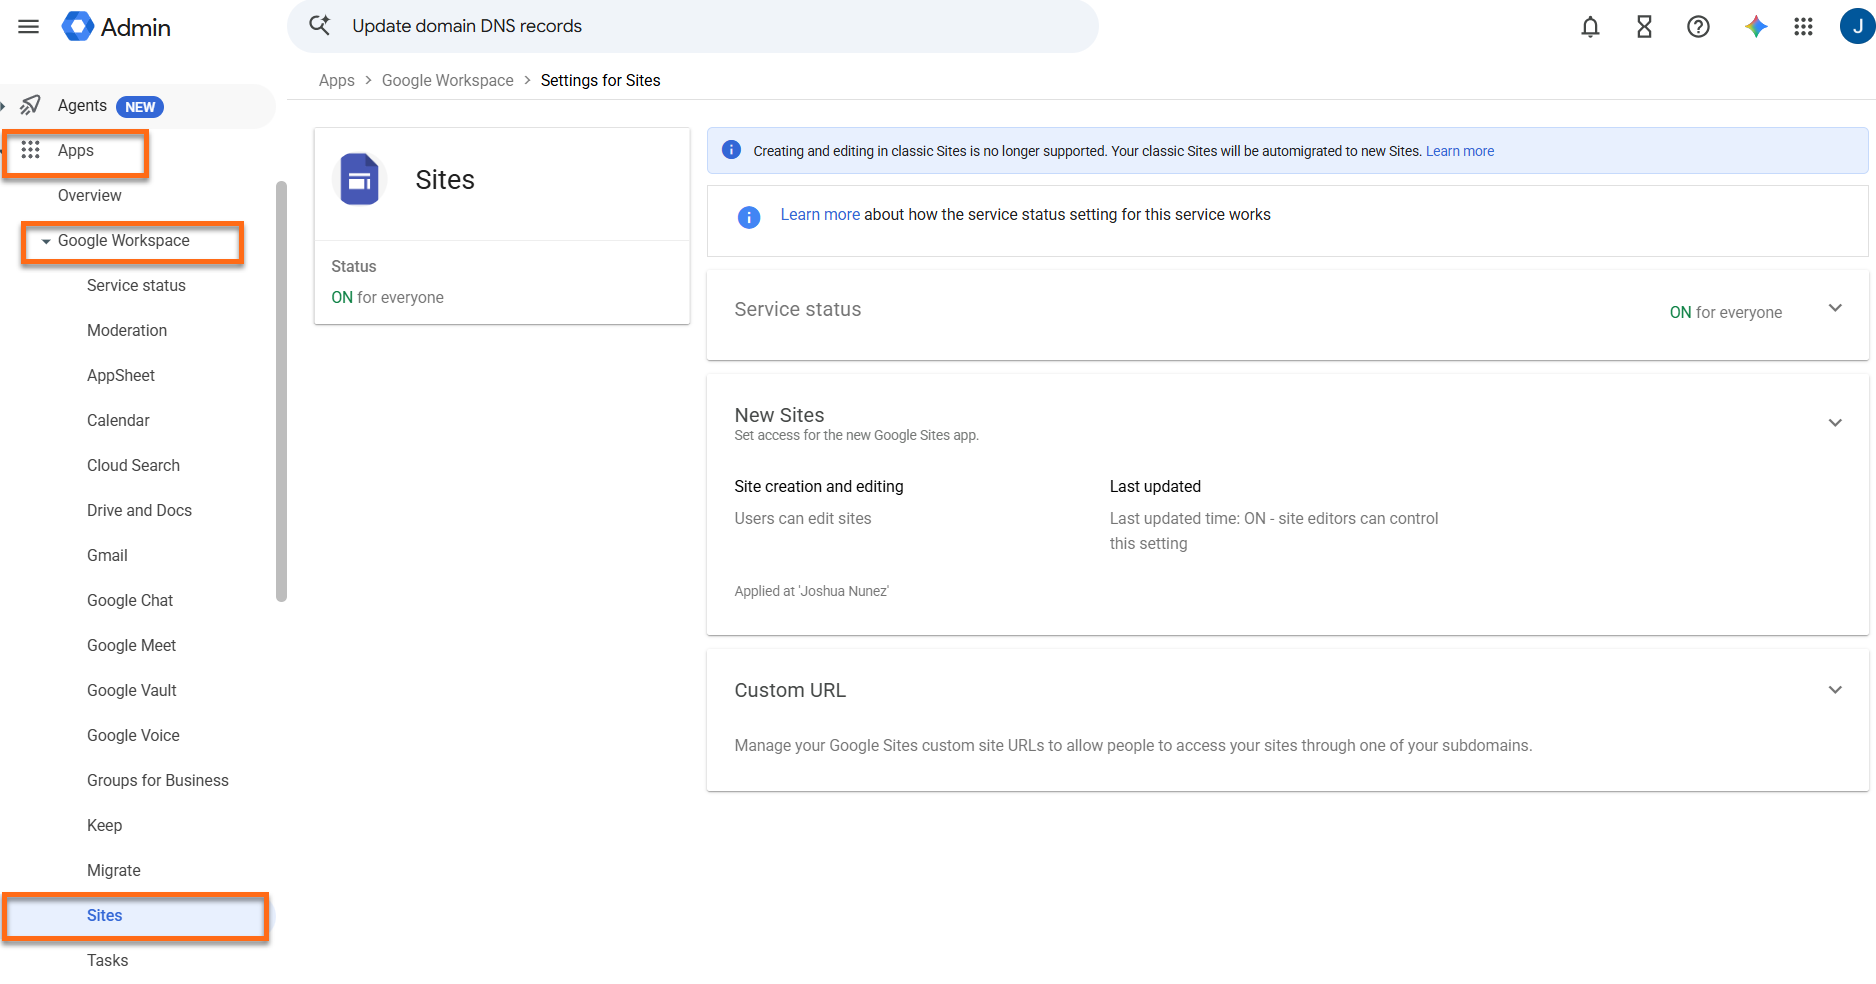
- Follow the prompts to add a custom URL. When Google asks for the current site address, type it without
https://, such assites.google.com/yourdomain.com/sitename, and click Continue. - Select your verified domain, type the custom URL you want, and click Continue.
- Click Add Custom URL.
Step 2: Point Your Subdomain to Google With a CNAME Record
When HostGator manages your domain's DNS, add a CNAME record that sends your subdomain to Google.
- Log in to your Customer Portal.
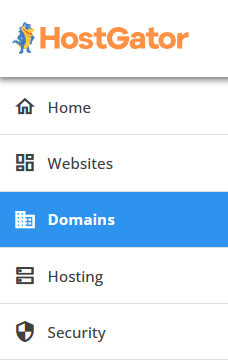
- Click Domains on the left-side menu.
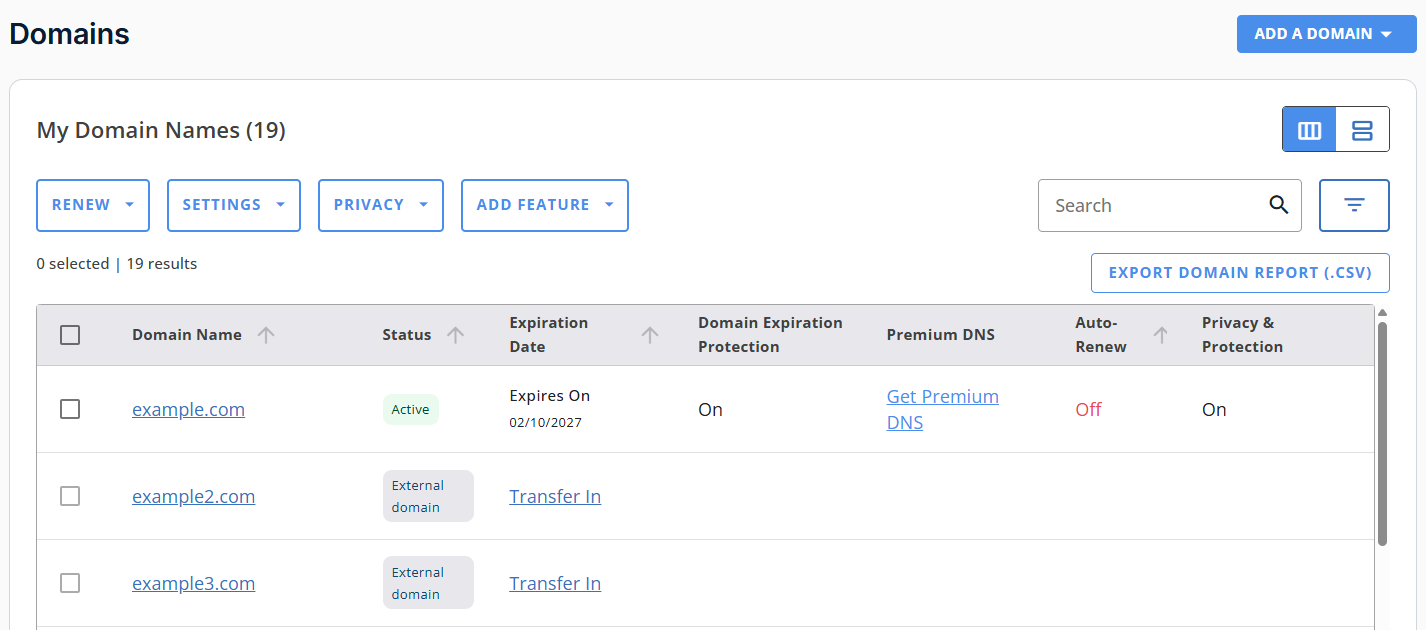
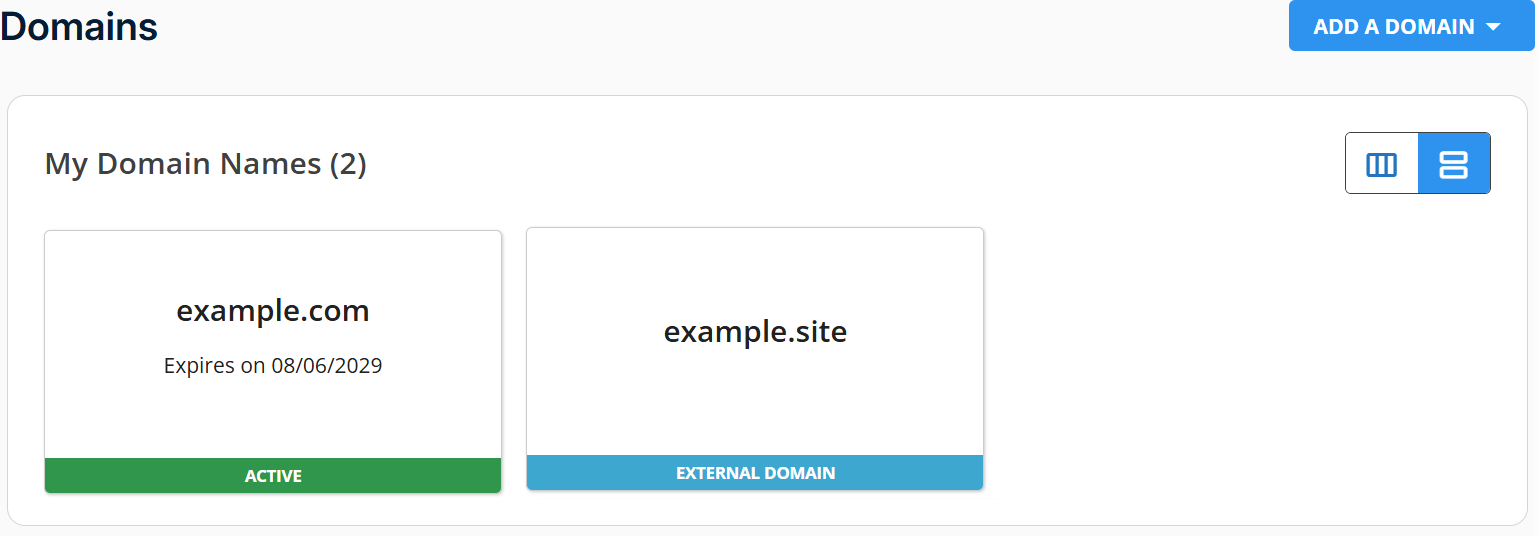
- If you have a single domain in your account, you will be redirected to the domains panel right away.
- If you have multiple domains, a list will appear. Click the domain you want to manage.
List view:
Card view:
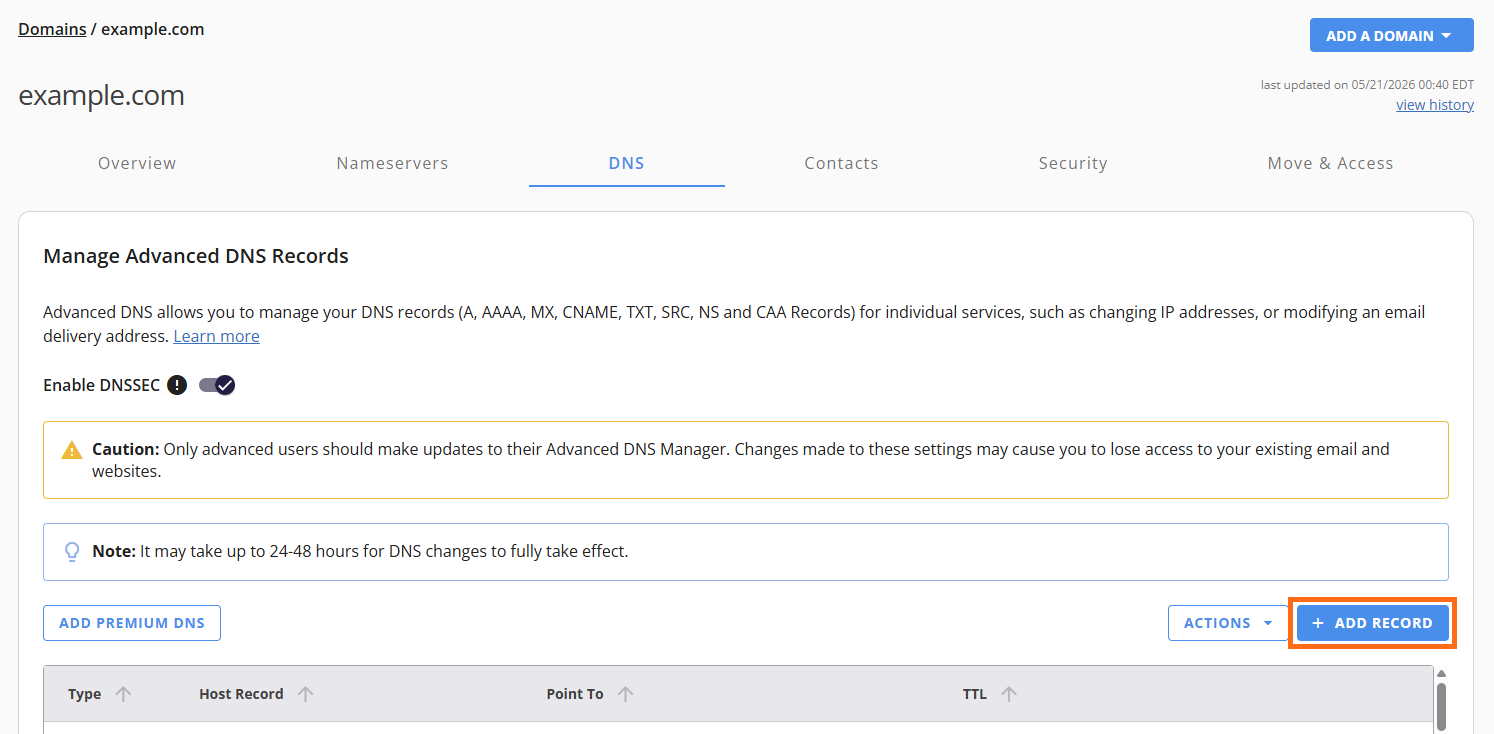
- Open the DNS tab.
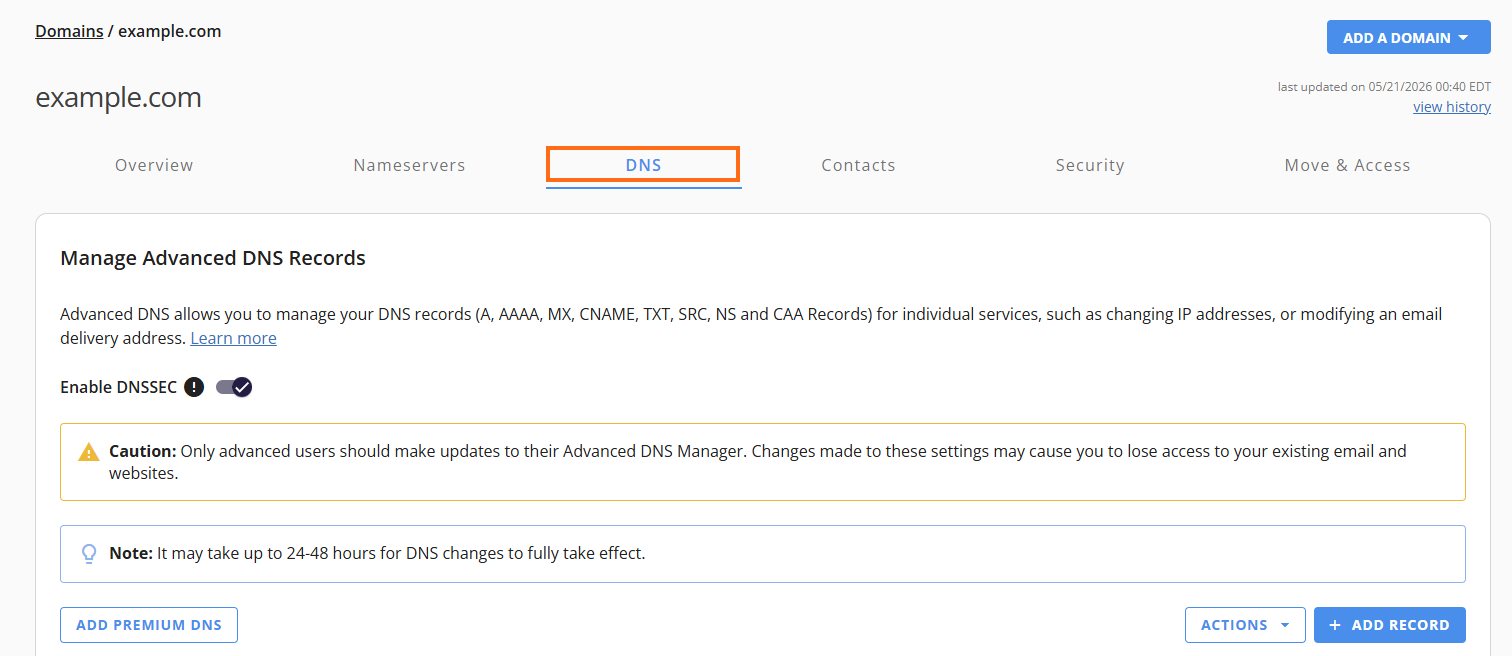
- Under Manage Advanced DNS Records, click + Add Record.
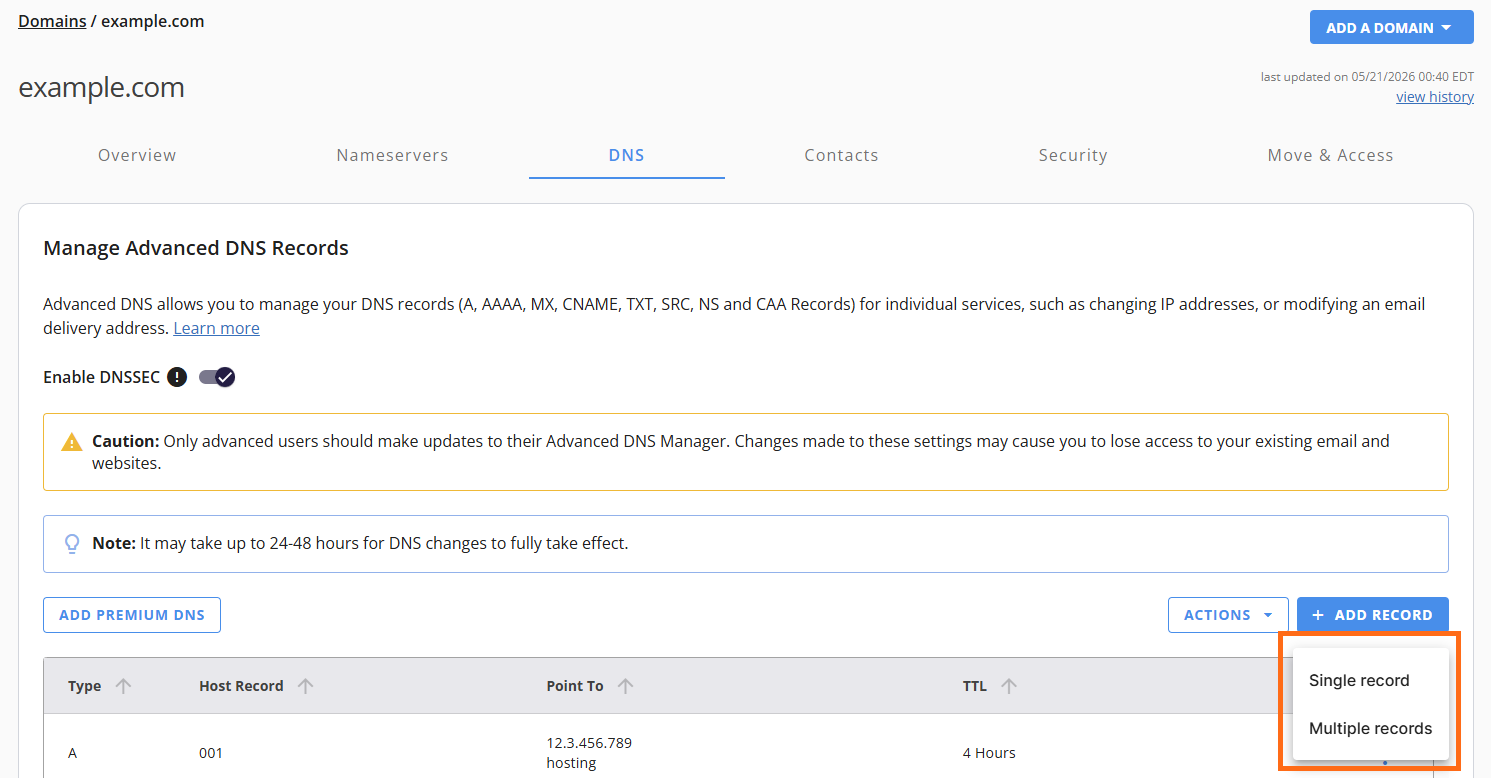
- Select Single record.
- Set the type to CNAME and fill in the values from the table below.
Field Value Type CNAME Name (host) Only the subdomain, for example teamfor team.yourdomain.comRefers to (target) ghs.googlehosted.comTTL Keep the default 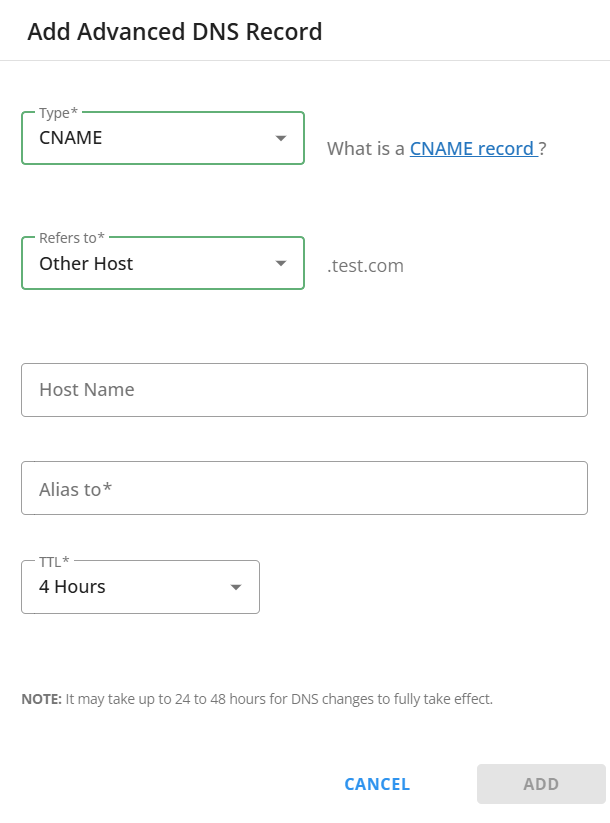
- Click Add to save it.
www for your HostGator website, can conflict with that record and may take the existing site offline. Pick a new subdomain like team or intranet so your main website isn't affected. Adding a CNAME record for a new subdomain doesn't change your MX records, which control where your email is delivered.Expect DNS changes to update within a few hours, though they can take up to 48. Google supplies a domain-validated SSL certificate for your custom URL, and it may need a little while to activate. For more on records, see Manage DNS Records with HostGator.
Frequently Asked Questions
Q: Is Google Sites part of my Google Workspace plan?
A: Yes. Google Sites is included with Google Workspace plans from HostGator, and your Workspace admin controls who can use it. Plans change over time, so see the Google Workspace page for current options and pricing.
Q: Do I have to know how to code?
A: No. You assemble pages from the Insert tab. When you want more control, paste custom HTML, CSS, or JavaScript through Insert > Embed > Embed code.
Q: Can Google Sites stand in for my HostGator website?
A: It works well for intranets, project hubs, and straightforward information pages. A complete business site, store, or blog is better suited to HostGator hosting. Plenty of businesses run both: a HostGator site for customers and Google Sites for team resources.
Q: Can I edit my site from my phone?
A: Editing happens on a computer. Published sites resize on their own for phones and tablets.
Q: How do I duplicate a whole site?
A: Open the site, click the three-dot More icon in the upper-right corner, and choose Make a copy. Type a file name, pick Entire site or Selected page(s), and click OK. Extremely large sites may not copy.
Q: How do I ask search engines to skip my public site?
A: Click the arrow beside Publish, select Publish settings, check Request public search engines to not display my site, and click Save. Search engines treat this as a request, so some results may still list your site.
Related Articles
- Google Workspace Admin Help: Map a New URL to a Site in Google Sites
- Google Workspace (Formerly G Suite) Setup Part 1
- Google Workspace (Formerly G Suite) Tools Overview
- How to Get Started with Google Meet in Google Workspace
- Manage DNS Records with HostGator
- What is Google Workspace (Formerly G Suite)?