Guide to WordPress Block Editor
With the release of WordPress 5.0 back in 2019, WordPress incorporated the new Gutenberg editor as the default content editor. The Gutenberg editor, now known as the Block Editor, allows more customized options when creating and adding content to a WordPress site.
What is a block?
A block is a content element used to add or edit a WordPress page or post. Each item you add to your page or post is a block. It could be a title, audio or video file, table, image, image gallery, buttons, and more. Each block acts independently of the other. This allows you to customize the blocks to fit your website needs and layout better, which you can preview before hitting the Publish button.
When creating pages and posts within WordPress, you can add, remove and customize each block. There are blocks for common content elements, and more can be added by plugins.
This article will discuss the following topics.
- Understanding blocks ⤵
- Adding a new block ⤵
- Searching for a bock ⤵
- Customizing a block ⤵
- Removing a block ⤵
- Other useful block options ⤵
- Additional Information ⤵
We created a video tutorial to introduce and guide you in using blocks on your WordPress website.
Understanding blocks
It is important to know that each block has its own features, which may or may not have the same settings and options as the other blocks. Essentially, a block is divided into 3 basic sections - the Block content, Block toolbar, and Block settings sidebar.
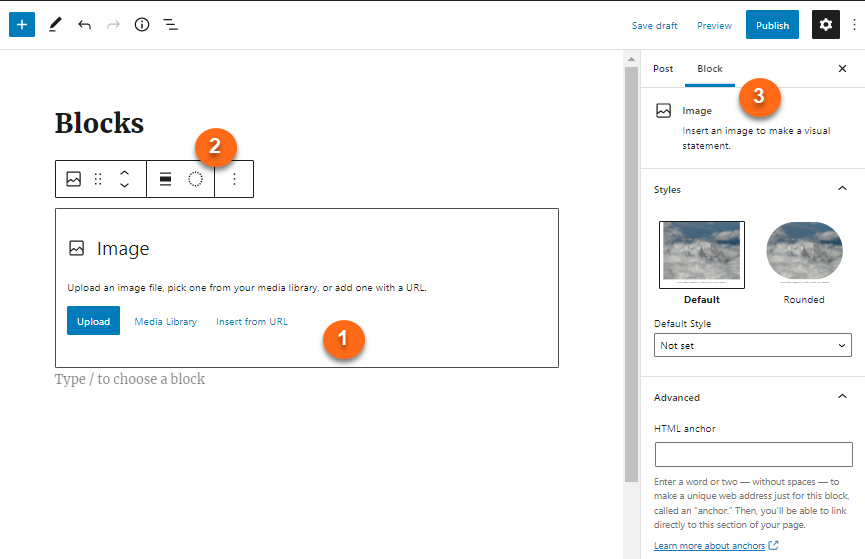
- Block content - This is the "body" of the specific block you selected that you can customize using its toolbar and settings sidebar.
- Block toolbar - This shows the available features in a specific block.
- Block settings sidebar - The sidebar shows the items you can use to customize a specific block.
Adding a new block
It's fascinating to know that there are many ways of adding a block to your workspace.
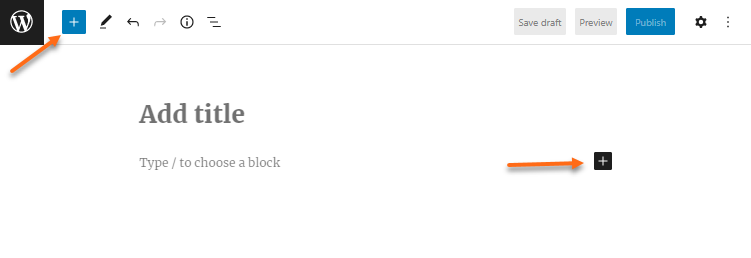
You can easily spot the "+" Inserter in your WordPress workspace. When you open a new page or post, you will find the "+" icon at the top of the page, in the workspace area, and even in between blocks. You will always be given an opportunity to add blocks!
Use the Inserter
Here are a few things you may find useful when adding blocks.
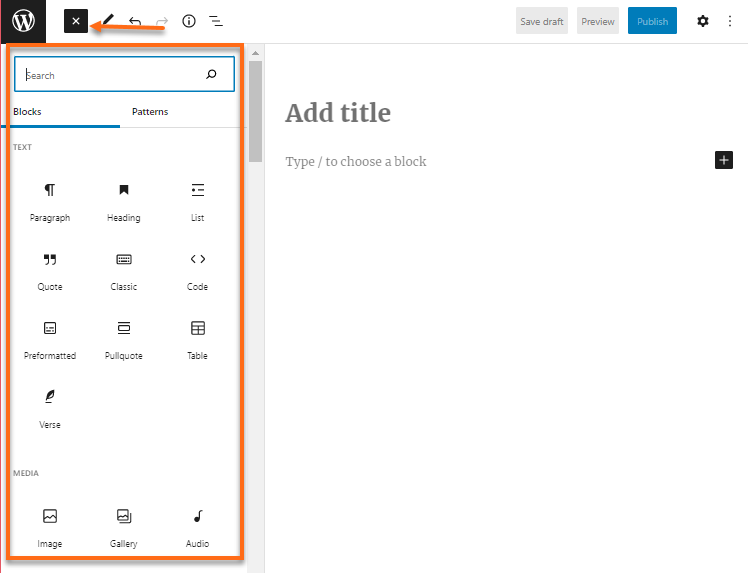
- The top menu "+" Inserter will show blocks in an expanded list on the left side.
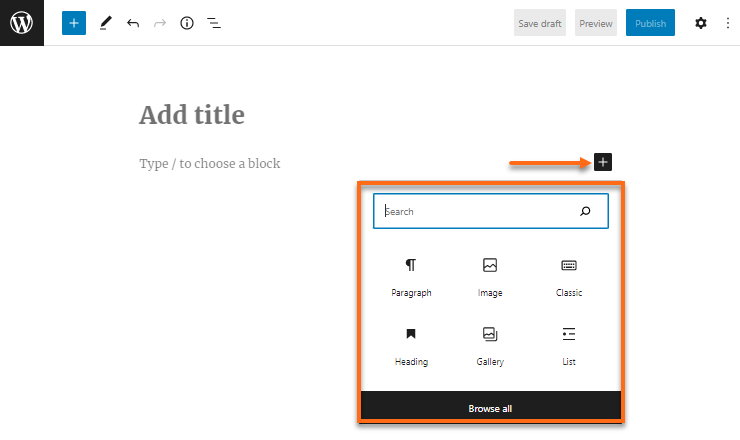
- The workspace "+" Inserter will show a mini window of blocks. Click Browse all for the full list of available blocks.
To add a new block to a page:
- Log in to your WordPress dashboard.
- Click + New at the top menu, then select:
Pages if you want to create static page content like an About, Contact, or Services page, or;
Posts if you want to create a blog entry that has dynamic content.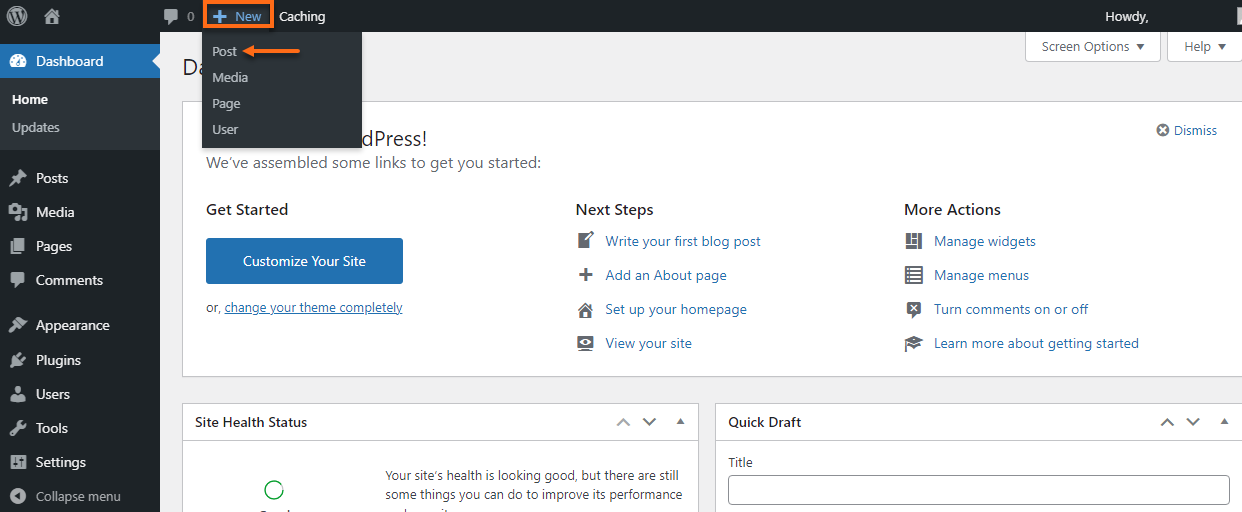
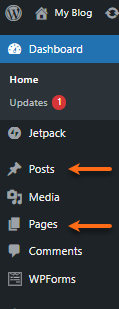
Alternatively, you can also hover over Pages or Posts in the left-hand menu, then select Add New from the list of options.
- Once in the editor, click the + (Inserter) icon located at the top left or in the workspace area of the page or post.
- You will be presented with a list of blocks. Search for a specific block type or scroll down to reveal other block categories. (See below for tips on searching blocks.)
- Click on the block you wish to use, and it will be placed on the page or post's workspace area.
Searching for a block
You can locate the block you need for your website using the search box or the slash "/" key.
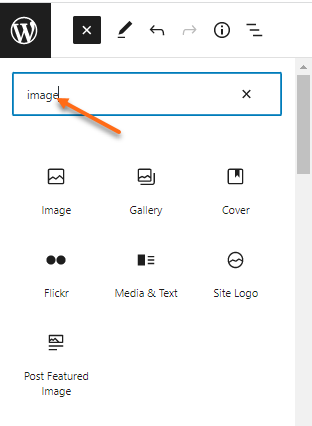
Search box
Use the search box to look for blocks by entering the block name or a keyword, for example, "video" or "image." A list of blocks that fits the description will be displayed.
Slash "/" key
In the workspace area, you can use the slash "/" key to prompt the editor to show a list of blocks that you can choose from. Type in the block name or a keyword to display a list of blocks matching the description.

Customizing a block
You can customize the settings of each block. Depending on the selected block, the features and settings may vary.
To display the formatting toolbar or sidebar:
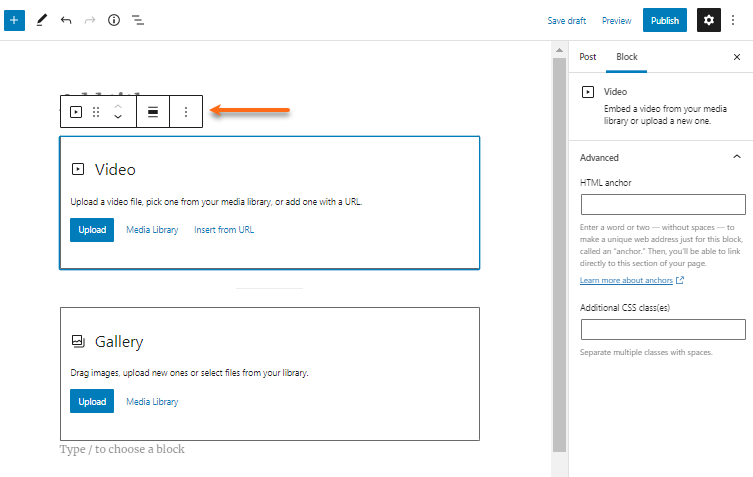
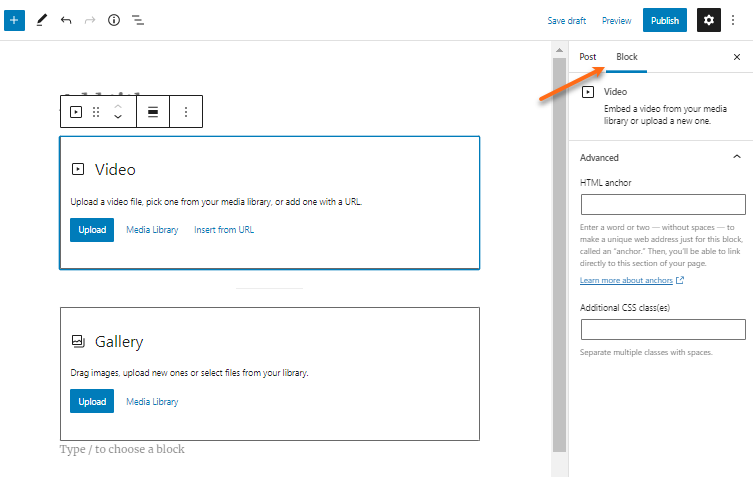
- Select a block to display the toolbar at the top of the block. Additional format settings will be displayed on the right sidebar of the editor.
-
To show or hide the settings sidebar, click the cog icon at the top right of the workspace area.
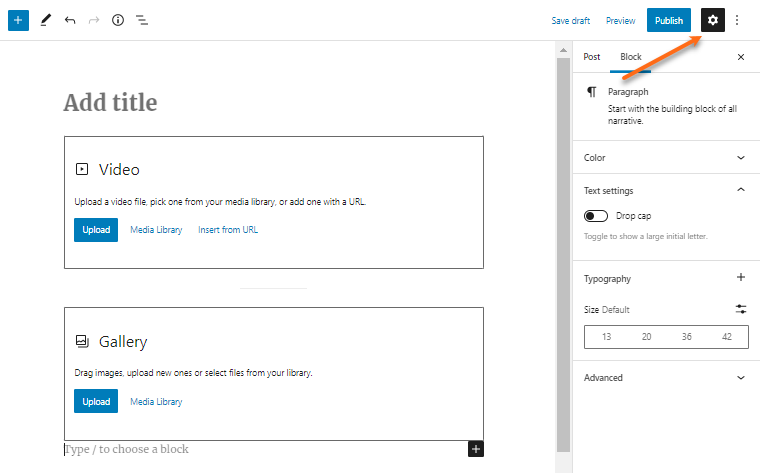
- There will be two tabs in the sidebar - one for the page or post and another for the block itself. Click the Block tab to reveal more formatting options for the block.
- Click the Page or Post tab to reveal format settings for the page or post itself.
Rearranging blocks
When adding blocks to your page or post, you may find it beneficial to rearrange them.
To rearrange blocks in the workspace area.
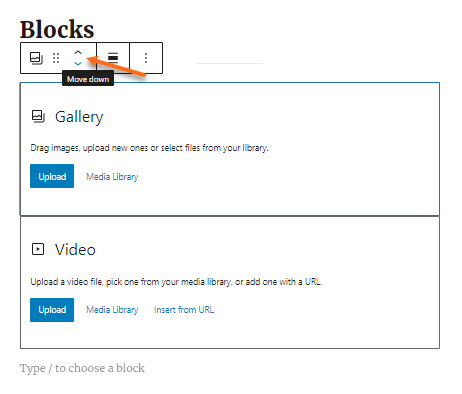
- Select a block to reveal the formatting toolbar at the top.
- Click the up or down arrow to move the block above or below the adjacent block one at a time.
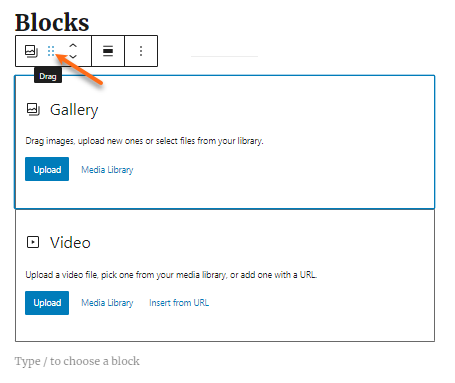
You may also use the drag option to grab the icon and move it around your workspace area.
Inserting additional blocks
You can insert an additional block in between blocks.
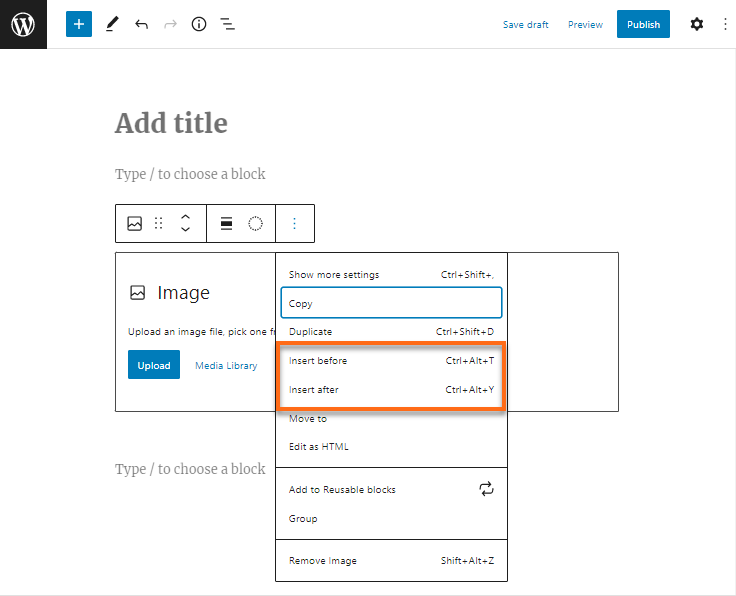
To insert a block:
- Select a block to reveal the formatting toolbar at the top.
- Click the three-dots menu to display more options.
- Select Insert before or Insert after from the list to insert a block above or below the selected block.
Removing a block
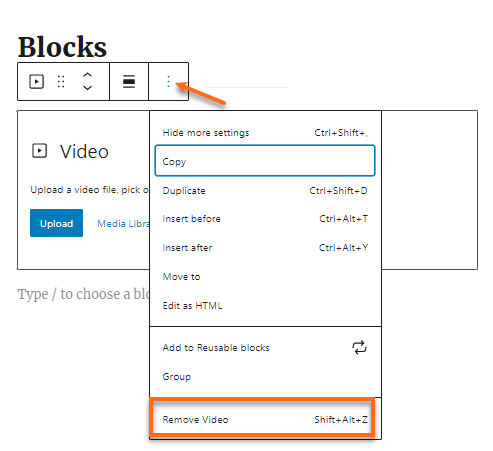
To remove a block:
- Select the block you wish to remove.
- Click the three-dots menu from the formatting toolbar.
- Select Remove (block name) from the list of options.
Other useful block options
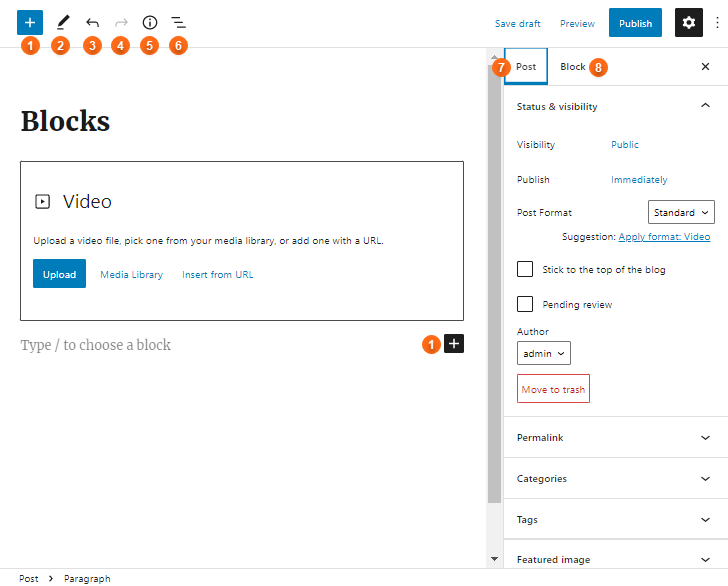
- Block inserter - This is located in the upper left-hand corner or in the workspace area. These two buttons will allow you to add new blocks.
- Tools - This icon provides different interactions for selecting, navigating, and editing blocks. You can toggle between select and edit by pressing Escape and Enter.
- Undo - This button will allow you to undo a change, addition, deletion, or any other task you wish to revert.
- Redo - Similar to the undo button, the redo button will allow you to revert to a change that you had previously undone.
- Details - This information button will reveal details about the page or post you are editing, such as the content’s word count, characters used, headings, paragraphs, and the number of blocks on the page or post.
- List View - This button lists the blocks used on the page or post. Select the block from the drop-down to jump to it within the content.
- Page or Post tab - This tab provides the document's specific settings. Within this section, you will have the option to set the visibility, a publish date, view revisions (if more than 1 update to content), change the permalink, add a featured image, and more.
- Block tab - This option will reveal the advanced options for a selected block. Depending on the block chosen, these options may include font style, color, additional CSS, and formatting.
Additional Information
Are you new to WordPress, or would you like to familiarize yourself with the basics and how-tos in WordPress? We've got you covered! Here are the links to our "Building your First WordPress Website" videos to get you started.
- How to Choose and Install a WordPress Theme - Ep 1 Workin' with WordPress
- How to Customize a WordPress Theme - Ep 2 Workin' with WordPress
- How to Create and Edit a Page in WordPress - Ep 3 Workin' with WordPress
- WordPress Navigation Menu and Widgets - Ep 4 Workin' with WordPress
- Building your Homepage with WordPress Block Editor - Ep 5 Workin' with WordPress
- How to Install and Activate WordPress Plugins - Ep 6 Workin' with WordPress
- How to Create WordPress Blog Post - Ep 7 Workin' with WordPress
- How to Build an Online Store with WooCommerce - Ep 8 Workin' with WordPress