Weebly - Guide to Settings and Publishing
Once you have completed adding pages and content and configuring the menu, the next step is to review the general and advanced settings before publishing the website. Addressing these items will provide the finishing touches. Not only will site visitors notice them, but search engines will as well.
This article will guide you through the settings and steps needed to publish your Weebly website.
- Settings Guide for Weebly ⤵
- Publishing Guide for Weebly ⤵
- Deleting your Weebly Site ⤵
- Additional Resources ⤵
Settings Guide for Weebly
The Settings tab in Weebly is where you can change the details about how your website is seen in a web browser.
General
In the General tab, you can change various pieces of information that appear publicly to your visitors.
-
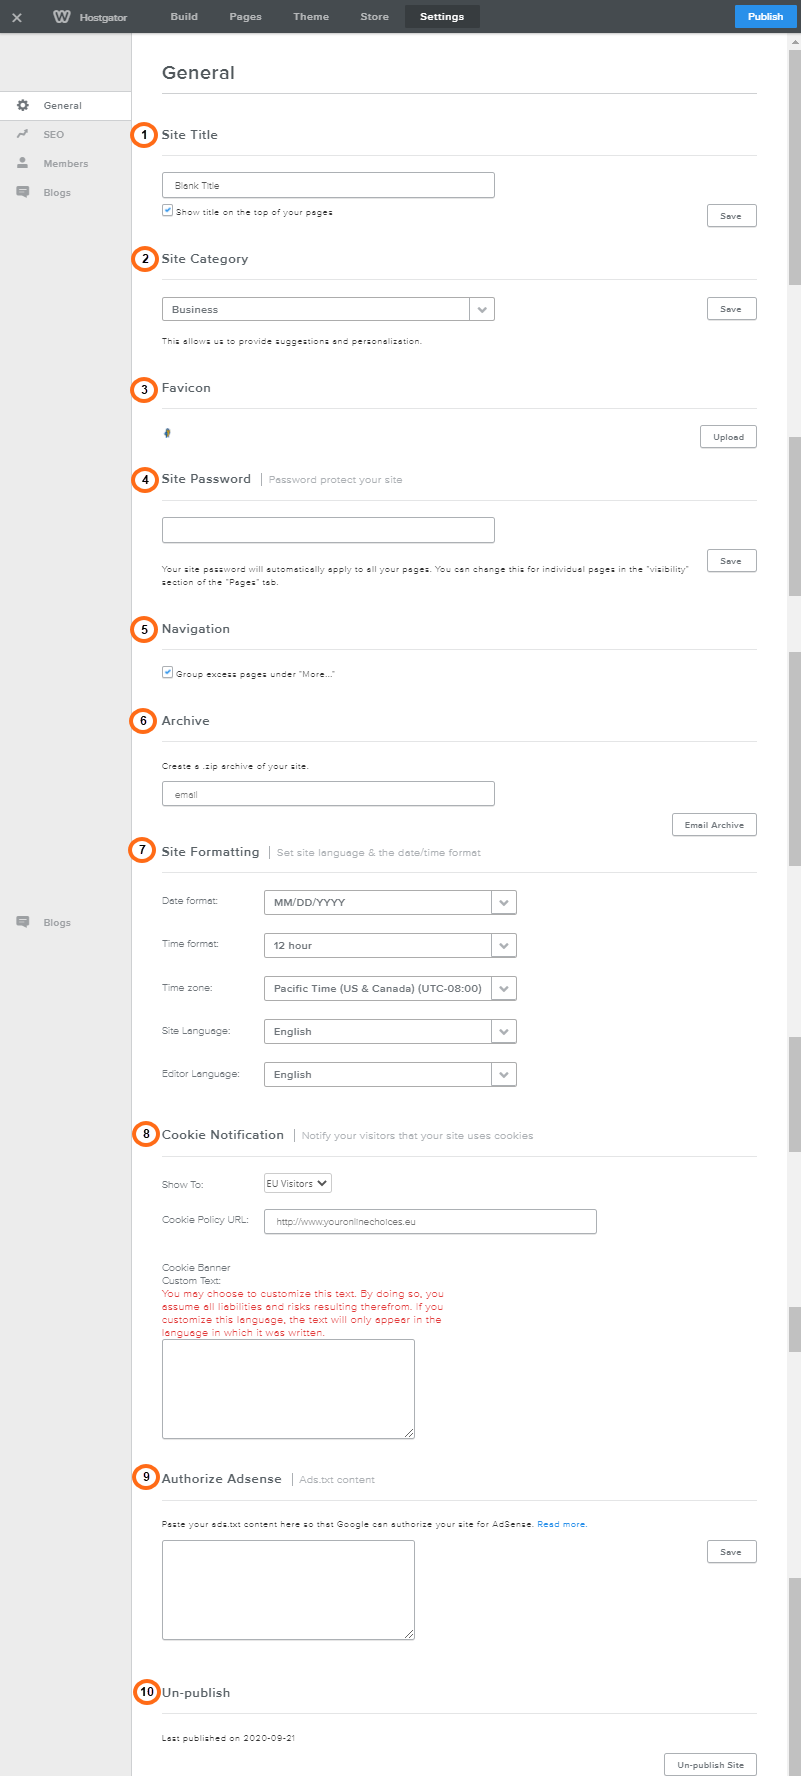
Site Title - This is the title of the page that will appear in the browser title bar. It will also appear as the title text at the top of your pages. If you do not want the title to show, simply uncheck the box.
-
Site Category - This will show you options on the type of website you can create with Weebly, such as an online store, business, personal, or blog, to get a custom experience.
-
Favicon - The favicon is a small logo that appears in your browser's address bar next to your site's URL. If you have a premium account, you will be able to upload your own icon.
-
Site Password - You can set a password that will allow you to password-protect pages.
-
Navigation - This checkbox will group pages that do not appear in your site navigation under a More tab.
-
Archive - This is where you can enter an email address that you would like to send a .zip file of your website. The .zip contains the HTML, CSS, and all images for the site.
-
Site Formatting - This sets how the dates and times will be displayed as well as the timezone. Here you can also change the language of the site and the editor.
-
Cookie Notification - This allows you to add a notification display about browser cookies.
-
Authorize Adsense - In this field, you can add your ads.txt so Google can authorize your site for Adsense.
- Un-publish - This shows the last date the site was published and the option to remove the site from publication.
SEO (Search Engine Optimization)
The SEO tab is all about making your site more visible to search engines. In this section, you can set keywords about your site for the search engines to index.
-
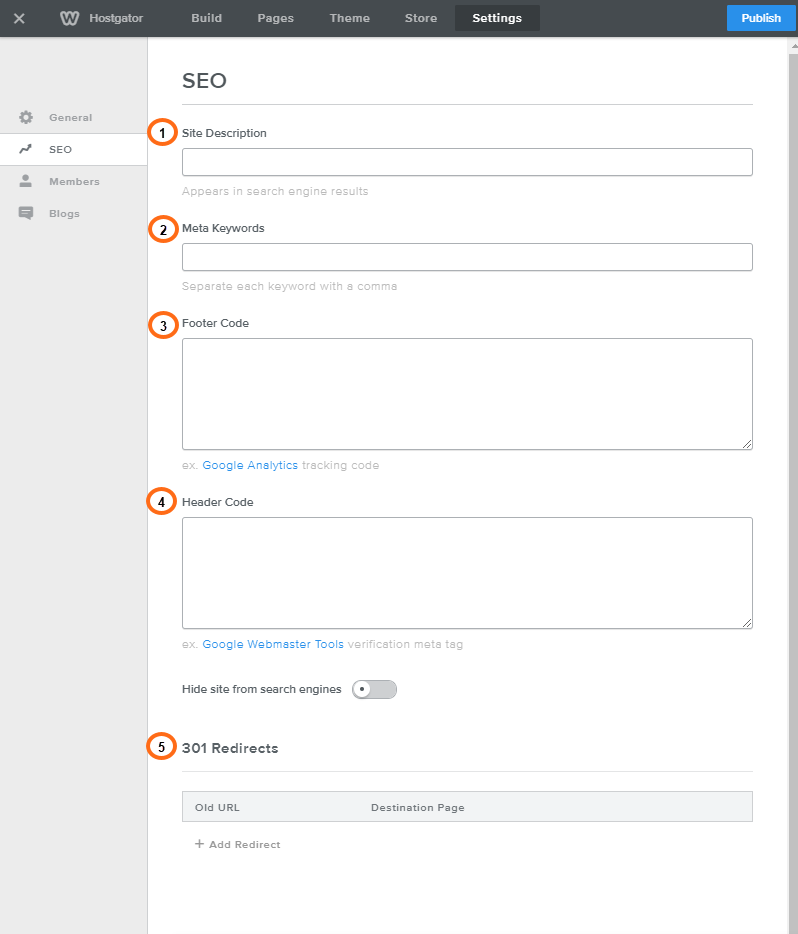
Site Description - In this field, you can give a brief description of your website. This description will appear directly below your search result in search engines, allowing your visitors to know what your site is about before clicking your link.
-
Meta Keywords - These keywords will not appear on your website directly, but they are visible to the search engines and will help index your site so visitors can find your website in a search.
-
Footer Code - If you have code for services, such as Google Analytics, to assist in tracking visitors, this is where you will want to place that code.
-
Header Code - This area, similar to your footer code, is used for special services. Typically, header code is used for Google Webmaster Tools. However, there are various other types of code available for use in the site header.
- Hide Site from Search Engines - Checking this box will restrict search engine robots from indexing your website entirely.
-
301 Redirects - This link will allow you to create a redirect to another page. It can be useful if you are moving your site to another platform.
Members
Weebly's Members is a premium feature that is available with the Weebly Pro or Business plan.
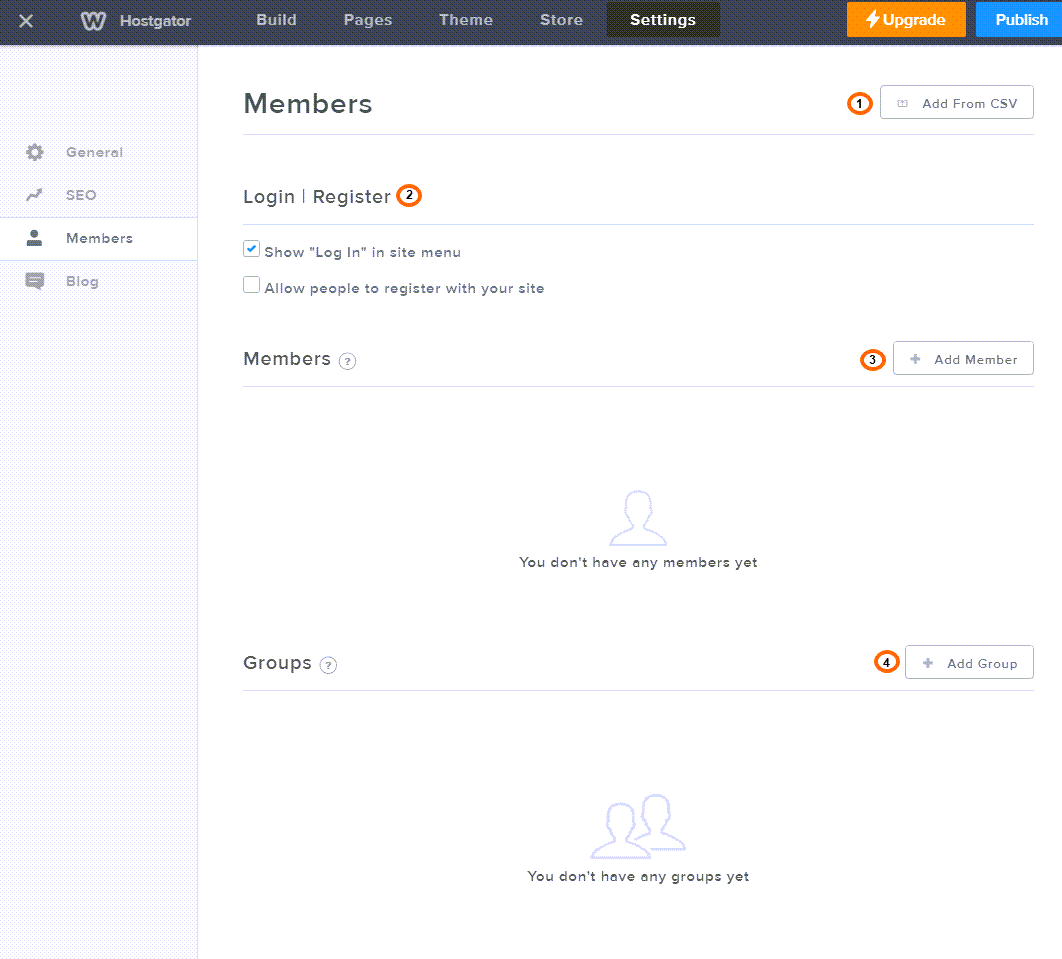
- Add From CSV - In this section, you can upload a CSV file of the members' names, email addresses, and groups. To send an email to the imported members, check the box to Email members an invitation to log in.
- Login | Register
-
Show "Log In" in the site menu - If checked, this will allow registered members to log into your site.
- Allow people to register with your site - If checked, this will let anyone register on your site as a Members. If checked, the following options will appear:
- Require approval - This requires that new members be manually approved.
- Default Group for New Members - The new members will automatically be added to a group.
-
- Add Member - In this section, you can manually add people as members to the site and set up which pages and groups the member is allowed to access.
- Add Group - Here, you can set up the various groups your site will use for its members. You can set the pages that the group can view and add existing members to the group.
Blog
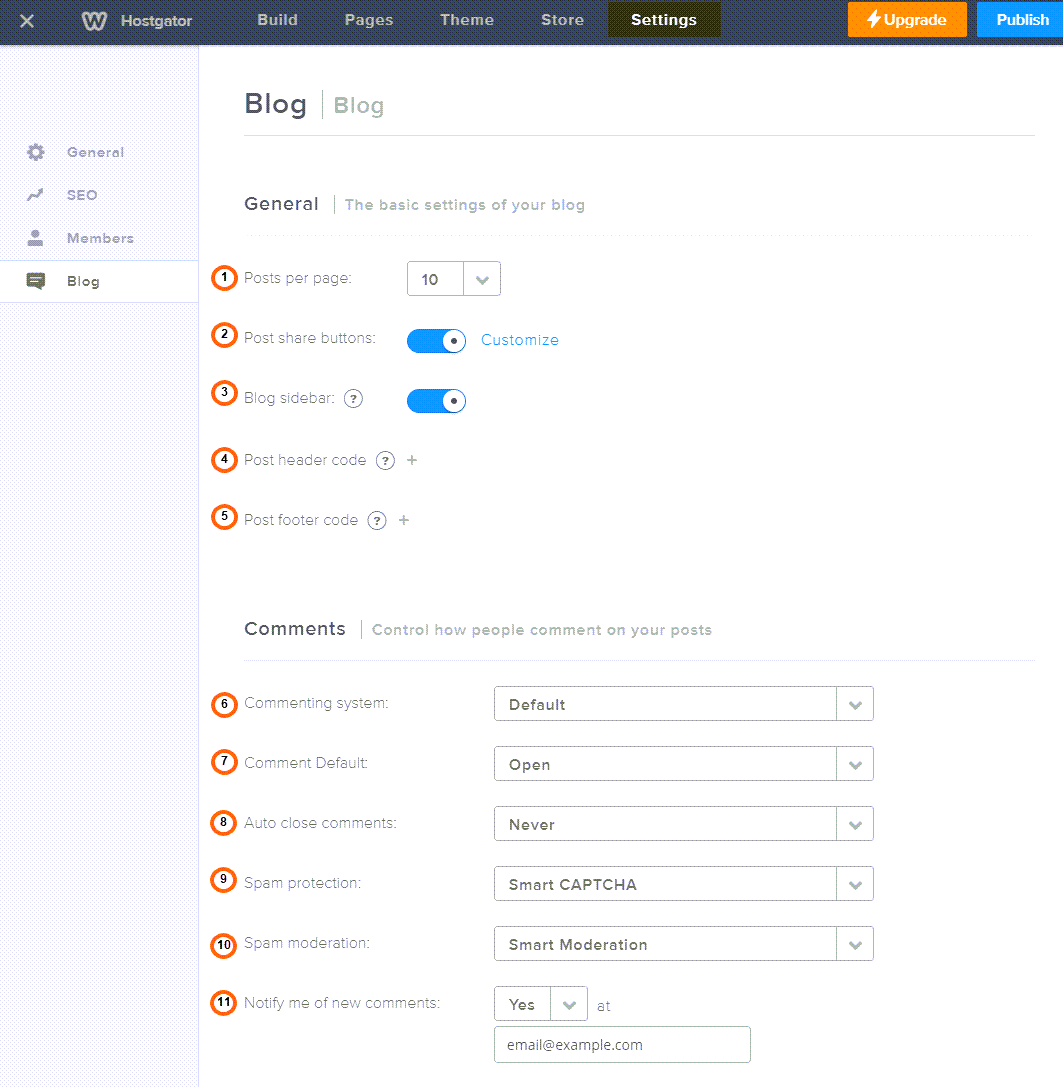
This section allows you to select and control how your blog will appear and handle comments.
-
Posts per page - This changes the number of posts that are displayed on the blog page.
-
Post share buttons - Toggle the social media share buttons for blog posts. Here, you can select if the Facebook or Twitter icon appears.
-
Blog sidebar - Toggle the default blog sidebar to display or not.
-
Post header code - You can add HTML codes for the header of the blog posts.
-
Post footer code - You can add HTML codes for the footer of the blog posts.
-
Commenting system - Choose between the Default, Disqus, and Facebook comment systems. Changing the system from Default will change the remaining options listed below.
-
Comment Default - New comment threads can be set to be open to allow further discussion, closed for a single comment thread, or requiring approval.
-
Auto close comments - Comments can be set to never close or to automatically close in 30, 60, or 90 days after they were made.
-
Spam protection - Option to change CAPTCHA for comments to Smart, Always, or Never show.
-
Spam moderation - Select the moderation type for spam comments to either be Smart Moderation or Never Moderate.
-
Notify me of new comments - This sends an email to the email listed when new comments are made to the blog.
Publishing Guide for Weebly
Here is a checklist you can use before publishing your Weebly website.
Website Settings: Review the settings to make sure they are correctly filled out.
Contact Form: Check the contact form options and confirm that the email to address is correct and there are no typo errors.
Mobile: You may not have realized that while building your website with Weebly, you were also creating a mobile-optimized version of that website.
To view the mobile version:
- Select a page and click the monitor icon from the top menu.

- In the dropdown menu, click on Mobile.
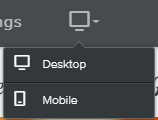
- Pending the theme, you may or may not be able to edit the mobile version. If it's a mobile-responsive theme, you will have a message stating that the theme is responsive and mobile options do not apply.
-
Once ready to publish, click the Publish button in the upper right-hand corner.
- A pop-up will show the publishing progress.
- When completed, a pop-up will provide the link to the published site. Click the link to view the site on your desktop and mobile devices.
Congratulations on creating, building, and publishing your Weebly website with HostGator!
Deleting your Weebly Site
If the time comes when you decide to delete your Weebly website, you can do so via your Customer Portal.
- Please note that deleting your Weebly site does not cancel your hosting plan or domain name registration.
- This process is irreversible! Due to Weebly's restrictions, we cannot move a Weebly site's content to a new domain name. Though the files themselves would transfer, Weebly cannot integrate the files properly, and the site would not be editable on the new domain in Weebly's interface.
To delete your Weebly site:
- Log in to your Customer Portal.
- Click on the Websites tab on the left-hand navigation menu.
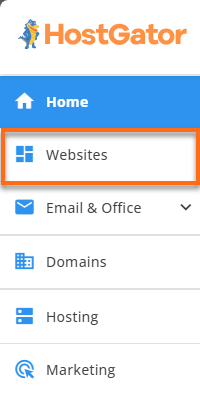
- Click on the Settings button of the Weebly site you are working on.
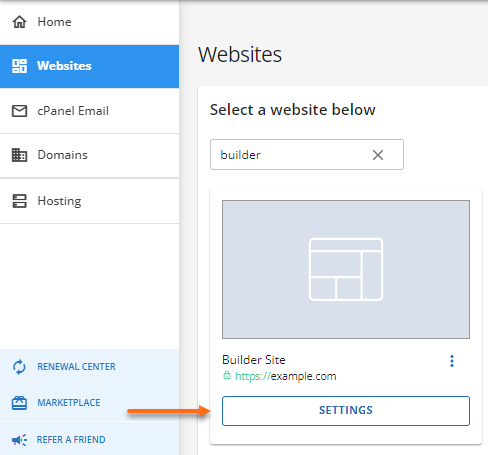
- Click the Settings tab on the top menu.

- Scroll down to the Site Management section and click the Delete Site button.

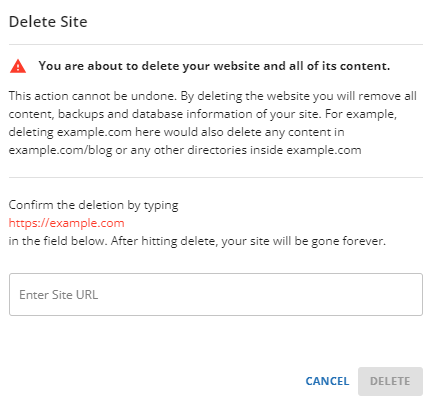
- A pop-up box will appear, informing you of the consequences of deleting your site. To proceed, type the text shown in the pop-up box and click the Delete button. (In the sample image below, "https://example.com" should be typed into the box.)
