Email Setup Guide for Windows Mail on Windows 8/10
This article will instruct you on configuring your email in Windows Mail for Windows 8/10. Before setting up your account, please ensure that your MX records are correctly pointed to your HostGator servers. To learn more about changing your domain’s MX records, please refer to this guide: How Do I Change My Website’s MX Record?
Here is a video guide we created to demonstrate how to set up your email on Windows Mail.
We have also outlined the full Windows Mail email setup instructions below.
Windows Mail on Windows 8/10
To set up your Windows Mail email client:
Option 1
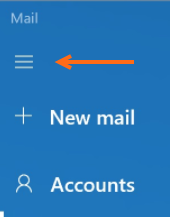
- From your computer's Start menu, click Mail from the application list.
- Once launched, click the three-bar icon on the top left.
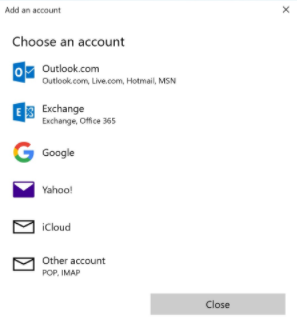
- Choose your preferred account where you wish to set up your email (In the video guide, Another Account — POP/IMAP was selected).
- Enter your email login credentials — complete email address and password. This is the email account you have created inside your cPanel. You can copy these details from your cPanel's Email Accounts section.
- Click Sign-in. The Mail application should automatically discover your email configuration.
- Once the Mail application auto-discovers your email settings, click Done.
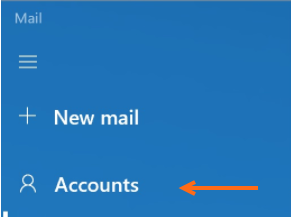
- On your computer, click the Accounts icon. Your newly added email account should be reflected in this section.
Option 2
To manually add a new account in your Windows Mail/Outlook:
- From your computer, click on Accounts.
- Select Add account.
- Scroll down a little from the dialog box and click Advanced Settings.
- Choose Internet email.
- Fill in the required fields:
- Email Address: The complete email address you wish to configure in Windows Mail (the same email address added in cPanel).
- User name: The same email address as above.
- Password: The password you used when you created your email account in the cPanel.
- Account name: This is the name of the report. You can choose any name you want to use.
- Send your messages using this name: This is the name that will appear on the messages that you will send.
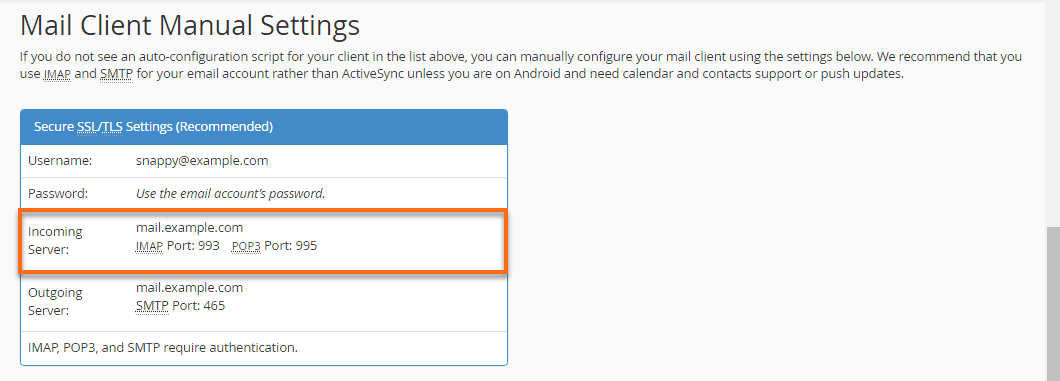
- Incoming email server: This information is found in your cPanel and usually displays as mail.yourdomain.ext or your server name.
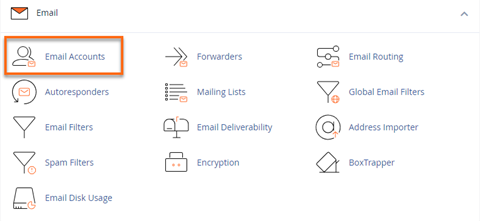
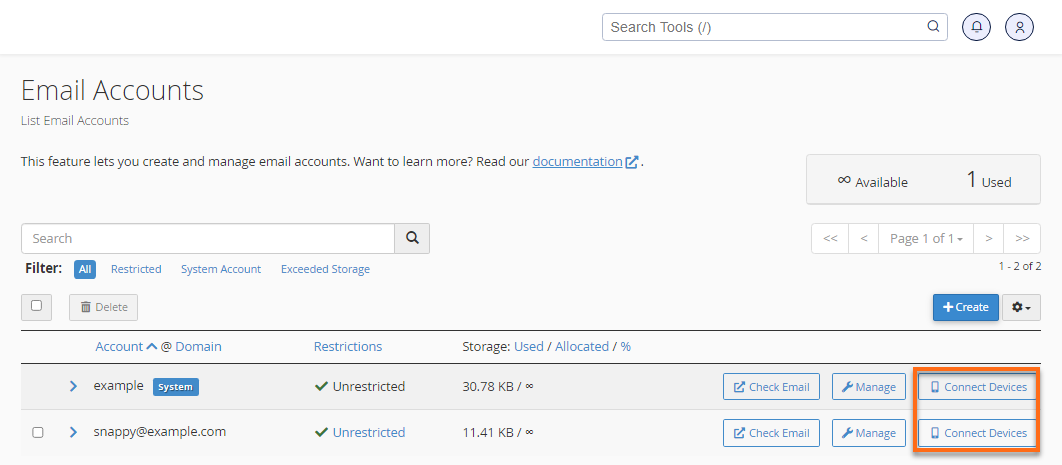
- In your cPanel's Email Account section, locate your email account.
- Click the Connect Devices.
- On the next page, you will find your configuration settings. Scroll down to the Manual Settings.
- The cPanel provides two email settings — SSL and Non-SSL Settings. It is recommended to use the SSL Settings. However, if these do not work properly, you can also try the Non-SSL configuration. Take note of the Incoming server under the SSL Settings.
- Account Type: You can choose either POP3 or IMAP. To know more about these two, please refer to this article: POP3 or IMAP with SSL.
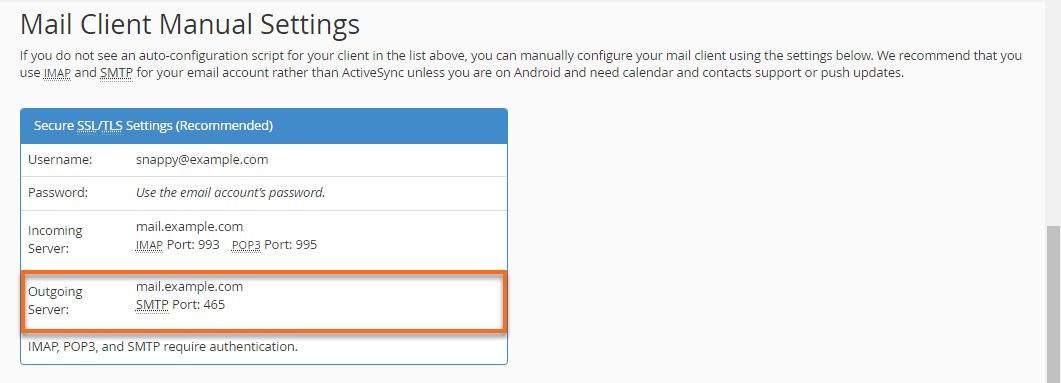
- Outgoing (SMTP) email server This can also be found in your email account's Manual Settings.
You can leave the rest of the checkboxes selected.
- Click Sign-in. The email account should then be displayed on your Accounts list.
The listed instructions above apply to Windows Mail. Please refer to this article to know more about the general email settings you will need to use for other email clients: Email Connection Settings.
HostGator also now offers Microsoft 365 to cater to your business email needs.