Knowledge Base
How to Rename a Database in phpMyAdmin
The latest version of phpMyAdmin allows you to rename a database directly within the interface.
Remember that when you change the database name, you must reconfigure MySQL user permissions and update any scripts or applications that reference the old database.
Before you begin:
If you are using cPanel, note the existing MySQL database user assigned to the database. This user may or may not share a similar name with the database itself. You will need this information when updating permissions later.
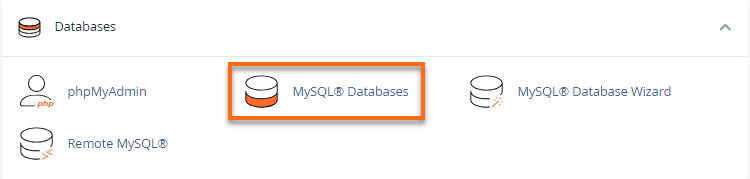
- In cPanel, click on MySQL Databases.
- Scroll down to the Current Databases section of the page.
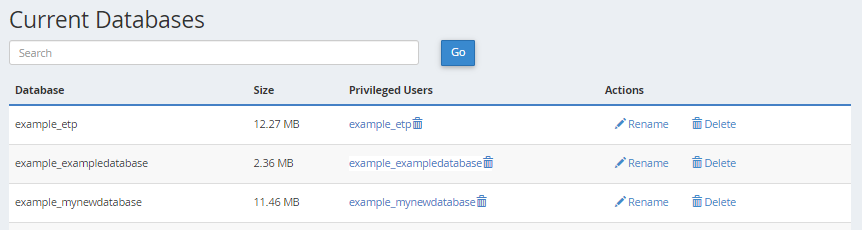
- Find the database you are about to rename, and take note or remember the database user already assigned to the database. You will need to know this for Step 2.
- You can return to the cPanel home screen to begin Step 1.
Step 1: Renaming the Database
The phpMyAdmin may look slightly different in the video below; however, the steps described should remain the same.
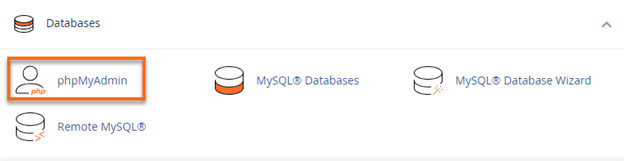
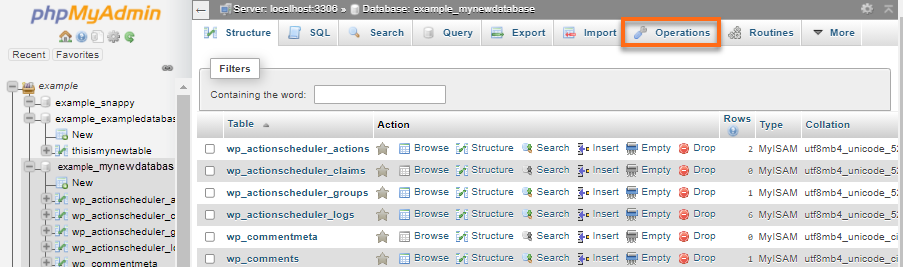
- From cPanel, click on phpMyAdmin. (It should open in a new tab.)
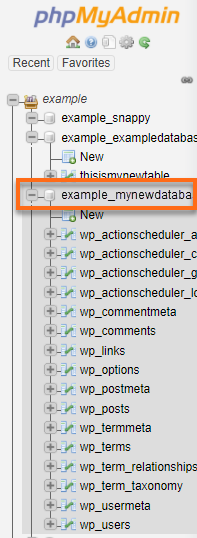
- Click on the database you wish to rename in the left-hand column.
- Click on the Operations tab.
- Where it says "Rename database to:" enter the new database name.
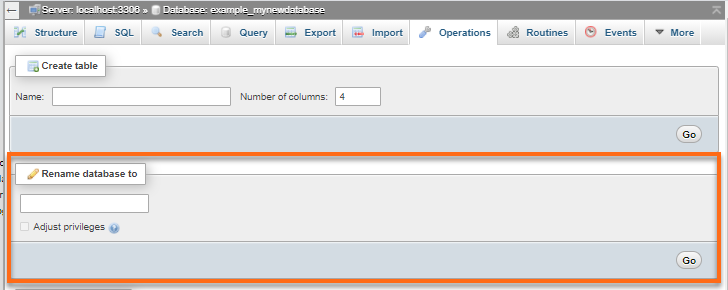
- Click the Go button.
- When it asks you if you want to create the new database and drop the old database, click OK to proceed. (This is a good time to make sure you spelled the new name correctly.)

- Once the operation is complete, click OK when asked if you want to reload the database.
Step 2: Reconfiguring User Permissions
If your hosting plan has cPanel, you must reconfigure user permissions.
- Go back to the main cPanel page.
- Click on MySQL Databases.
- Scroll down to the Add User To Database section of the page.
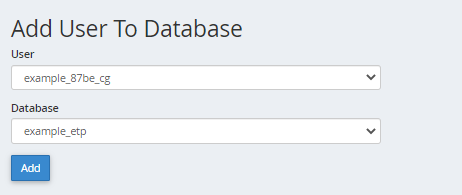
- Select the database from the list (it should be the new name).
- Select the database user from the list (the same one that was associated with this database).
- Click on the Add button.
- Check the box next to All Privileges on the Manage User Privileges page.
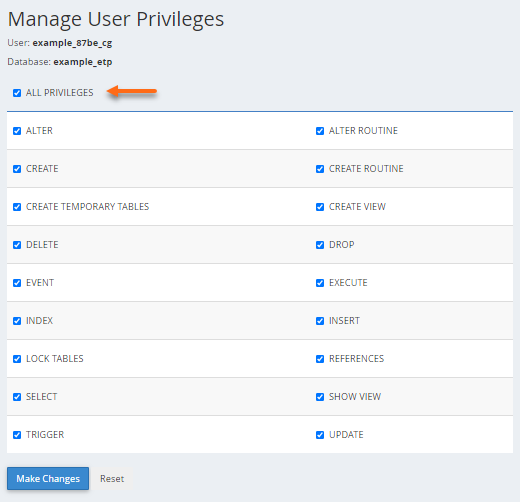
- Click on the Make Changes button.
Step 3: Update the Scripts
You may need to update any scripts or applications that reference this database since the name has changed, if you want them to continue to have access to this database.
Did you find this article helpful?