Exporting a MySQL Database via phpMyAdmin
This article guides you through the process of exporting and backing up your MySQL database using phpMyAdmin or cPanel’s Backup feature. You’ll find clear instructions for accessing phpMyAdmin in both cPanel and Plesk, along with helpful tips about user privileges and database naming. Follow the steps to securely save your database, and reach out to our support team if you need any assistance.
This video shows how to export data from your MySQL database using phpMyAdmin. A link to phpMyAdmin can be found in your HostGator control panel (cPanel or Plesk, depending on your hosting package).
How can I export a database?
Similar to importing databases, there are many ways to export your MySQL databases. This article will discuss instructions for exporting a database, also known as a database dump.
How to access phpMyAdmin in your control panel
Once a database is created, you can access it via your hosting account's control panel.
Via cPanel
- Log in to cPanel.
- Look for the Databases section, then click the phpMyAdmin icon.
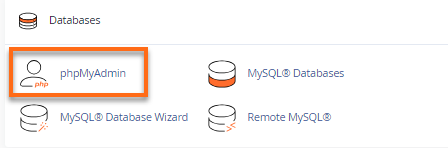
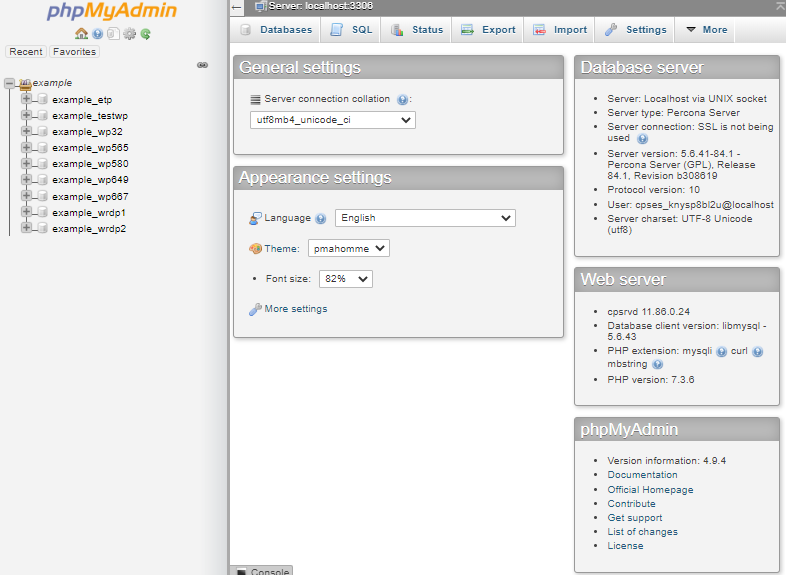
- A list of available databases will be displayed once you expand the username on the top left-hand side of the phpMyAdmin homepage.
Via Plesk
- Log in to Plesk.
- Click on Website & Domains from the left-hand menu.
- Click on Databases in the list of functions on the right. Alternatively, you can also click Databases from the left-hand menu.
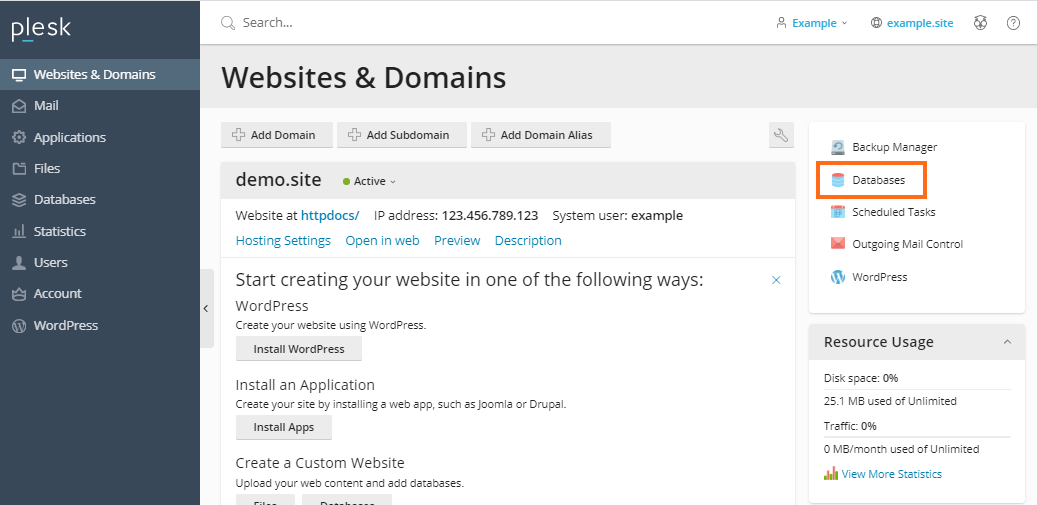
- Locate the database name you wish to access.
- Click on phpMyAdmin under your database's list of functions.
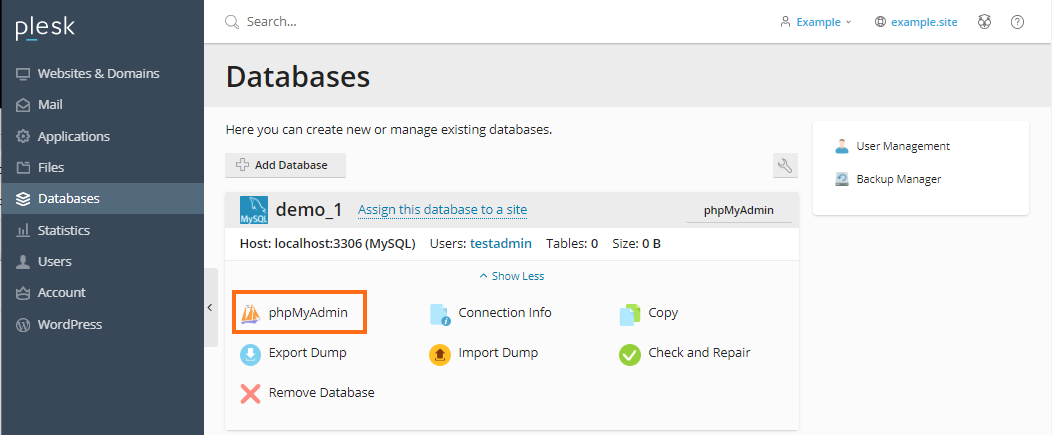
- You will then see a list of available databases in your control panel.
How to export a database
There are many ways to export a database.
Via phpMyAdmin
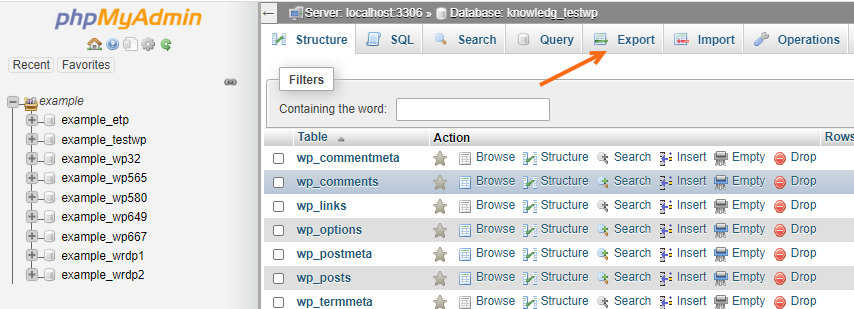
- Select an existing database in phpMyAdmin.
- Click the Export tab on the top menu.
- The Quick radio button is selected by default.

- Scroll down and click Go.
- This will download a .sql file into your computer. Depending on the database's size, the downloading may take some time.
More in-depth instructions, including explanations of different options on the export screen, can be found in the video below.
Via cPanel's Backup
Alternatively, you can also use the Backup feature of your cPanel, as demonstrated in the video guide below.
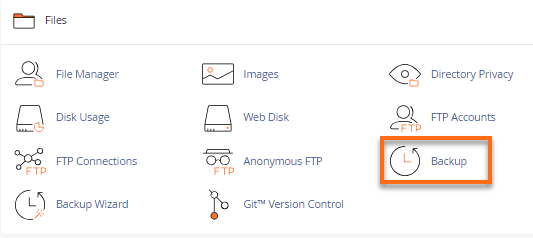
- Log in to the cPanel.
- Look for the Files section, then click the Backup icon.
- Scroll down the Backup page and locate Download a MySQL Database Backup.
- Click the database name you wish to generate a backup for.
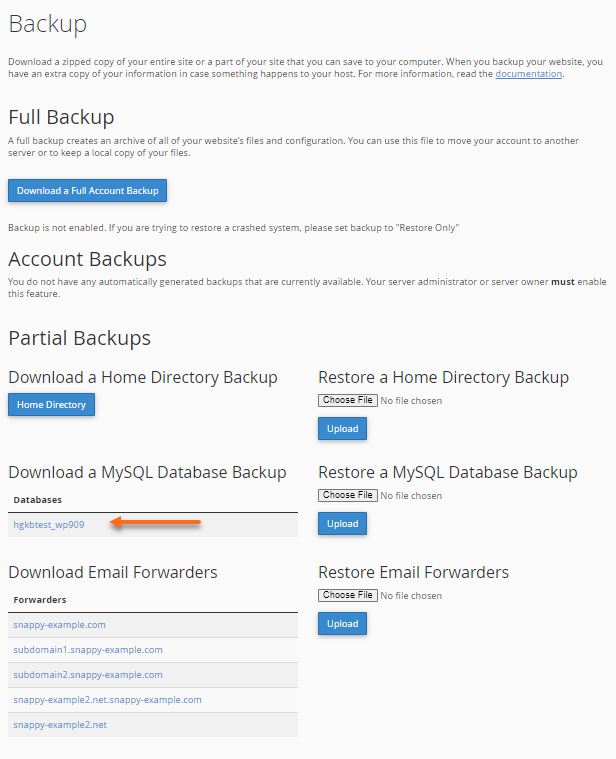
- Your database will start downloading to your computer.
Notes and Concepts
For the video tutorial, we are connected to phpMyAdmin using the root MySQL user. When connecting as a different user, some options may be disabled, depending on the server's configuration and the specific privileges granted to the user by the system administrator.
On systems with Plesk, the master MySQL user is the admin user instead of the root.
Like HostGator's servers, many systems are configured with control panel software installed to delegate the administration of the account on the server. Whenever possible, it is recommended that you use the controls within the control panel itself for certain tasks (such as the creation of databases, creation of users, management of user privileges, etc.) instead of phpMyAdmin. Performing these tasks outside the control panel without full knowledge of how to work around them can produce undesirable results in the operation of the control panel software.
Please note that on Linux-based systems, database names, database users, table names, and column names are case-sensitive, whereas on Windows-based systems, they are case-insensitive.