How to Create a Backup of Installation with Softaculous
It is a known fact that backups are essential in a website. If you used Softaculous to install a script, WordPress, for example, you could also use Softaculous to create a backup of your website. This article discusses how to generate a backup and download a copy of the backup of your install using Softaculous.
It is important to note that the size of your backups will occupy a space in your server, so you may also want to be aware of your disk space usage.
Please click the lin links to jump into sections.
How to Create Backups
To create a backup via Softaculous:
- Log in to cPanel.
-
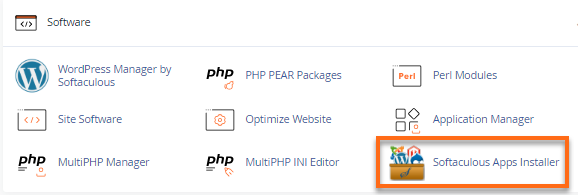
Look for the Software section, then click on Softaculous Apps Installer.
- Click the Installation box. We will use WordPress as an example.

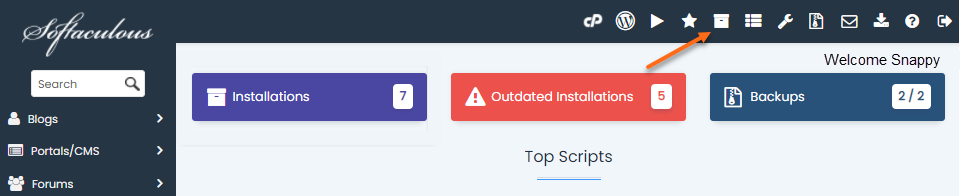
Alternatively, you can click the All Installations icon in the top-right menu.
- On the next page, a list of your current installation will be displayed.
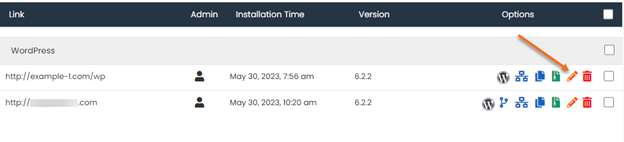
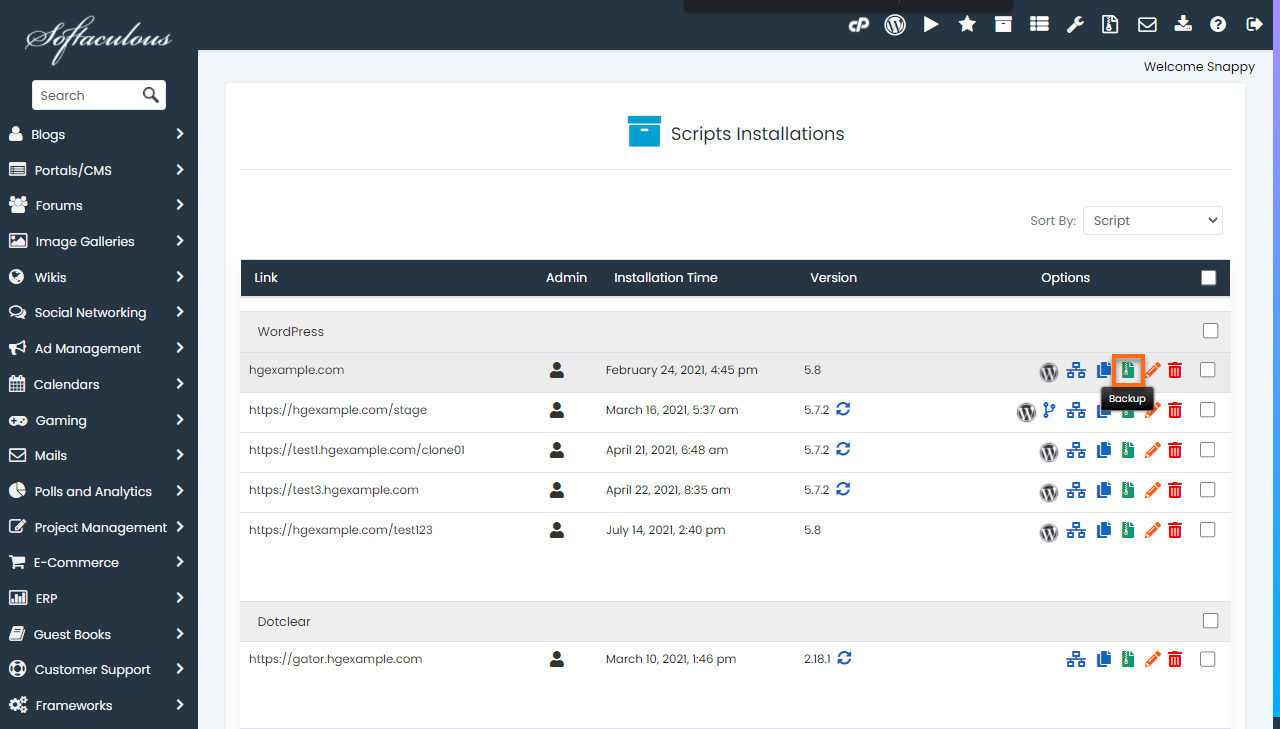
- Locate the website you wish to backup.
-
Click the Backup icon under the Options column.
- You will be redirected to the Backup information page. It will display the number of backups you currently have and the maximum number of backups you can generate. The Backup Directory and Backup Database are also already selected by default.
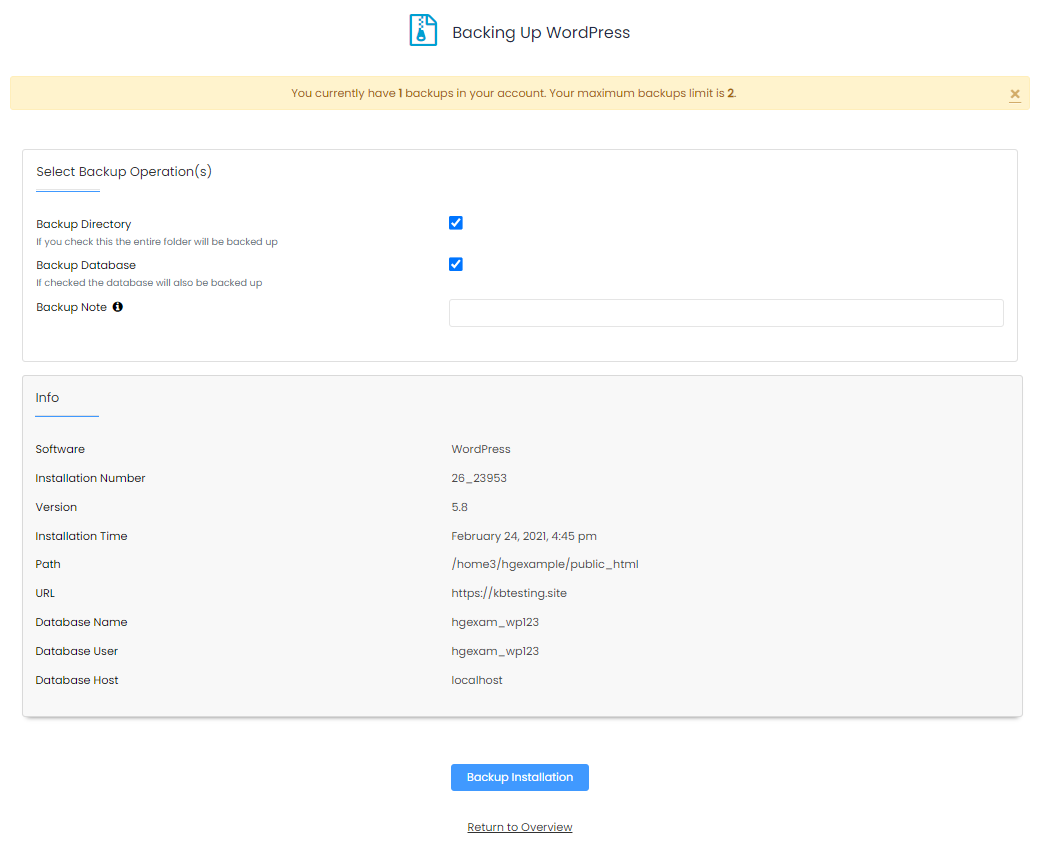
- Click the Backup Installation button.
-
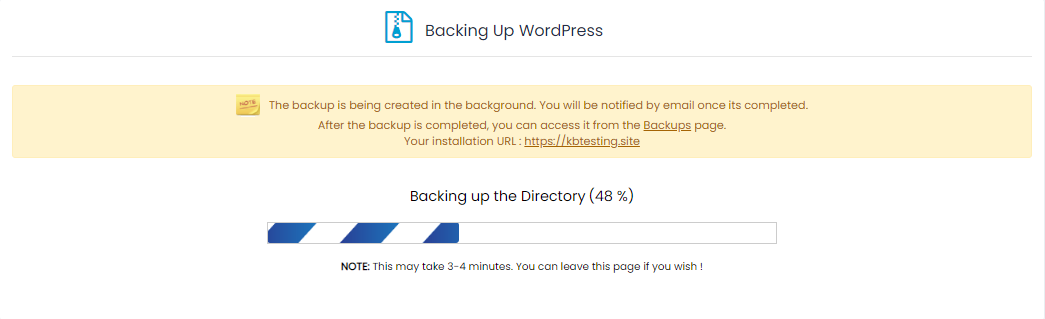
A progress bar will appear.
- Once done, click the Return to Overview link to go back to your current installations.

How to Download a Copy of the Backup
There are two ways to download a backup created via Softaculous.
Download Backup via Backups and Restore
-
On the Softaculous homepage, click the Backups and Restore icon in the top-right menu.

-
Locate the website from the list. The backup filename will be displayed under the File Name column.
-
Click the backup filename or the download icon to download the backup.

-
The backup will be downloaded to your local computer.
Download Backup via File Manager
To download a copy of the backup via File Manager:
- Log in to cPanel.
-
In the Files section, click File Manager.

-
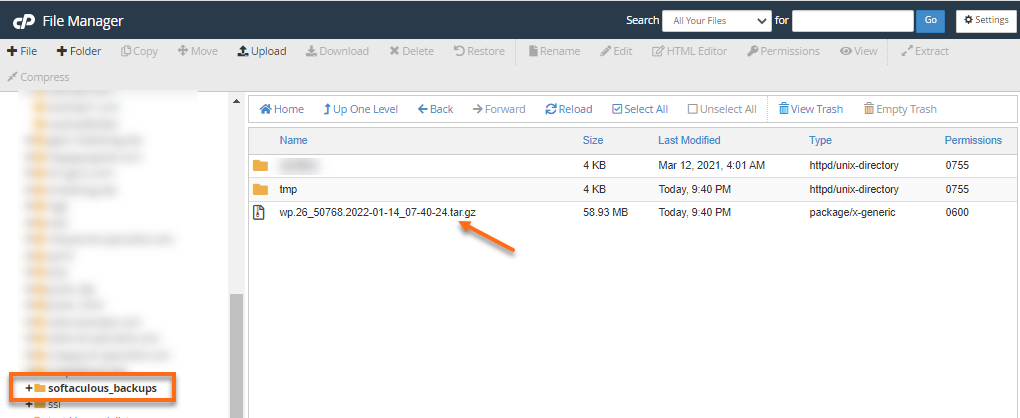
Inside File Manager, locate the softaculous_backups directory from the list of files and folder.
-
You will find the backup in a .tar gz file. The filename usually includes the date when the backup was generated.
-
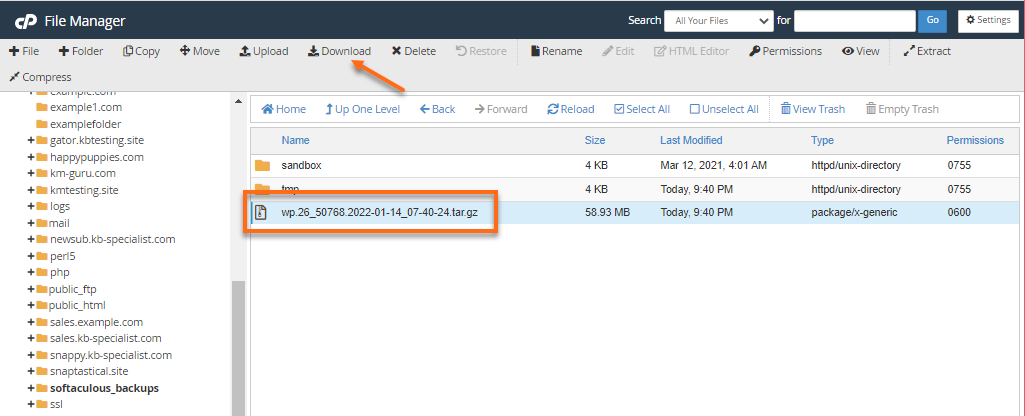
Select the backup and click the Download icon located in the top menu.
-
The backup will be downloaded to your local computer.