Knowledge Base
Categories: SiteLock
How to Configure SiteLock SMART/DB Scanner
The SiteLock Secure Malware Alert and Removal Tool Database (SMART/DB) Scanner scans your website databases on-demand and cleans any malware automatically. For this scan to connect, you will need the same FTP account you used to connect your SMART scan. For instructions on enabling your SiteLock SMART scanner, please visit the following article.
This article will guide you in configuring server access and database settings within the SiteLocK Dashboard.
To set up your SMART Database Scanner:
- Access your SiteLock Dashboard.
- Navigate to your website's Site Settings tab.
If you have a single website, click on the Sites Settings tab in the top menu.

If you have multiple websites, click Sites on the left-hand menu, then select Manage next to the website you need to set up.
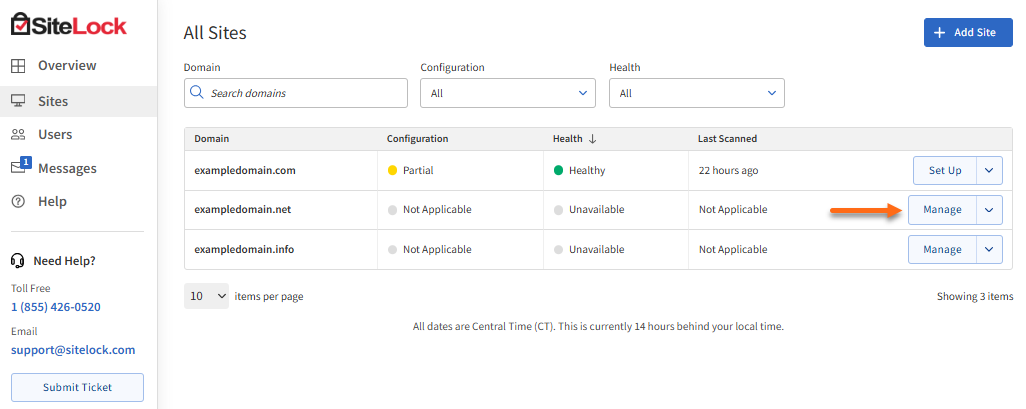
- By default, the Configure Server Access section appears under the Server Access tab in Site Settings.
This section lets you set up connections for the SMART Scanners to automatically scan and clean your website.
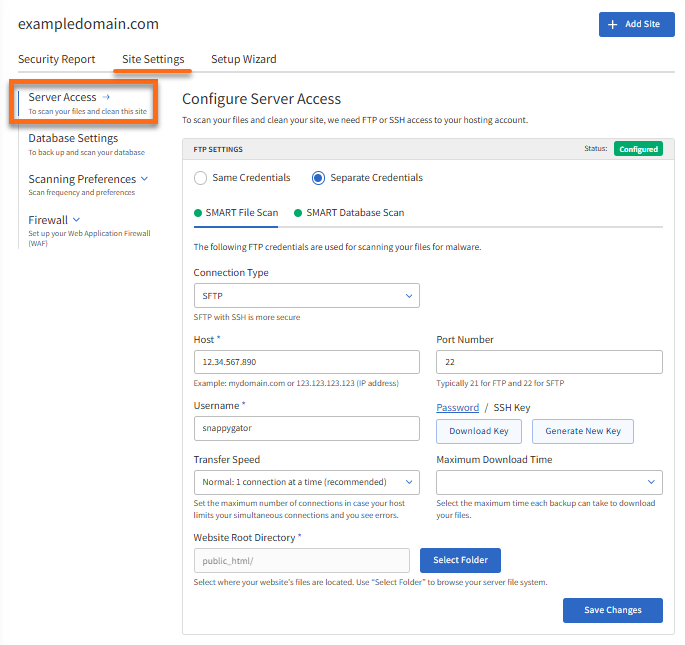
- Select whether to use the Same Credentials or Separate Credentials options. This applies to all features of SiteLock (SMART File Scan, SMART Database Scan, File Backup, and Database Backup.)
- Same Credentials - This option allows you to enter the FTP details just once, and all products will use the same credentials. This is the most common scenario, as most accounts typically require access to only one server.
- Separate Credentials - This option enables you to enter distinct FTP connection details for the SMART File Scan, Database Scan, and Backup products. We strongly recommend using a single FTP user for all products unless you have a specific reason for creating multiple FTP users.
- Make sure you're on the SMART Database Scan tab.
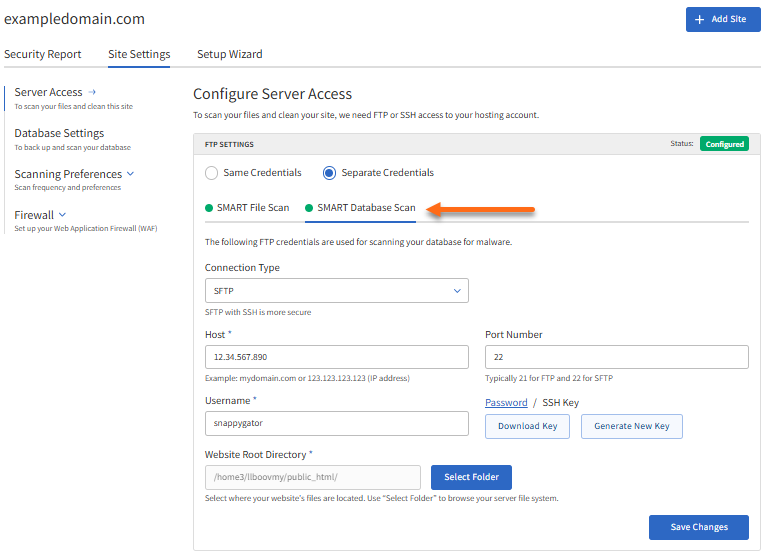
- Select the protocol from the Connect Type dropdown menu.
- FTP - File Transfer Protocol; a standard network protocol used for transferring files.
- FTPS - FTP Secure; an extension to FTP that adds support for the Transport Layer Security.
(TLS) and the Secure Sockets Layer (SSL) cryptographic protocols. - SFTP - SSH File Transfer Protocol; a protocol recommended for secure file transfers.
- Enter your FTP credentials.
- Host - This is your server address, which can be a domain or an IP address
- Port number - This port is used to connect to the database. This is the port number of the MySQL server, which is typically 3306 for MySQL.
- Username - The username required to access the database.
- Password - The password to access the database.
- Website Root Directory - This is where your website's files are located (for example, public_html folder). Click the Select Folder button to browse your server file system.
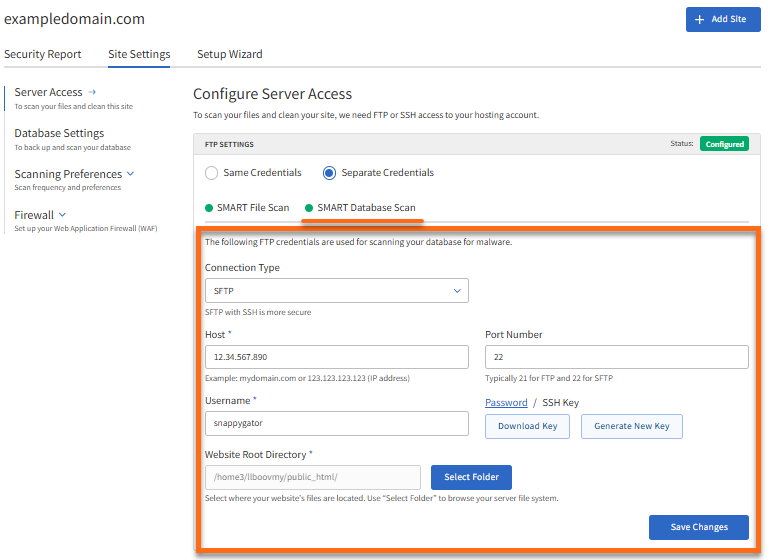
- Once done, click the Save and Continue / Save Changes button.
- Next, click on the Database Settings tab on the left menu.
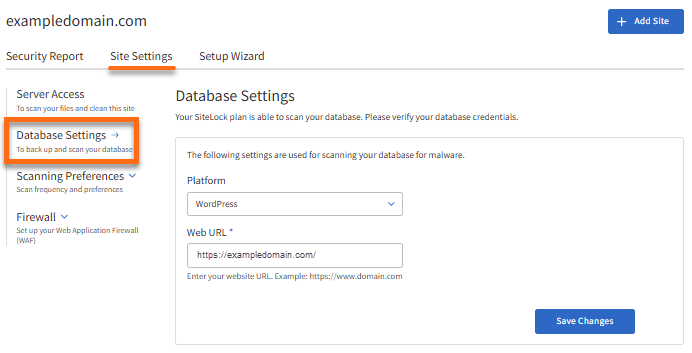
- Select your website's Platform. To configure SiteLock for WordPress or Joomla sites, choose either WordPress or Joomla from the dropdown if your site is built with one of these platforms. SMART Database should automatically detect the configuration file, so you won't need to enter it manually. If your site uses a different platform, select Other and complete the additional fields required to access your website.
- Enter your website's URL. Please include "http(s)" and "www" (if applicable) when sharing your website URL. If you are unsure of your full URL, visit your website's homepage. Then, double-click the URL bar to copy the complete URL, including any additional details that may not be visible in some browsers.
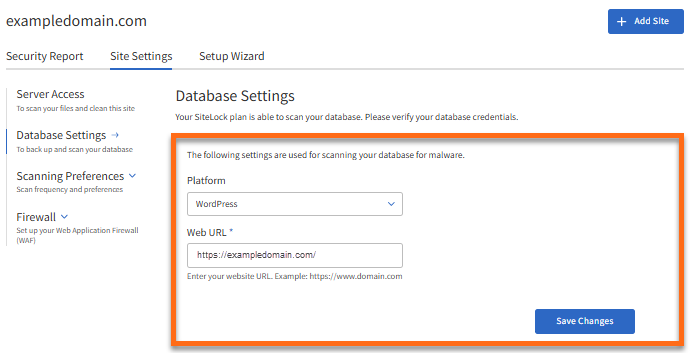
- Once done, click on Save Changes.
Related Articles
Did you find this article helpful?