Enable SiteLock TrueShield and TrueSpeed
TrueShield and TrueSpeed are included in all SiteLock plans. These security and performance solutions protect your website from malicious traffic and improve site speed by delivering your content through SiteLock’s global Content Delivery Network (CDN). The CDN uses servers around the world to ensure faster performance for legitimate visitors.
If you have purchased SiteLock, we highly recommend ensuring that both TrueShield (Website Firewall) and TrueSpeed (CDN Acceleration) are properly configured. To complete the setup, you must activate the Firewall and CDN within your SiteLock Dashboard.
How to Activate the SiteLock Firewall & CDN
To fully enable the SiteLock firewall, you need to update your domain’s DNS records so all website traffic flows through the SiteLock CDN and Firewall.
Step 1: Manage Certificate (SSL Validation)
SiteLock automatically detects whether your domain has an SSL certificate. If SSL is detected, you will be prompted to validate domain ownership by adding a TXT DNS record.
- Access the SiteLock Dashboard through your Account Login Links.
- In the SiteLock Dashboard, go to the Setup Wizard tab for your domain.
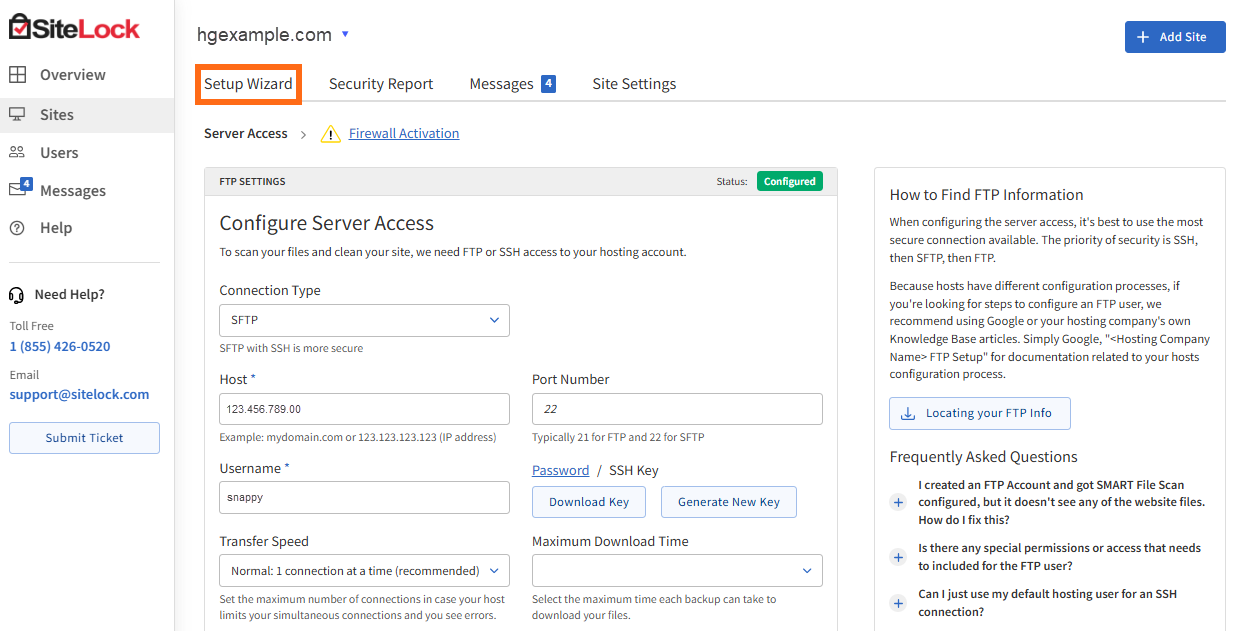
- Click on the Firewall Activation tab, and copy the TXT Value shown in the Validating Domain Ownership section.

- Add this TXT record to your domain control panel (If using HostGator, go to the Domains tab in the Customer Portal. Refer to the Making DNS Changes to the Domain Bought from HostGator | Managing Domain's DNS Records for instructions).
- Wait up to 24-48 hours for DNS changes to take effect.
- Once your domain is verified, the Firewall & CDN section will show that SSL traffic is routing through the firewall.
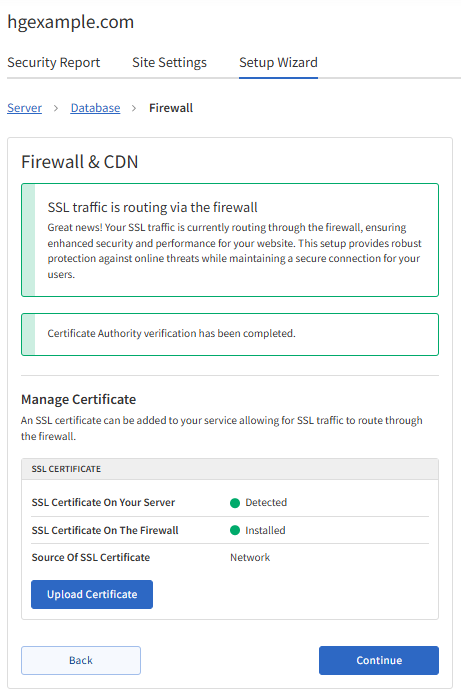
- Click Continue to proceed.
Step 2: Manage Routing (Update DNS Records)
Next, update your DNS records to route website traffic through the SiteLock CDN.
- In the Setup Wizard, look for the Remove DNS records table and delete the specified records from your domain.
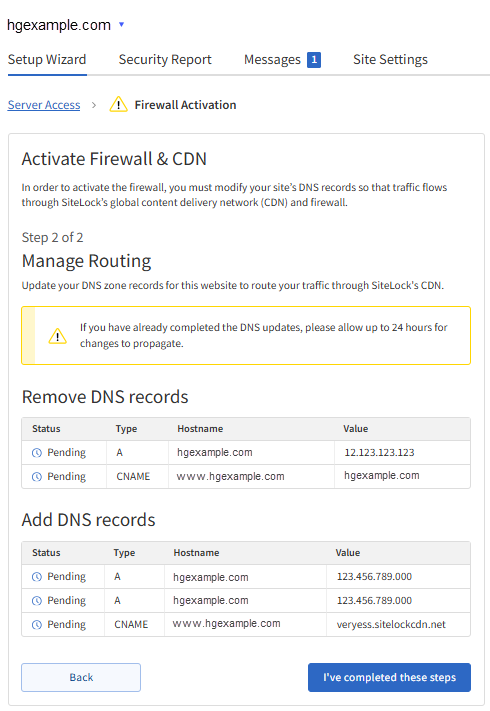 The values displayed in the tables in the image above are sample values only. Your SiteLock Dashboard will provide the exact DNS record values you need to remove and add to your domain.
 - Click the I've completed these steps button to finalize the task.
- Allow propagation to take place, which usually takes 24-48 hours.