Problems with Spoof, SPF
What is email spoofing?
Email spoofing is when the email header's From line is modified to something other than the original sender. A common sign that your email address is being spoofed is getting large numbers of bounced or returned messages, such as Mailer Daemon or Failure notifications, for emails you never sent.
One of the features of a standard SMTP server is modifying the email header to be from any address. This is a convenient built-in feature, so the address is easy to read (like [email protected]). Spammers often exploit this feature to mask where they are sending from.
This article discusses the following topics:
How to create an SPF record in cPanel
Creating an SPF record will verify that the email server or IP address from which the email was sent is authorized to send emails for a particular domain name. This is used to prevent email spoofing for your domain. For more information about the DNS records involved in preventing email spoofing, please see the Understanding email spoofing section below.
There are several methods for creating this record, regardless of whether you are using cPanel or WHM.
Creating an SPF record automatically
This is the easiest method for creating an SPF record in cPanel. It will also show whether or not an SPF record is already installed.
- Log in to cPanel. There are two ways to access your cPanel.
- Option 1: Access your cPanel directly.
- Option 2: Access your cPanel via your Customer Portal.
- Log in to your Customer Portal.
- Click Hosting in the left-side menu.
- If you have a single hosting package in your account, scroll down to the Quick Links section.
If you have multiple hosting packages in your account, locate the hosting package you want to manage on the Hosting Packages page, then click its Manage button.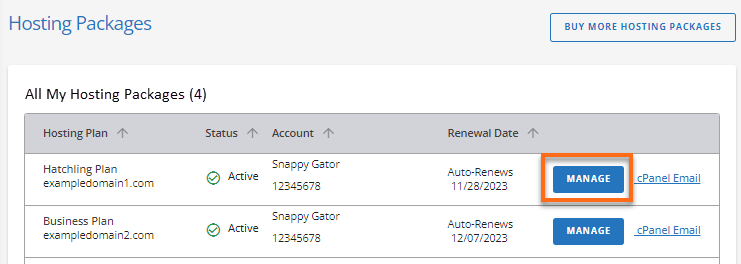
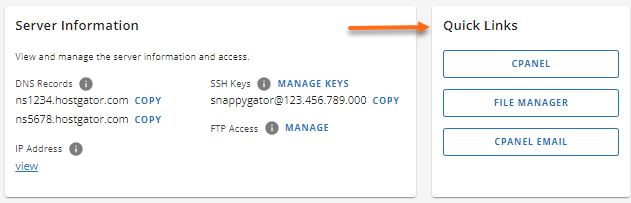
- Under the Quick Links section, click the cPanel button.
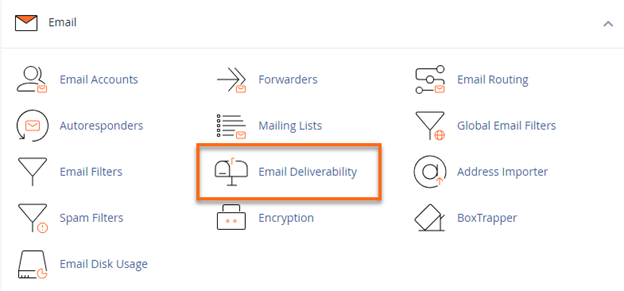
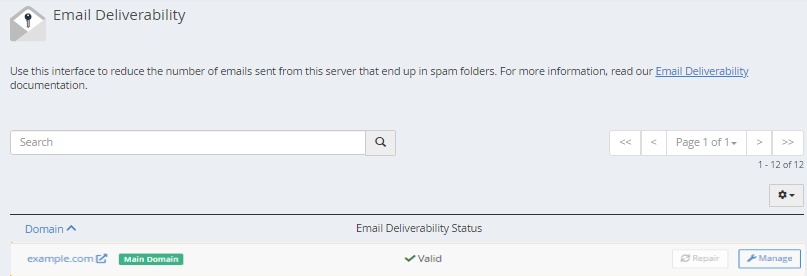
- In the Email section, click the Email Deliverability icon.
- Check the Email Deliverability Status. In this section, you will also see the Repair and Manage buttons on the far right.
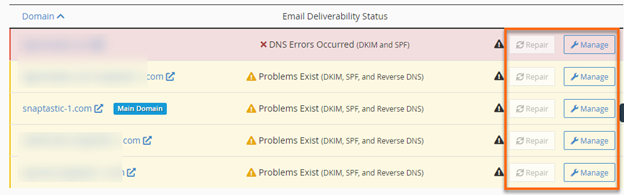
- If it says Valid, then DKIM & SPF are enabled.
- If it says Problems Exist (DKIM and SPF) or Problems Exist (DKIM), click the Repair or Manage button on the far right.
- The Repair option will repair a domain's invalid DNS records. A new interface will appear, allowing you to review and confirm the system's recommendation for invalid records. You can copy or customize the suggested record before approving the repair. The system's process of checking repair records may take minutes, depending on your server.
Notes:
- This option is unavailable if your server does not control the domain's DNS records.
- Reloading the page does not interrupt the repair process.
- You cannot simultaneously update 2 or more domains whose DNS records exist in the same zone.
- Under Manage, you can manually resolve issues with your domain's email-related DNS records. A new interface will show the DKIM and SPF sections with the reason for the error. Make sure you address the error by connecting your domain to your HostGator name server.
For more information on how to connect your domain to your server, please visit the following article:
- Within the Manage the Domain interface, you can perform the following actions.
DKIM Records
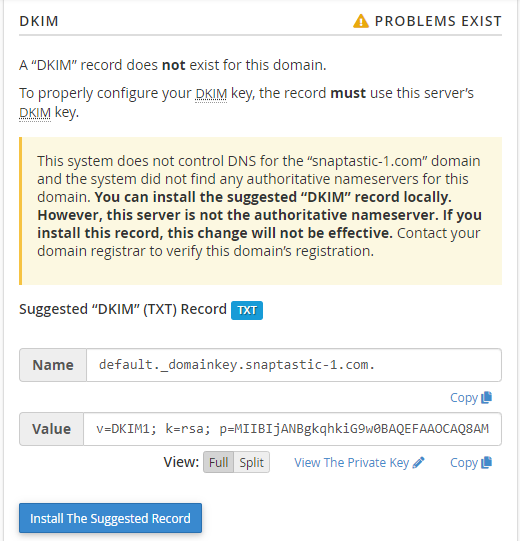
- Generate Local DKIM Key - If there is no existing DKIM record, click this to generate one.
- Copy - You can copy the information in the Name and Value text boxes within the Suggested "DKIM" (TXT) Records section.
- View - This allows you to modify the Value field. You can view the Value field in Full or Split, where Full displays the record in its entirety and is for providers who split their records automatically. In contrast, Split displays the record into 255-character parts and is for providers who don't split their records automatically.
- View the Private Key - This option retrieves the suggested private key and directs you to the View the Private DKIM Key interface.
- Install the Suggested Record - Click this button if your DKIM record is not yet installed, and the Email Deliverability section shows that the record is invalid.
SPF Records
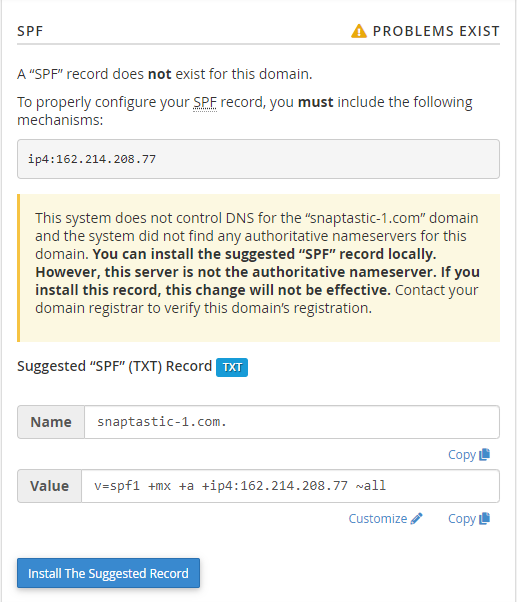
- Copy - You can copy the information in the Name and Value text boxes and provide these to your name server provider if you're not hosting your emails with HostGator.
- View - This allows you to modify the Value field. You can view the Value field in Full or Split.
- Customize - This option allows you to modify the suggested SPF record. It redirects you to the Customize an SPF Record interface.
- Install the Suggested Record - Click this button if your SPF record is not yet installed, and the Email Deliverability section shows that the record is invalid.
- Click the Install the Suggested Record button under the SPF section (and the DKIM section if it also shows an error).
- The system will initiate the installation process and notify you of the progress. Reloading the page or returning to the previous page will not interrupt this process.

- Your SPF record (and DKIM record) will be generated and added to the domains listed in your cPanel. A prompt will be displayed, notifying you of the successful DNS record update.
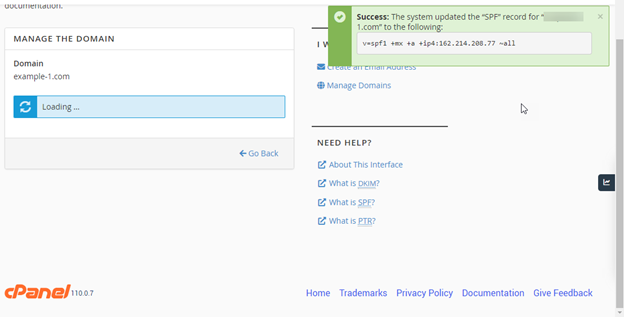
- The Email Deliverability section will show the status as Valid.
Creating an SPF record manually
This method is intended for users who want to ensure that the SPF record is tailored to their preferences.
- Log in to cPanel. (See options above on how to log into your cPanel)
- In the Domains section, click the Zone Editor icon.

- Click Manage to view the domain's complete set of DNS records.

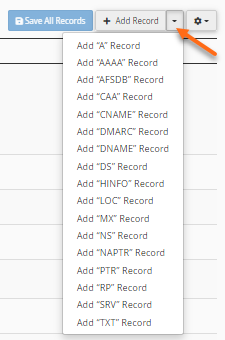
- Click the +Add Record button or its dropdown icon on the far right, then select Add "TXT" Record for the record type.
- Enter the following information:
- Name: Type your domain name (without the www)
- TTL: 14400
- Address: Create this special code or use an SPF wizard to generate the code
- Once done, click on the Save Record or Save All Records button.
How to create an SPF record in WHM
WHM users can create SPF records using the instructions listed below for current cPanel accounts or domains. If an SPF record is needed for a new cPanel account, WHM users can also choose to enable the SPF record while creating the cPanel by checking the Enable SPF option.
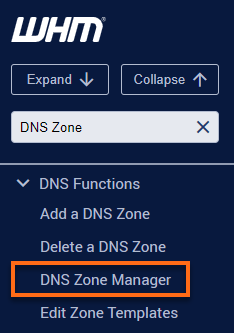
- Log in to WHM.
- Look for the DNS Functions section. The quickest way is by typing a keyword in the search boxes, either in the left-side panel or at the top of the page.
- Select DNS Zone Manager from the list.
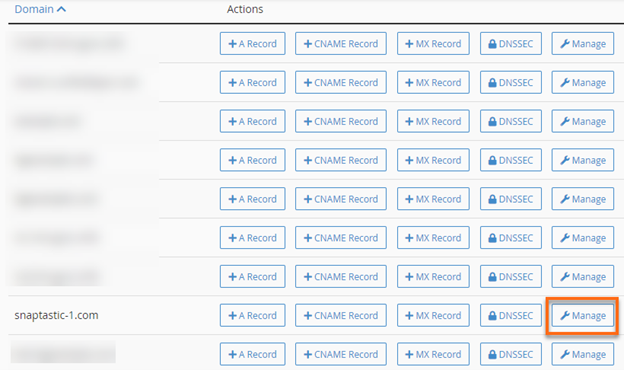
- In the DNS Zone Manager section, select the desired domain name from the list and click Manage.
- Click the +Add Record button or its dropdown icon and select Add "TXT" Record.
- Enter the following information:
- Name: Type your domain name (without the www), then add an extra dot at the end (for example, hostgator.com). Including a trailing dot at the end of your domain is important, or you may break your DNS.
- TTL: Keep the 14400 part.
- Type: Select TXT.
- Record: Create this special code in the Text Information box or use an SPF wizard to generate the code.
- Click Save Record to save the changes.
Understanding email spoofing
How do I stop someone from spoofing my domain?
Unfortunately, it is not entirely possible to stop someone from using your email address as the FROM address. This is because the address on an email works similarly to a physically mailed letter or package. You can physically put any address on a letter sent via the U.S. Postal Service. The post office does not even check if the return address is real. It is similar to email. However, there are several methods to help alleviate the issue, which are discussed above.
How to resolve email spoofing
Spoofing cannot be stopped entirely; it can only be mitigated. Though our system is automatically set to return messages with :fail: No such user here, the real problem may not be solved.
HostGator automatically creates an SPF record for all Shared and Reseller accounts. You can check the existence of your SPF record via online DNS lookup tools, such as https://mxtoolbox.com/.
What are the necessary DNS records involved to mitigate email spoofing?
While it is not entirely possible to stop email spoofing, several DNS records are set up to handle this issue.
- SPF records - These records define what servers can send an email for a particular domain.
- DKIM records - They specify a set of authentication keys used to ensure an email was not modified in transit between email servers or recipients.
- DMARC records - Used to specify a set of rules for handling emails that do not pass SPF and/or DKIM record checks.
What happens when an email is spoofed?
When emails are sent from a non-existent FROM address for your domain, and they bounce-back, our email server will attempt to deliver the email to the spoofed email address. If the spoofed emails happen to use an existing email address for your domain, you will receive a bounce-back in your inbox that contains the spam email that was originally sent. Otherwise, you should not receive the bounce back message if the spoofed emails are sent from a non-existent email address. Luckily, modern mail servers understand that abuse happens and have built-in functionality to help prevent or stop it. Modern mail servers can use many factors to determine whether an incoming email is spam or not and whether to accept delivery of that email.
If an email server receives a spoofed email claiming to be from your domain, the server will use methods such as sender verification, various DNS record checks (SPF, DKIM, and DMARC records) to determine where the email was sent from, whether the sender really is who they claim to be, and numerous other checks before deciding whether to accept delivery of the received email or not. If a spoofed email is sent from your domain and fails any or all of these verification checks, a bounce back email will be generated and sent back to the email address that sent the email originally. If this email address on your domain does not exist, you will not receive a bounce back.
Once a spoofed email is received, the recipient can then choose to report the email as spam, which may result in third-party reports being generated and sent to systems administrators to handle and shut down the source of the spam.