Mac Mail Setup
Apple Mac Mail is a built-in, free email client designed for Mac users, featuring a simple interface designed for straightforward setup and flexible customization. In this article, we will guide you on how to set up your Apple Mac Mail.
General Email Settings
Mac Mail supports auto-discover for detecting server settings. If your email client can detect your email configuration from the email provider and your username and password are correct, then you may use the recommended settings.
If autodiscovery fails, you may wish to use the troubleshooting steps provided in this article:
Otherwise, you will need to provide an email for general settings that can be used in conjunction with the setup instructions listed below; please refer to the following article:
Before setting up Mac Mail to use with your domain, it is recommended that you first:
- Wait until your domain name has been propagated.
- Create the email account in your hosting control panel.
Mac Mail Configuration
The following video will walk you through Mac Mail Configuration:
These steps are available for reference and may be used to follow along with the video:
- Open the Mac Mail application.
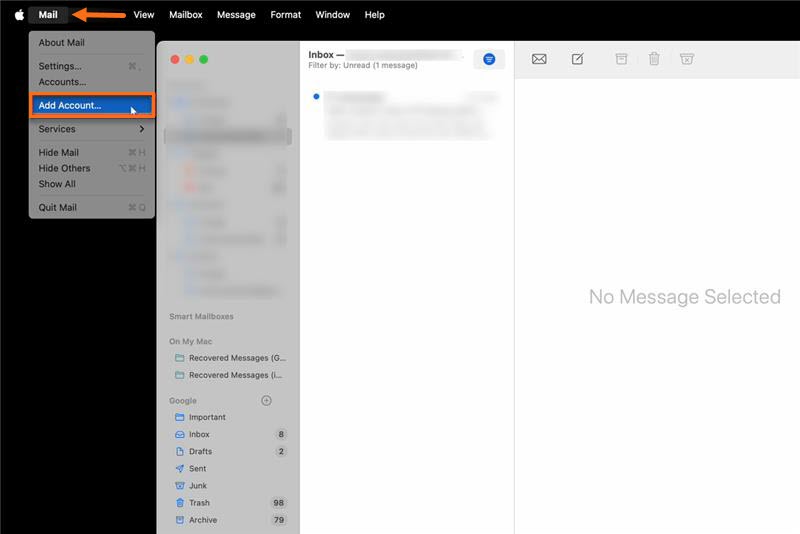
- From the Mail menu, choose Add Account. First-time users will be automatically prompted to create an account.
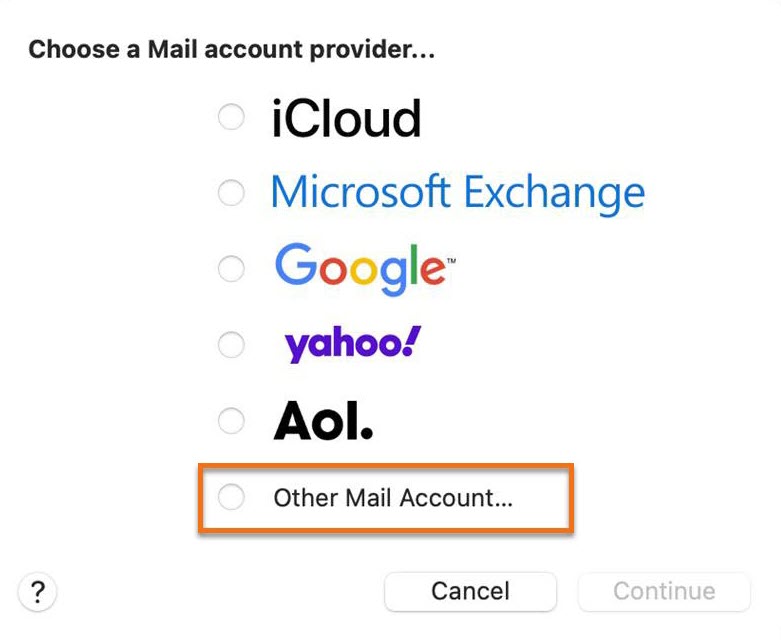
- Select Add Other Mail Account and click Continue.
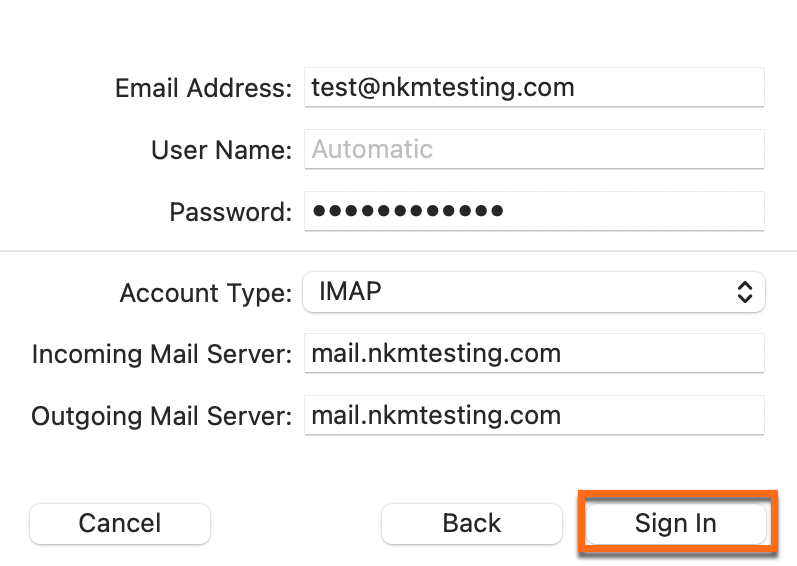
- In the appropriate fields, provide your full name, complete email address to be used, and password.
- If this option is enabled, deselect Automatically Setup Account to configure the email account manually, then click Continue.
- If you want your account to be automatically configured, you need to keep the option selected and follow the instructions provided by the Mail Setup Assistant.
- Click Sign In.

- In the Account Type section, you can choose to use either the IMAP or POP settings.
Incoming Mail Server:
mail.example.com or full.servername.comPlease replace "example.com" with your email's domain name. You can also use the server hostname that you can find on your cPanel's homepage, Welcome email, or Customer Portal.Secure SSL/TLS Settings:
Non/SSL Settings:
IMAP Port: 993
POP3 Port: 995
or
IMAP Port: 143
POP3 Port: 110 - Input the settings for the Incoming Mail Server.
- Provide the Outgoing Mail Server information - your SMTP settings.
Outgoing Mail Server:
mail.example.com or full.servername.comPlease replace "example.com" with your email's domain name. You can also use the server hostname that you can find on your cPanel's homepage, Welcome email, or Customer Portal.Secure SSL/TLS Settings:
Non/SSL Settings:
SMTP Port: 465
or
SMTP Port: 25 or 26- If prompted, select Use Authentication and provide the email username and password.
- If prompted, provide Outgoing Mail Security settings, then click Continue.
- Once done, click Sign in.
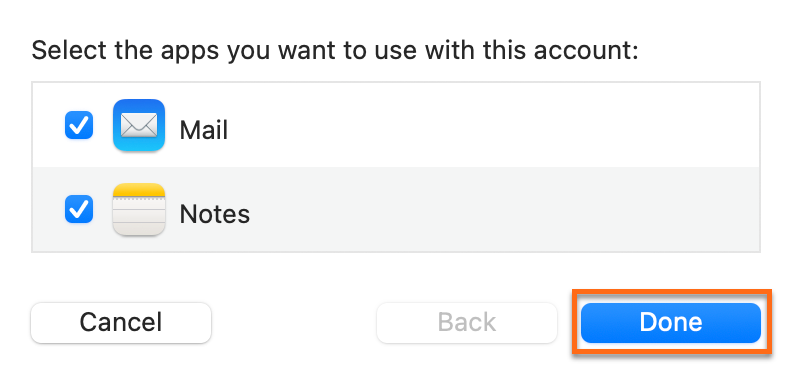
- After clicking Sign In, you'll be prompted to select the apps you want to use with this account. Simply click Done to continue.
- That's it! Your newly added email account is now accessible. in Mac Mail.
After completing these steps, users can send and receive emails through the newly created account. For additional help with the Mail Setup Assistant, please consult the following external guide:
Removing an Email Account
Exchange, IMAP, and MobileMe accounts keep their mailboxes and messages stored on the server. So deleting these accounts in Mail will not remove the messages permanently from the server. However, if you're unsure whether your account falls into one of these categories, it's a good idea to copy the mailboxes and messages you want to retain into an On My Mac mailbox or manually save individual messages by selecting them and using the Save As option in the File menu.
Troubleshooting
If you receive an error regarding "too many connections" or "error 500," there are a few options that are available to troubleshoot these errors.
Try a Different Mail Client
You can install and use Thunderbird without affecting your current Mac Mail settings. We recommend Mozilla Thunderbird because it's stable, easy to use, and freely licensed.
Delete Any Additional Folders
Mac Mail often creates a separate connection for each mailbox folder. Removing unused folders can reduce the number of outbound connection attempts made by the application.