Knowledge Base
Categories: Windows General Information
How To Create a Feedback Email Address in Plesk
We want our visitors to send us feedback and get a response saying that we have received it. To do this, first, set up a new email account as before and name it Feedback, but don't click OK quite yet. Use the following steps to create a feedback email address in Plesk.
- Log in to Plesk.
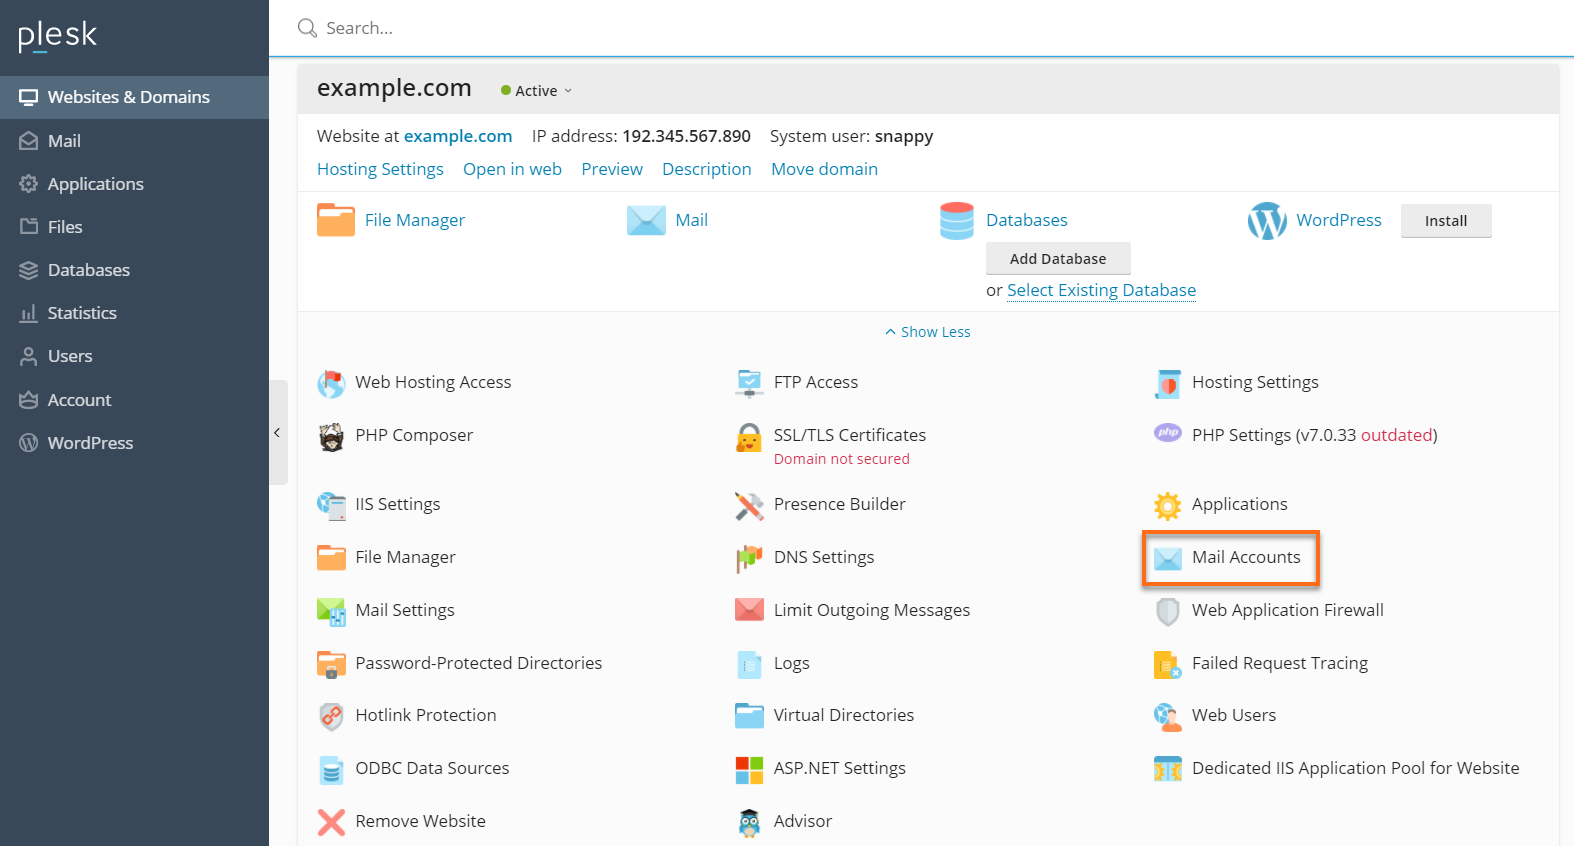
- Navigate to the Mail Accounts icon.

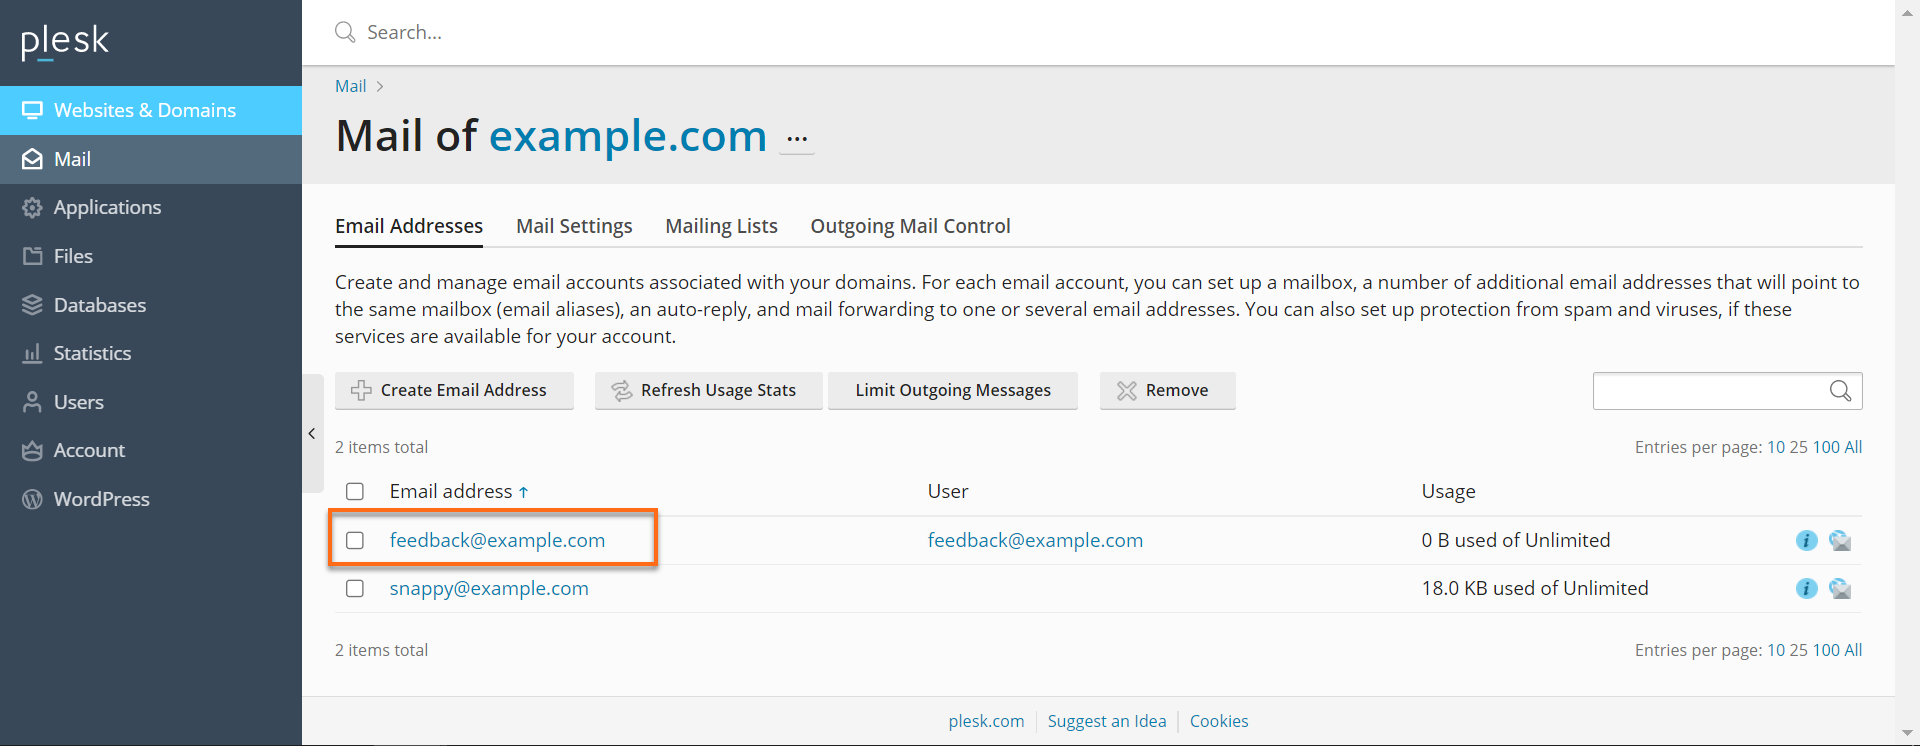
- Locate and click on the feedback email account.

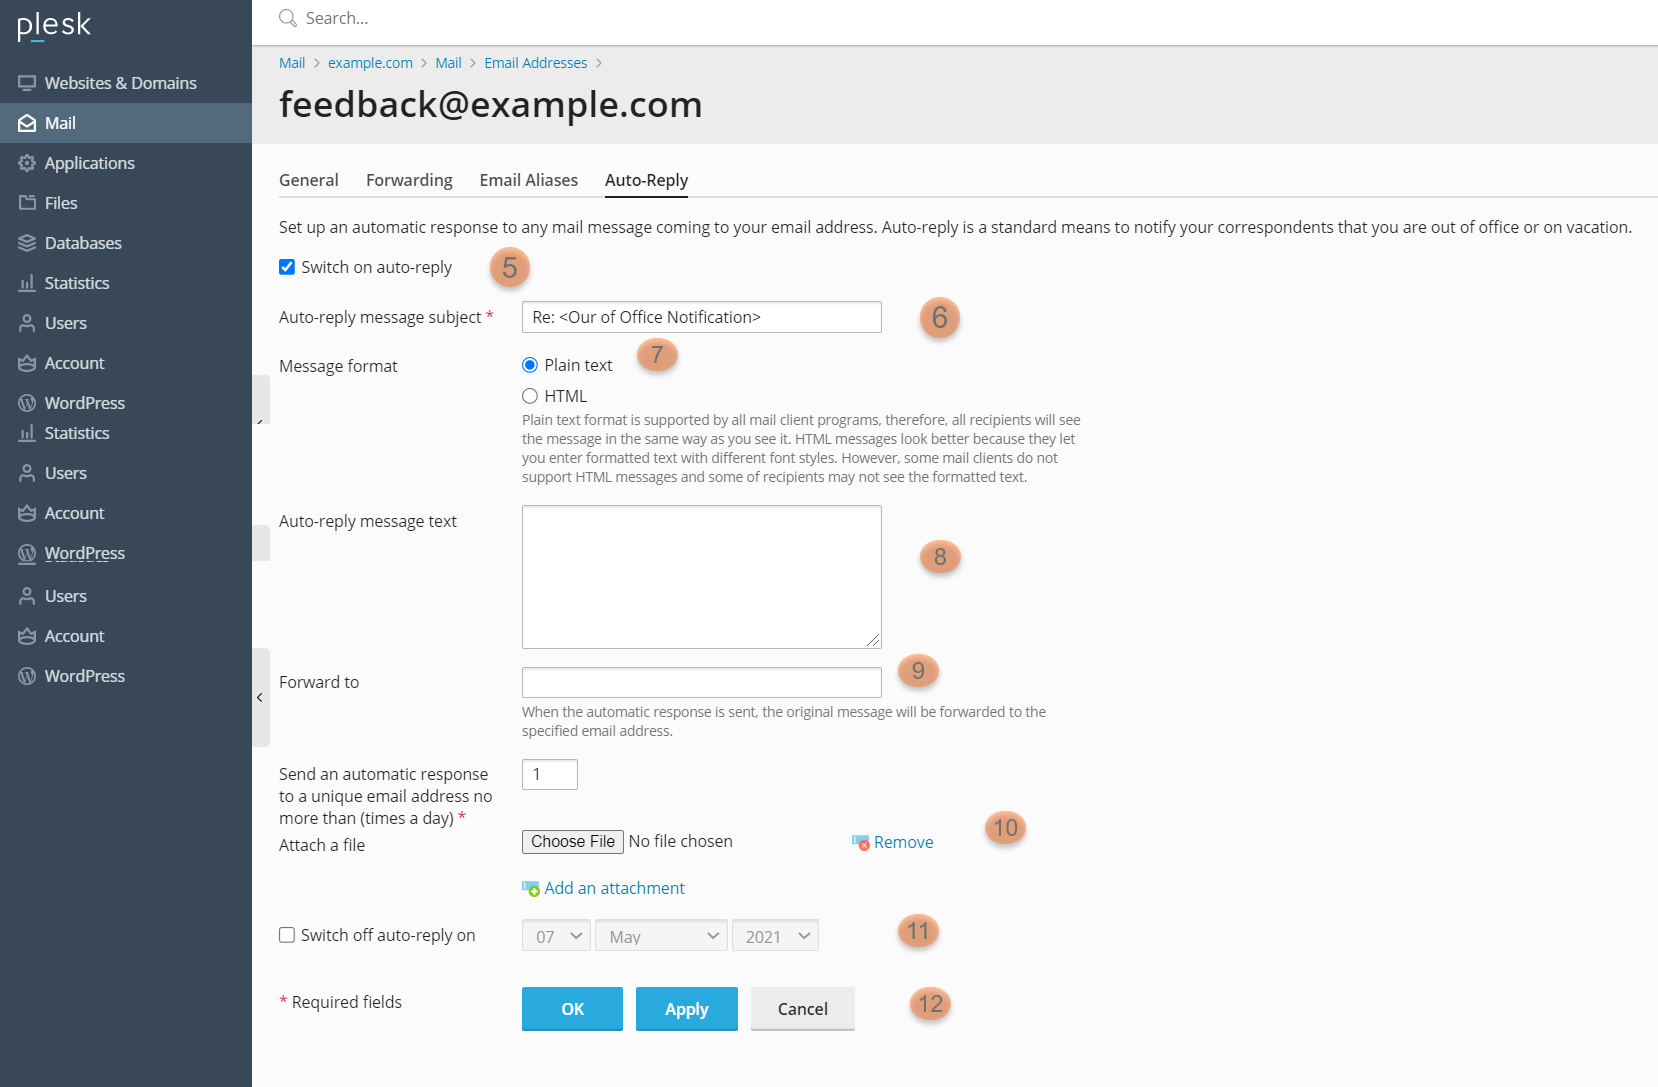
- Click on the Auto-Reply tab.

- Click the checkbox next to Switch on auto-reply to enable the feature.
- You can configure the subject line; however, if you leave the default subject, the mail server will insert the original subject to personalize the response.
- For Message Format, select Plain text. Plesk will ignore any HTML tags you put in the auto-reply text box, so there is no reason to select HTML.
- You can enter the auto-reply message you would like to be sent each time the email address receives mail in the text box.
-
All HTML tags will be discarded, so there is no need to be fancy. A simple message that the email was received and will be read should suffice.
- In the Forward to the field, you can specify an email address sent a copy of any emails received if you would like.
If you need true forwarding, leave this field blank and configure the Forwarding tab instead.
- In the Attach a file field, you can attach a file to the email you send, such as a picture or an HTML page.
- Click OK to create the new address.
Next: A Send-Only Address
Introduction to Plesk Administration
Did you find this article helpful?