How do I Get and Use SSH Access?
Secure shell (SSH) provides secure access to the shell environment on your HostGator account. SSH enables you to access a remote computer that runs an SSH server. This is used to carry out commands, file transfers, tunneling of applications, and even terminal access. HostGator offers SSH (secure shell) access to all Linux hosting plans except Optimized WordPress.
SSH on HostGator plans
Shared hosting
We offer locked SSH, which is limited to your account only. See instructions in the following section of this article.
VPS and Dedicated hosting
VPS and Dedicated hosting customers automatically have root SSH access, allowing users to change anything on their server.
If you enable shell access for individual cPanels, the SSH username and password would be the same as the cPanel username and password for those accounts.
How to enable SSH
Enabling SSH for a new cPanel account
If you have multiple cPanels that need SSH, you can activate them within root WHM.
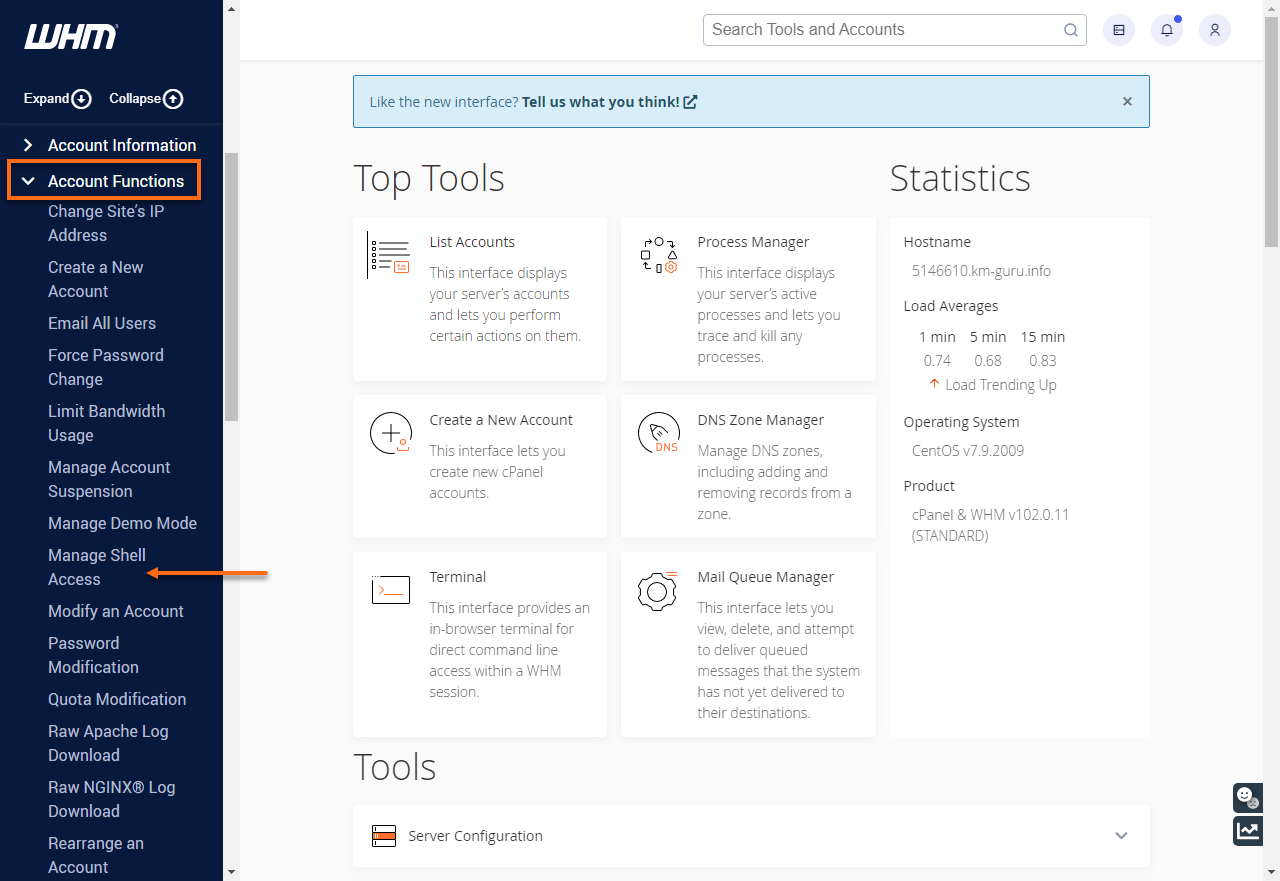
- Log in to WHM.
- In the left category list, click the Account Functions and select Create a New Account.
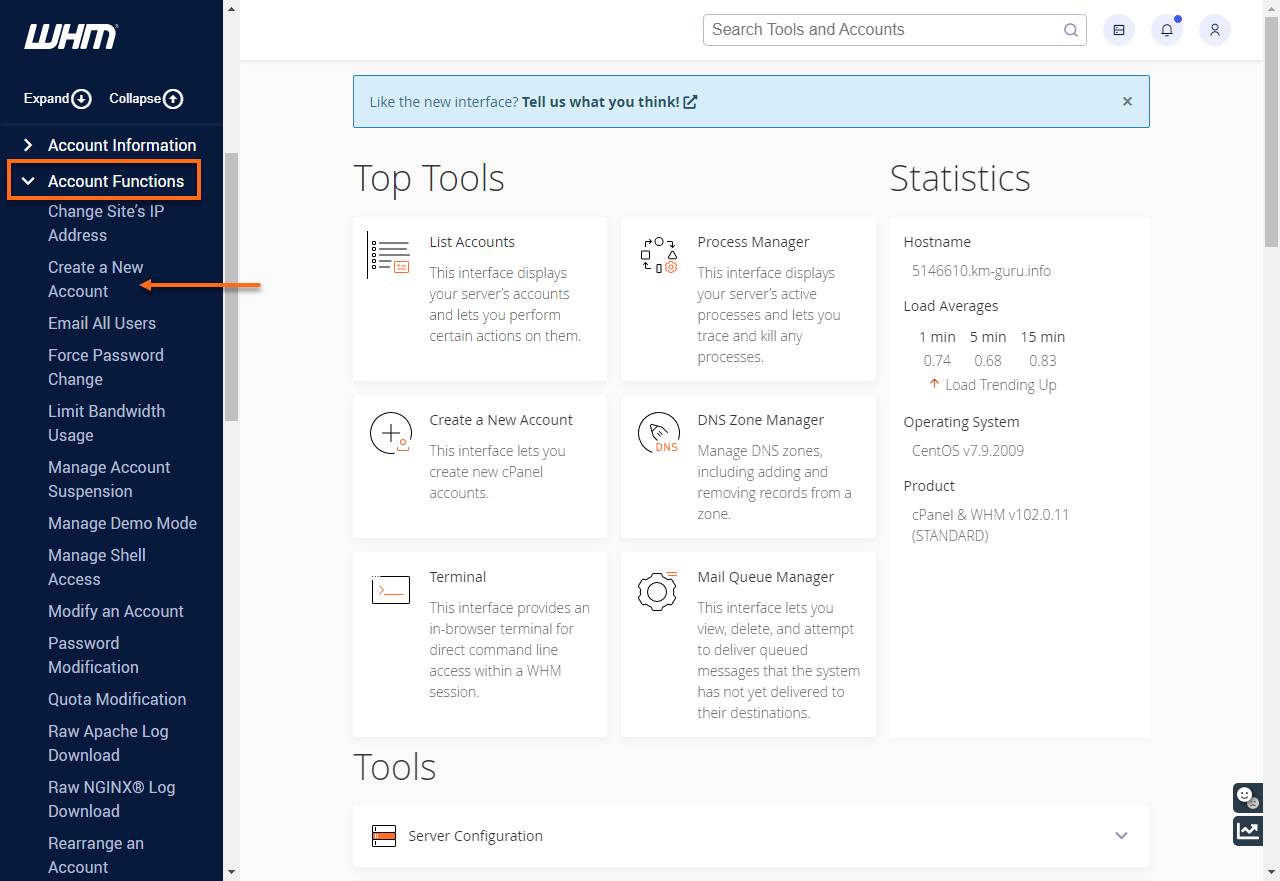
Alternatively, you can use the Search Tools and Accounts field to search for Create a New Account.
- To create a new cPanel account, please check out this article How Do I Create a cPanel Account?
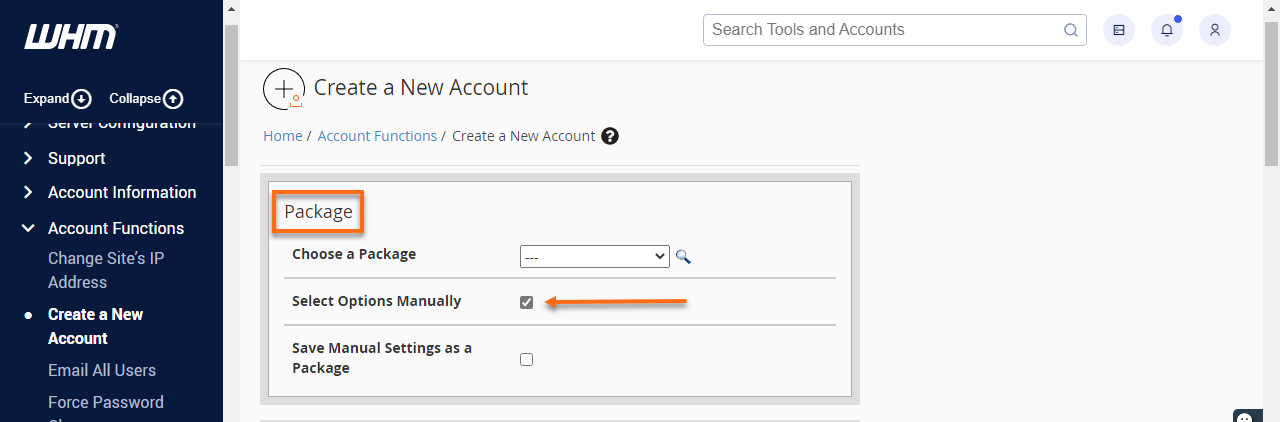
- Put a check on the Select Options Manually box in the Package section. This is where you can enable or disable shell access, which uses the normal shell option.
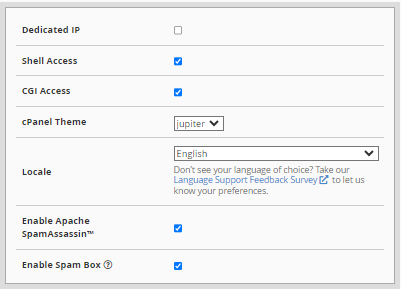
- Scroll down a bit and put a checkmark on Shell Access.
- Click Create at the bottom of the page.
Enabling SSH for an existing cPanel account
To enable SSH for an existing cPanel account:
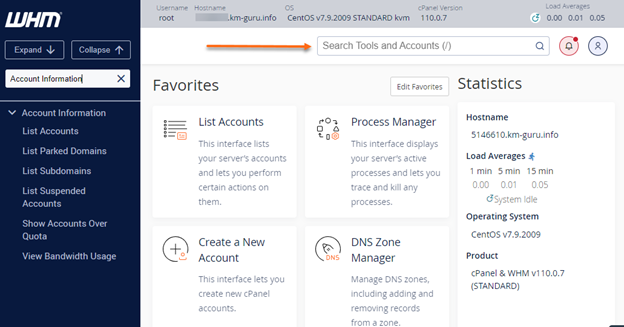
- Log in to WHM.
- In the left category list, click Account Functions and select Manage Shell Access.
Alternatively, you can use the Search Tools and Accounts field to search for Manage Shell Access.
- Locate the account you wish to modify.
- Select the type of SSH access to be applied to the account — Normal Shell, Jailed Shell, or Disabled Shell.
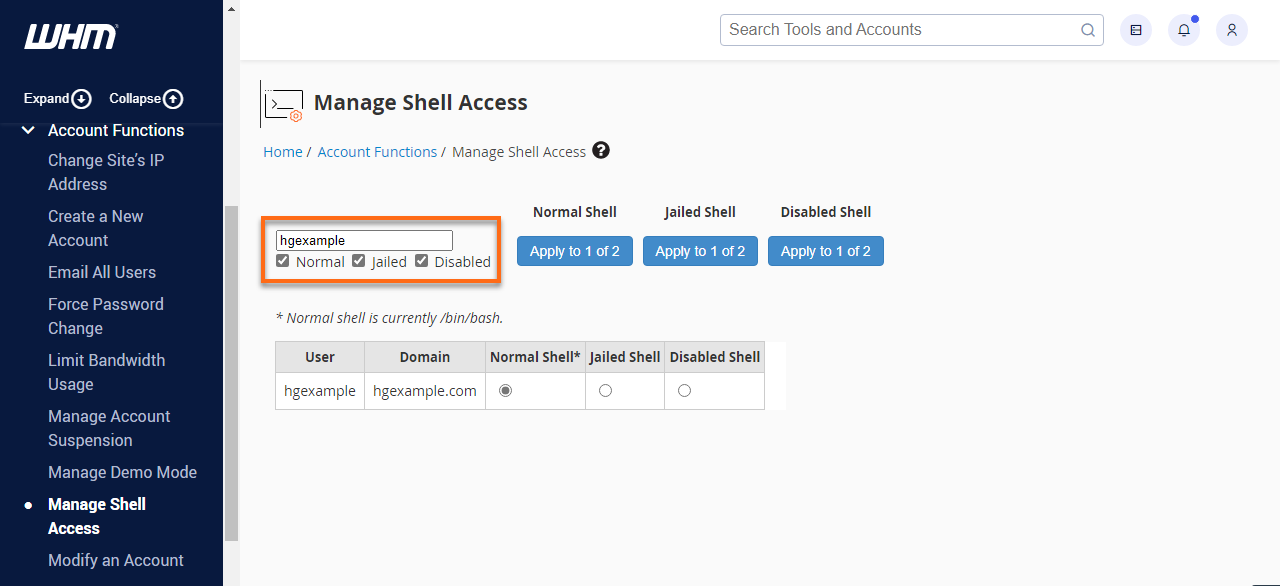
- If you have multiple users, select the type of shell access you want to grant to an account.

- Once you have made your selection, click Apply.
How do I connect to my server via SSH?
Step 1: Enable shell access
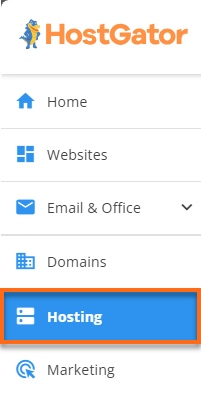
- Log in to your Customer Portal.
- Click the Hosting tab in the left-side menu.
- If you have a single hosting package in your account, proceed to the next step.
- If your account has multiple hosting packages, choose the hosting plan you need to manage, then click Manage.
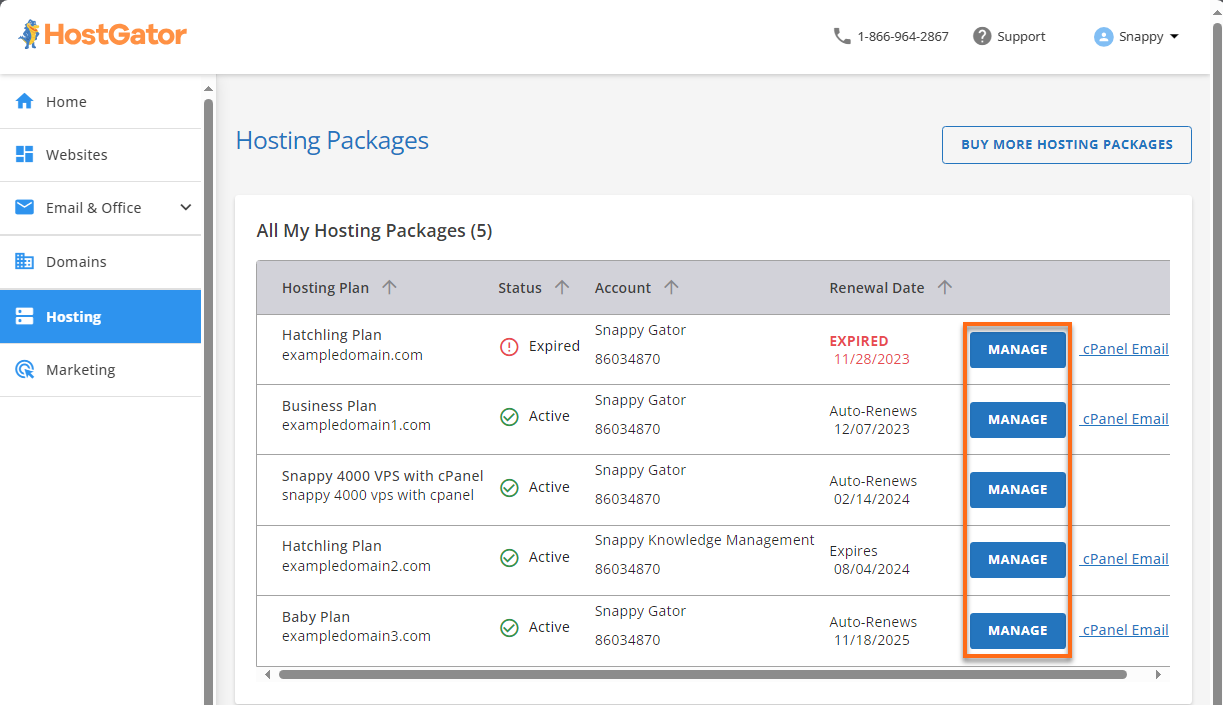
- Scroll down to the Server Information section and click Manage Keys.
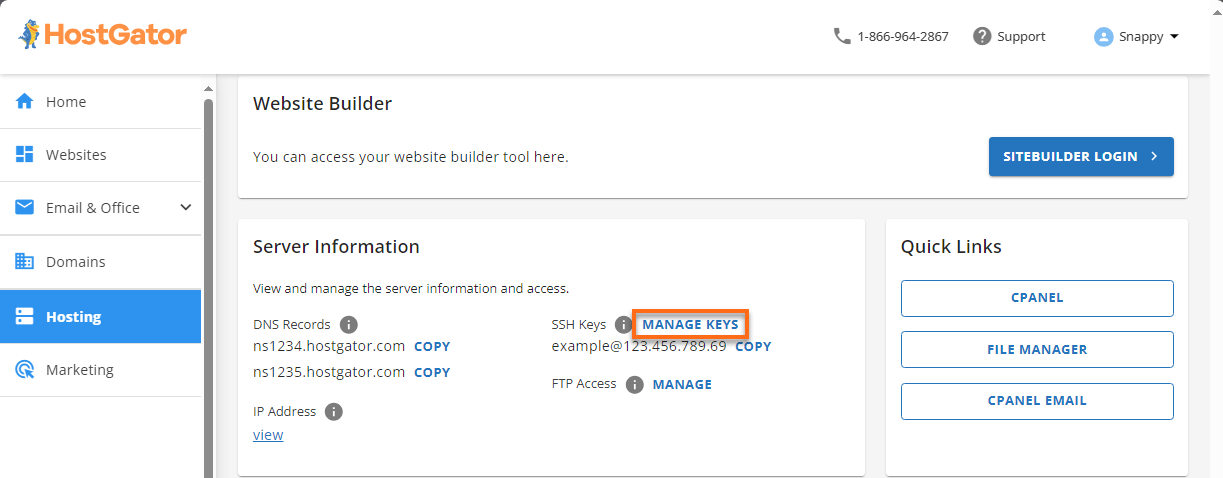
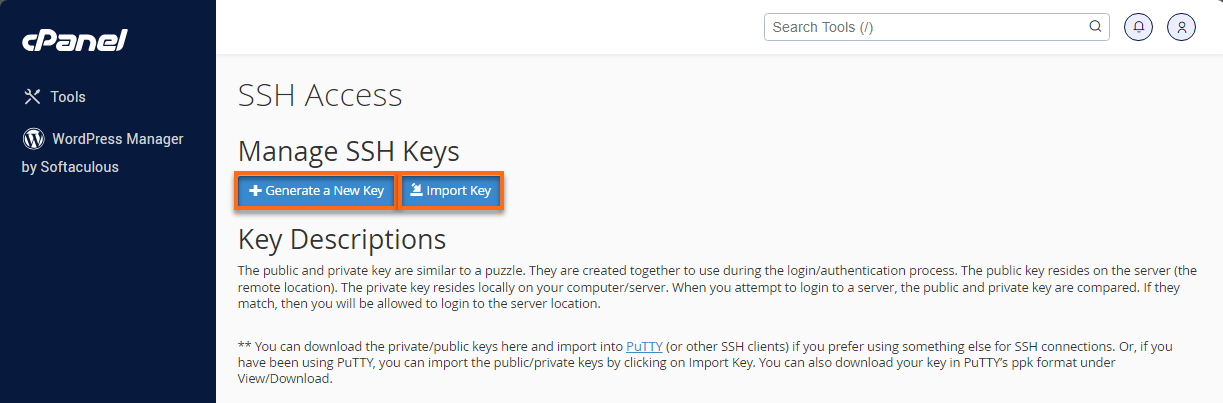
- In the cPanel SSH Access page, select Generate a New Key or Import Key.
- You may also want to take note of your cPanel username and the IP address from the same page as you will use them on Step 2 ⤵.
Step 2: Set up the Terminal
- Open your preferred terminal.
- In your terminal, type in:
ssh cpanelusername@IPaddress -p2222Notes:- For Shared, use port 2222.
- For VPS and Dedicated hosting, use port 22 instead. Dedicated and VPS customers can log in with the root WHM username and password.
- Please replace the cpanelusername and IPaddress with your actual cPanel username and IP address you copied from your HostGator Customer Portal with the @ symbol in between.
Example:ssh [email protected] -p2222
- Hit Enter.
- A confirmation prompt to proceed will appear. Type in yes and hit Enter.
- You will be asked to provide your cPanel password. Type in your cPanel password and hit Enter.
You are now connected to your SSH. To know more about the commonly used shell commands, check out this helpful article: Shell Command.
Summary
SSH access allows you to securely manage your HostGator hosting account via the command line. Shared hosting users must enable shell access, while VPS and Dedicated users have root SSH by default. For further assistance, visit the HostGator Support Portal or contact support directly.