How to Request Domain Ownership
Keeping your account details current is essential for security and control—especially during business transitions or when transferring access. This guide explains how to request domain ownership by updating your primary contact, replacing your email address, and completing a Change of Registrant (CoR).
This article will walk you through how to:
How to Change the Primary Contact on Your Account
Important for Primary Contact Changes
If your business owns the account and you need to update the Primary Contact, the current Primary Contact should log in and make the change. If they’re unavailable, you’ll need to submit a Primary Contact Replacement (PCR) request ⤵.
What You’ll Need
- Government-Issued Photo ID (unexpired, color)
- Two Organization Documents (must be recent and not personal)
- Utility bill (within last 90 days)
- Business License
- Letter of Incorporation
- Tax Return or Tax ID Document
If you already have a User ID, there’s no need to create another. See How to Merge User IDs if needed.
Submitting a Primary Contact Replacement (PCR) Request
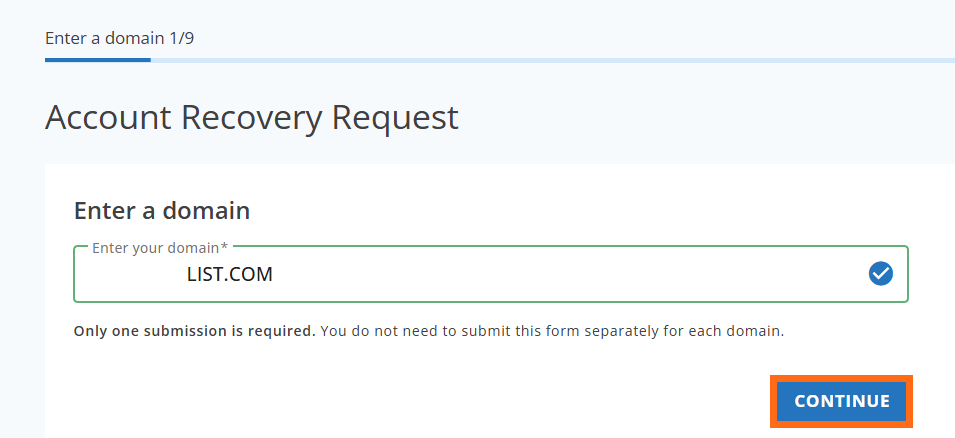
- Go to the HostGator Account Recovery Page
Go to https://www.hostgator.com/my-account/account-recovery-new
- Enter Your Account Information
Input your domain name or HostGator username, then click CONTINUE.
- Select Your Role
Choose your role (Owner, Billing Contact, Technical Contact, or Other), then click CONTINUE.
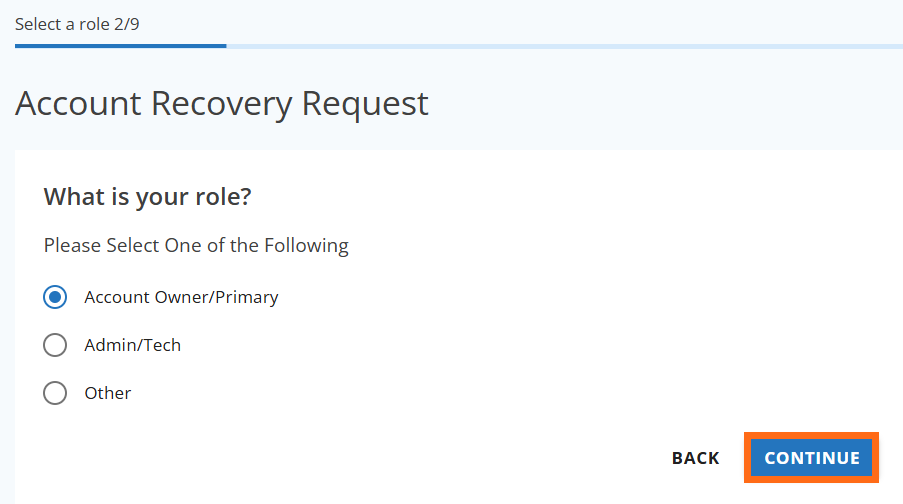
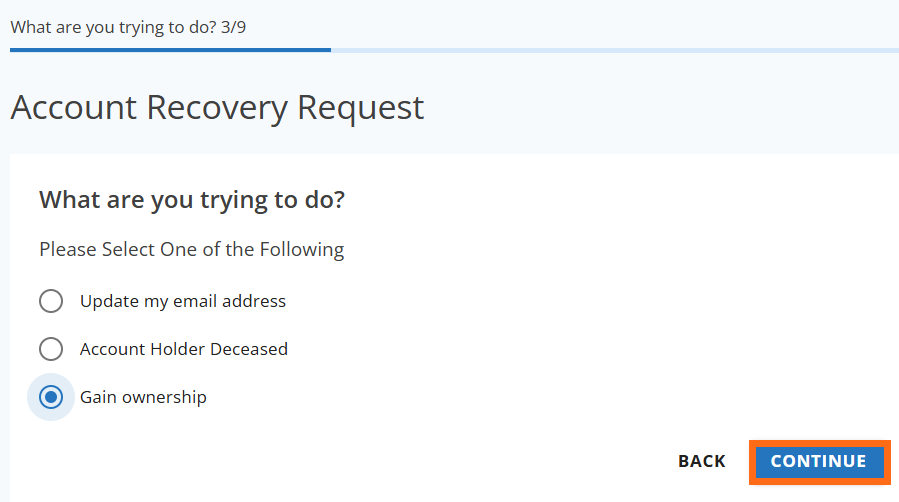
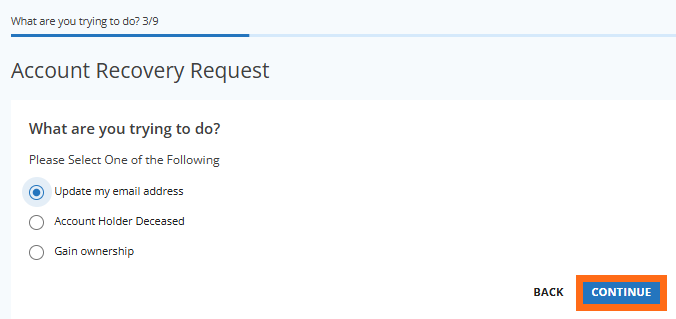
Available roles are based on your account’s users and permissions. - Select Reason for Access Request
Select Gain Ownership and click CONTINUE.
- Confirm Contact with Current Account Owner
- Indicate if you can contact the current owner.
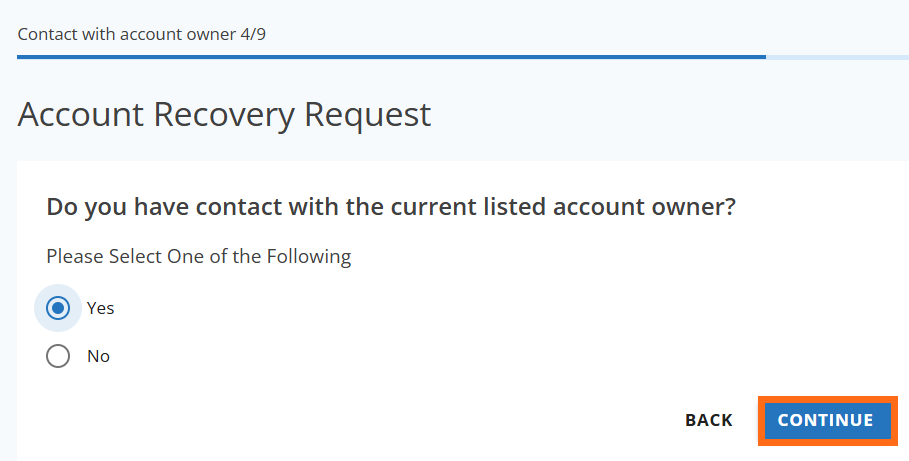
- If Yes: Work with them to transfer access, or select I already have a court order or legal documentation if needed, and continue.
- If No: Select I already have a court order or legal documentation and continue.
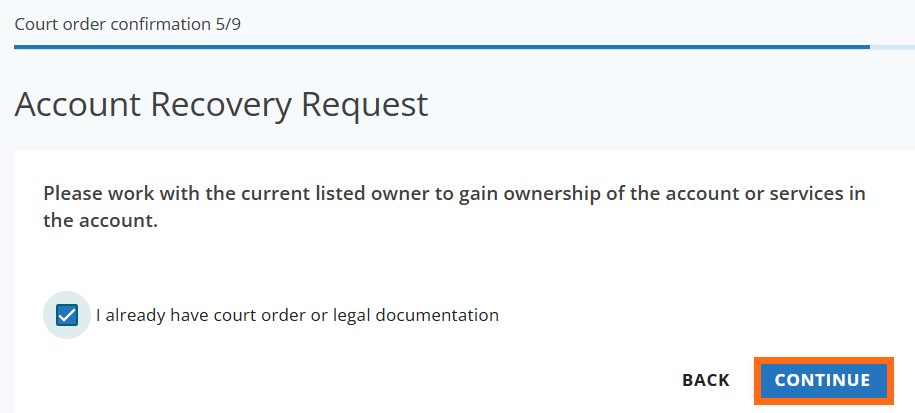
- Indicate if you can contact the current owner.
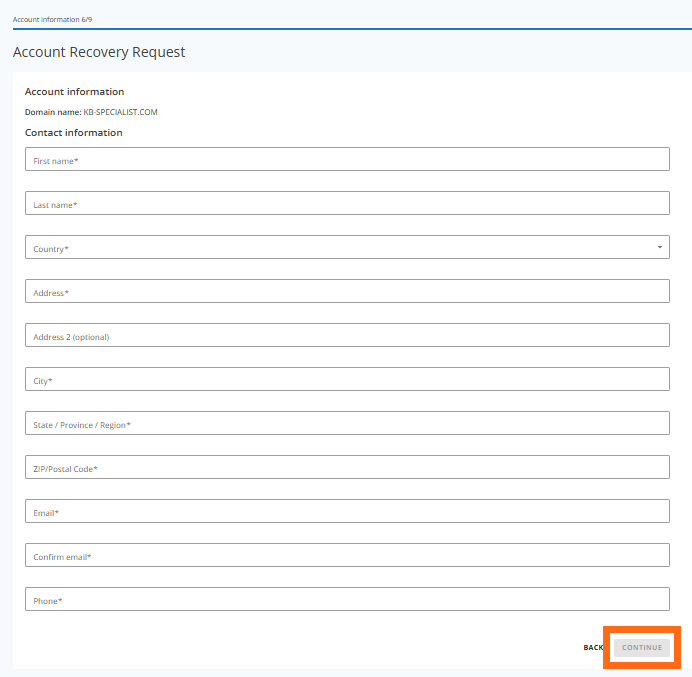
- Provide Contact Information
Fill in your contact details for verification, then click CONTINUE.
- Upload Government-Issued Photo ID
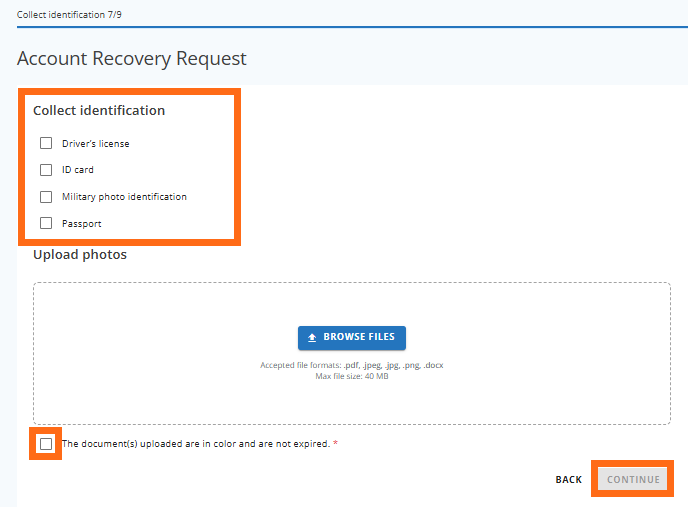
- Upload the selected ID in color (not expired), confirm validity, and continue.
- Upload Additional Documents
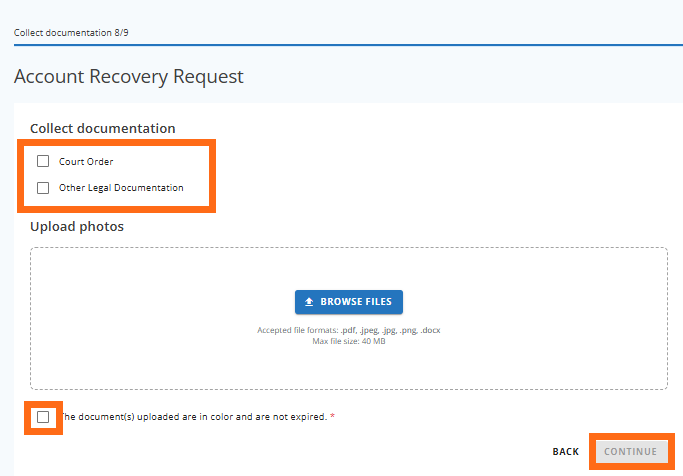
- Upload recent/valid business, court, or ownership documents. Continue.
- Provide Additional Information and Submit
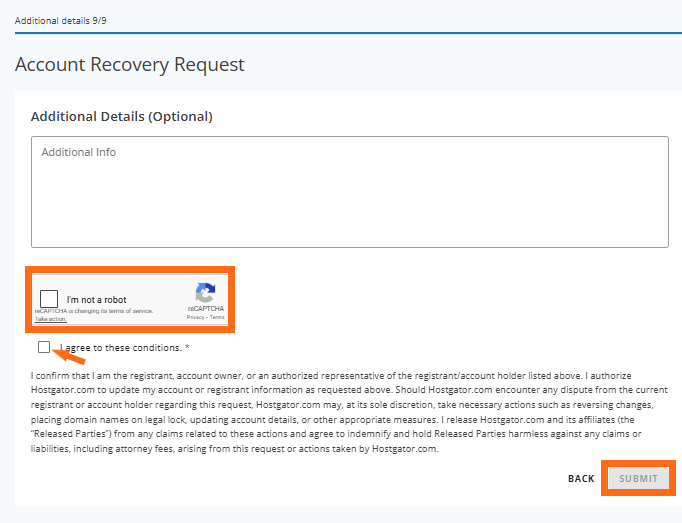
- Enter any extra details, check I agree to these conditions, and submit.
- Confirmation
After submission, you'll see a confirmation page with your ticket number.
Record your ticket number for reference.
How to Change Your Primary Email Address
Important for Changing Primary Email
You can update your primary email address in the Domains tab of your Customer Portal under the Contacts menu. Please refer to the How to Update WHOIS Information for Your HostGator Domain article for details.
When You Can’t Change It Yourself
If you’re unable to log in or access your old email, you’ll need to submit a Contact Email Replacement (CER) request. Reasons include: outdated/invalid email address, no access to login, or unable to access the email on file.
What You’ll Need
- Government-Issued Photo ID (color, unexpired)
- Utility Bill (issued within the last 90 days)
If you don’t have a recent utility bill, you may use: a lease agreement, a recent bank or credit card statement (within 90 days), vehicle insurance/registration, student/worker visa, or a voided check.
Submitting a Contact Email Replacement Request
- Go to the HostGator Account Recovery Page
Go to https://www.hostgator.com/my-account/account-recovery-new
- Enter Your Account Information
Input your domain name or HostGator username, then click CONTINUE.
Tip: You may also use the registered email if you’re unsure of your domain. - Select Your Role
Choose your role and click CONTINUE.
Roles shown depend on your account access. - Select the Request Type
Select Update my email address and click CONTINUE.
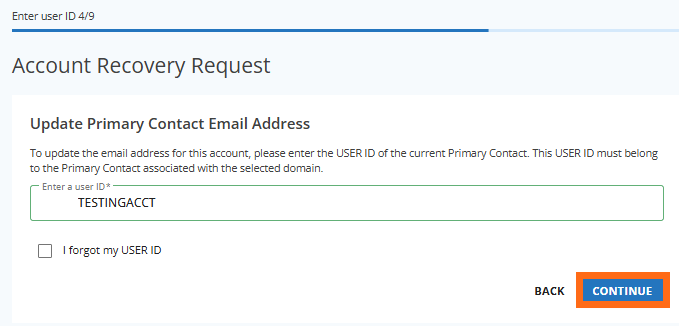
- Provide User ID
- Enter your User ID and click CONTINUE.
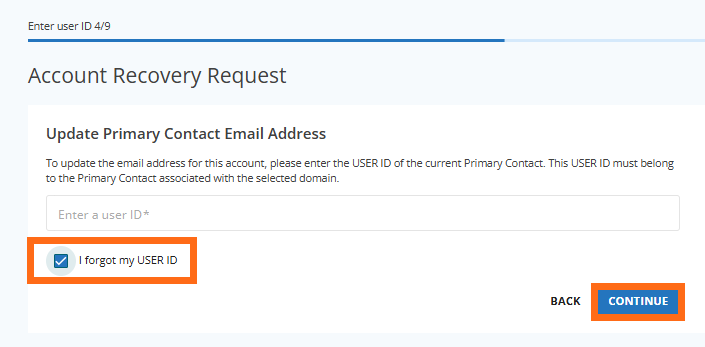
- If you do not know your User ID, check I forgot my USER ID and continue.
- Enter your User ID and click CONTINUE.
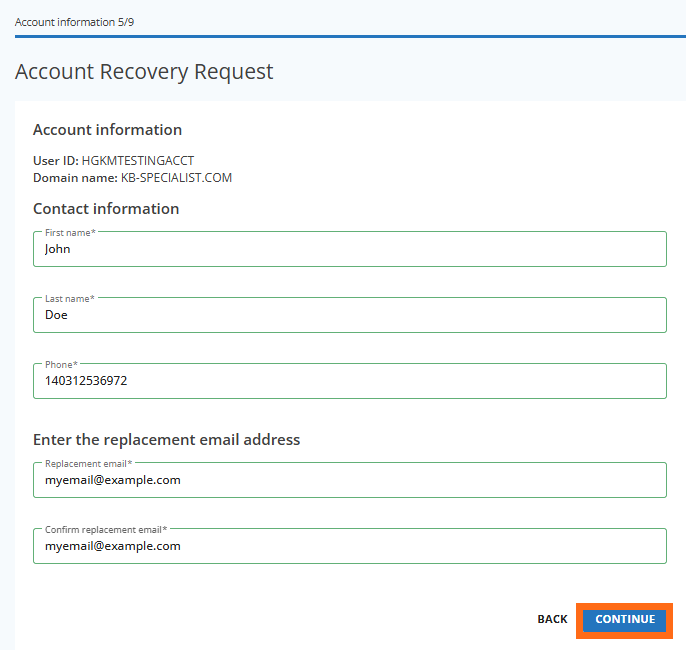
- Enter Contact and Replacement Email Information
Fill in your current contact information and the new email address you wish to use. Click CONTINUE.
- Upload Government-Issued Photo ID

- Upload a clear, color, non-expired ID and continue.
- Upload Additional Documents
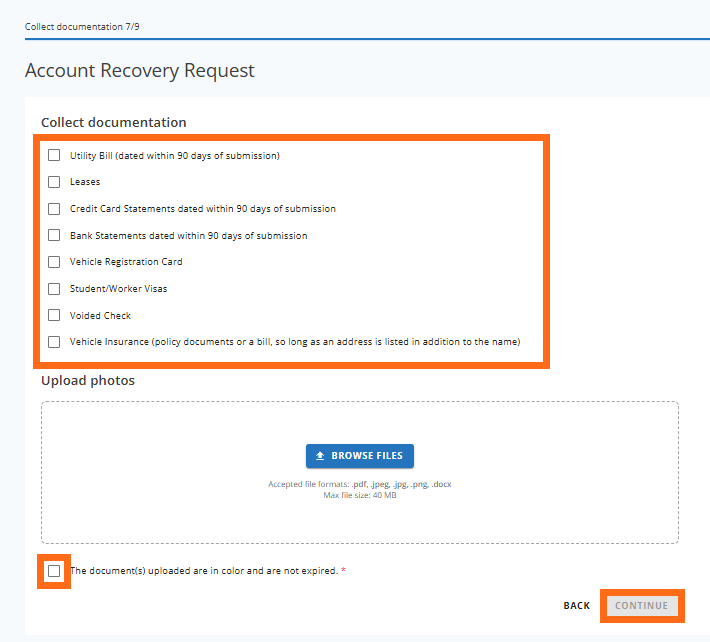
- Upload the required documents matching your address, confirm, and continue.
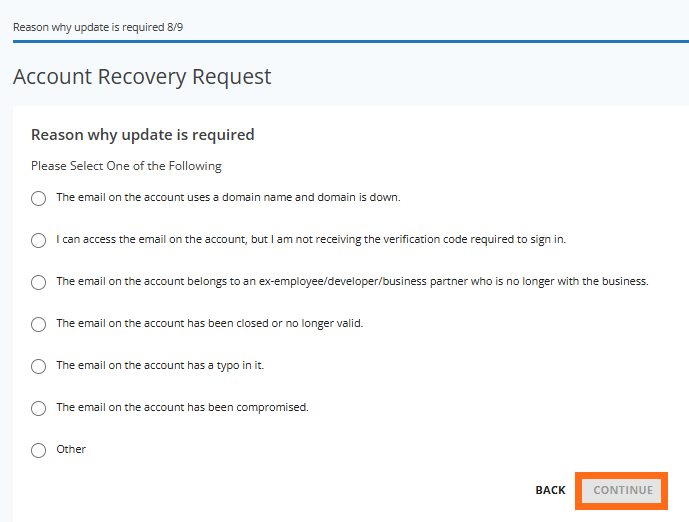
- Select Reason for the Update
Select your reason, then continue.
- Provide Additional Information & Submit
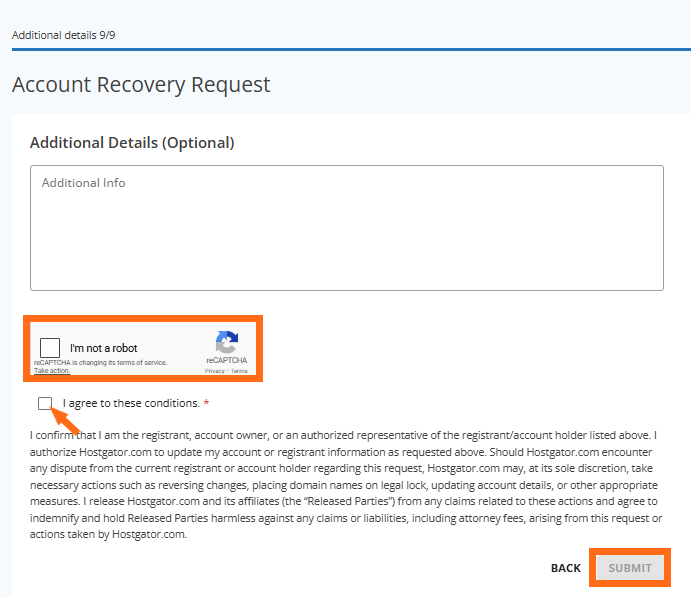
- Add details, check I agree to these conditions, and submit.
- Confirmation
You’ll see a confirmation page with your ticket number.
Save your ticket number for your records.
How to Change Domain Ownership
Important for Domain Ownership Changes
ICANN Change of Registrant (CoR) Locks
ICANN applies a 60-day CoR Lock if you change the domain registrant’s name, email address, or organization name. This helps prevent hijacking. For more, see The Different Types of Domain Locks Explained.
Updating WHOIS Information
You can update your WHOIS information in your Customer Portal. See How to Update WHOIS Information for Your HostGator Domain for instructions.