How to Replace WordPress Cron with a Real Cron Job
Have you ever noticed that your scheduled posts in WordPress are missing? Although WordPress has its own cron feature for managing scheduled posts and automated tasks, WP‑cron is not a true Linux cron job, which often leads to missed or delayed scheduled events.
- Linux cron job vs. WP-cron ⤵
- How to replace WP-cron with a Linux cron job ⤵
- Staggering multiple WordPress cron jobs⤵
Linux cron job vs. WP-cron
A Linux cron job gives users full control over task scheduling to ensure processes run consistently. For high‑traffic WordPress sites, using Linux cron jobs can also reduce downtime by lowering server load and conserving resources.
In contrast, WP‑cron is a virtual cron system that only runs when someone loads a page on your site. When a page is requested, WP‑cron attempts to trigger scheduled tasks. While convenient, it can fail due to several issues, including:
- Plugin conflicts
- DNS‑related problems
- WordPress bugs
- Caching plugins are blocking execution
- Heavy server load
These are common reasons why WordPress scheduled posts fail to publish.
How to replace WP-cron with a Linux cron job
To optimize WordPress performance and ensure reliable scheduling, the best solution is to disable WP‑cron and set up a true Linux cron job through cPanel that runs every hour.
A video tutorial is provided to guide you through your first time replacing WP‑cron with a Linux cron job.
Button layouts in cPanel may differ slightly, but functionality remains the same. HostGator Support cannot assist with custom scripts or third‑party coding issues.
Step 1: Disable wp-cron.php
You can disable WP-cron by modifying the wp-config.php file, which is located in your WordPress site's document root.
To disable wp-cron.php:
- Open the wp-config.php file.
- Add a new line after <?php.
- Add the following code on a new line:
define('DISABLE_WP_CRON', true);
Step 2: Set up Linux cron
You need to have a working knowledge of Linux commands before you can use cron jobs effectively.
To set up a Linux cron job:
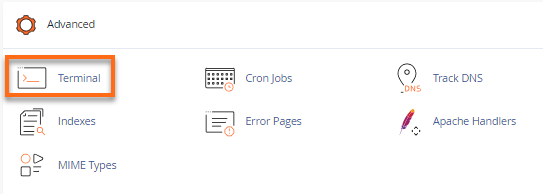
- Log in to your cPanel.
- In the Advanced section, click Cron jobs.
- Under Add New Cron Job, select the time interval. HostGator recommends that you do not set the interval lower than 15 minutes.
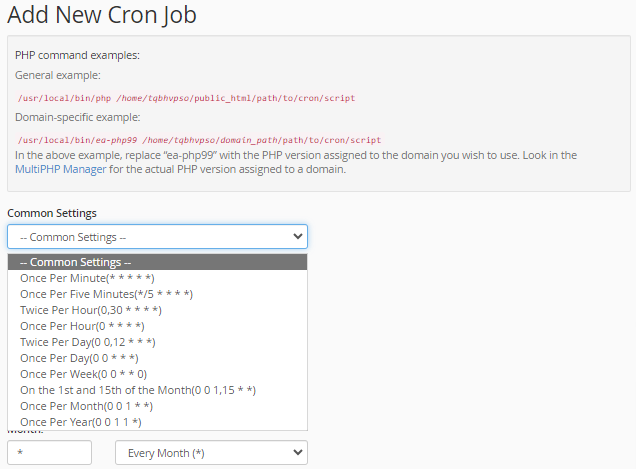
- Set the cron command to the following, replacing yourwebsite.com with your actual domain name:
wget -q -O - http://yourwebsite.com/wp-cron.php?doing_wp_cron >/dev/null 2>&1The above command tells the Linux server to run wp-cron via wget, which will trigger the wp-cron.php script to do its job on your schedule instead of on each page view. - Click Add New Cron Job to set the cron.

To test out the new cron, wait for the elapsed period for the cron to run. If the cron does not run, please review the steps listed above to ensure that you have completed all steps correctly.
Staggering multiple WordPress cron jobs
Creating cron jobs for multiple WordPress cron jobs without custom configuration can cause them all to fire at the same time. Having multiple cron jobs run simultaneously can cause your CPU usage to increase, negating the benefit of using Linux cron jobs.
To stagger your cron jobs:
- Divide 60 by the number of WordPress installations you have. If you have more than 60, use the number 1. For example, if you have 6 WordPress installations, 60 divided by 6 equals 10.
- When creating your WordPress cron jobs, use 0 for minutes for your first cron job.
- For each cron job after the first one, add the number you got in Step 1.
If you have more than 60 WordPress sites, after you reach 59, you will need to start at 0 again. If you experience CPU issues with this many WordPress sites running cron jobs this frequently, you may wish to consider migrating some of your sites to a second account.
By following these steps, you will ensure that your WordPress cron jobs run once per hour and that there is as little overlap as possible between them, which should greatly improve your CPU usage with this platform.