How to Change Name Servers with Hover
While HostGator cannot modify DNS at third-party registrars on your behalf, we can provide you with instructions on how to do so. Here's how you can change your DNS at Hover.
While we try to make sure you have the most up-to-date information, Hover is a third party, and the steps to update your domain's name server may change without us knowing.
Step 1: Find your hosting account information
The first step is to find out which name servers you should use for your HostGator hosting account. This varies by server and hosting. For instructions on how to find out your name servers, please read the article:
Step 2: Change the name servers
- Log in to your Hover account using the method you choose for 2FA.
- If you have only one domain, it automatically directs to the domain's overview.
- If you have more than one, you need to select the correct domain near the top to be taken to its overview page.
- On the overview page, click Edit in the NameServers section.
- Next, change name server 1 and name server 2 to the name servers for your HostGator hosting account.
You can also add extra nameservers if needed.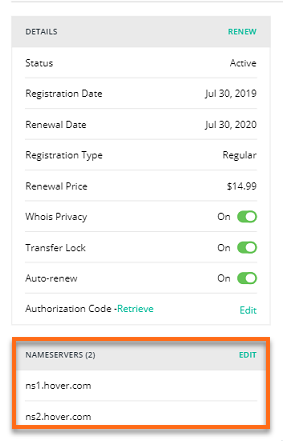
- Click Save nameservers to complete the changes.
Once you have made changes to your DNS at the registrar, please wait 24-48 hours of DNS propagation time. Your website and email may not be available during this time.
HostGator customers can change their domain DNS within the cPanel interface. For instructions, please see the article below:
Updating name servers for multiple domains
This menu is available to customers with multiple domains.
You can edit your name servers from the Nameservers page on the navigation bar.

Click the Edit button beside domains, and you will have 2 options in this menu:
- Edit nameservers - This is where you can adjust the domain's nameservers.
- Reset nameservers - This is where you can reset the name servers to Hover default setting.
Using the Bulk edit function, you can also edit the nameservers for multiple domains.
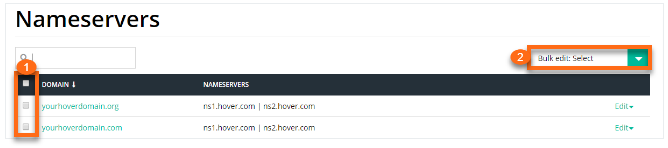
- Choose the domains by toggling each of the domains.
- Click on the Bulk edit: Select dropdown.
- Click on Edit nameservers and make the changes in the pop-up window.
Alternatively, you can bulk edit the name servers from the Domains menu.