Knowledge Base
Categories: Plesk Administration
Creating a Service Plan - Plesk
Prerequisite Article
How to Log In and Preview - Plesk
How to Log In and Preview - Plesk
What is a Service Plan?
A Service plan in Plesk is much like a Package in WHM. Service plans represent a particular business offer. The service plan defines the allocation of your resources, such as how much disk space, bandwidth, and other features are offered to your customer. The service plan also indicates whether your customer is a website owner or a reseller of hosting.
There are two types of service plans:
- Hosting Plan - This provides a set of resources and services for web hosting. Typically, the resources include disk space on the server and bandwidth for hosting websites, and the services include web hosting service, mail hosting service, etc. There are also add-on plans, which allow for the addition of resources and services to a particular service plan.
- Reseller Plan - It provides a set of resources and services that a reseller account redistributes through subscriptions to its own service plans.
Service plans remain connected to accounts. When you modify a service plan, any account synced to it will update to the new resource and privilege settings.
Okay, How Do I Create One?
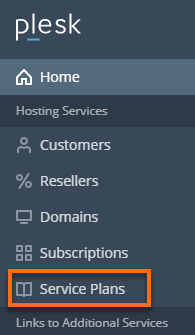
- Log in to your Plesk admin panel.
- In the left-hand menu, click Service Plans.
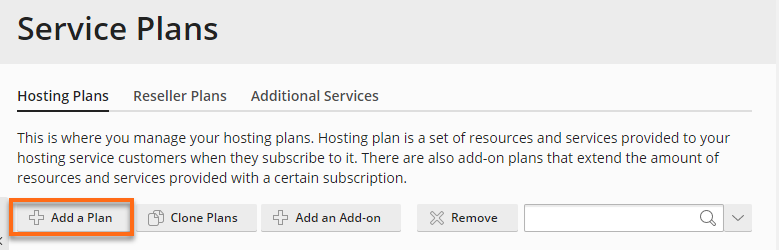
- Choose the Type of Plan you want to create from the tabs at the top.

- Click the Add New Plan button.
- On the next page, configure based on your preferred settings.
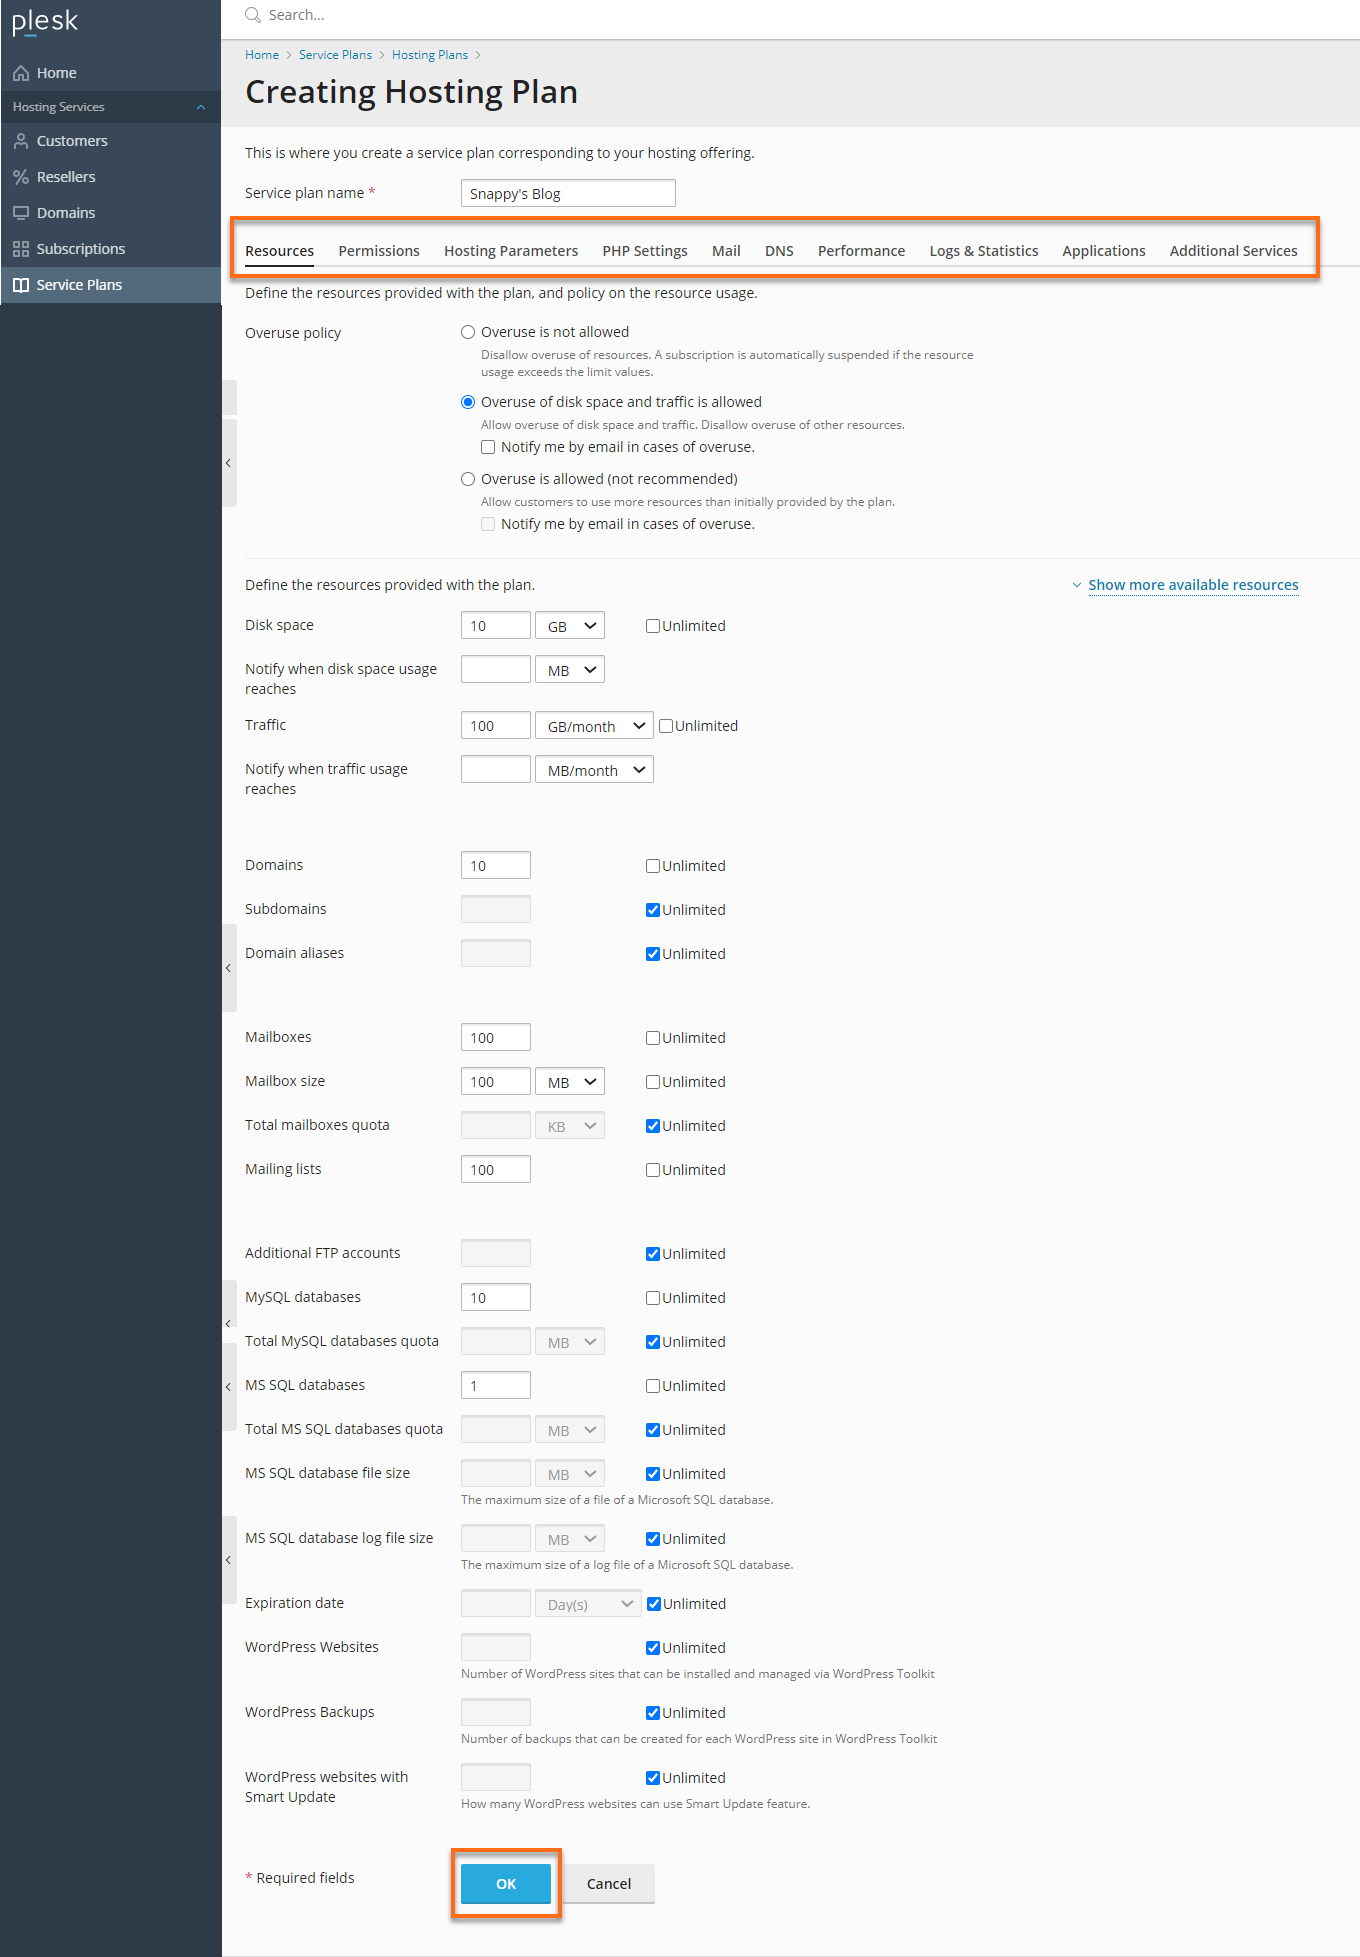
- Enter the name of your new plan in the Service plan name field.
- Adjust the settings to your preference. Bandwidth is referred to as Traffic.
We strongly suggest you change the number of Domains from 10 to 1. This means you will have to create a new subscription (hosting account) for each new domain, but the benefit is that each domain will have the ability to add a dedicated IP and private SSL certificate in the future. - You can leave the other settings and tabs in their default values.
- Once you are happy with your values, scroll down and click the OK button.
Now you are ready to create a Subscription! Please visit this article to know how to create one.
Did you find this article helpful?