How to Create and Manage FTP Accounts in Customer Portal
FTP accounts (File Transfer Protocol) are important for efficiently managing website files. By using an FTP client, you can securely transfer files, easily manage FTP accounts, update content, and maintain seamless website functionality.
Recommended FTP clients
To enhance your experience, we recommend using reliable FTP clients, such as:
- Filezilla
- CoreFTP
- Cyberduck
- SmartFTP (A trial version is available.)
- CuteFTP (A trial version is available.)
Please visit the following article to learn how to download and configure these FTP clients.
How to configure FTP clients
After downloading the FTP client, you'll need the correct settings to connect to your hosting account. The information you need to configure your FTP client is in your Customer Portal.
- FTP Host/Address: (IP address or server hostname)
- FTP User: (FTP username)
- FTP Password: (FTP password)
- Port: 21
For more information about FTP settings and connections, please refer to the following article
How to access the FTP management panel
Already logged into your Customer Portal? Use the following link to go to your Folder Index Manager section.
Not yet logged into your Customer Portal? Follow the steps below.
To access the FTP Management panel:
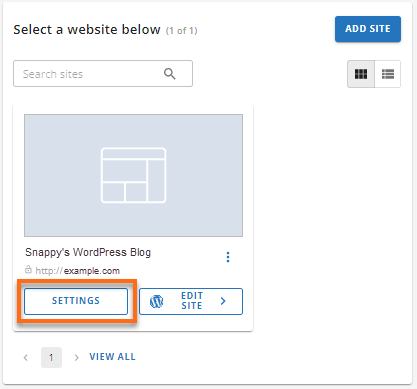
- Log in to your Customer Portal.
- Go to Websites from the left navigation menu.
- Click Settings next to the website you want to manage.
- On the top menu, click the ADVANCED tab.

- Click the MANAGE button under the FTP Access card.
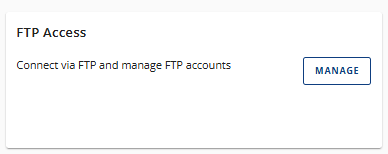
- You'll be redirected to the FTP Management panel, where you can create and manage FTP accounts.
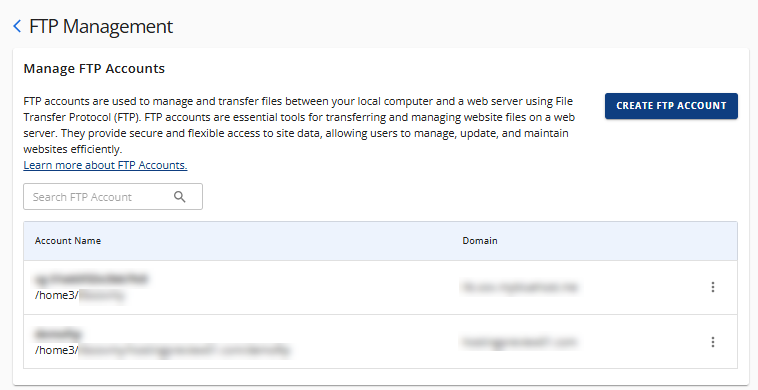
How to manage FTP accounts
In the FTP Management panel of your Customer Portal, you can manage your FTP accounts with the following actions.
Create an FTP Account
- In the FTP Management panel, click the CREATE FTP ACCOUNT button.
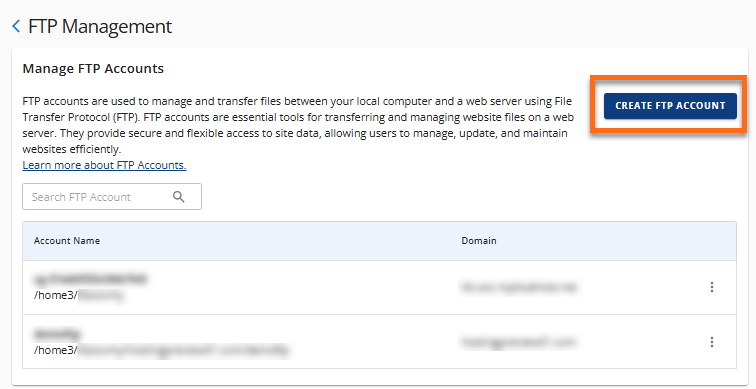
- Fill out the required fields for the username, password, and directory, and select the correct domain where you want to create the FTP account.
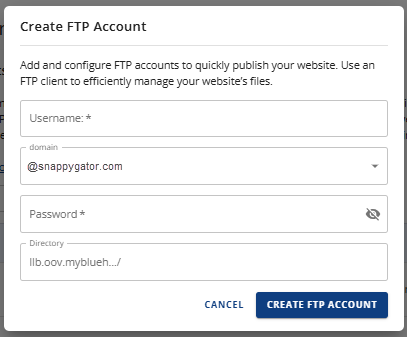
- Click CREATE FTP ACCOUNT.
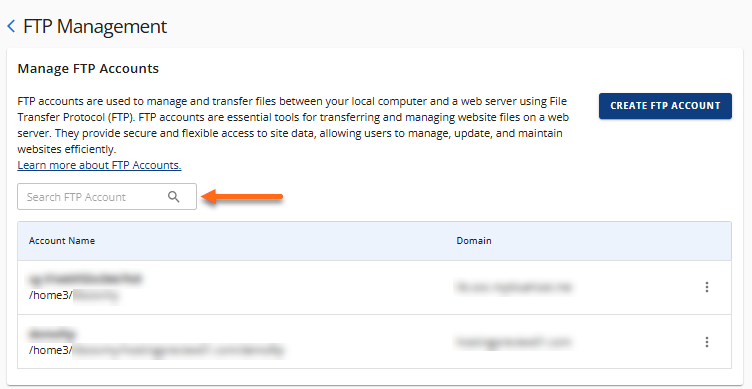
Search for an Existing FTP User/Account
If you have multiple FTP accounts in your Customer Portal, you can use the search box to locate a specific FTP user or account.
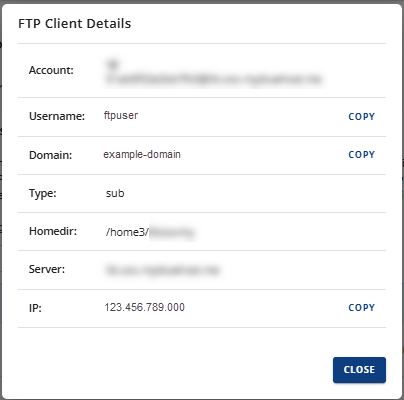
View the FTP Client Details
- In the FTP Management panel, locate the FTP account whose details you want to view, then click its vertical ellipsis icon on the right.
- Select View.
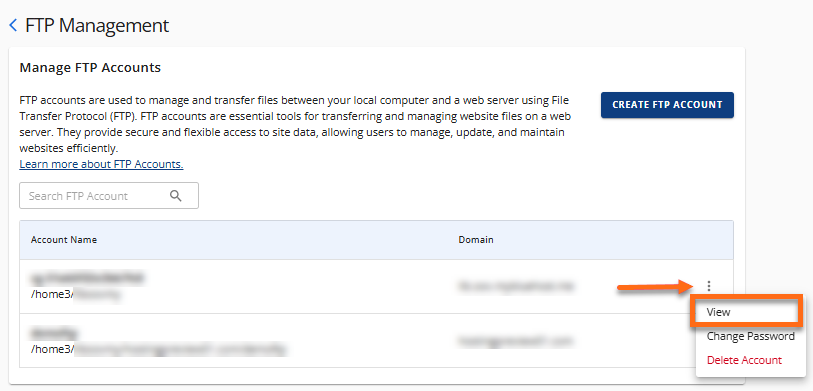
- A pop-up window will appear, showing you the details of the selected FTP account.
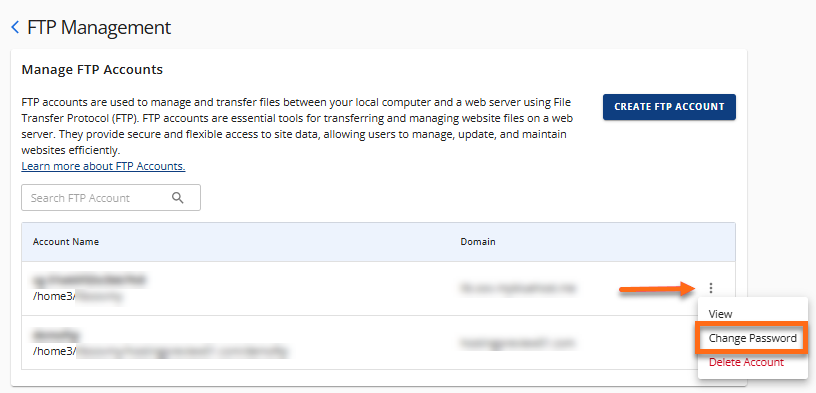
Change the FTP Account Password
- In the FTP Management panel, locate the FTP account you want to change the password for, then click its vertical ellipsis icon on the right.
- Select Change Password.
- Enter your new FTP password in the pop-up window.
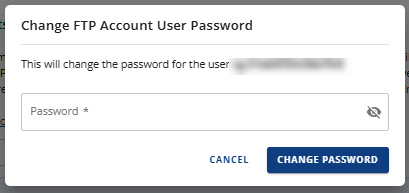
- Click CHANGE PASSWORD.
You can now access your FTP account using the new password.
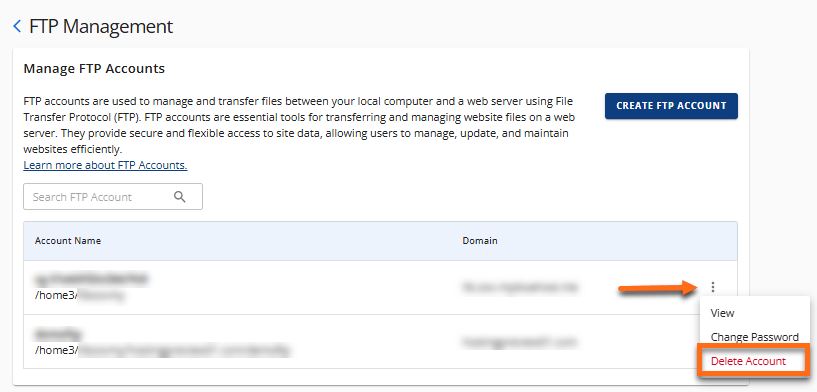
Delete an FTP Account
- In the FTP Management panel, locate the FTP account you want to delete, then click its vertical ellipsis icon on the right.
- Select Delete Account.
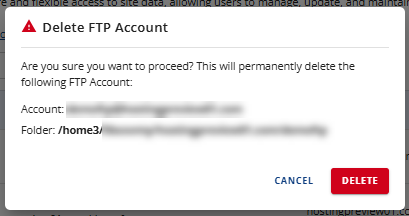
- In the pop-up window, click DELETE to confirm removing the FTP account.
If you're looking for a consolidated list of FTP-related articles, please visit the following article.