Caching and clearing cache with the HostGator plugin
Depending on how often you want to save your site's cache and what you want to cache, you can select your preferred cache settings using the HostGator plugin within the WordPress Dashboard.
This article discusses the following topics.
What are the cache options?
The HostGator plugin provides you with different caching options.
To manage your cache using the HostGator plugin:
- Log in to your WordPress Dashboard.
- Go to the HostGator plugin section. The quickest way is to click on HostGator from the left-side menu.
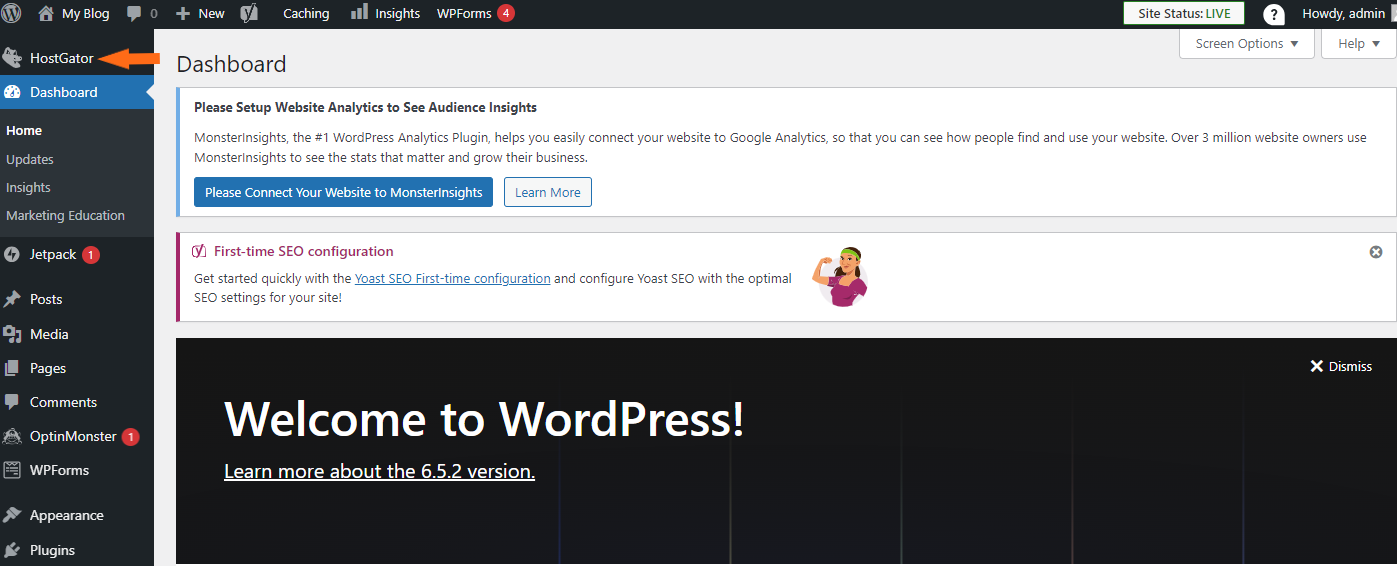
- On the HostGator plugin page, select the Performance tab.
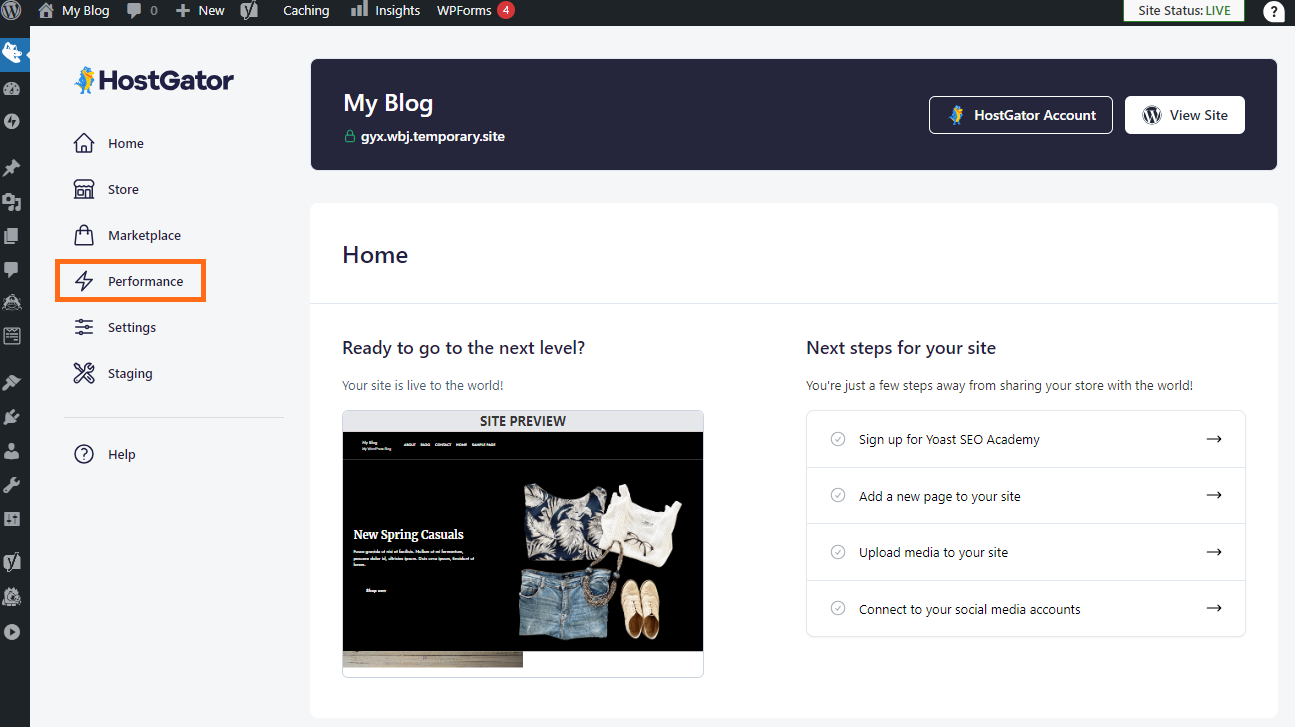
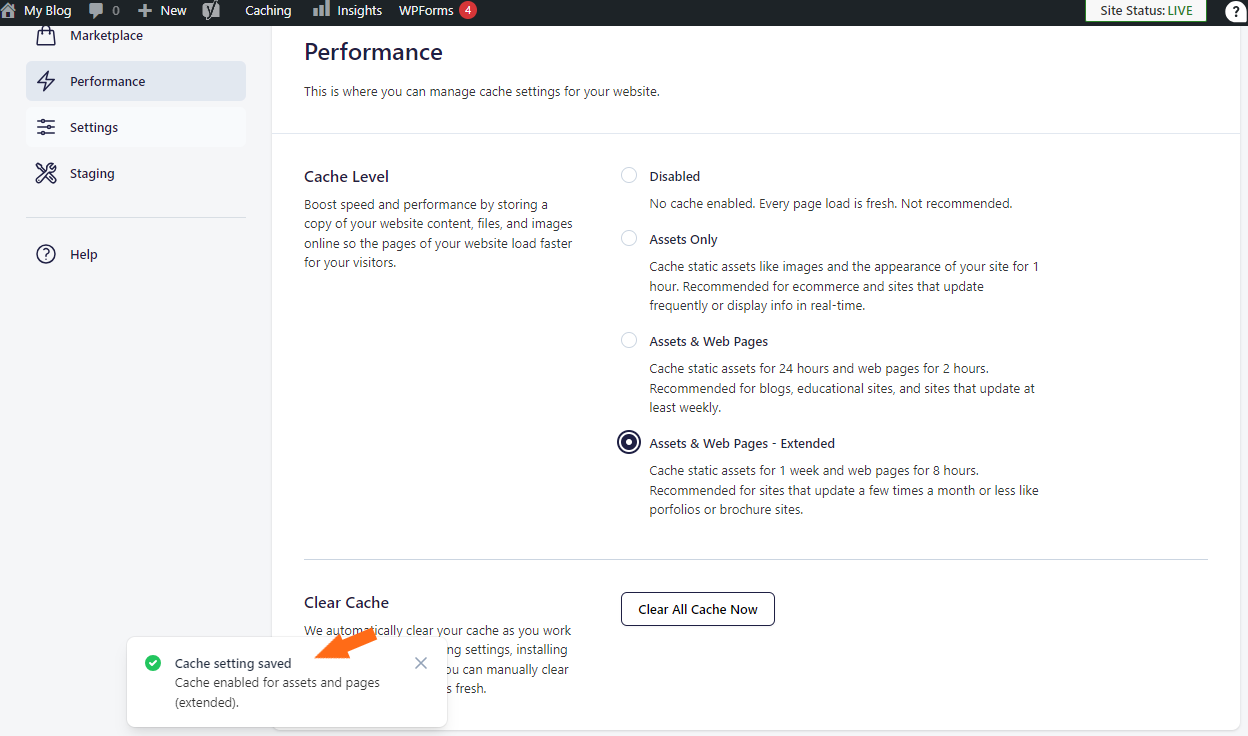
- Choose your preferred caching option from the Cache Level section.
- Disabled - No cache is enabled.
Recommended: No
- Asset Only - Cache static assets, such as images and site appearance, for 1 hour.
Recommended: For e-commerce and sites that update frequently or display information in real time.
- Assets & Web Pages - Cache static assets for 24 hours and web pages for 2 hours.
Recommended: For blogs, educational sites, and sites that update at least weekly.
- Assets & Web Pages - Extended - Cache static assets for 1 week and web pages for 8 hours.
Recommended: For portfolios, brochure sites, and sites that update monthly or less often.
- Disabled - No cache is enabled.
- A little prompt will pop up at the bottom of the page, notifying you that the cache setting was applied.
How do I clear my website's cache?
Clearing the cache of your WordPress website is another awesome feature of the HostGator plugin.
To clear your website's cache:
- Go to the HostGator plugin section.
- Click the Performance tab.
- Scroll down to the Clear Cache section.
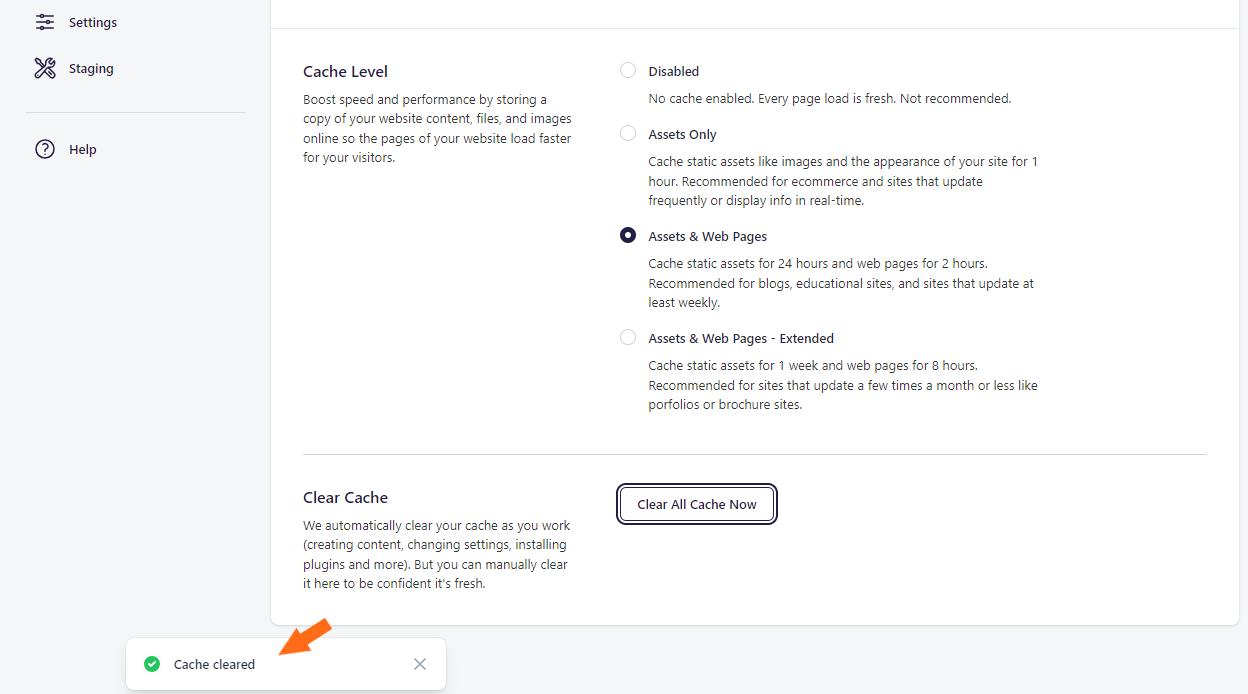
- Click on the Clear All Cache Now button.
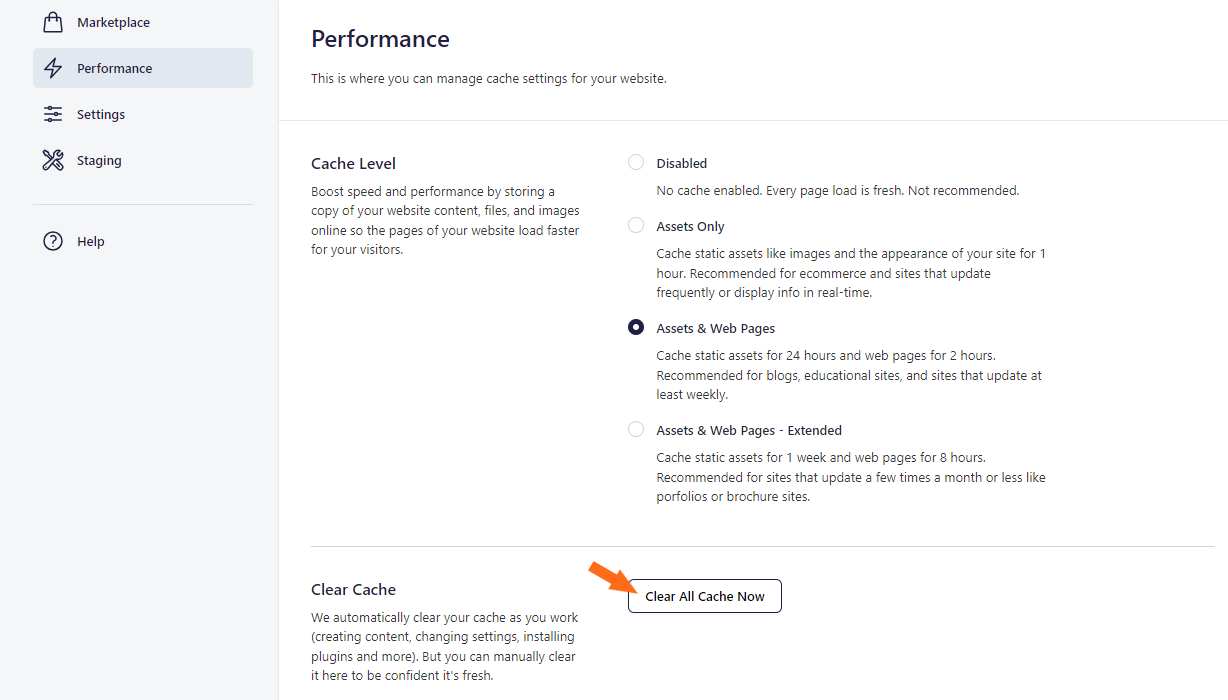
- A Cache Cleared prompt will be displayed at the bottom of the page. Visit (or refresh) your WordPress website.
Related Articles
If you've cleared the cache using the HostGator plugin but have seen no significant improvement, you may also want to clear your website browser's cache and further optimize your website. Here are support articles to guide you with these tasks.
- Advanced WordPress Optimization
- How do I clear my web browser's cache?
- How to optimize a WordPress installation
If you're interested in the fundamentals of cache, how it works, and how important it is, you'll find the details in the following article.
This article provides an in-depth discussion of the features and functionalities of the HostGator plugin.