Knowledge Base
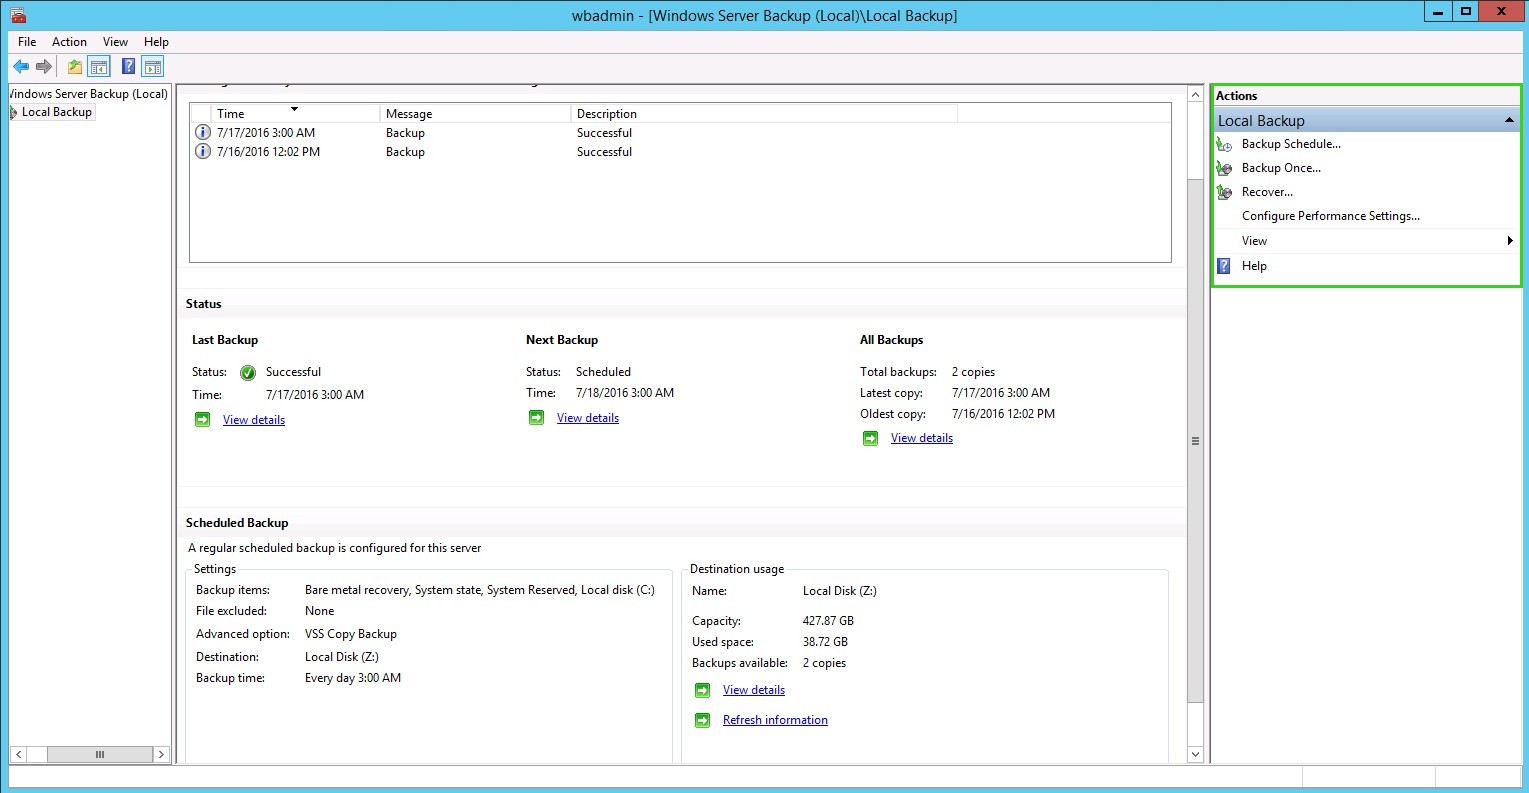
Windows Server Backup
New Windows Dedicated Servers are provisioned with the Windows Server Backup scheduled to create backups daily to the Z: drive. This article will provide instructions to configure your scheduled backups, create a one-time backup, or restore from a previous backup:
Configure Scheduled Backups
The following steps may be used to configure and manage the Backup Schedule:
- Access the server via Remote Desktop.
- From the Start menu, search for the term backup and select Windows Server Backup.
- In the right-hand Actions menu, select Backup Schedule.
- Choose from the following two options, then click the Next button to proceed.
- Modify backup – Make changes to backup items, times, or storage locations. If you select this option, please continue to the next step.
- Stop backup – Permanently stop the backup schedule. The backup disk is released and the data on the disk is preserved. If you select this option, click Next, then Finish and confirm your changes to complete the process.
- Please select between a full server backup or a custom configuration, then click the Next button.
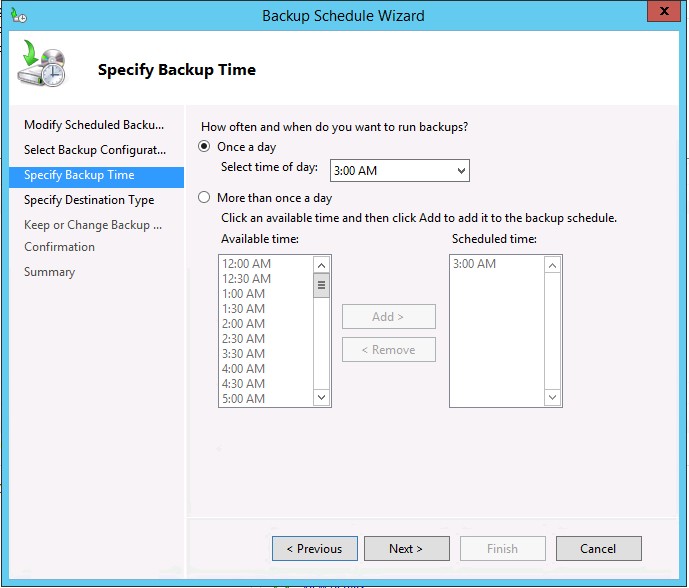
- Select the frequency in which backups are performed and the scheduled time, then select Next:
- Specify where the backups are to be stored. If Back up to a volume is selected, then on the Next page, you may select Keep current backup destinations.
Back up to a volume is the recommended setting. If Back up to dedicated hard disk is selected, the disk will be formatted first and all data stored on the disk will be destroyed.
- Select Next to continue.
- Review the new backup schedule and click Finish.
Create a One-Time Backup
To create a one-time single backup using Windows Server Backup:
- Access the server via Remote Desktop.
- From the Start menu, search for the term backup and select Windows Server Backup.
- In the right-hand Actions menu select Backup Once.
- Choose from the following options to create a backup using:
- Schedule backup options - Choose this option if you have created a scheduled backup and want to use the same settings for this backup.
- Different options - Choose this option if you have not created a scheduled backup or to specify a location or items for this backup that are different from the scheduled backup.
- Click Next to continue.
- Once a backup location has been defined, review the Confirmation page.
- Select Backup to initiate the backup task.
Recover Content from a Backup
To recover content from a previous backup:
- Access the server via Remote Desktop.
- From the Start menu, search for the term backup and click Windows Server Backup.
- In the right-hand Actions menu, select Recover.
- Specify if the backup is stored on this server, or another location, then choose Next.
- Select the date and time of recovery, then select Next.
- Specify which of the following options will be recovered:
- Files and Folders - You can browse volumes included in this backup and select files and folders.
- Volumes - You can restore an entire volume, such as all data stored on C:.
- Applications - You can recover applications that have registered with Windows Server Backup.
- System state - You can restore just the system state.
- Click Next to continue.
- Specify which items you wish to restore, then click Next.
- Specify Recovery Options, then choose Next.
- Review the recovery confirmation, then select Recover and wait for the restoration to complete.
Did you find this article helpful?