How to Set Up Custom Error Pages in Plesk on Windows Server
To properly configure Plesk custom error pages on a Windows server, follow the steps below. These instructions apply to Plesk 18 and similar versions.
Step 1: Turn On the Custom Error Pages
Before configuring error documents, you must enable custom error pages in Plesk.
- Log in to Plesk.
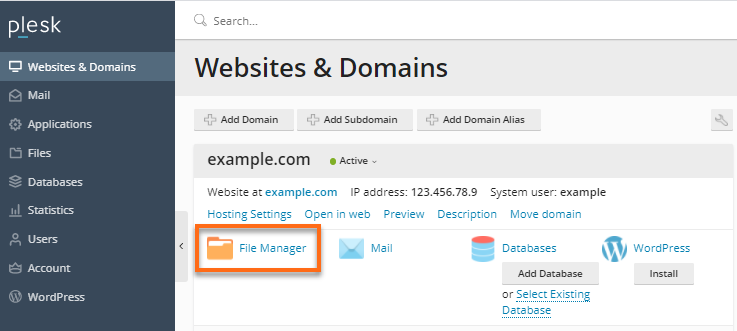
- Click Websites & Domains from the left-hand menu.

- Locate the domain you wish to configure.
- Click on Hosting Settings under the domain you are configuring.

- Navigate to the Web scripting and statistics section, then check the box for Custom error documents.
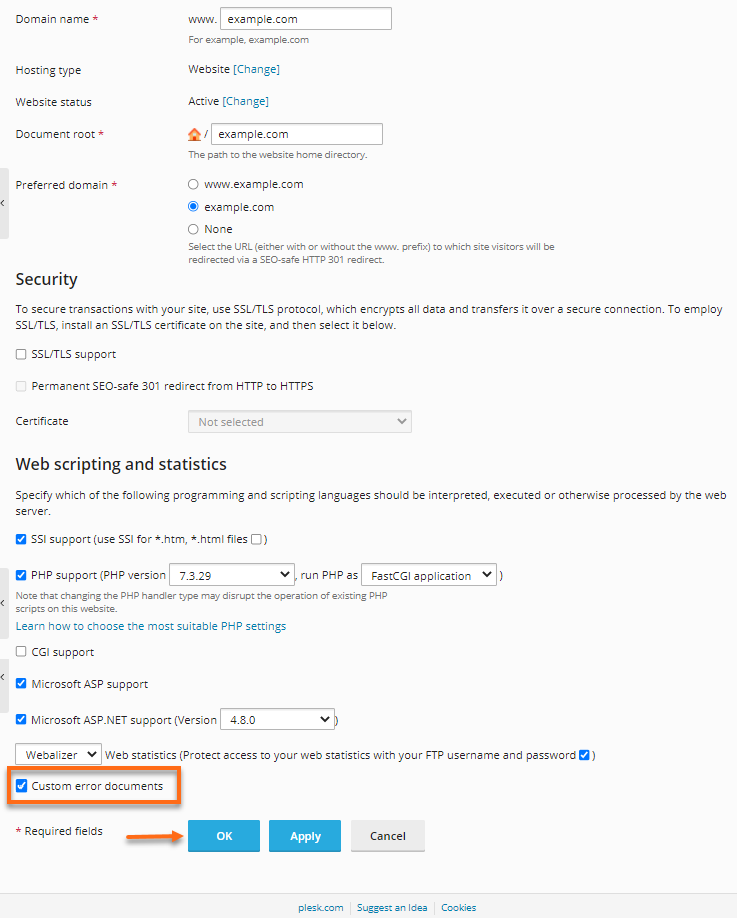
- Click OK.
- You will be taken back to the Websites & Domains page with a successful notification at the top of the page.
√ Information: The settings were successfully updated.
Once Custom Error Pages are turned on, you can edit, configure, or create new error documents.
Step 2: Configure the Custom Error Pages
You can configure your Plesk custom error pages using two methods: editing existing files or using the web.config file for IIS.
Option 1: Editing an Existing Custom Error Page
The simplest way to create your own Plesk error page is to modify an existing one.
- Click on the Website & Domains tab (if not already on that page).
- Click on the File Manager icon.
- Within the Root directory, click the error_docs folder.
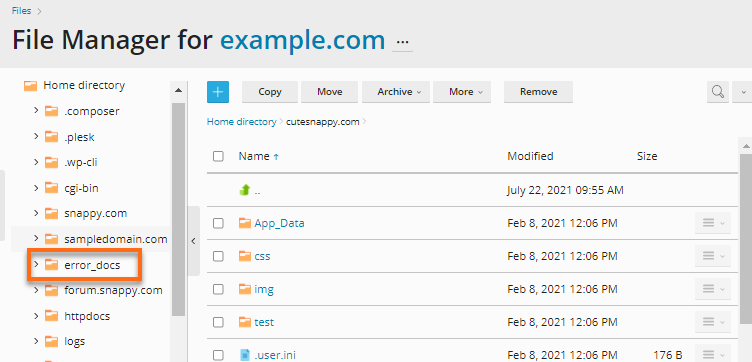
- Click on the error page you want to edit. For example, not_found.html.
- Use Plesk's built-in code editor to edit the error page.
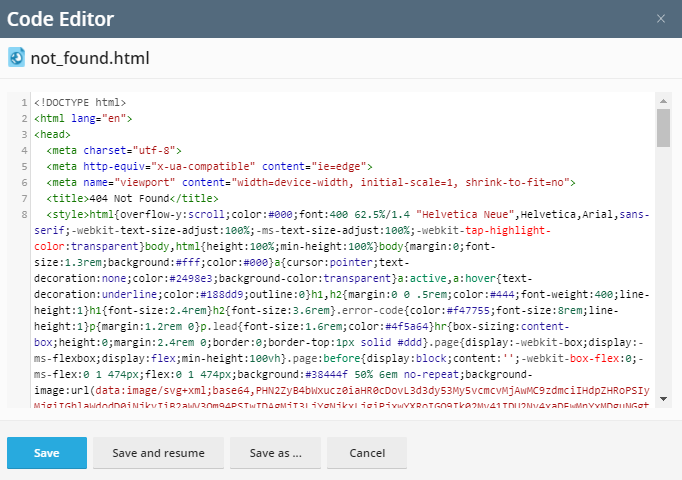
- Click OK to save your changes.
Once saved, your changes will take effect. No additional steps are necessary.
Option 2: Using web.config File
You can also manage IIS custom error pages through the web.config file.
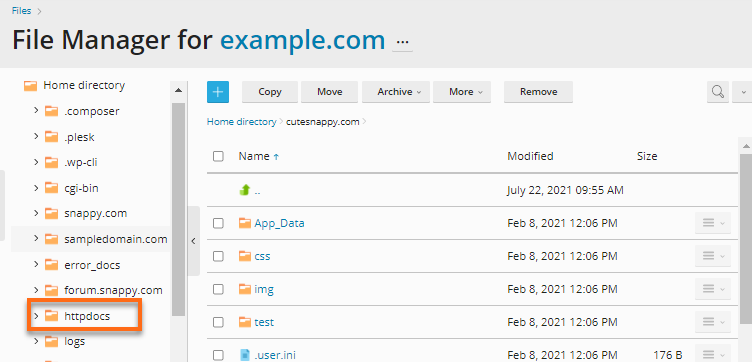
- Click on the Files tab and open httpdocs (or the document root for the domain you are configuring).
- Locate the web.config file to open it in the Plesk text editor.
If no web.config file exists, create a new file named web.config and place the following text inside:
<?xml version="1.0"?> <configuration> <system.web> <customErrors mode="On"/> </system.web> <system.webServer> <httpErrors errorMode="Custom"> </httpErrors> </system.webServer> </configuration> - Custom error documents can be added in the httpErrors section. The first step would be to add code that removes the preset error document.
For example, to remove the preset 404 document, add the following code:
Replace the number for the statusCode with the error code you wish to replace.<remove statusCode=”404” subStatusCode=”-1”/> - After the preset error documents have been removed, the new error page can be added.
404 error page example code:
For the path, use the relative path to the error file from your document root. For example: "/error_docs/NothingHere.html"<error statusCode=”404” path=”/path/to/error-file” responseMode=”ExecuteURL”/> - The step above can be repeated for each error status code you would like a custom error page for.
Following all of the steps above with a blank web.config file would result in the following example web.config file.
<?xml version="1.0"?>

<configuration>

  <system.web>

    <customErrors mode="On"/>

  </system.web>

  <system.webServer>

    <httpErrors errorMode="Custom">

      <remove statusCode=”404” subStatusCode=”-1”/>

      <error statusCode=”404”path=”/error_docs/NothingHere.html” responseMode=”ExecuteURL”/>

    </httpErrors>

  </system.webServer>

</configuration>