Manage AutoSSL in WHM
AutoSSL is a WHM (Web Host Manager) feature that automatically installs and manages domain-validated SSL certificates for cPanel accounts on VPS and dedicated servers. It simplifies SSL deployment by securing domains without requiring manual certificate installation.
Features of AutoSSL
cPanel has recently implemented a new feature in WHM called AutoSSL. This feature will automatically install domain-validated SSL certificates on cPanel accounts for VPS and Dedicated Server packages. The Manage AutoSSL feature will select an SSL certificate provider, view logs, and manage which users can be secured with an SSL Certificate. For more information regarding the AutoSSL in WHM, please refer to cPanel's documentation,
- AutoSSL covers the www subdomain for each domain and subdomain listed in the certificate. These certificates do count towards any daily rate limits. For example, the domains example.com and www.example.com will be included in the certificate.
- AutoSSL does prioritize new certificates over the renewal of existing certificates due to rate limits.
- The AutoSSL sorting algorithm determines the priority of domains to secure when a virtual host contains more domain names than the provider's limit.
- Different providers may wait a certain period before replacing an AutoSSL-provided certificate before it expires. Such as certificates provided by cPanel, will attempt to renew within 15 days of expiry.
- AutoSSL will replace certificates with overly weak security settings. Example: RSA modulus of 512 bits or less.
AutoSSL will automatically check that all domains in the cPanel user account have a certificate, unless you exclude them in the Manage Users option. Please see the "Disable for Certain Users" section below for instructions on completing this.
Limitations of AutoSSL
- cPanel-provided certificates through AutoSSL can secure up to 200 domains per certificate (Apache virtual host).
- Domains and subdomains must pass a Domain Control Validation (DCV) test to prove domain ownership.
- Corresponding www. Domains will not be included if they do not pass the DCV test.
For the AutoSSL DCV to function, the domain must be pointed to HostGator via either nameservers or an A record to your server's IP address. This change must be completed within the domain's management. - Pre-existing certificates will not be replaced if they were not issued via AutoSSL.
- AutoSSL does not secure wildcard domains.
How to enable SSL in WHM
This video discusses how to enable your preferred SSL in a VPS or Dedicated server's WHM using Let's Encrypt as an example. For a Reseller's WHM, we will configure it.
Here are the steps outlined in the video guide above.
- Log in to your Customer Portal.
- From the left-hand menu, navigate to Hosting and select My Plans.
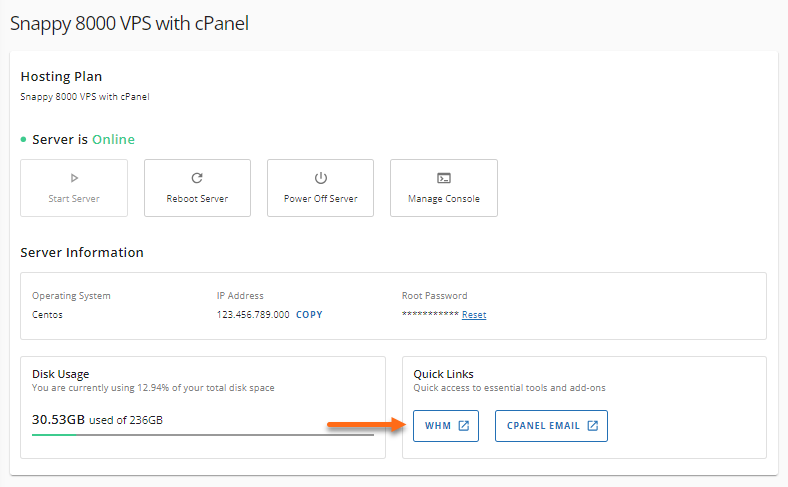
- Click the WHM button.
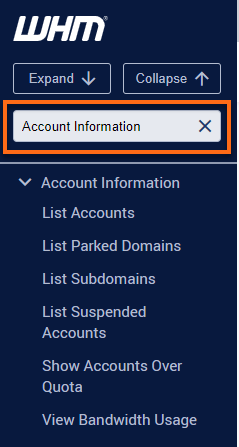
- Look for the SSL/TLS section. The quickest way is to type the keyword in the Search box on the left-hand panel.
Alternatively, you can use the Search box at the top.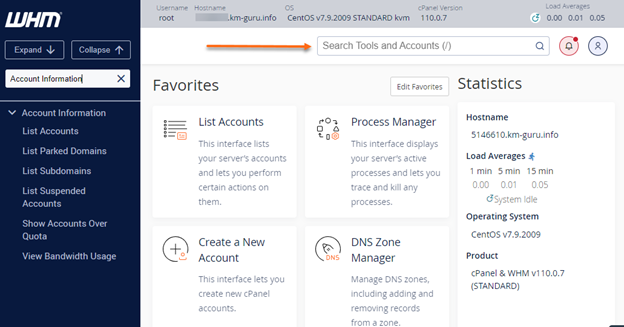
- Select Manage AutoSSL.
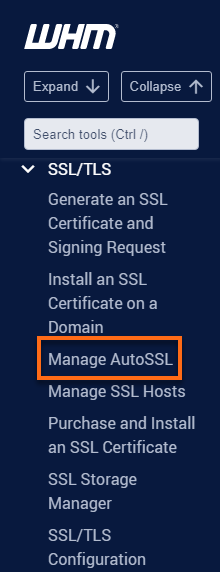
- Scroll down a little bit and select Let's Encrypt under AutoSSL Providers. The cPanel is enabled by default.
- Click the Options tab. This section allows you to customize your SSL and replace invalid or expiring SSL certificates.
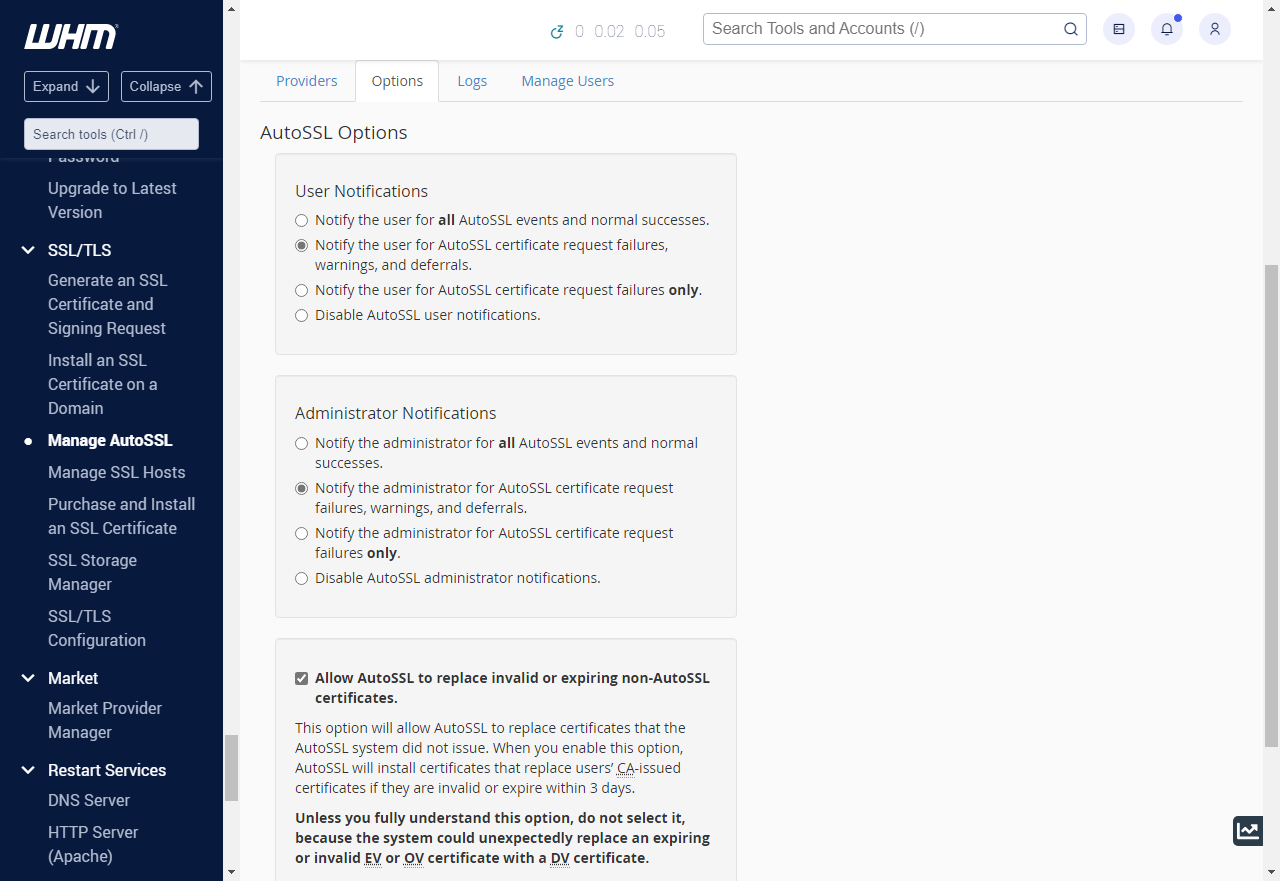
- If you have a paid SSL installed in a domain and want to use Let's Encrypt instead, select Allow AutoSSL to replace invalid or expiring non-AutoSSL certificates to automatically replace them with either cPanel or Let's Encrypt SSL.
- Leave this checkbox unselected if you do not wish to replace your paid SSL certificate with AutoSSL.
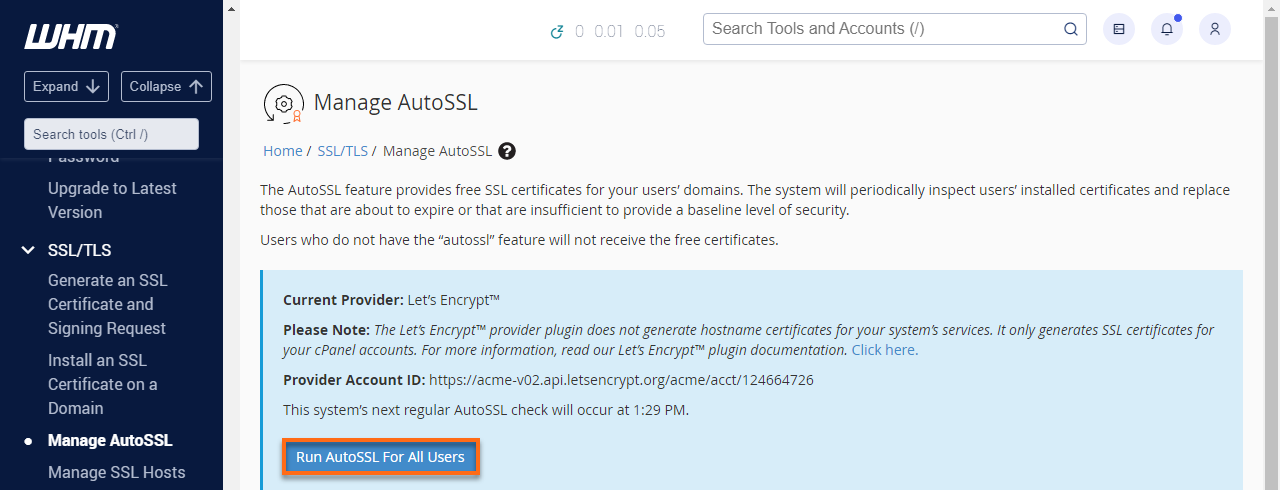
- Next is to run AutoSSL.
- To use AutoSSL for all cPanel users in your WHM, click the AutoSSL for All Users button.
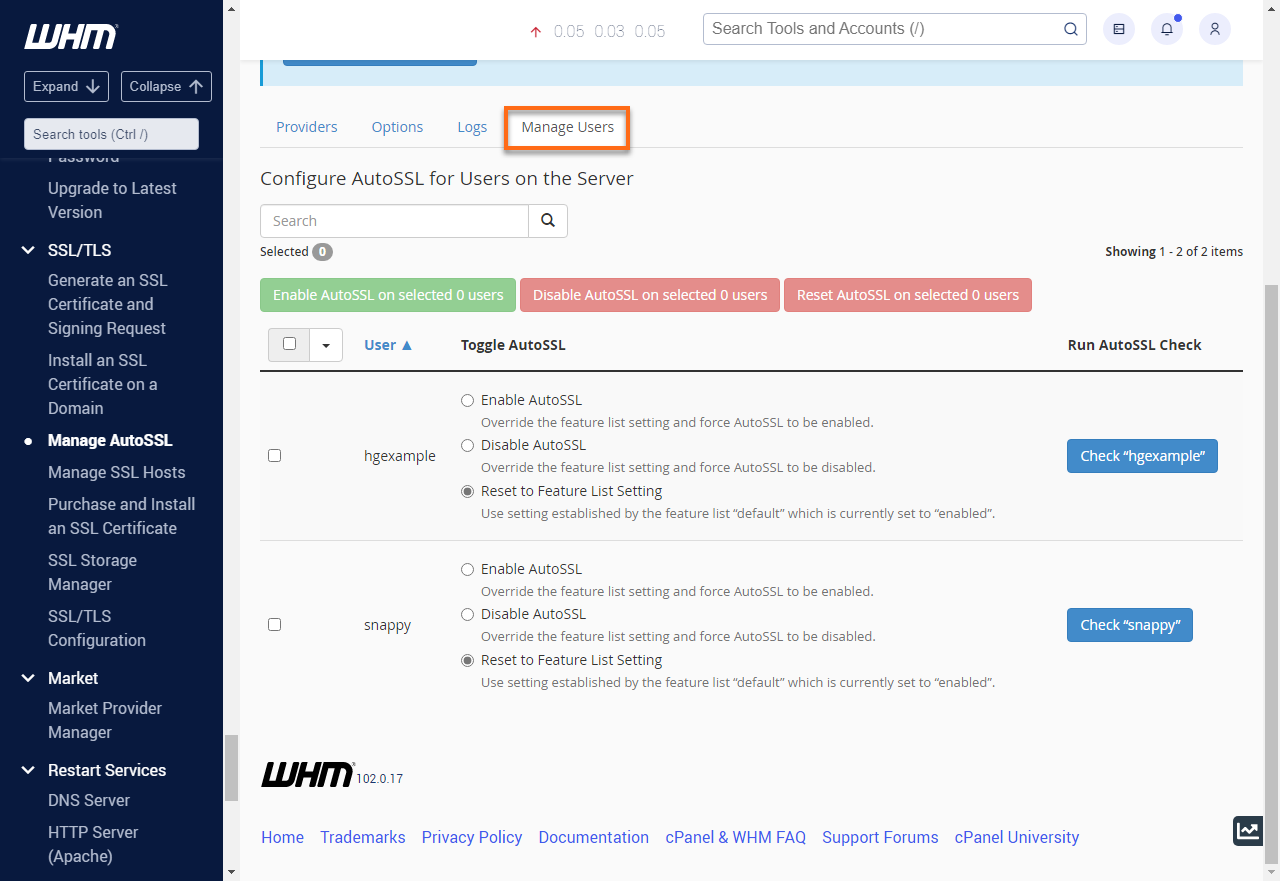
- If you wish to choose the users who will use AutoSSL, click the Manage Users tab, select your preferred cPanel users, enable the AutoSSL radio button, and click the Check (username) button under the Check (username) Run AutoSSL Check.
- To use AutoSSL for all cPanel users in your WHM, click the AutoSSL for All Users button.
- Once the AutoSSL is triggered, you can check its status in the Logs tab.
- Click View Logs to see the complete details.
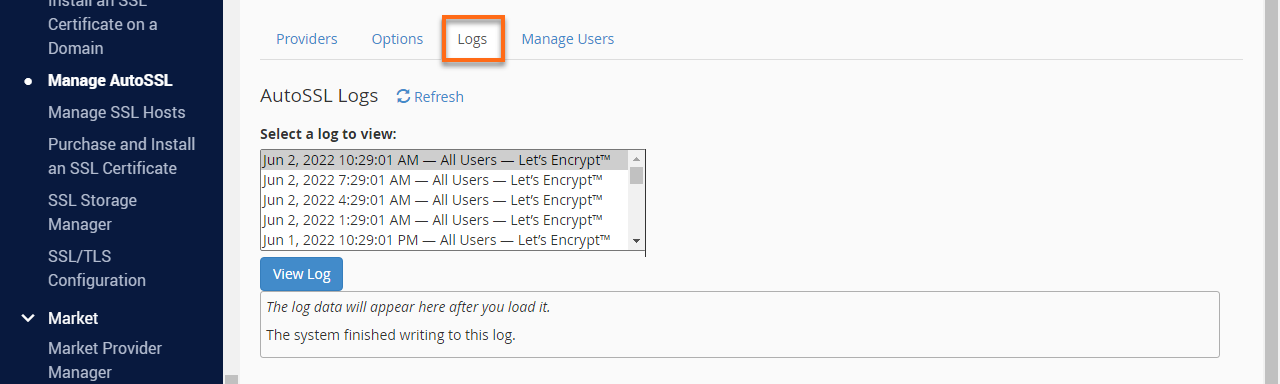
- Scroll through the logs to find the green text indicating a successful installation.
- Check your website in a browser by typing https:// followed by your domain name. Your SSL should now be activated on your website.
Disable for Certain Users
- Click on the Manage Users tab, and then click the checkbox on the left-hand side of each user that you wish to disable.
- Once all users are selected, click Disable AutoSSL on selected users at the top.
- Then click Save at the bottom of the screen.
Enable for Certain Users
- Click the Manage Users tab, then select the checkbox on the left-hand side for each user you wish to enable.
- Once all users are selected, click Enable AutoSSL on selected users at the top.
- Then click Save at the bottom of the screen.
Change AutoSSL Provider
Within Manage AutoSSL, you can change the SSL provider by selecting which provider you would like to use. The provider may require you to read and accept their Terms of Service by selecting the checkbox to agree.
To reset your registration with the provider, select the appropriate checkbox to agree to the terms, then Reset Registration, and then click Submit.
Let's Encrypt™ AutoSSL Plugin
The Let's Encrypt™ plugin will automatically provision cPanel accounts with Let's Encrypt SSL certificates for sites that do not already have valid CA-signed SSL certificates. The plugin only integrates with the AutoSSL feature, which generates SSL certificates for cPanel accounts. It does not generate hostname certificates for your system's services.
- Using SSH, log in as the root user of the server.
- Run the following command:
/scripts/install_lets_encrypt_autossl_provider
To disable and uninstall the Let's Encrypt plugin, run the following command via SSH:
/usr/local/cpanel/scripts/uninstall_lets_encrypt_autossl_provider
AutoSSL Troubleshooting
The Log tab in the AutoSSL manager will display the issue after the first cron job runs. Viewing the log is done by selecting the file's date, then clicking View Log.