Knowledge Base
How to Update Installations with Softaculous
This article will show you how to set your installations to auto-upgrade with Softaculous. We will use WordPress installation as an example.
How to enable auto-upgrade for new installations
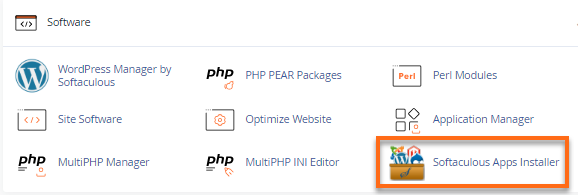
- Log in to cPanel.
- Under the Software section, click on Softaculous Apps Installer.
- In Softaculous, there are two ways to install the software you wish to install. You can either click on the software widget or search for it. We will use WordPress as an example.
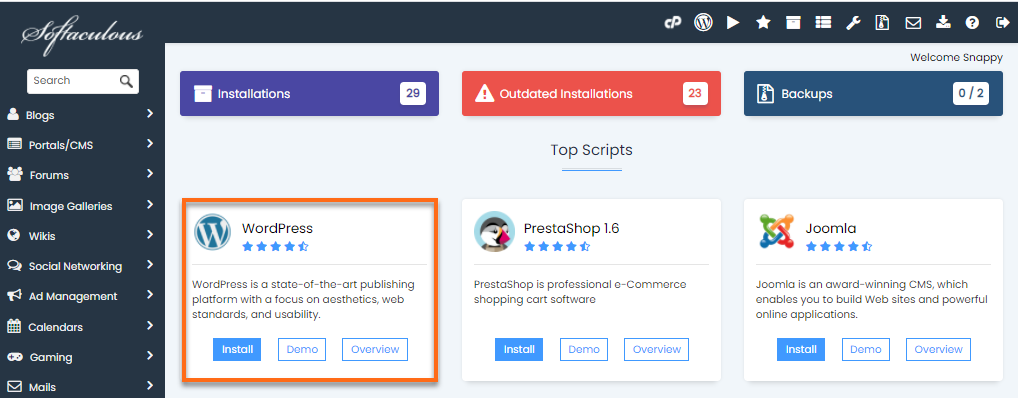
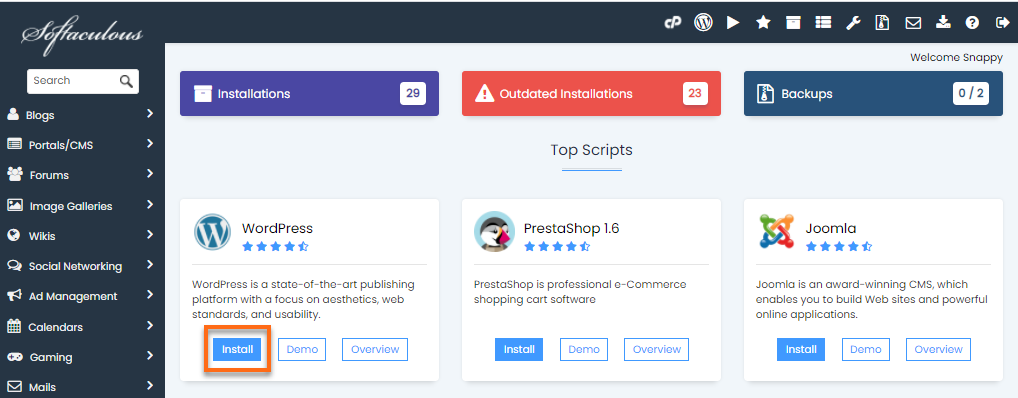
- Click on the Install button.
- On the Installation page, fill out the form with the required information.
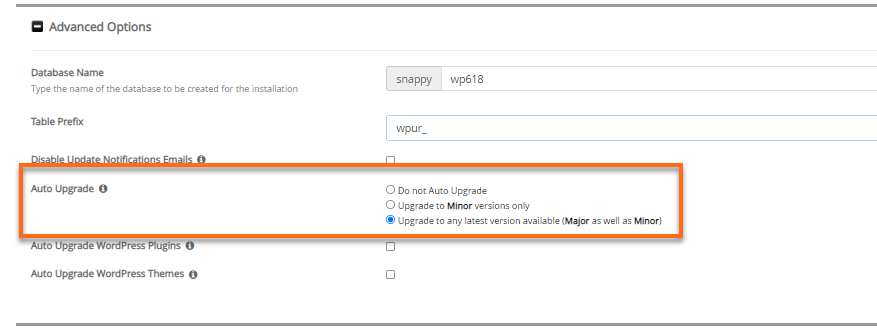
- Expand the Advanced Options and scroll down to the Auto Upgrade section.
- Choose preferred settings from the three options provided.
- Do not Auto Upgrade — The auto-upgrade is disabled.
- Upgrade to Minor versions only — The software will be automatically upgraded with minor updates (WP update from 5.3 to 5.3.3 instead of 5.4). Upgrade to any latest version available.
- (Major and Minor) — The software will be automatically upgraded with both major and minor updates (For example, WP minor update from 5.3 to 5.3.3 and a major update from 5.4 to 5.5).
- Click on the Install button at the bottom of the page.
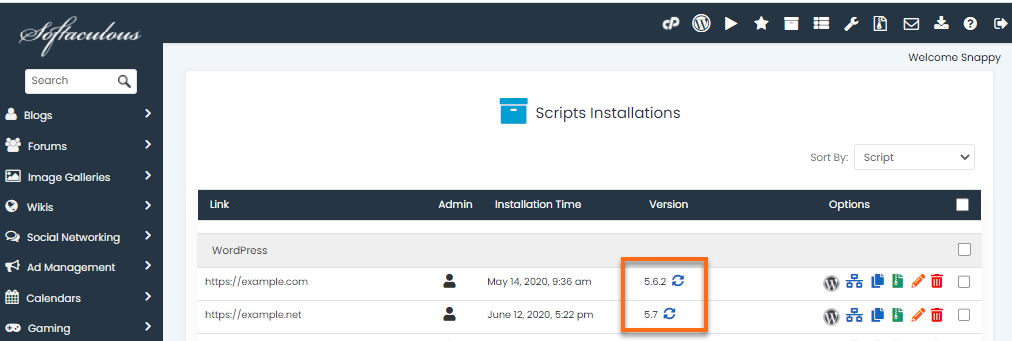
- The screenshot below shows how an installation looks like if auto-update is enabled.
How to enable auto-upgrade for existing installations
- Log in to cPanel.
- Under the Software section, click on Softaculous Apps Installer.
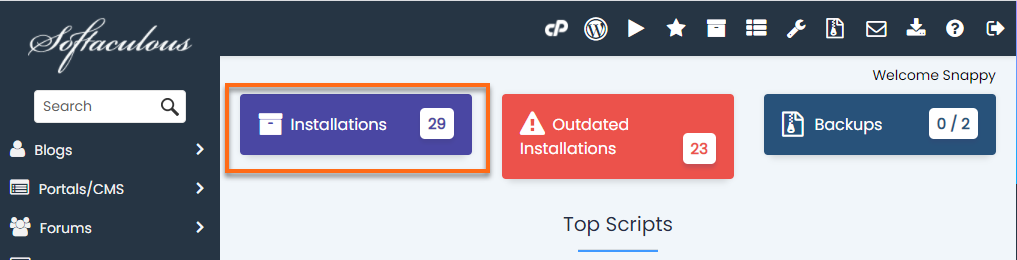
- In Softaculous, click on the Installations box.
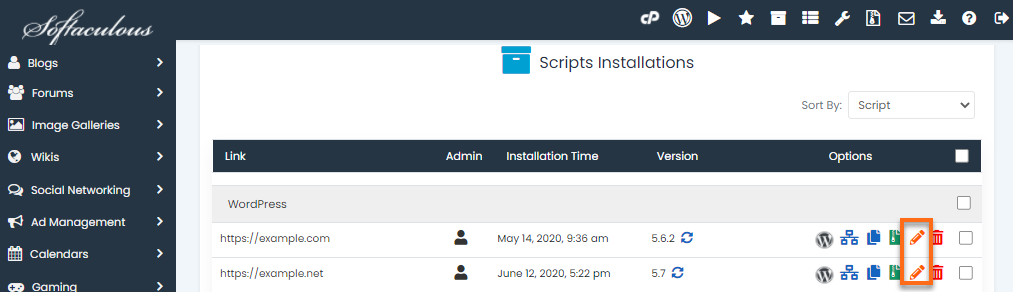
- The next page will show the list of installed scripts. Click on the Pencil icon to edit the installation details.
- Select how you want to upgrade your installation on the Edit Installation Details page.
- Choose preferred settings from the three options provided:
- Do not Auto Upgrade — The auto-upgrade is disabled.
- Upgrade to Minor versions only — The software will be automatically upgraded with minor updates (WP update from 5.3 to 5.3.3 instead of 5.4).
- Upgrade to any latest version available (Major and Minor) — The software will be automatically upgraded with major and minor updates (For example, WP minor update from 5.3 to 5.3.3 and major update from 5.4 to 5.5).

- Click on the Save Installation Details button at the bottom of the page.

- The screenshot below shows how an installation looks like if auto-update is enabled.
Did you find this article helpful?