How To Enable SiteLock SMART PATCH Scan
The SiteLock SMART PATCH Scan feature runs alongside the SMART scan and can patch any vulnerabilities within your site files, themes, and/or plugins. While this feature gives you more time to manage and make the updates yourself, it is strongly recommended that you update your website components when newer versions are available.
This article will discuss how to enable the SMART PATCH scan and configure its vulnerability patching feature within the SiteLock Dashboard.
What are the Key Features of the SMART PATCH Scan?
SMART PATCH detects and patches vulnerabilities in WordPress and Joomla sites.
Key features include the following:
- Patches vulnerable code for both platforms.
- Provides rollback functionality.
Scan Summary:
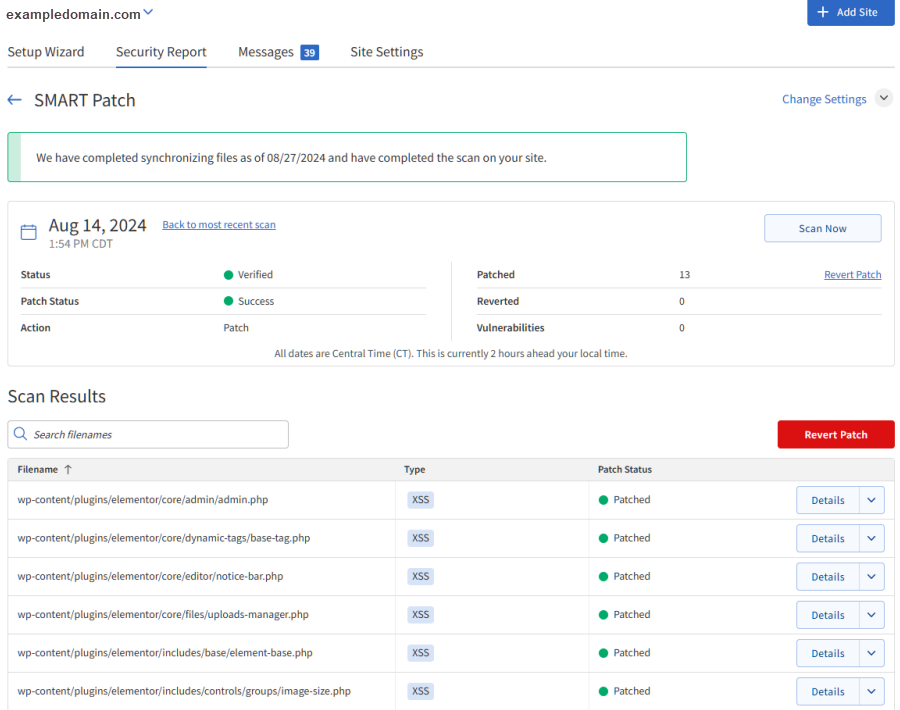
The SMART Patch section will display the following latest scan details:
- Scan time - The latest scan date is shown in Central Time Zone (UTC-6).
- Status - Indicates the current scan status: "Verified" or "Non-Compliant."
- Patch Status - Indicates the patch status: "Warning Only," "Success," or "Failed."
- Action - The action of the scan: "Patch" or "Revert."
- Patched - The number of instances patched.
- Reverted - The number of patches reverted.
- Vulnerabilities - The number of vulnerabilities detected.
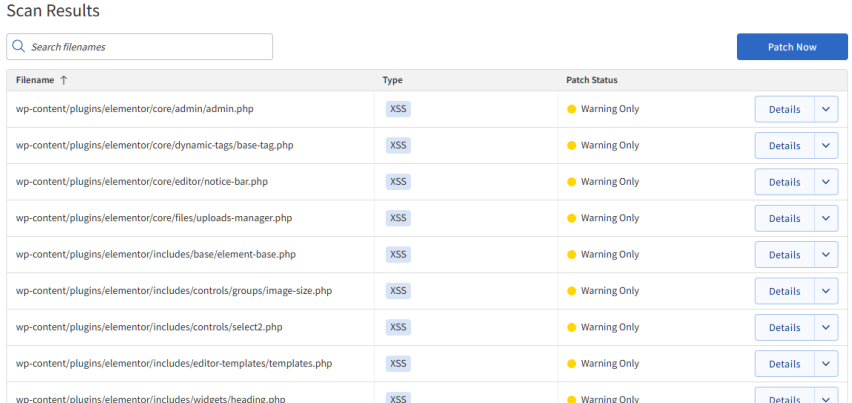
If vulnerabilities are detected but automatic patching is disabled, a Patch Now button will be displayed.
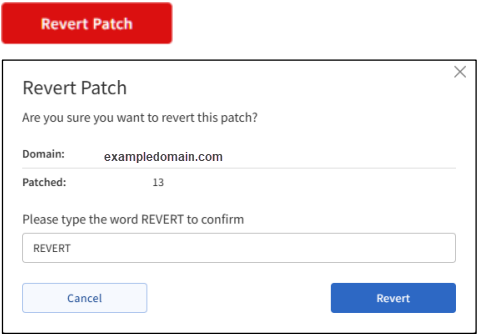
Revert Patch: Users can revert a successful patch if necessary. A red Revert Patch button appears, followed by a confirmation pop-up.
How to Enable and Configure SMART PATCH Scan
If you purchased the SiteLock service from SiteLock directly, please go to http://sitelock.com/ and click LOG IN in the top right-hand corner.
If you purchased SiteLock from HostGator, please follow the steps below.
To configure your SMART PATCH Scanner:
- Access your SiteLock Dashboard.
- Navigate to your website's Site Settings tab.
If you have a single website, click on the Sites Settings tab in the top menu.

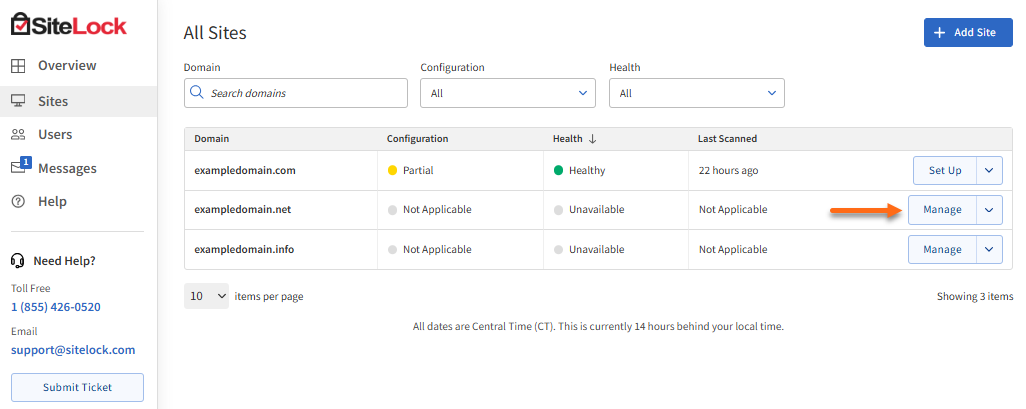
If you have multiple websites, click Sites on the left-hand menu, then select Manage next to the website you need to set up.
- Under the Site Settings tab, click Scanning Preferences on the left, then select SMART PATCH.
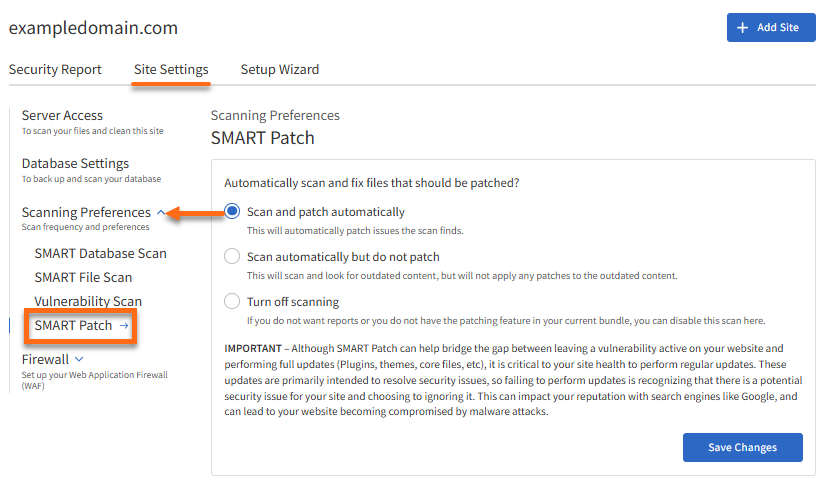
- Select your preferred setup.
- Scan and patch automatically - This will automatically patch issues the scan finds.
- Scan automatically but do not patch - This is the default setting. This scan will scan and look for outdated content, but will not apply any patches to the outdated content.
- Turn off scanning - If you do not want reports or do not have the patching feature in your current bundle, you can disable this scanning feature.
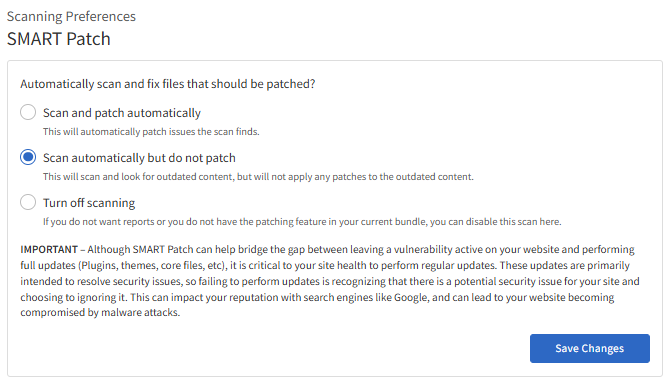
- Click Save Changes.