How to Change Your WordPress Login Username
There are several options for creating a new username in WordPress if you do not want to use its default login username. This article discusses the different methods on how to change the WordPress username.
Please click the links below to see each option's instructions.
Option 1: Via the WordPress Dashboard
This option will create an additional WordPress user since you cannot edit a username from within the WordPress Dashboard. If you do not wish to create an additional user, follow the instructions in Option 2 to edit your username through phpMyAdmin.
- Log in to your WordPress Dashboard by going to:
orhttp://example.com/wp-adminhttp://example.com/wp-login.php-
Replace example.com with your actual domain name.
-
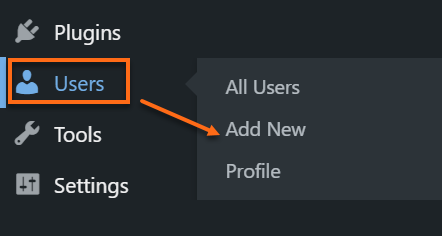
- Navigate to Users, then click on Add New.
- You will be redirected to the Add New User page. Fill out the required information below.
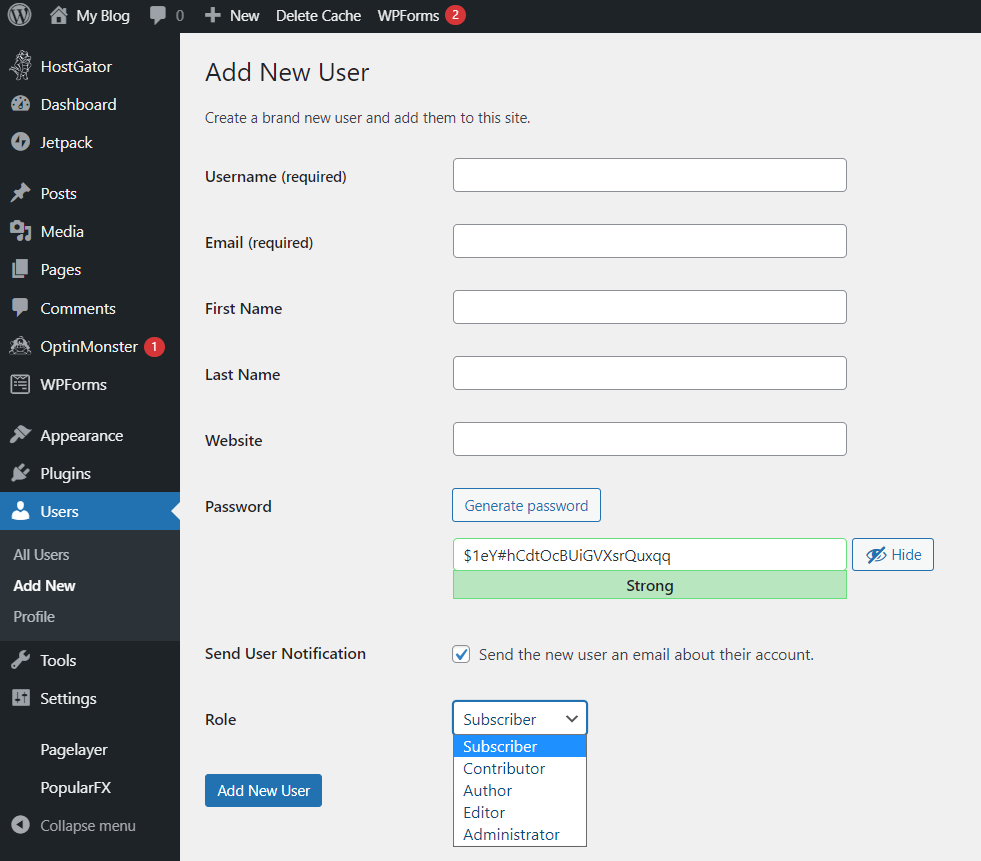
- Create a new Username.
- Enter your Email address.
- Complete the fields for First Name, Last Name, and Website.
- Create a new Password and enter it in the next two fields.
- Check the box to Send the new user an email about their account.
- Select the Role of the new user.
-
Click Add New User.
To learn more about WordPress User Roles, please check out our blog: How To Use WordPress User Roles To Improve Security.
Option 2: Via phpMyAdmin
To edit your WordPress login username in phpMyAdmin, find out which database is associated with the installation of WordPress that you wish to change. Follow the instructions below.
- Log in to cPanel. There are two ways to access your cPanel.
- Option 1: Access your cPanel directly.
- Option 2: Access your cPanel via your Customer Portal.
- Log in to your Customer Portal.
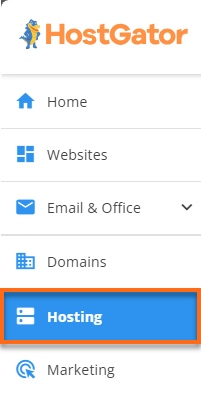
- Click Hosting in the left-side menu.
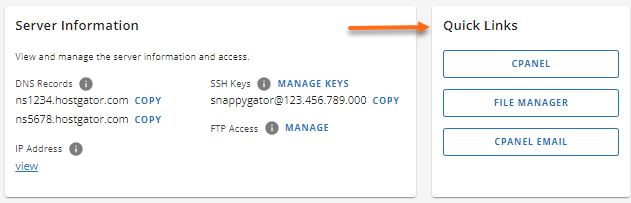
- If you have a single hosting package in your account, scroll down to the Quick Links section.
If you have multiple hosting packages in your account, locate the hosting package you want to manage on the Hosting Packages page, then click its Manage button.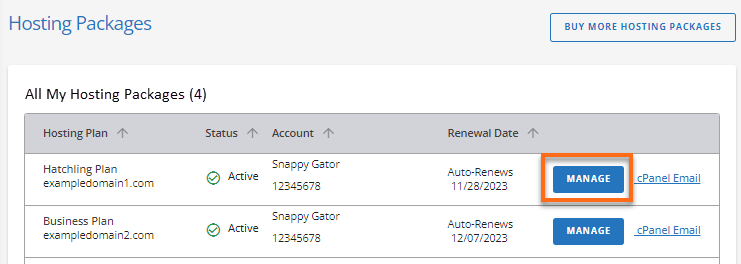
- Under the Quick Links section, click the cPanel button.
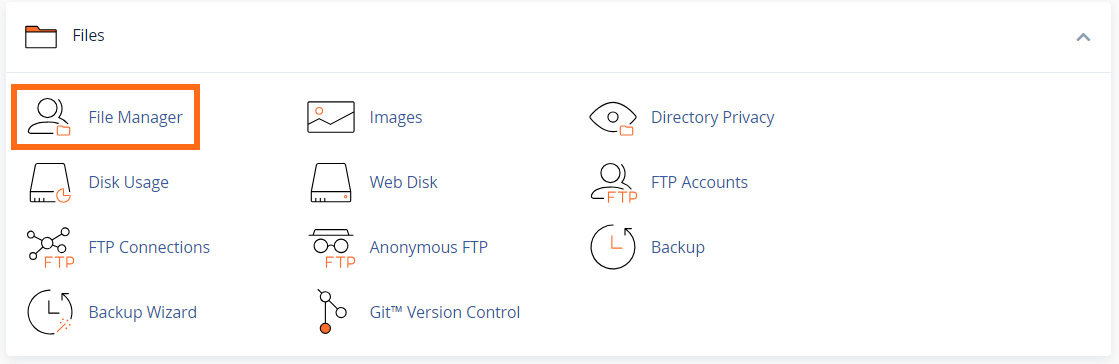
- In the Files section, click on the File Manager icon.
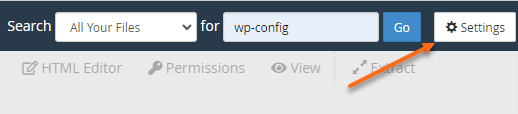
- Click on the Settings button in the top-right corner.
- From the pop-up screen, select Document Root, then choose your WordPress domain name.
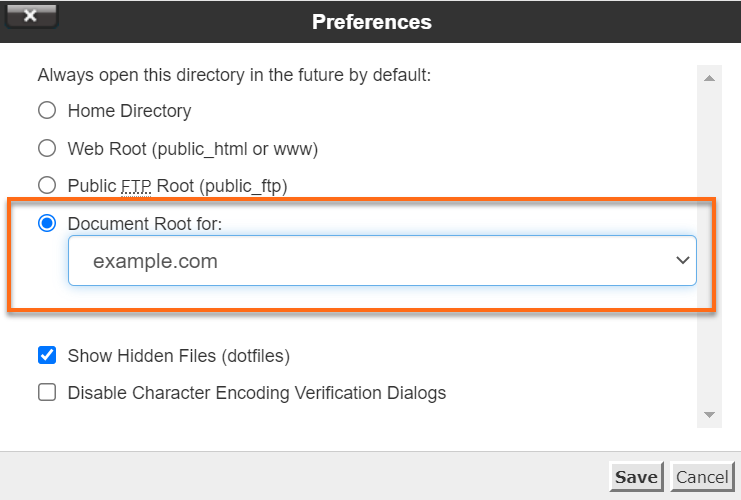
- Check the box for Show Hidden Files (dotfiles).
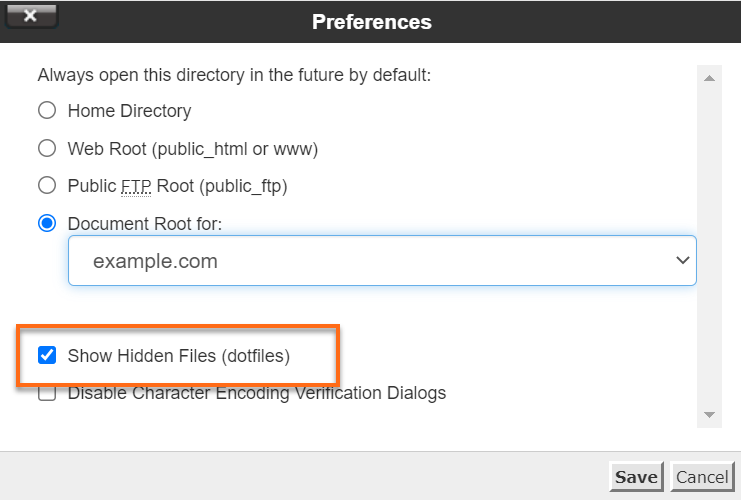
- Click Save.
- Next, search for the wp-config.php file.
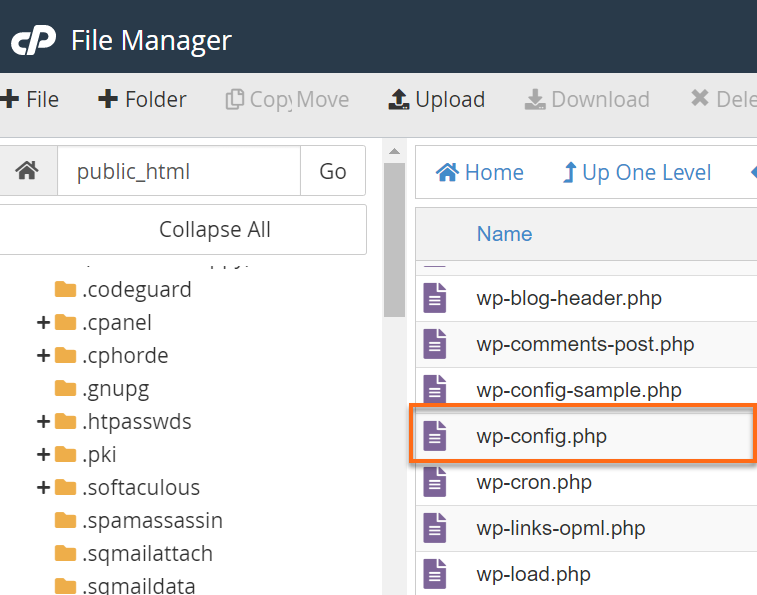
- Right-click and select Edit
- Click Edit when the screen pops up.
- Take note of the database name. It will look similar to this:
define('DB_NAME', 'domain_wrdp1')
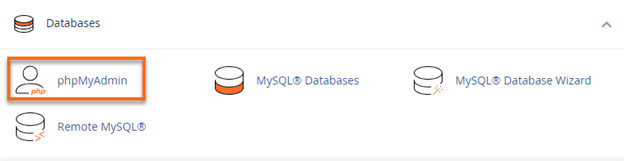
(Domain will be a prefixed form of the actual domain name or cPanel username being used.) - Go back to the cPanel homepage.
- In the Databases section, click phpMyAdmin.
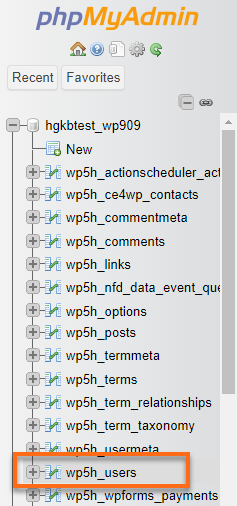
- From the left-hand navigation menu, click on the appropriate database name from Step 10.
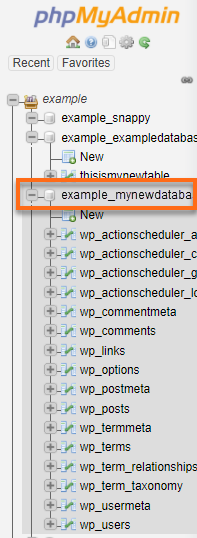
- Next, look for wp_users, then click on it.
- In the table next to the database login information, click Edit.
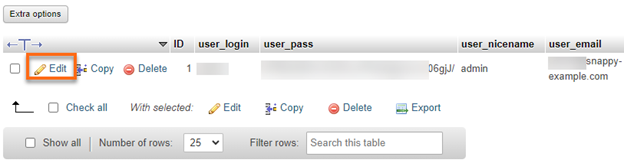
- Locate the user_login column, click on your current username, and change the name to something you prefer.
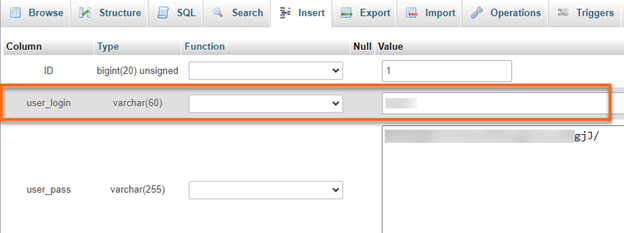
- Click Go.
You should now be able to log in to your WordPress site with your new username.