How to Manage MySQL Databases and Users in Customer Portal
Databases are important for handling large volumes of data in online applications, such as bulletin boards and e-commerce platforms. MySQL, a widely used open-source database system, is favored by developers worldwide. Learning how to manage MySQL databases and users effectively is important for beginners and experienced developers looking to optimize their database management skills.
In this article, we will discuss how to manage your MySQL database through your Customer Portal.
How to Access the Database Management Panel
You can manage your databases in the Database Management panel located within your Customer Portal.
Already logged into your Customer Portal? Use the following link to go to the Database Management panel.
Not yet logged into your Customer Portal? Follow the steps below.
To create or manage your indexes:
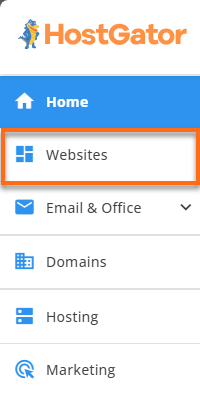
- Log in to your Customer Portal.
- Click Websites on the left-hand menu.
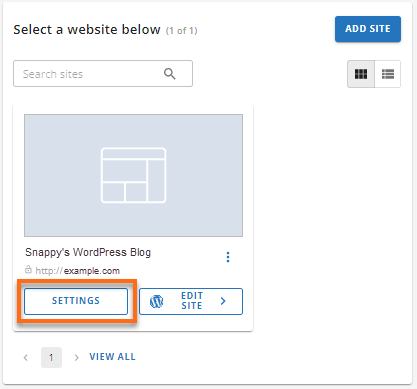
- On the website management page, locate the website you need to manage and click Manage Site button.
- On the Overview tab, locate the Database button below and click it.
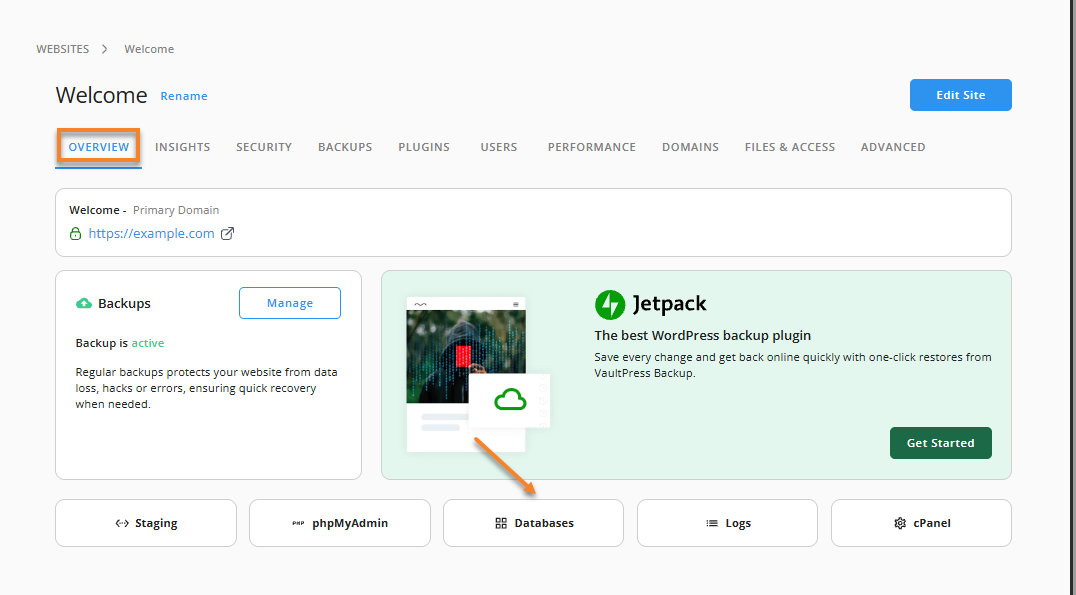
- You will be redirected to the Database Management panel, where you can view and manage all databases and database users.
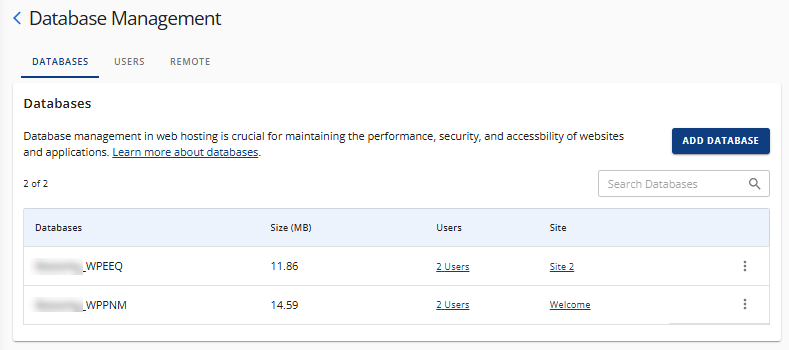
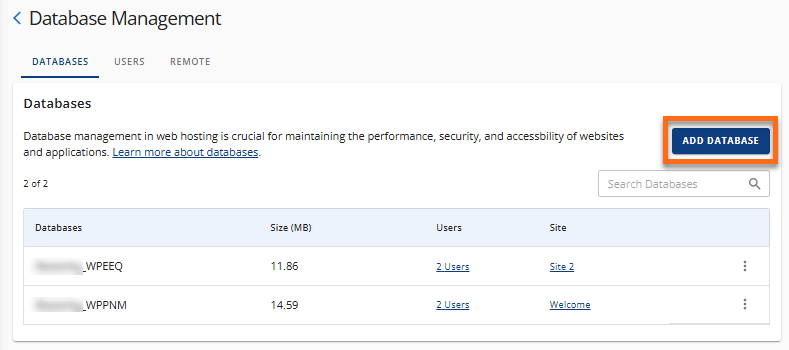
Databases tab
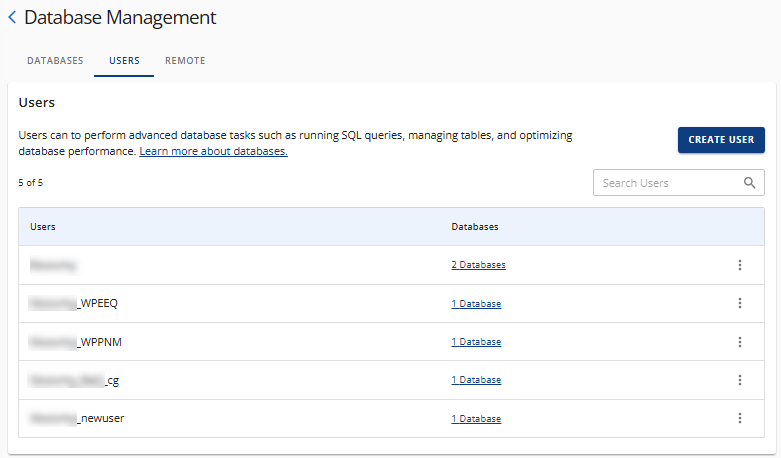
Users tab
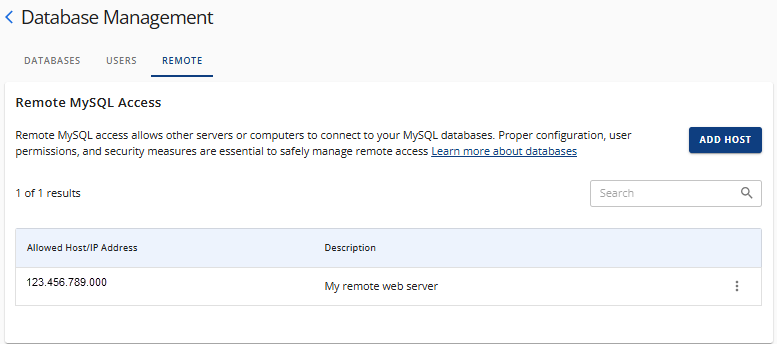
Remote tab
How to Manage MySQL Databases
On the Database Management panel, you can view and manage the MySQL databases for your website.
Under the Databases tab, you can take the following actions:
Create a New Database
- Under the DATABASES tab, click the ADD DATABASE button.
- In the Add Database pop-up, enter a name for your database.
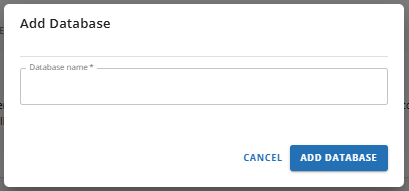
- Click ADD DATABASE to create the database.
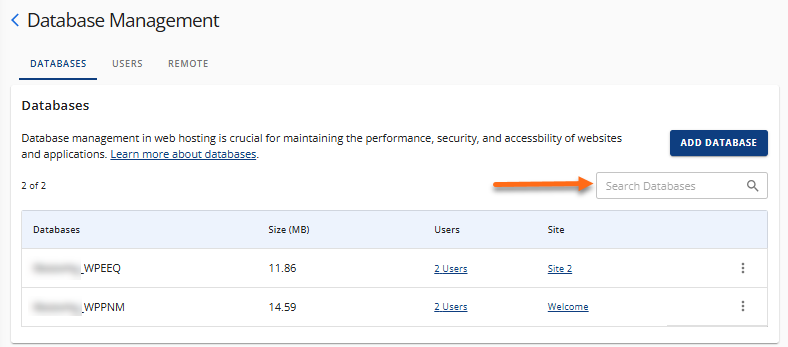
Search for a Database
On the Database Management panel's Databases tab, you can use the search box to locate a specific database to manage.
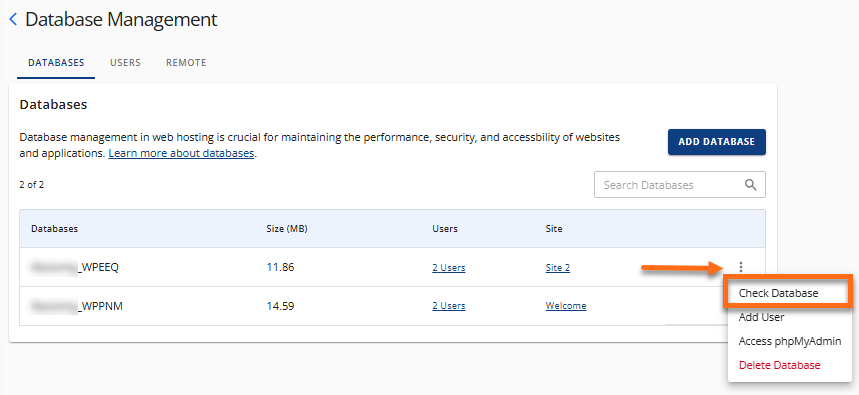
Check a Database
- Under the DATABASES tab, locate the database name that you need to check for errors.
- Click the vertical ellipsis icon on the right and select Check Database.
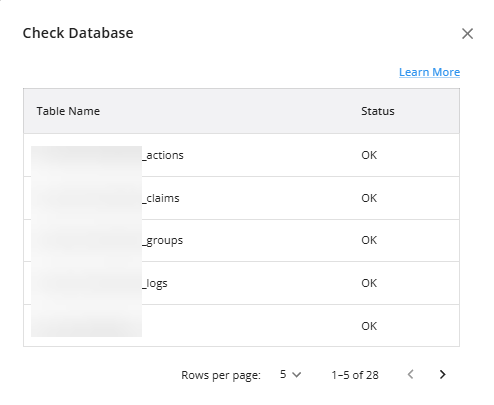
- The Check Database section will appear on the right side of the screen. The Table Name and Status will be provided.
Repair Database
- Under the Databases tab, locate the database name that you need to repair.
- Click the vertical ellipsis icon on the right and select Repair Database.
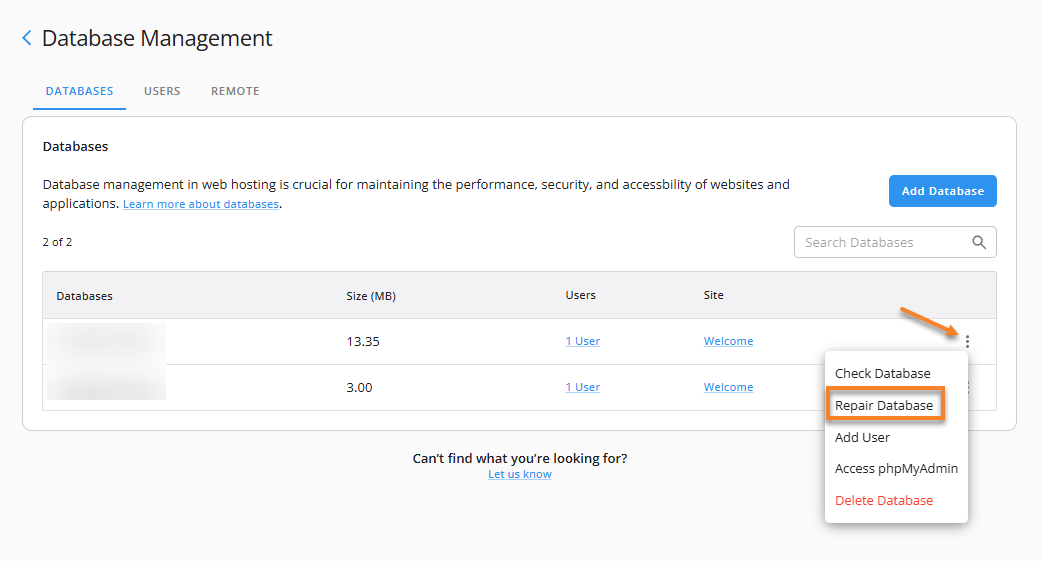
- The Repair Database section will appear showin the result.

Add a User
- Under the Databases tab, locate the database to which you want to add a user.
- Click the vertical ellipsis icon on the right and select Add User.
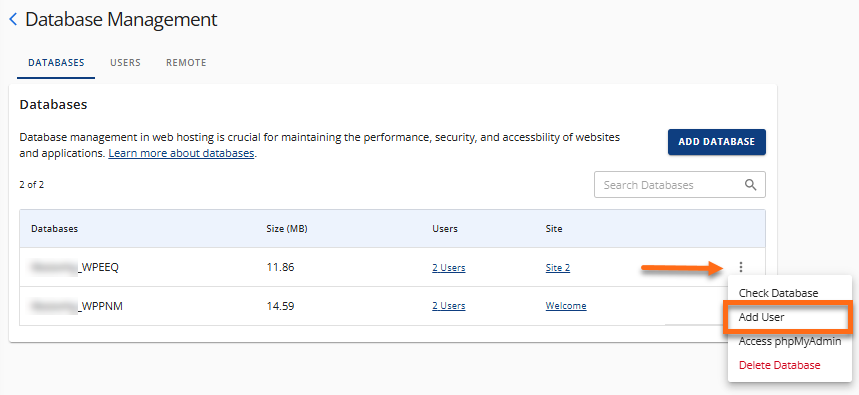
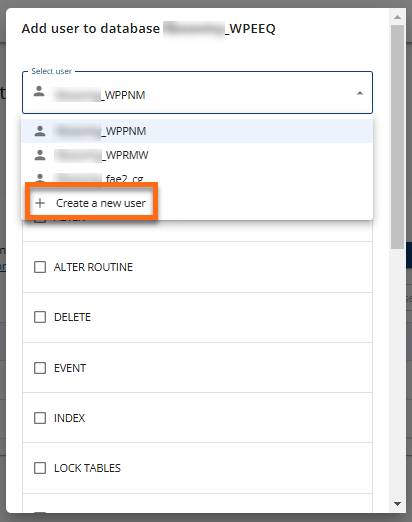
- In the pop-up, select a user you need to manage. If you need to create a new database user, select + Create a new user from the dropdown.
- When creating a new user, enter a new username and password, and then click the Select All option to grant all privileges to the new user.
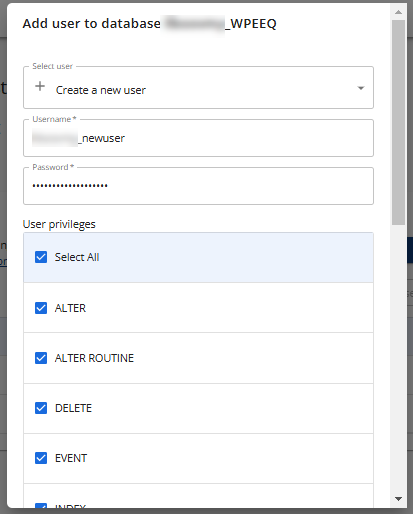
If you want to modify an existing user's privileges, ensure that you select the correct user from the dropdown menu. Click Select All to select all privileges and grant them to the selected user.

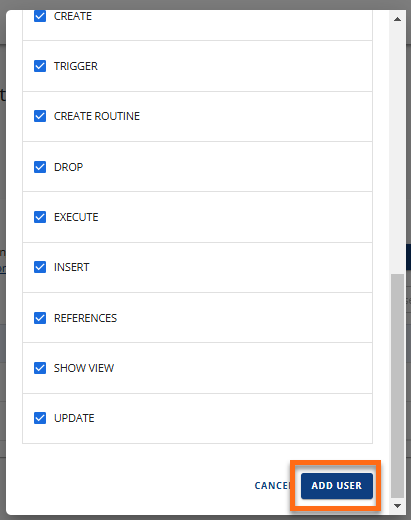
- Once done, scroll down and click the ADD USER button.
Access the phpMyAdmin
- Under the Databases tab, locate the database from which you want to access the phpMyAdmin.
- Click the vertical ellipsis icon on the right and select Access phpMyAdmin.
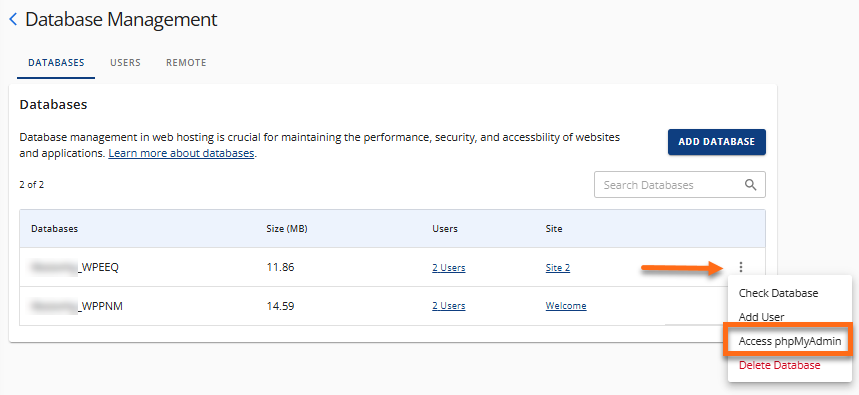
The phpMyAdmin page will open in a new tab.
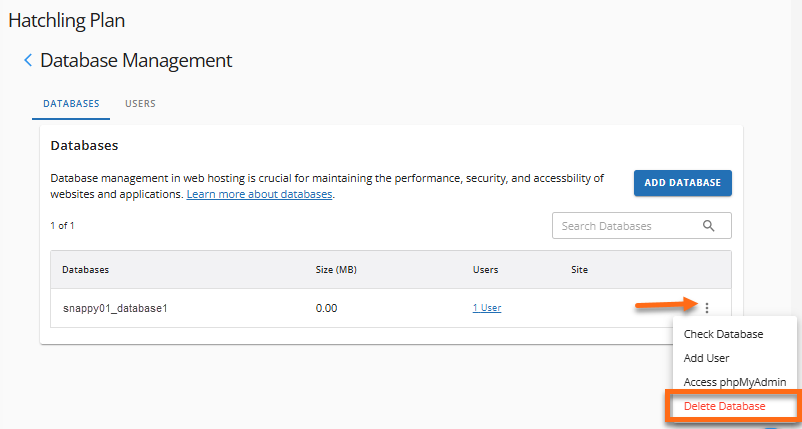
Delete a Database
- Under the Databases tab, locate the database you need to delete.
- Click the vertical ellipsis icon on the right and select Delete Database from the list of options.
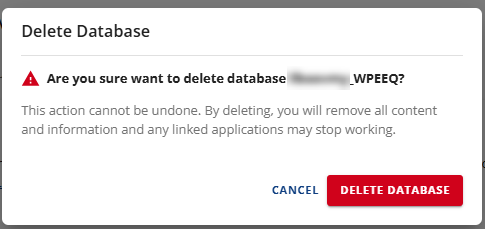
- An alert pop-up will appear, informing you that deleting a database will remove all content. Confirm the action by clicking the DELETE DATABASE button.
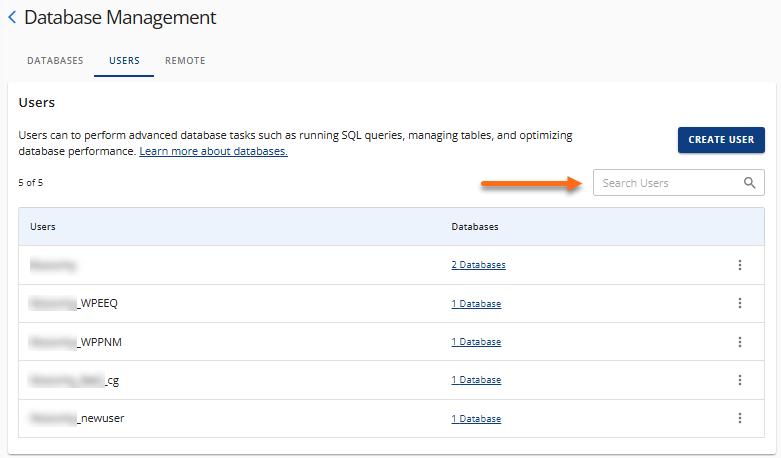
How to Manage MySQL Database Users
On the Database Management panel, you can create and manage the MySQL database users for your website.
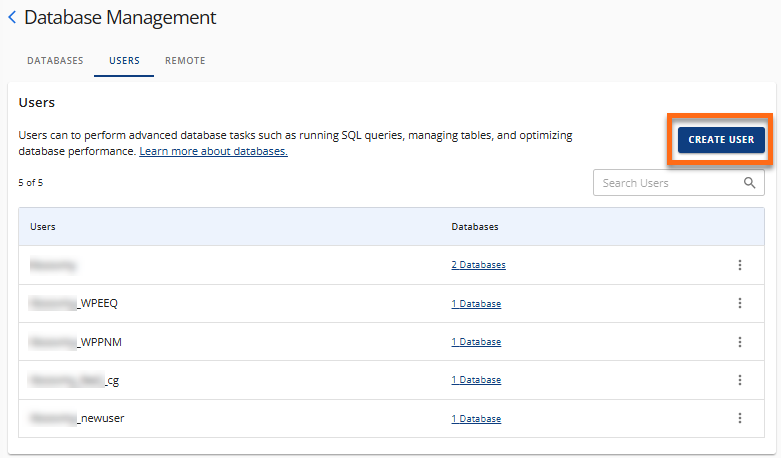
Under the Users tab, you can take the following actions:
Create a New Database User
- Under the Users tab of the Database Management panel, click the CREATE USER button.
- In the Create New User pop-up window, enter a username and password.
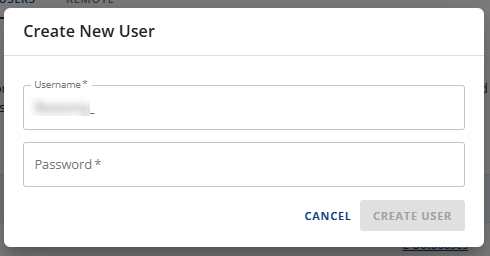
- Click CREATE USER.
Once the new user is created, you can edit its privileges, rename it, change its password, add it to a database, or remove it from the list of users.
Search for a Database User
On the Database Management panel's Users tab, you can use the search box to locate a specific database user to manage.
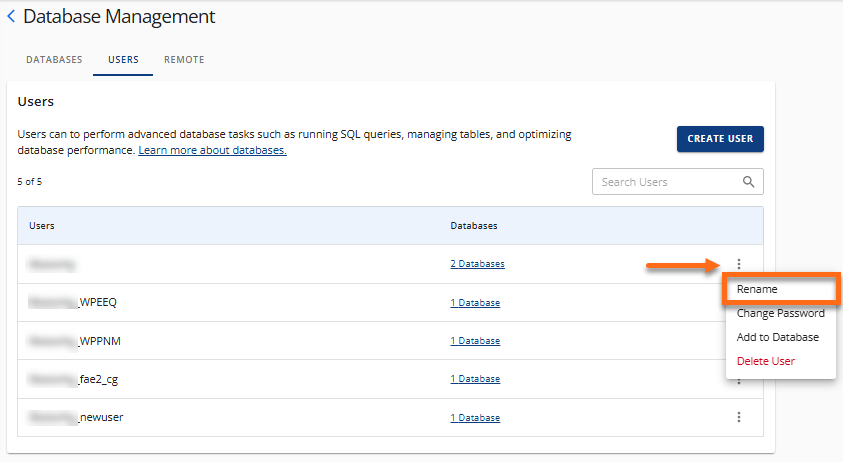
Rename a Database User
- Under the Users tab, locate the database user for which you want to rename.
- Click the vertical ellipsis icon on the right and select Rename.
- In the Rename User pop-up window, enter a new username. This will change the existing name of the database user.
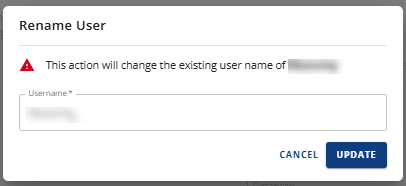
- Click UPDATE to save the new username.
Change the Password of a Database User
- Under the Users tab, locate the database user for whom you want to change the password.
- Click the vertical ellipsis icon on the right and select Change Password.
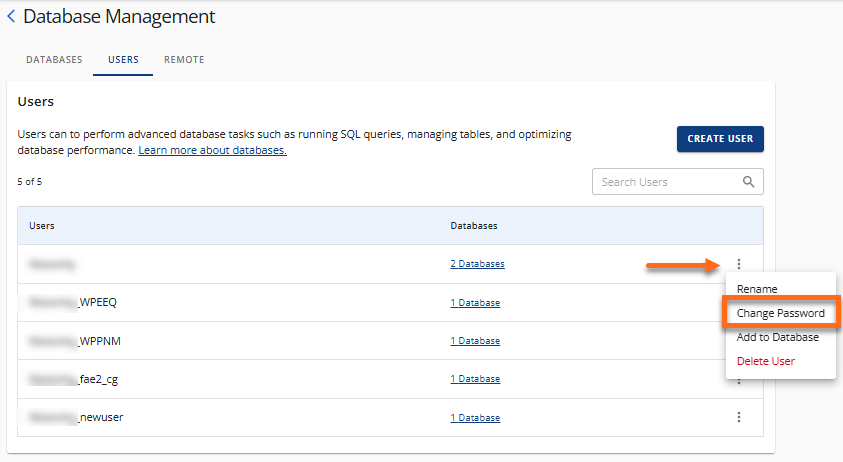
- Enter the new password in the Change MySQL User Password pop-up. This will change the password for the selected username.
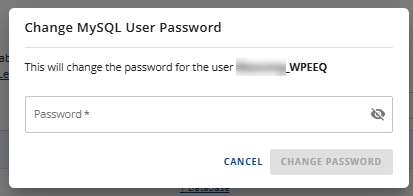
- Click CHANGE PASSWORD.
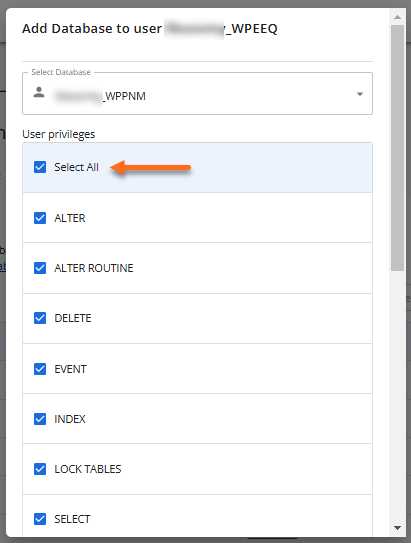
Add User to a Database
- Under the Users tab, locate the database user that you want to add to a database.
- Click the vertical ellipsis icon on the right and select Add to Database.
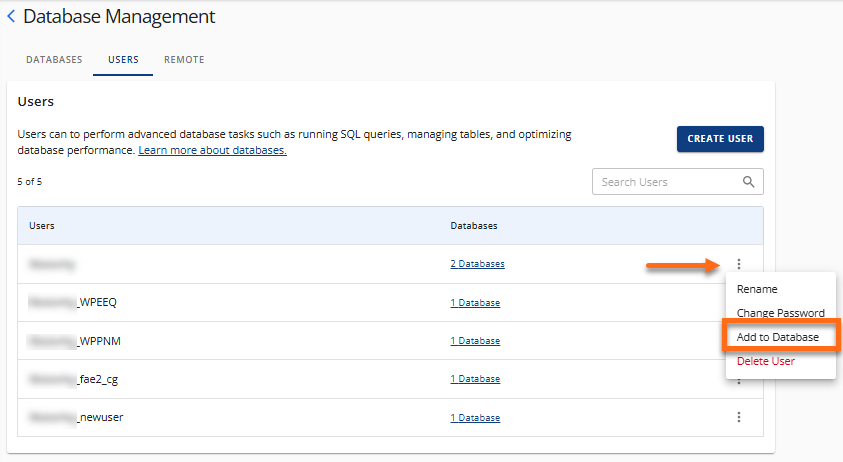
- In the pop-up, select the database you want to add to the user.
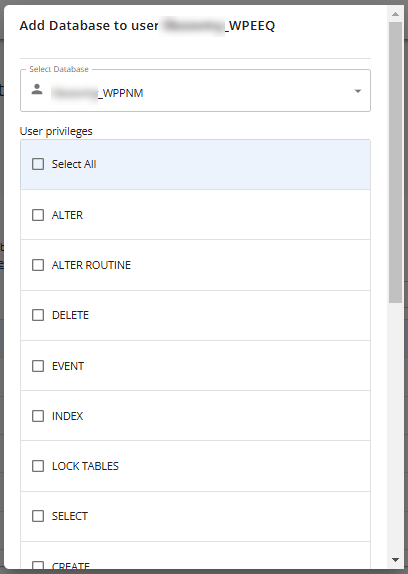
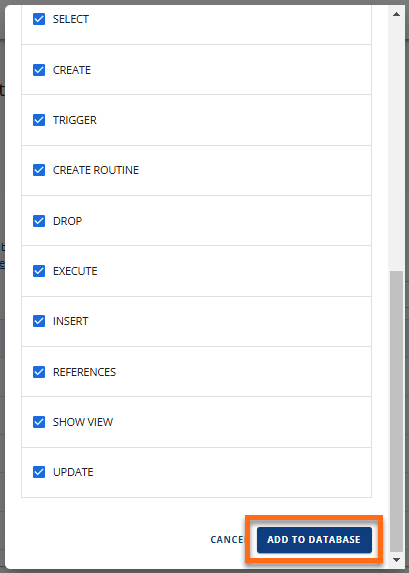
- Click the Select All option to grant all privileges to the selected user.
- Once done, scroll down and click the ADD TO DATABASE button.
Delete a Database User
- Under the Users tab, look for the database user for which the customer wants to delete.
- Click the vertical ellipsis icon on the right and select Delete User.
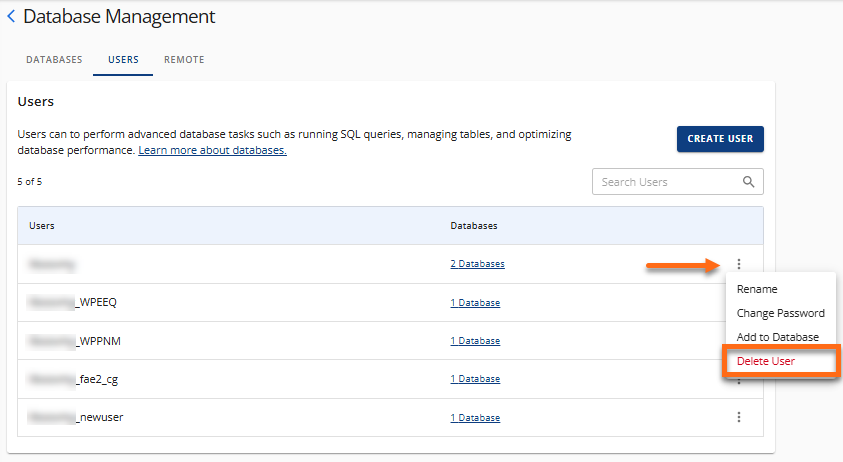
- An alert pop-up will appear, informing you that deleting a database user will remove all content for that user. Confirm the action by clicking the DELETE USER button.
